Install the M.2 drives and boot adapter
See this topic to learn how to install the M.2 drives and boot adapter.
About this task
ThinkSystem M.2 SATA/NVMe 2-Bay Enablement Kit (SATA/NVMe 2-Bay backplane)
ThinkSystem M.2 RAID B540i-2i SATA/NVMe Adapter (B540i-2i SATA/NVMe backplane)
If B540i-2i SATA/NVMe backplane is to be installed, make sure to remove the adapter cover before installing the backplane.
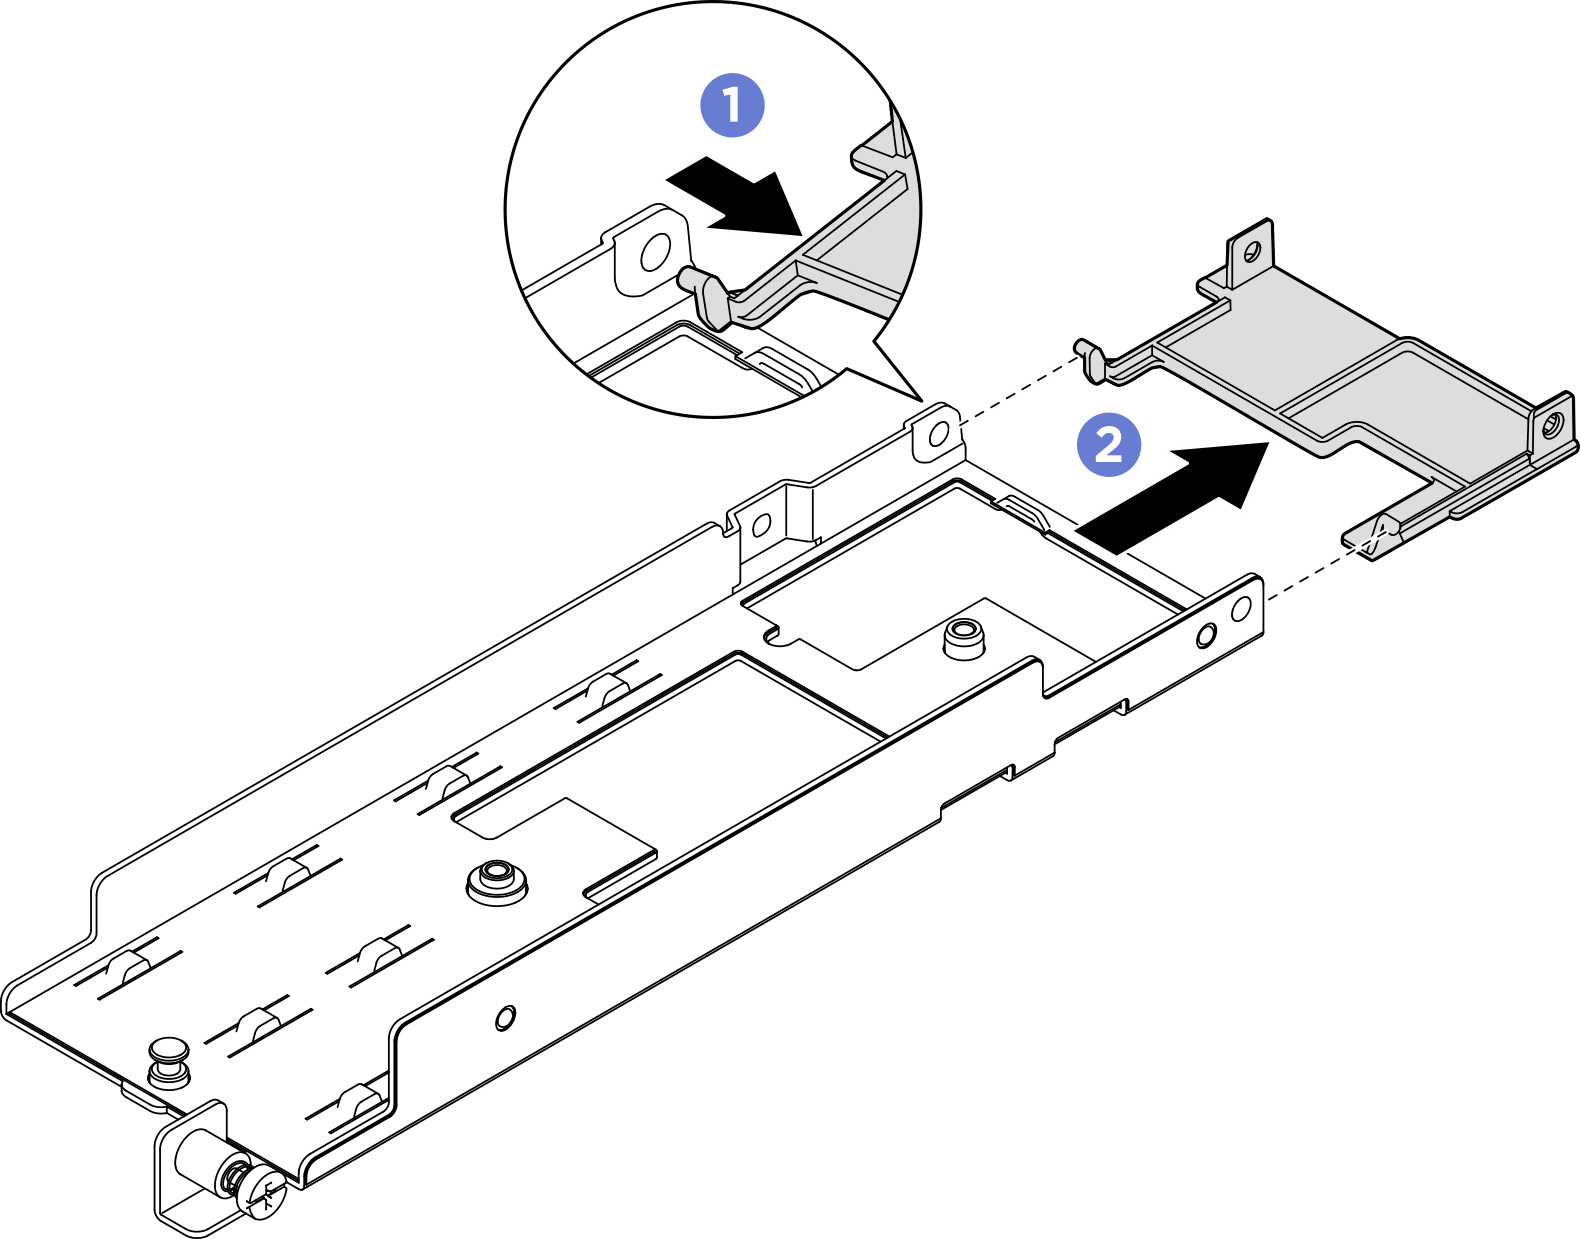
 Press one side of the adapter cover as illustrated to disengage it from the adapter.
 Remove the cover from the adapter.
Procedure
- If necessary, install the replacement backplane to the adapter.
- Install the backplane.Figure 2. Installing the M.2 backplane
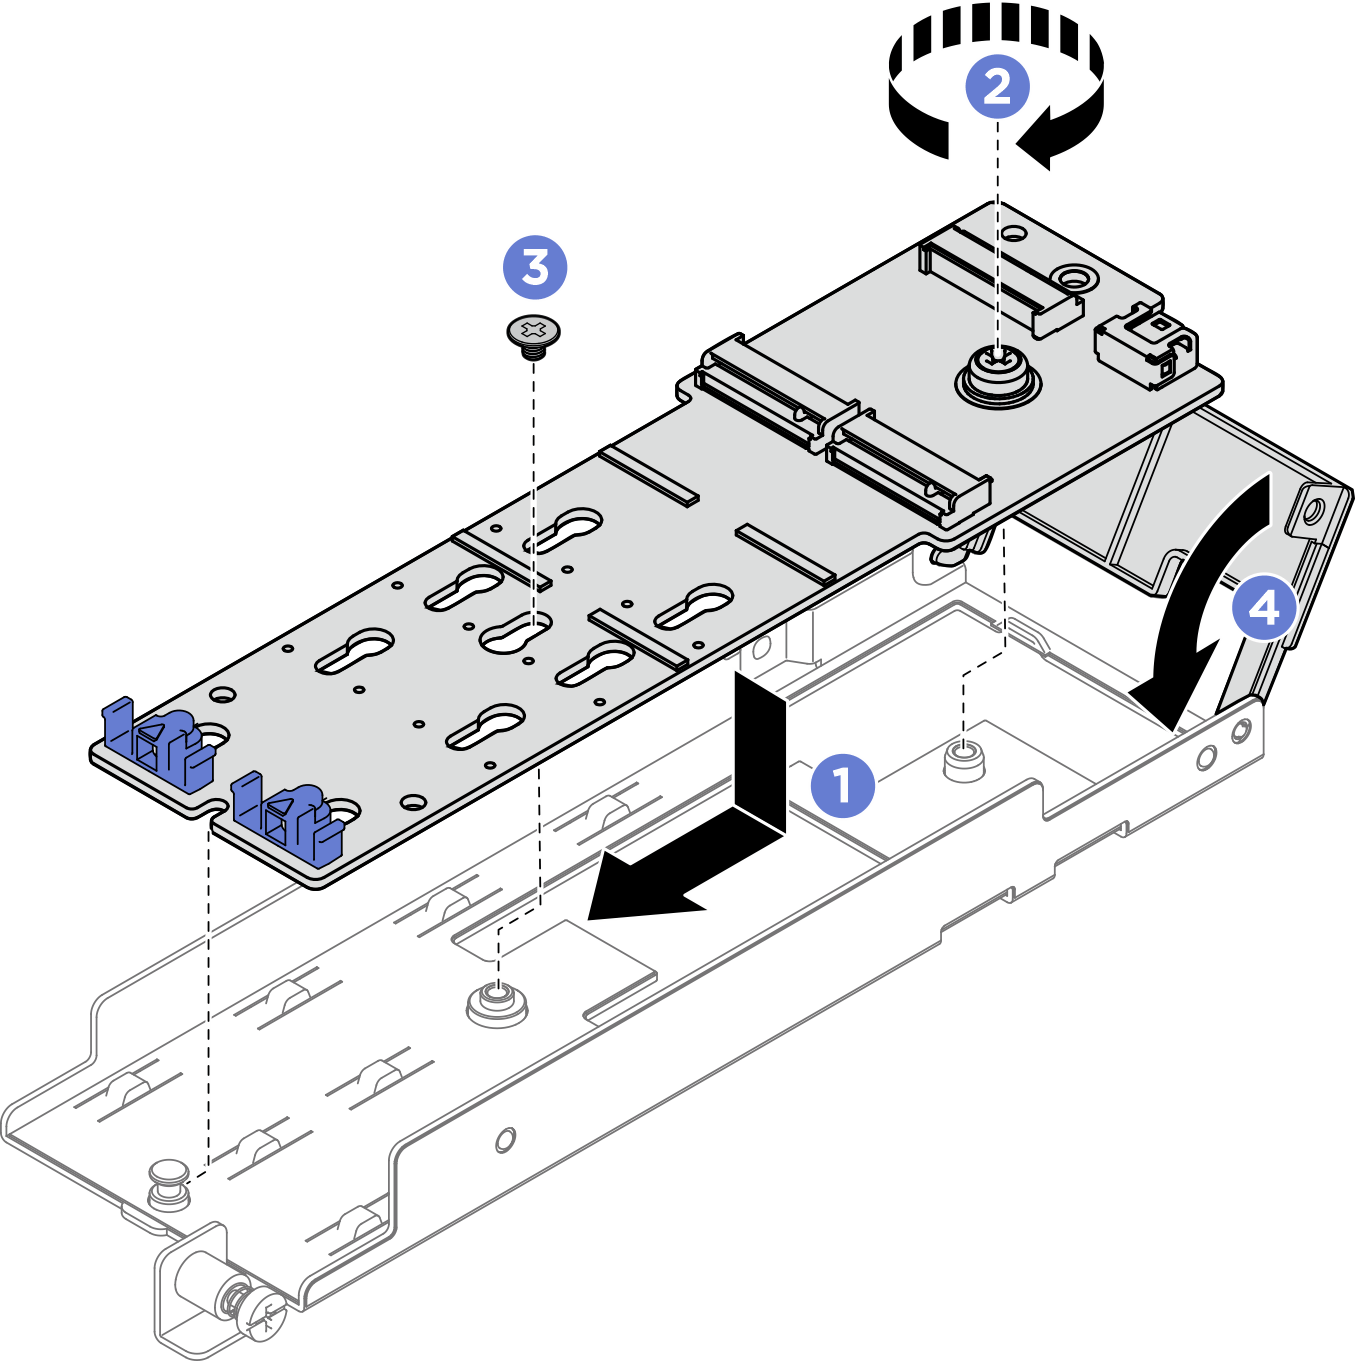
- Align the backplane with the slot in the adapter.
- Tighten the captive screw on the M.2 backplane.
 Secure the M.2 backplane with a screw.
 If applicable, close the adapter cover.
- Connect the M.2 cable to the backplane.SATA/NVMe 2-Bay backplaneFigure 3. Connecting the M.2 cable
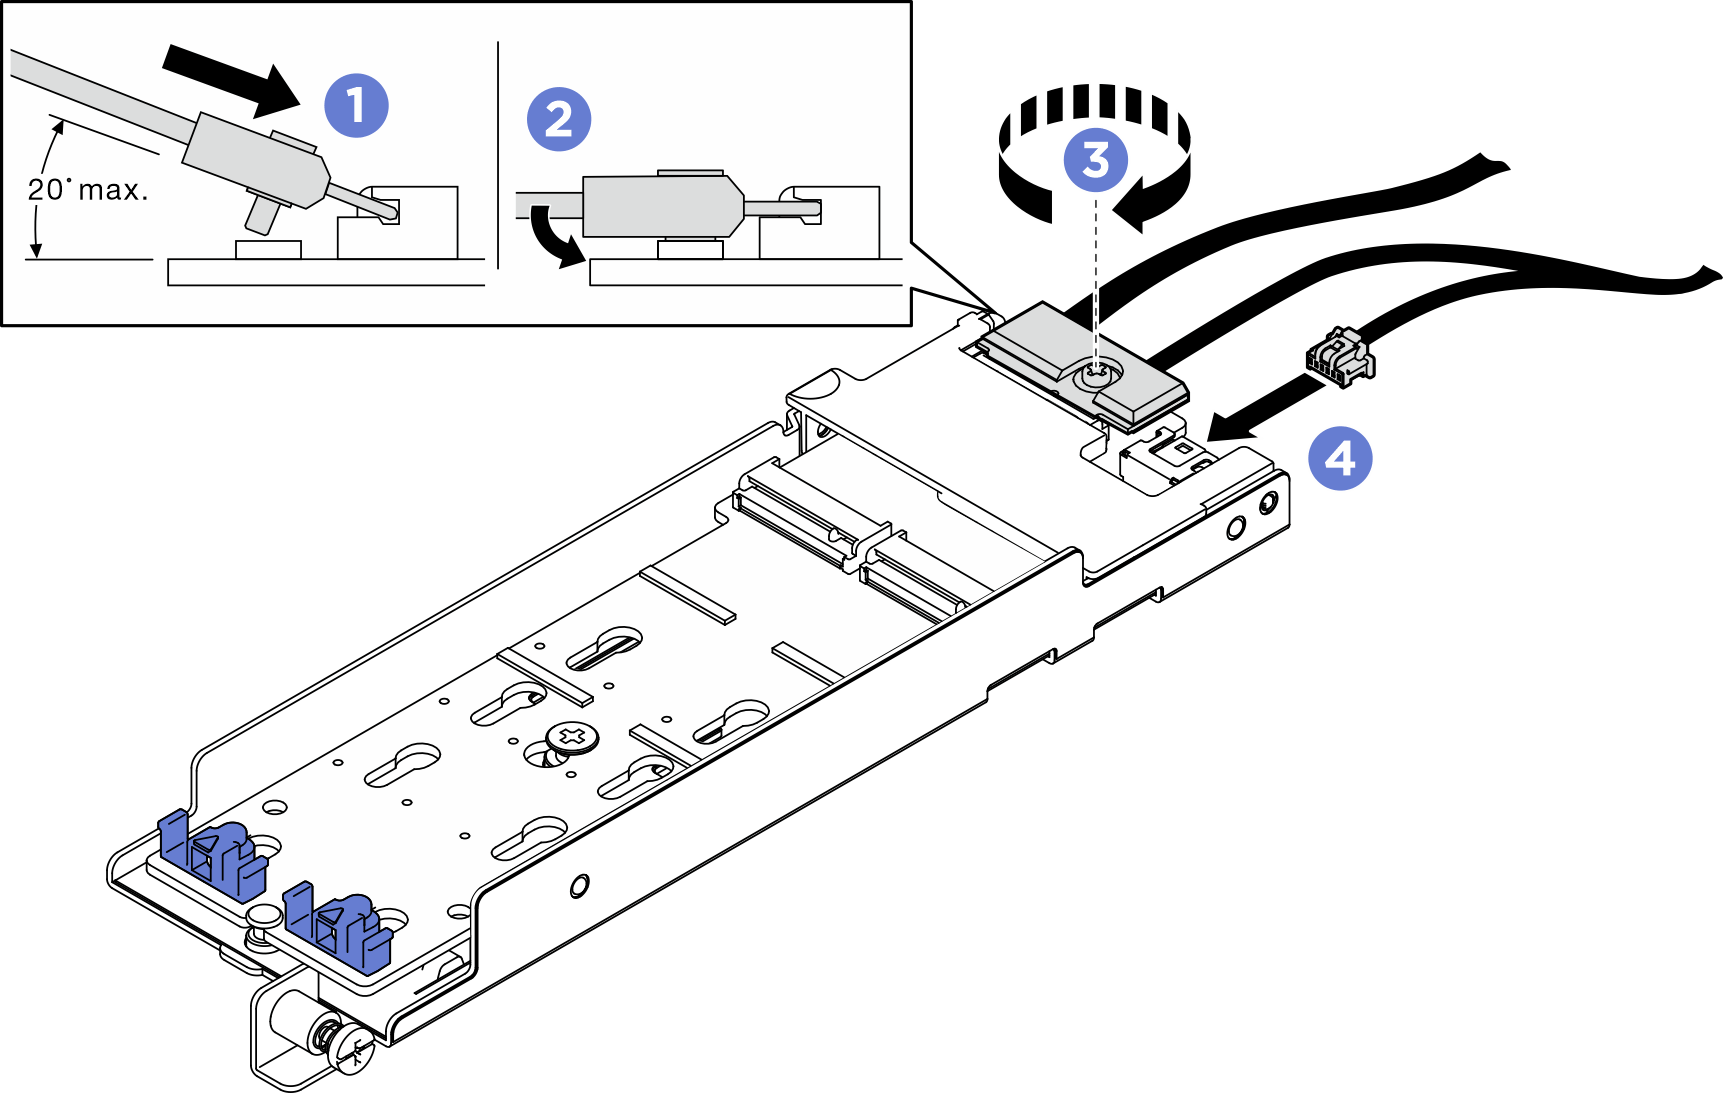
- Tilt the connector at an angle of 20 degrees or lower, and insert it until its bottom surface reaches the ramp.
- Press the connector down flat.
- Tighten the screw on the signal cable
- Connect the power cable.
B540i-2i SATA/NVMe backplaneFigure 4. Connecting the M.2 cable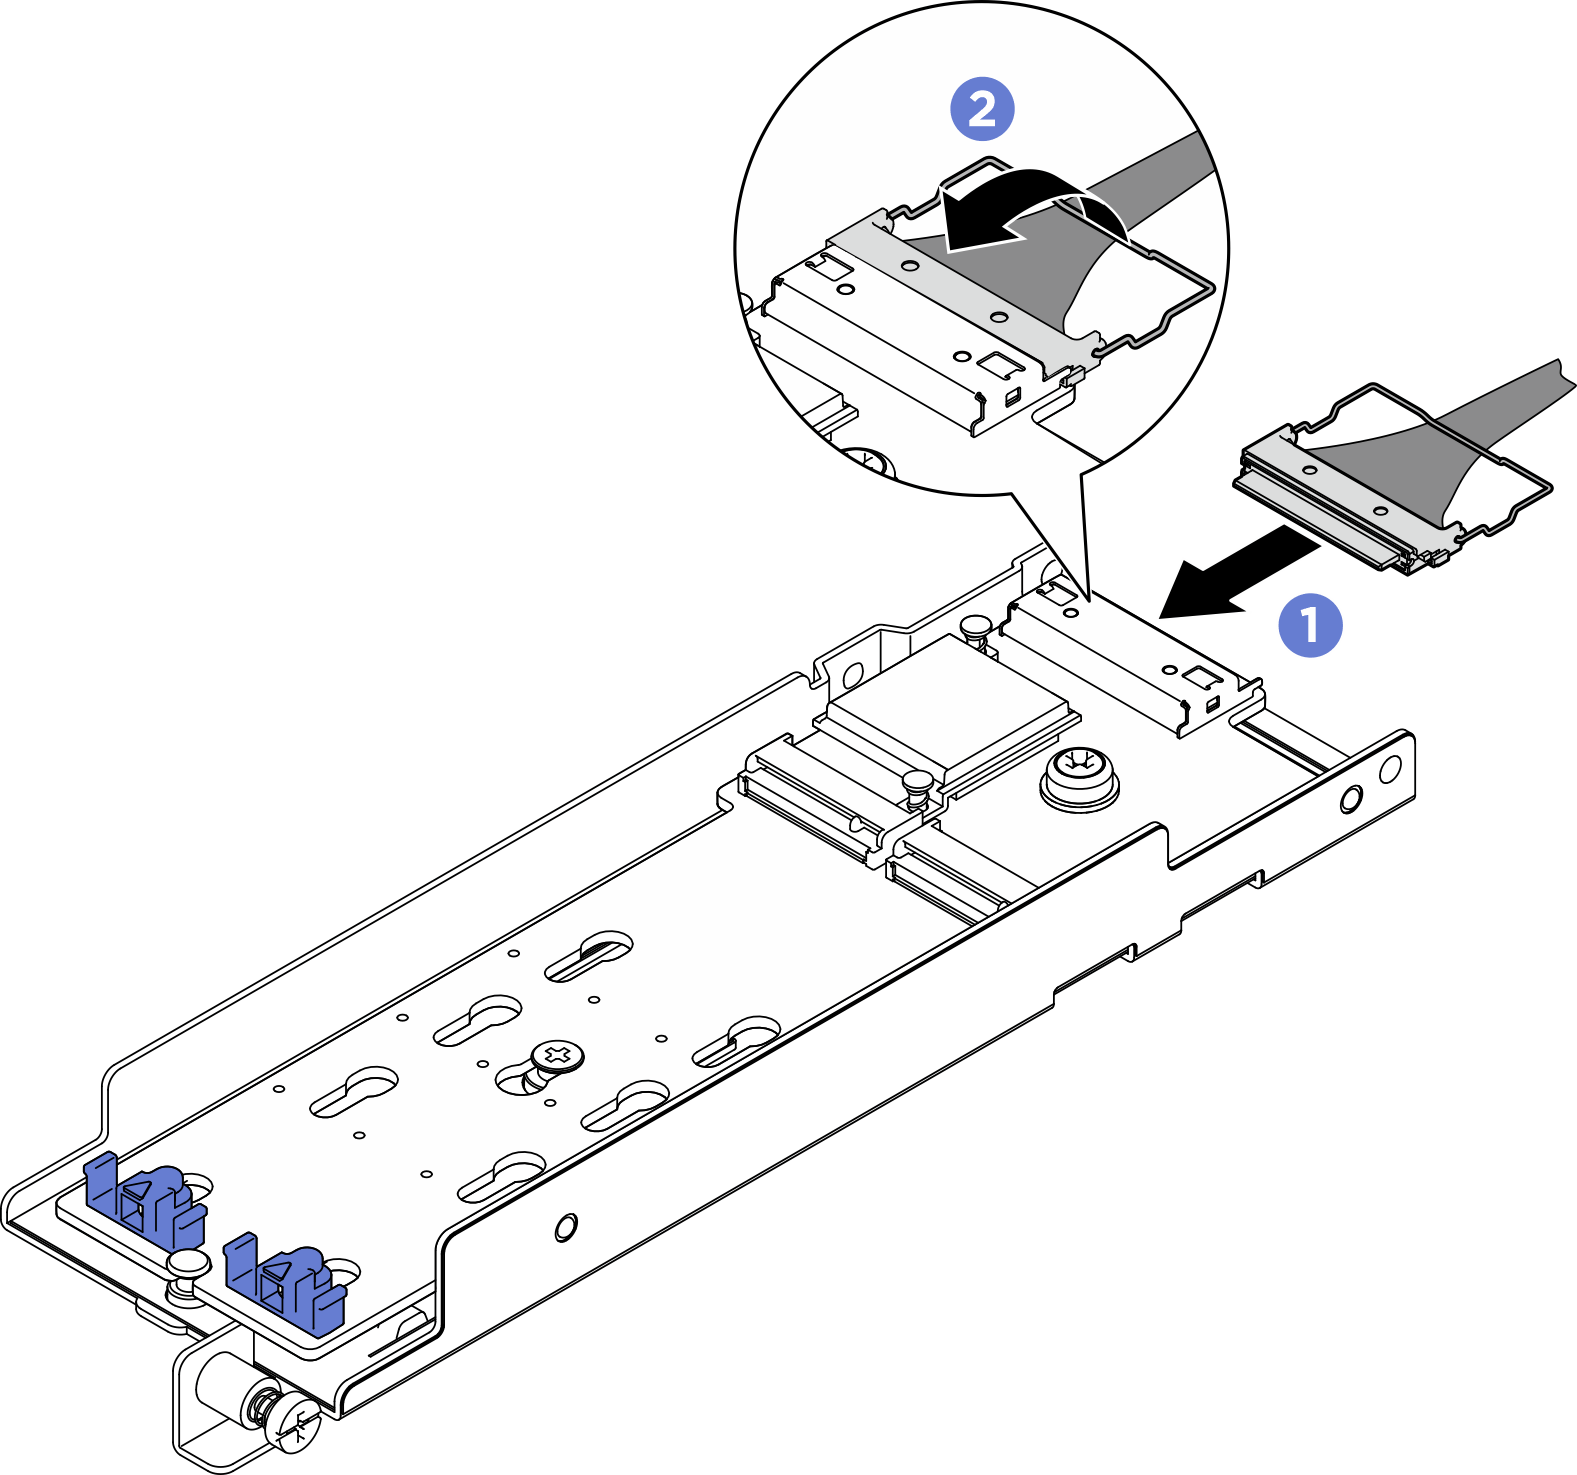
- Connect the cable to the M.2 backplane.
- Hook the wire bail on the cable onto the connector.
- Install the backplane.
- Install the M.2 drives to the backplane.Figure 5. Installing the M.2 drives

- Align the M.2 drives with the connectors.
- Pivot the other end of the M.2 drives toward the backplane.
- Slide the retaining clips forward to secure the drives to the backplane.
- Contain the cables between the guiding pin and the two cable clips as illustrated. Align the pointed ends of the two triangles on the adapter and the power supply cage, and lower the bracket. Then, slide the adapter backward slightly, and tighten the captive screw to secure the adapter.Note
If the adapter is without the adapter cover, make sure NOT TO let the backplane touch nearby components. Touching nearby components might cause damage to the backplane.
To spare space for proper installation, make sure to contain the cables with the two cable clips as illustrated before installing the adapter.
Figure 6. Installing the M.2 boot adapter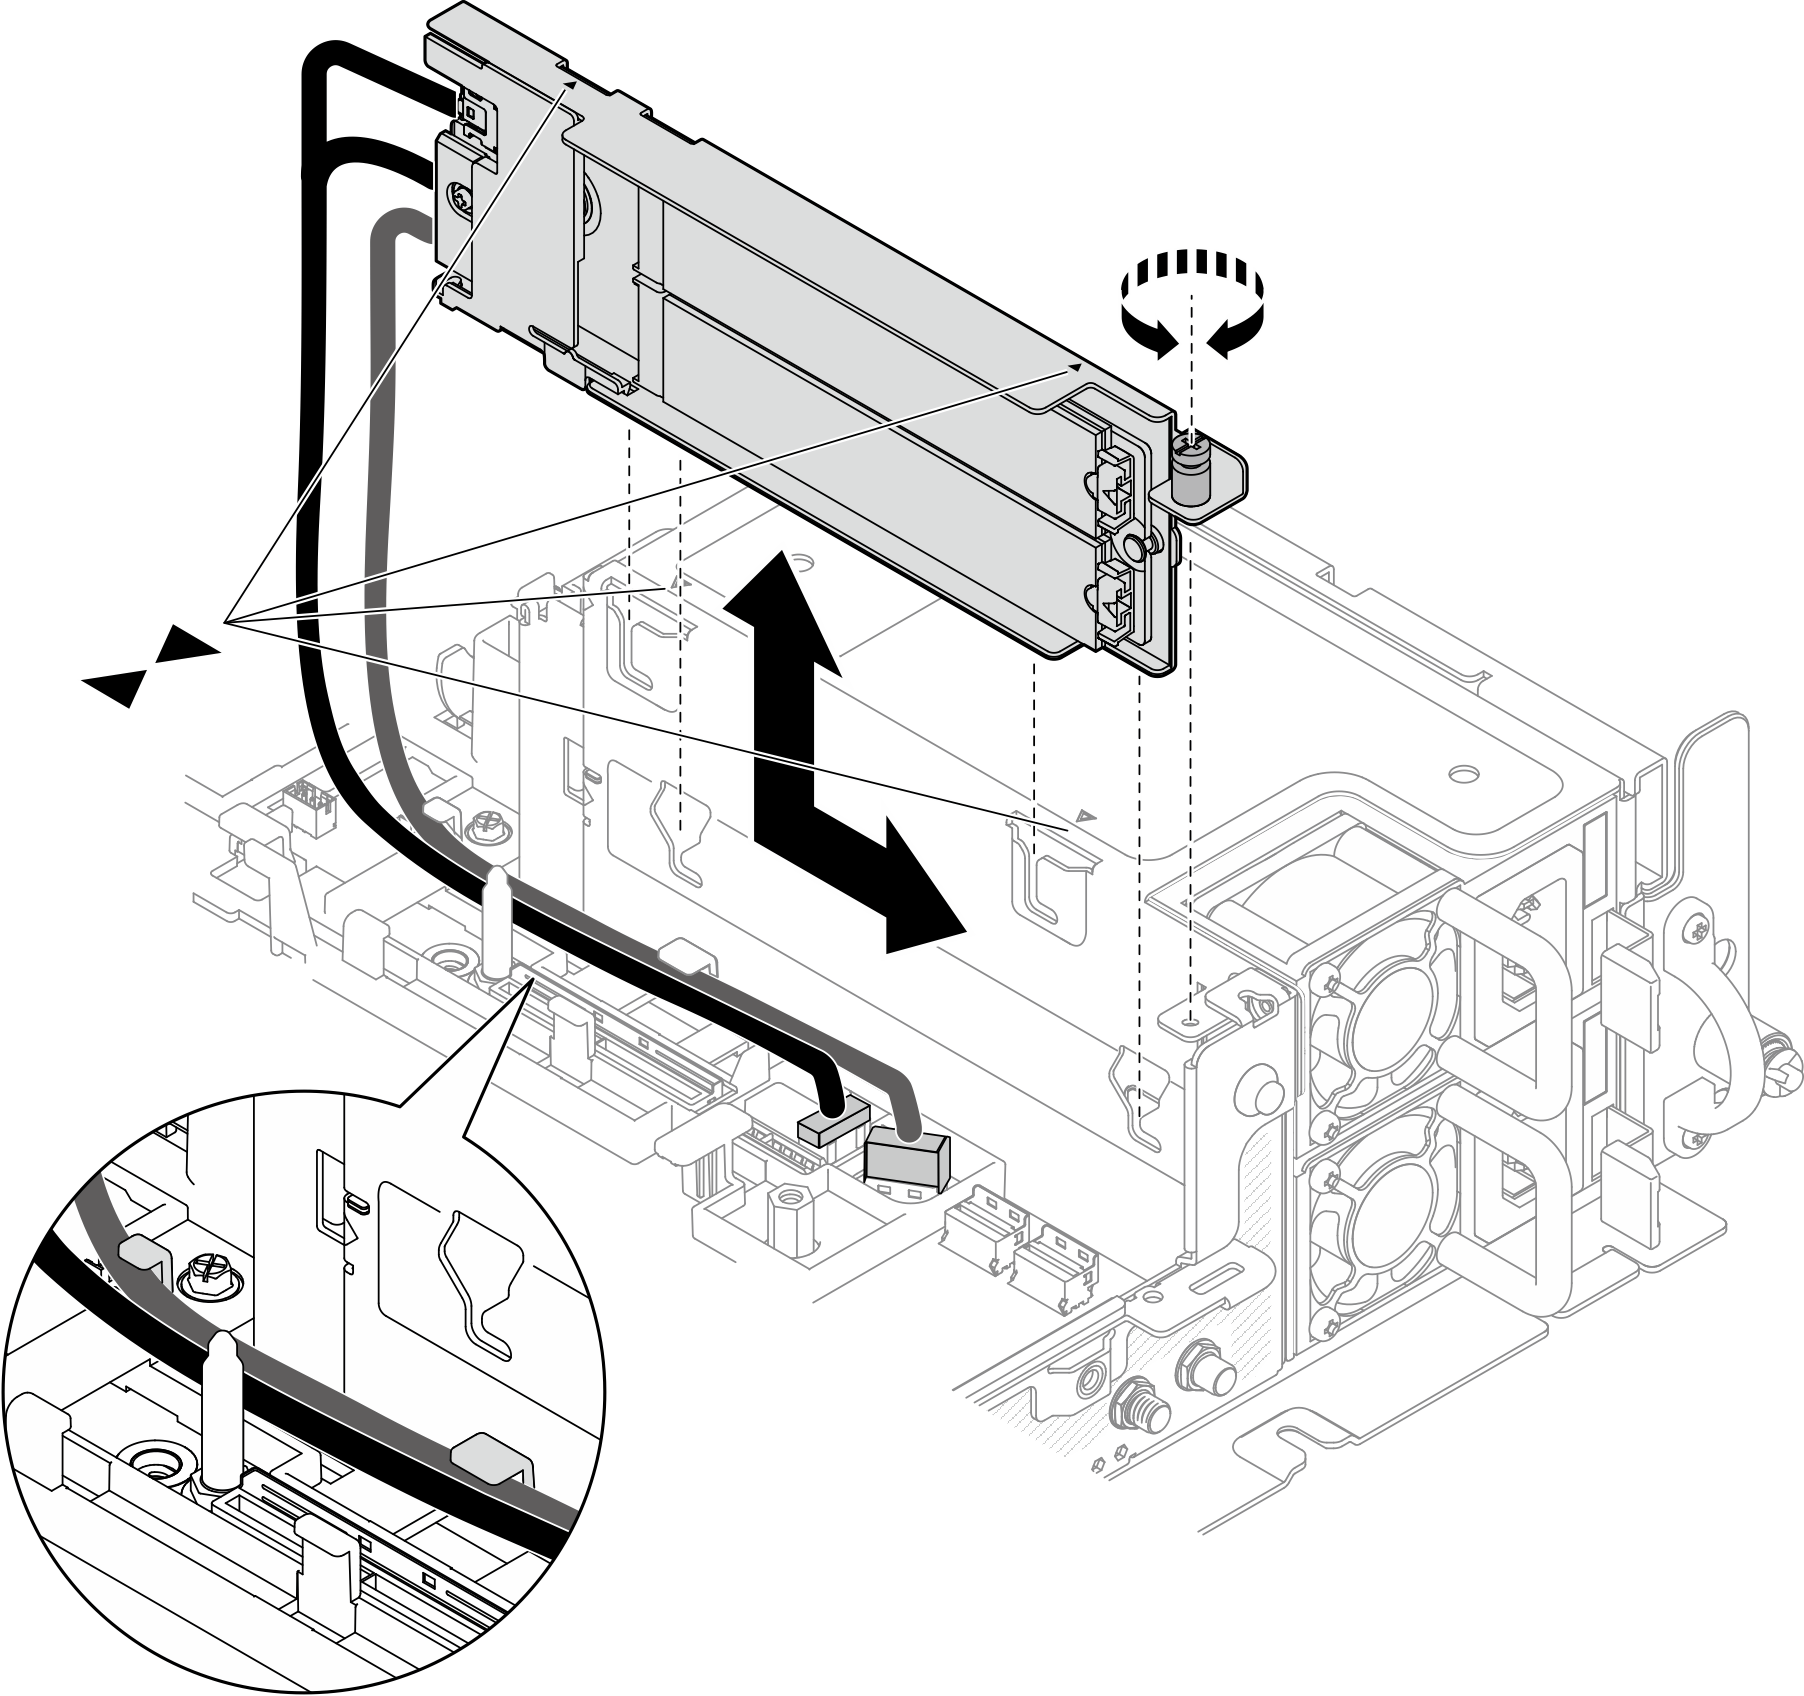
After this task is completed
Proceed to complete the parts replacement (see Complete the parts replacement).
- Deploy the operating system (see Deploy the operating system).