Remove the air baffle
See this topic to learn how to remove the air baffle.
About this task
Attention
Go over Installation Guidelines to ensure that you work with safety.
Turn off the server and peripheral devices and disconnect the power cords and all external cables (see Power off the server).
If the server is installed in a rack, slide the server out on its rack slide rails to gain access to the top cover, or remove the server from the rack.
To avoid possible danger, read and follow the following safety statement.
- S012
 CAUTIONHot surface nearby.
Procedure
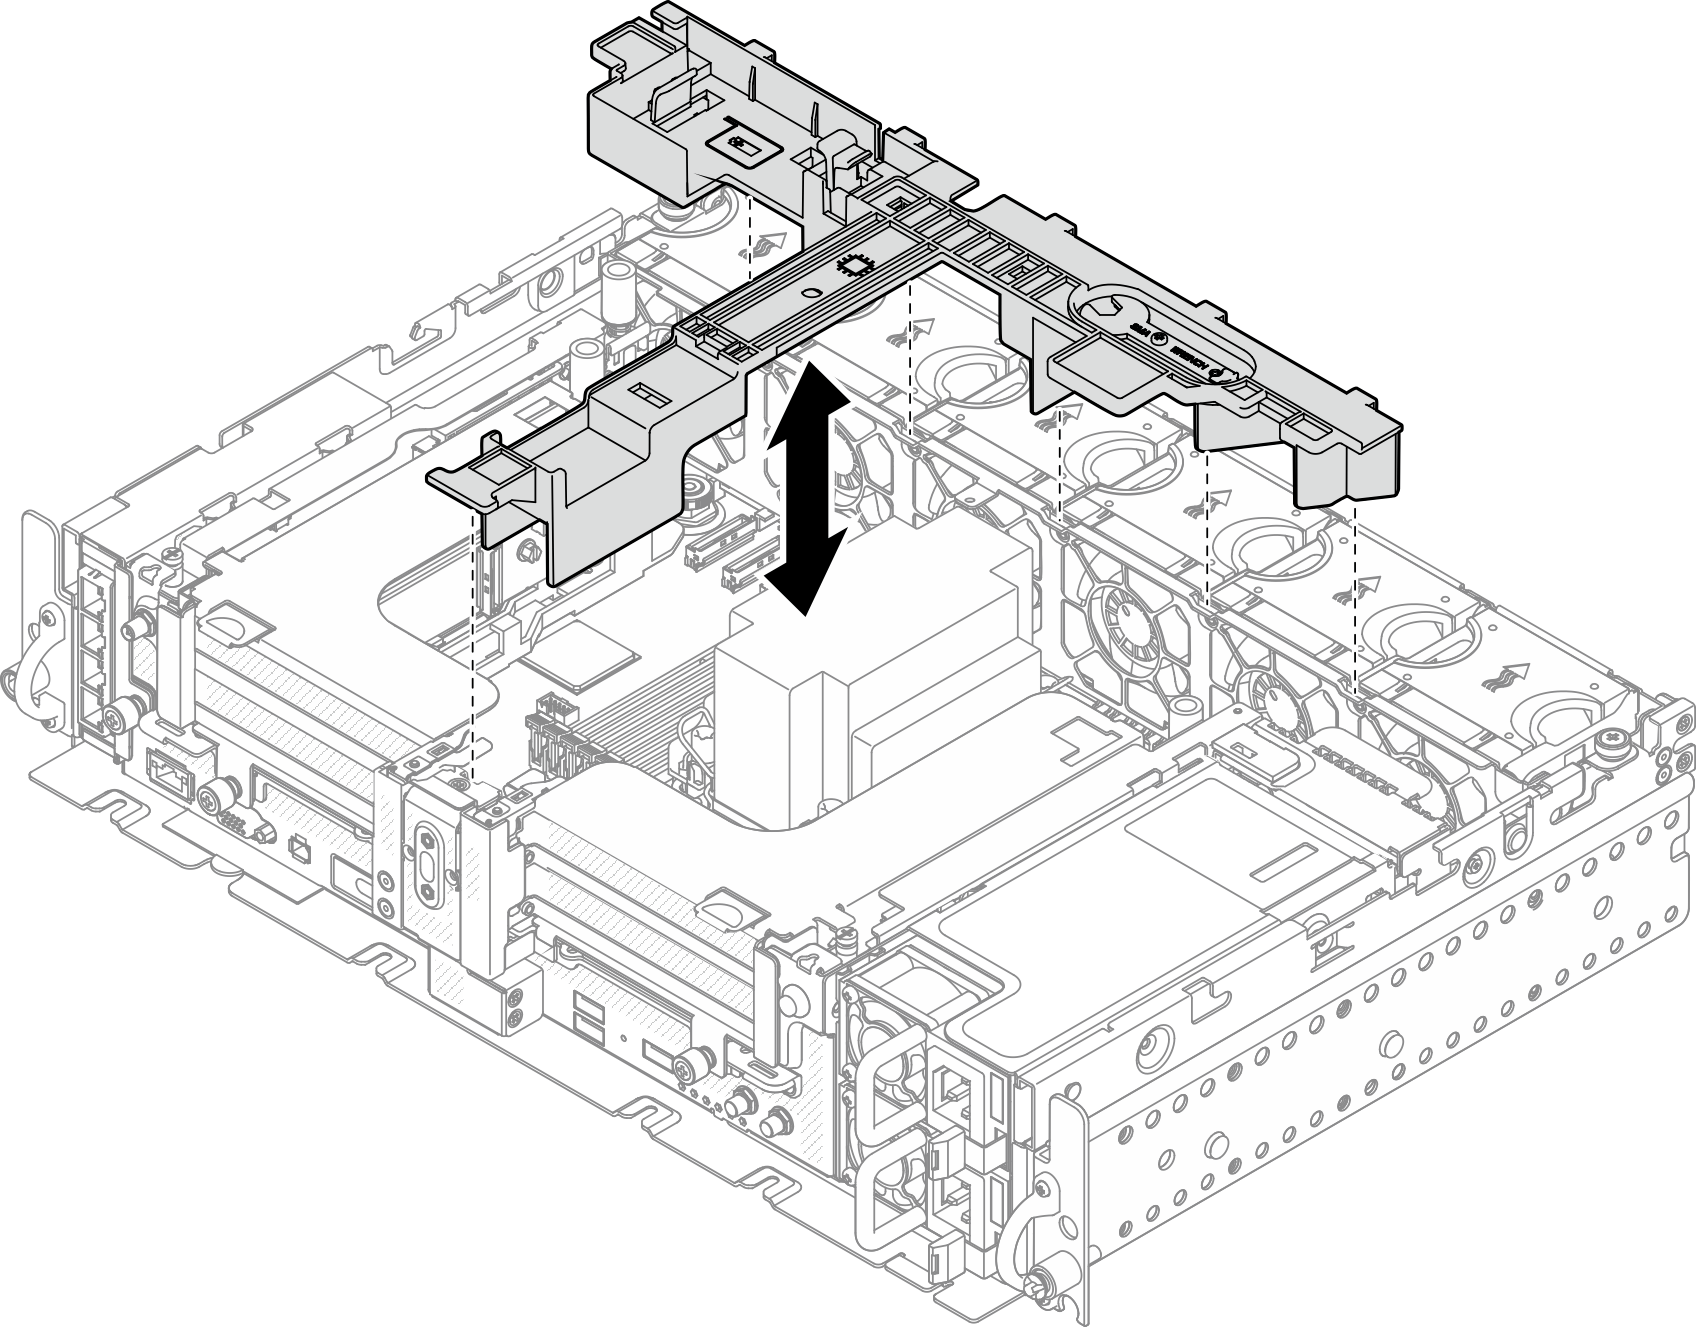
Remove the air baffle for 300mm chassis
Lift the air baffle to remove it.
Figure 1. Removing the air baffle
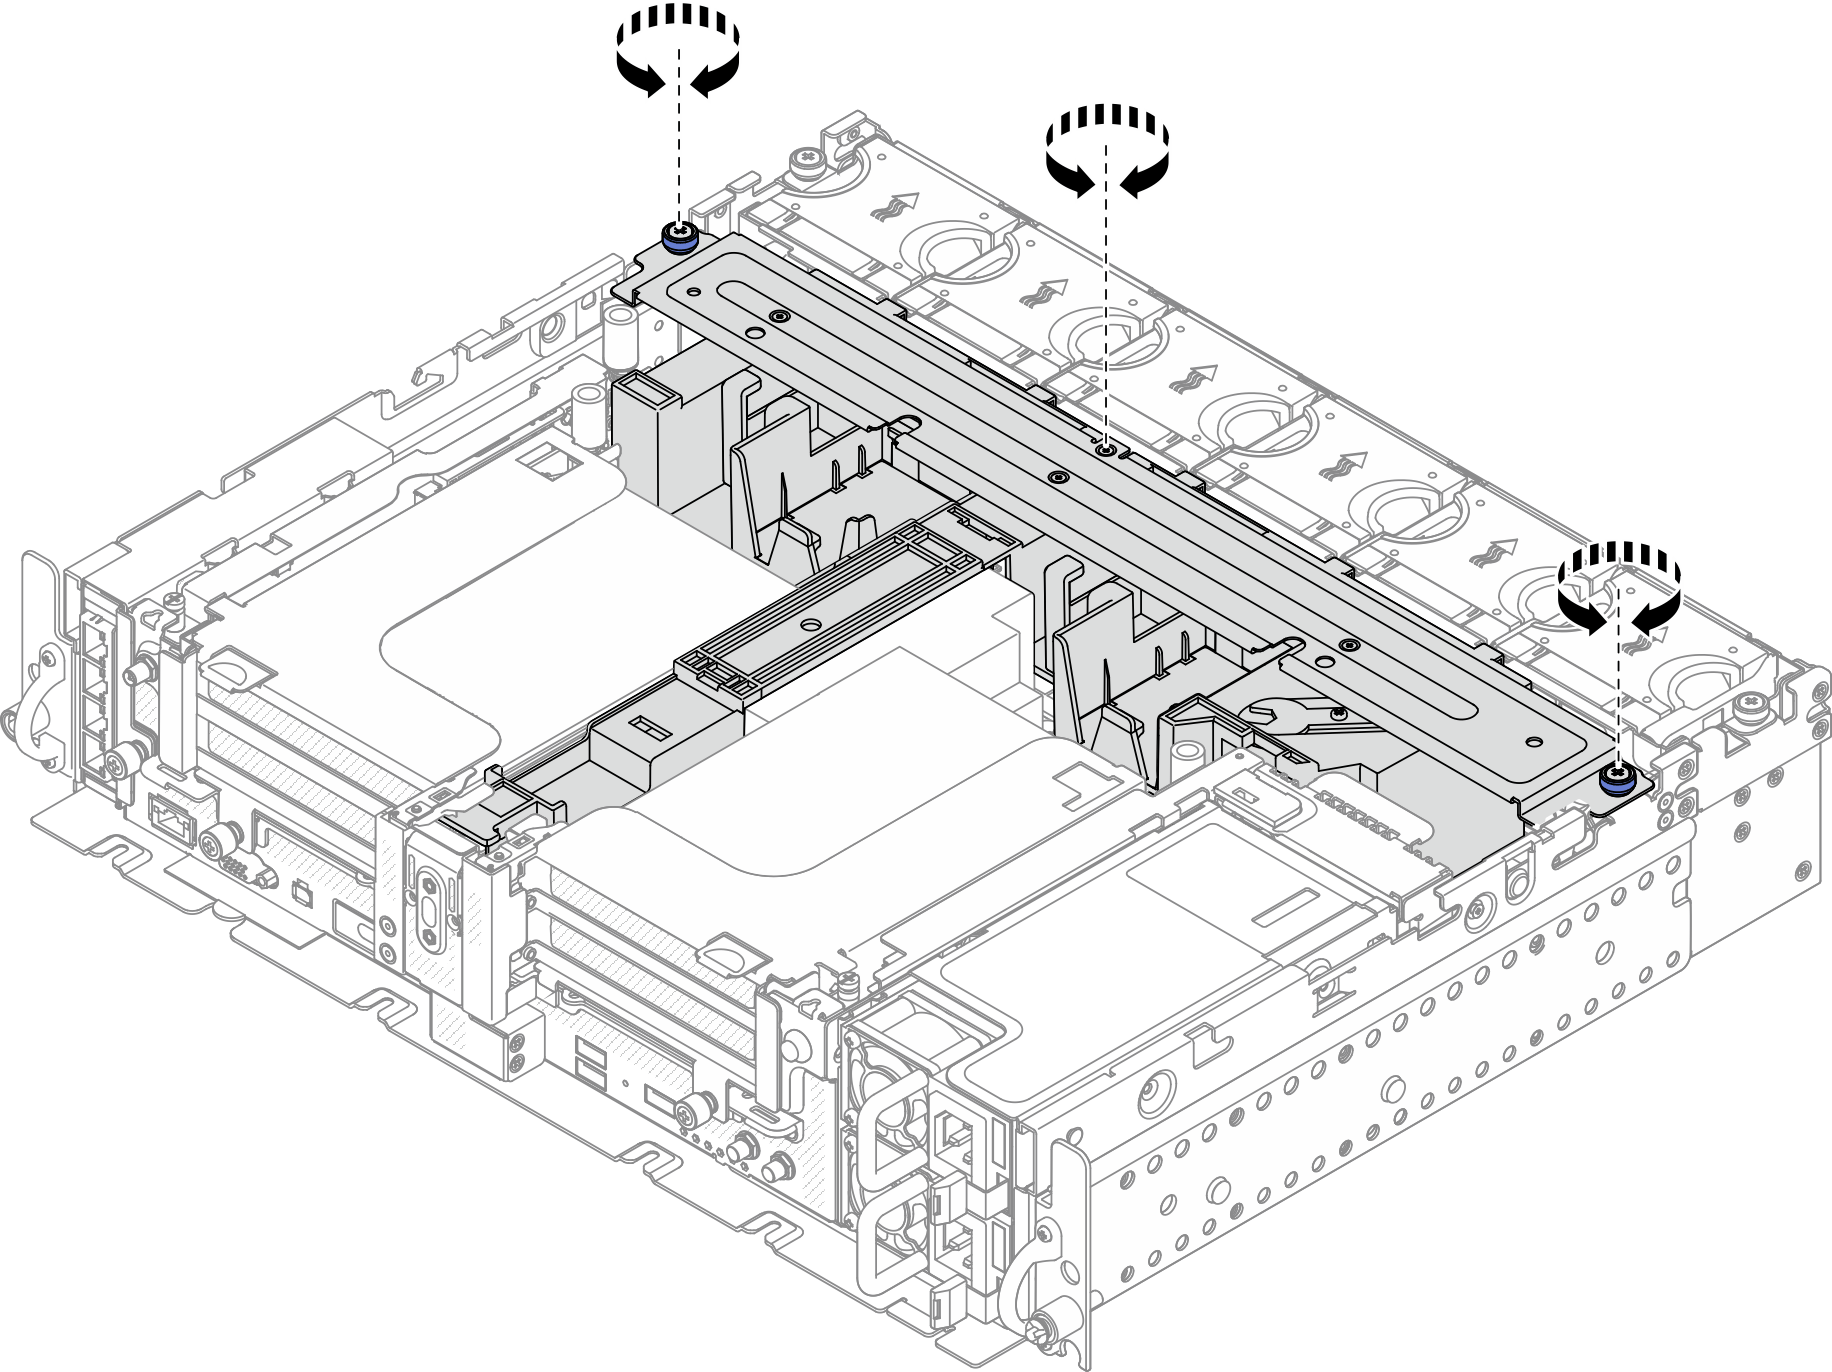
Remove the air baffle for 360mm chassis with half-length adapters
- Remove the one captive screw and two thumbscrews that secure the supporting bracket to the chassis.Figure 2. Releasing the air baffle assembly
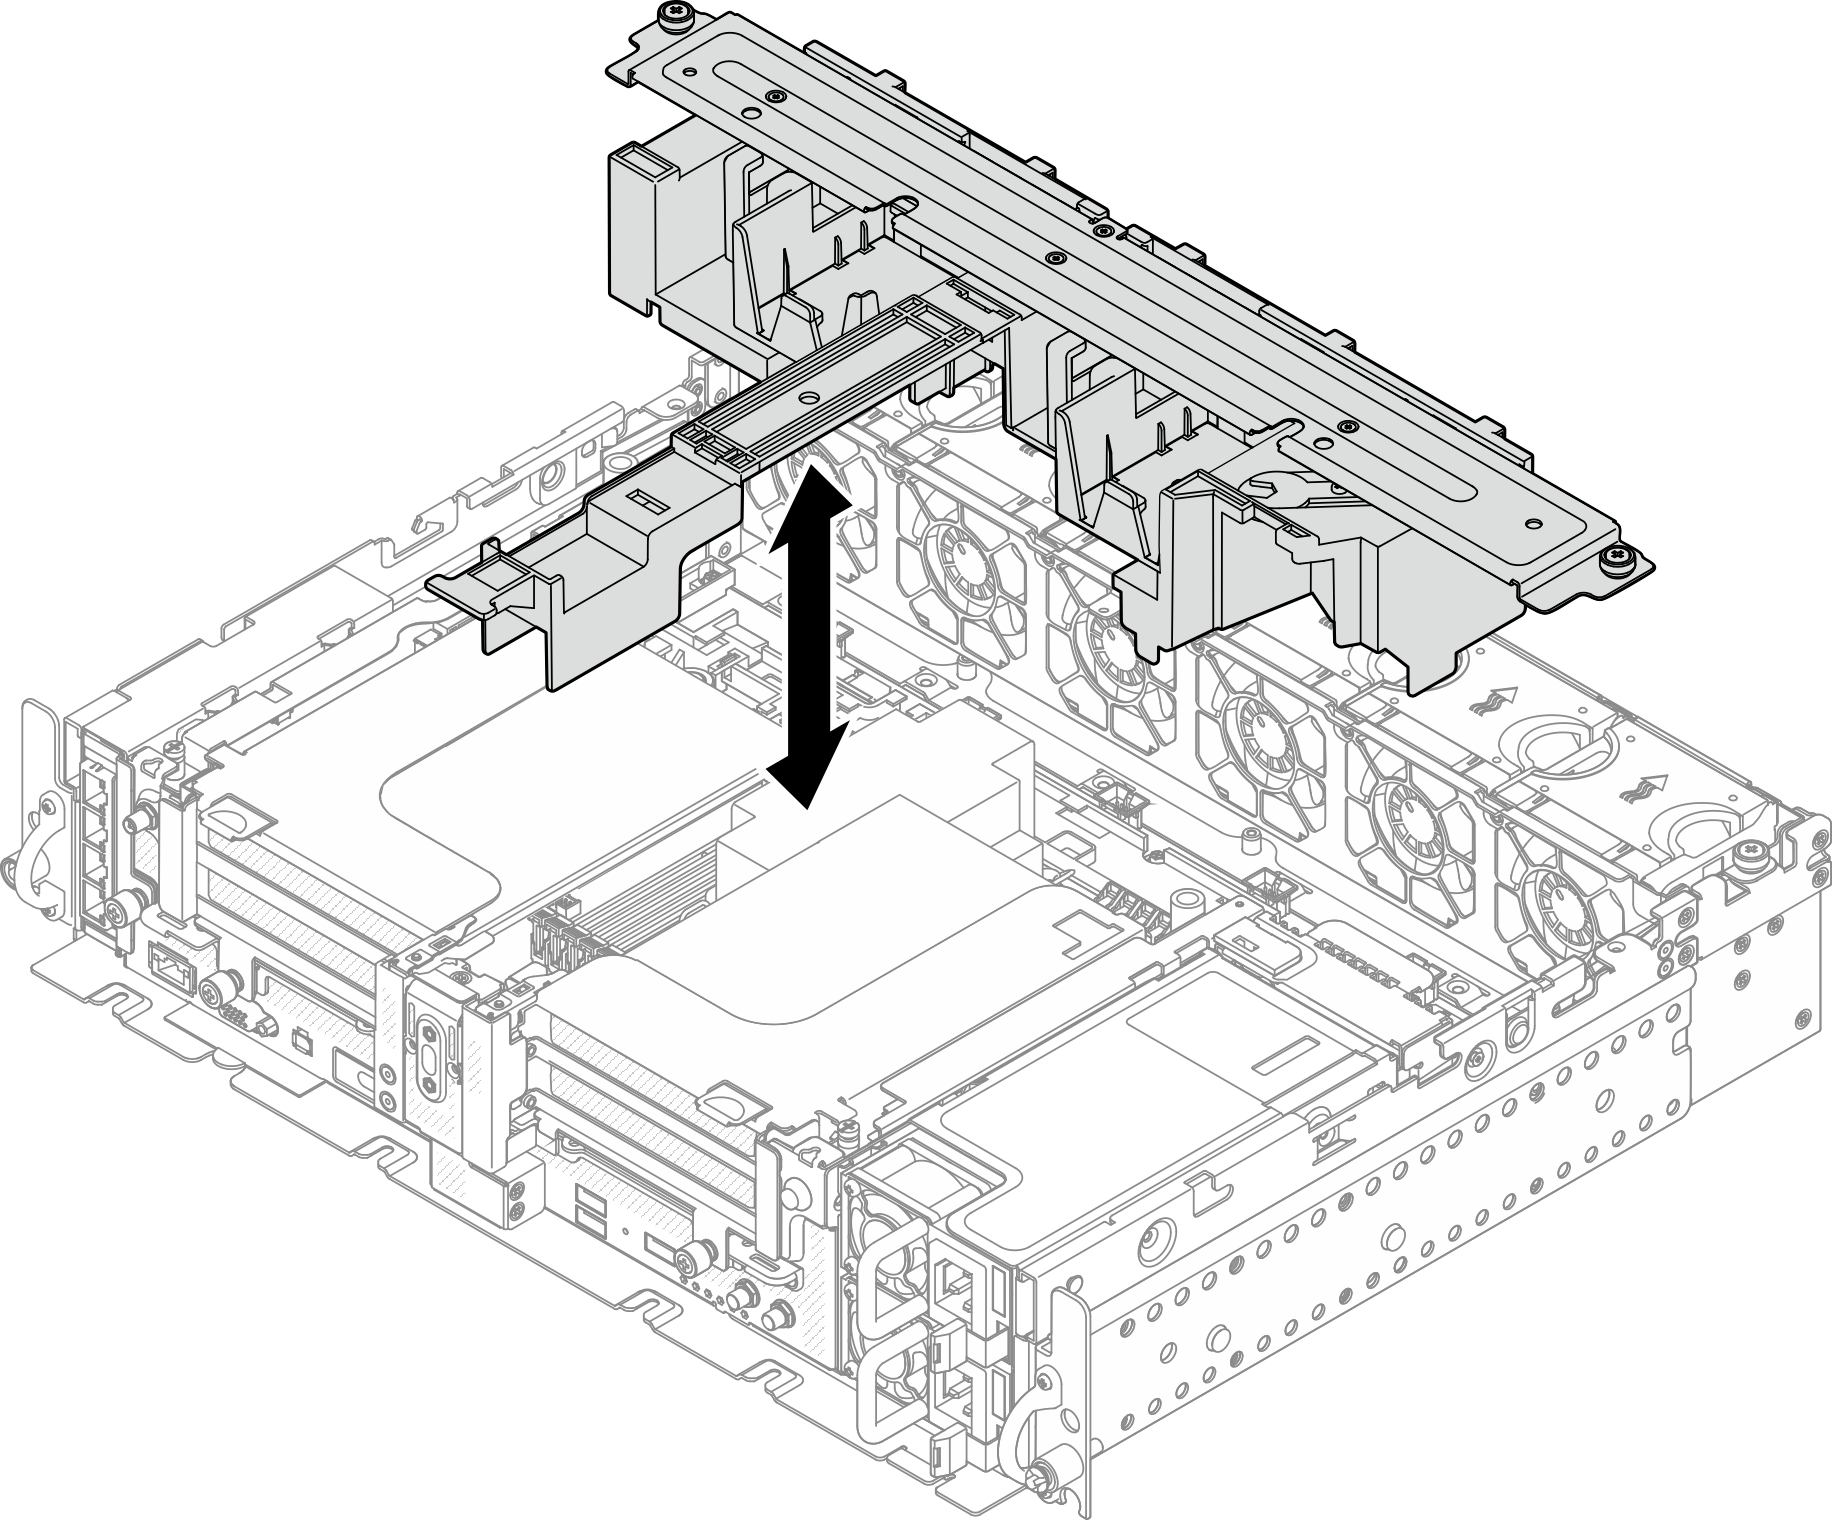
- Lift the air baffle along with the supporting bracket to remove the air baffle assembly.Figure 3. Removing the air baffle assembly
Remove the air baffle for 360mm chassis with full-length adapters
- Remove the supporting bracket.Figure 4. Removing the supporting bracket
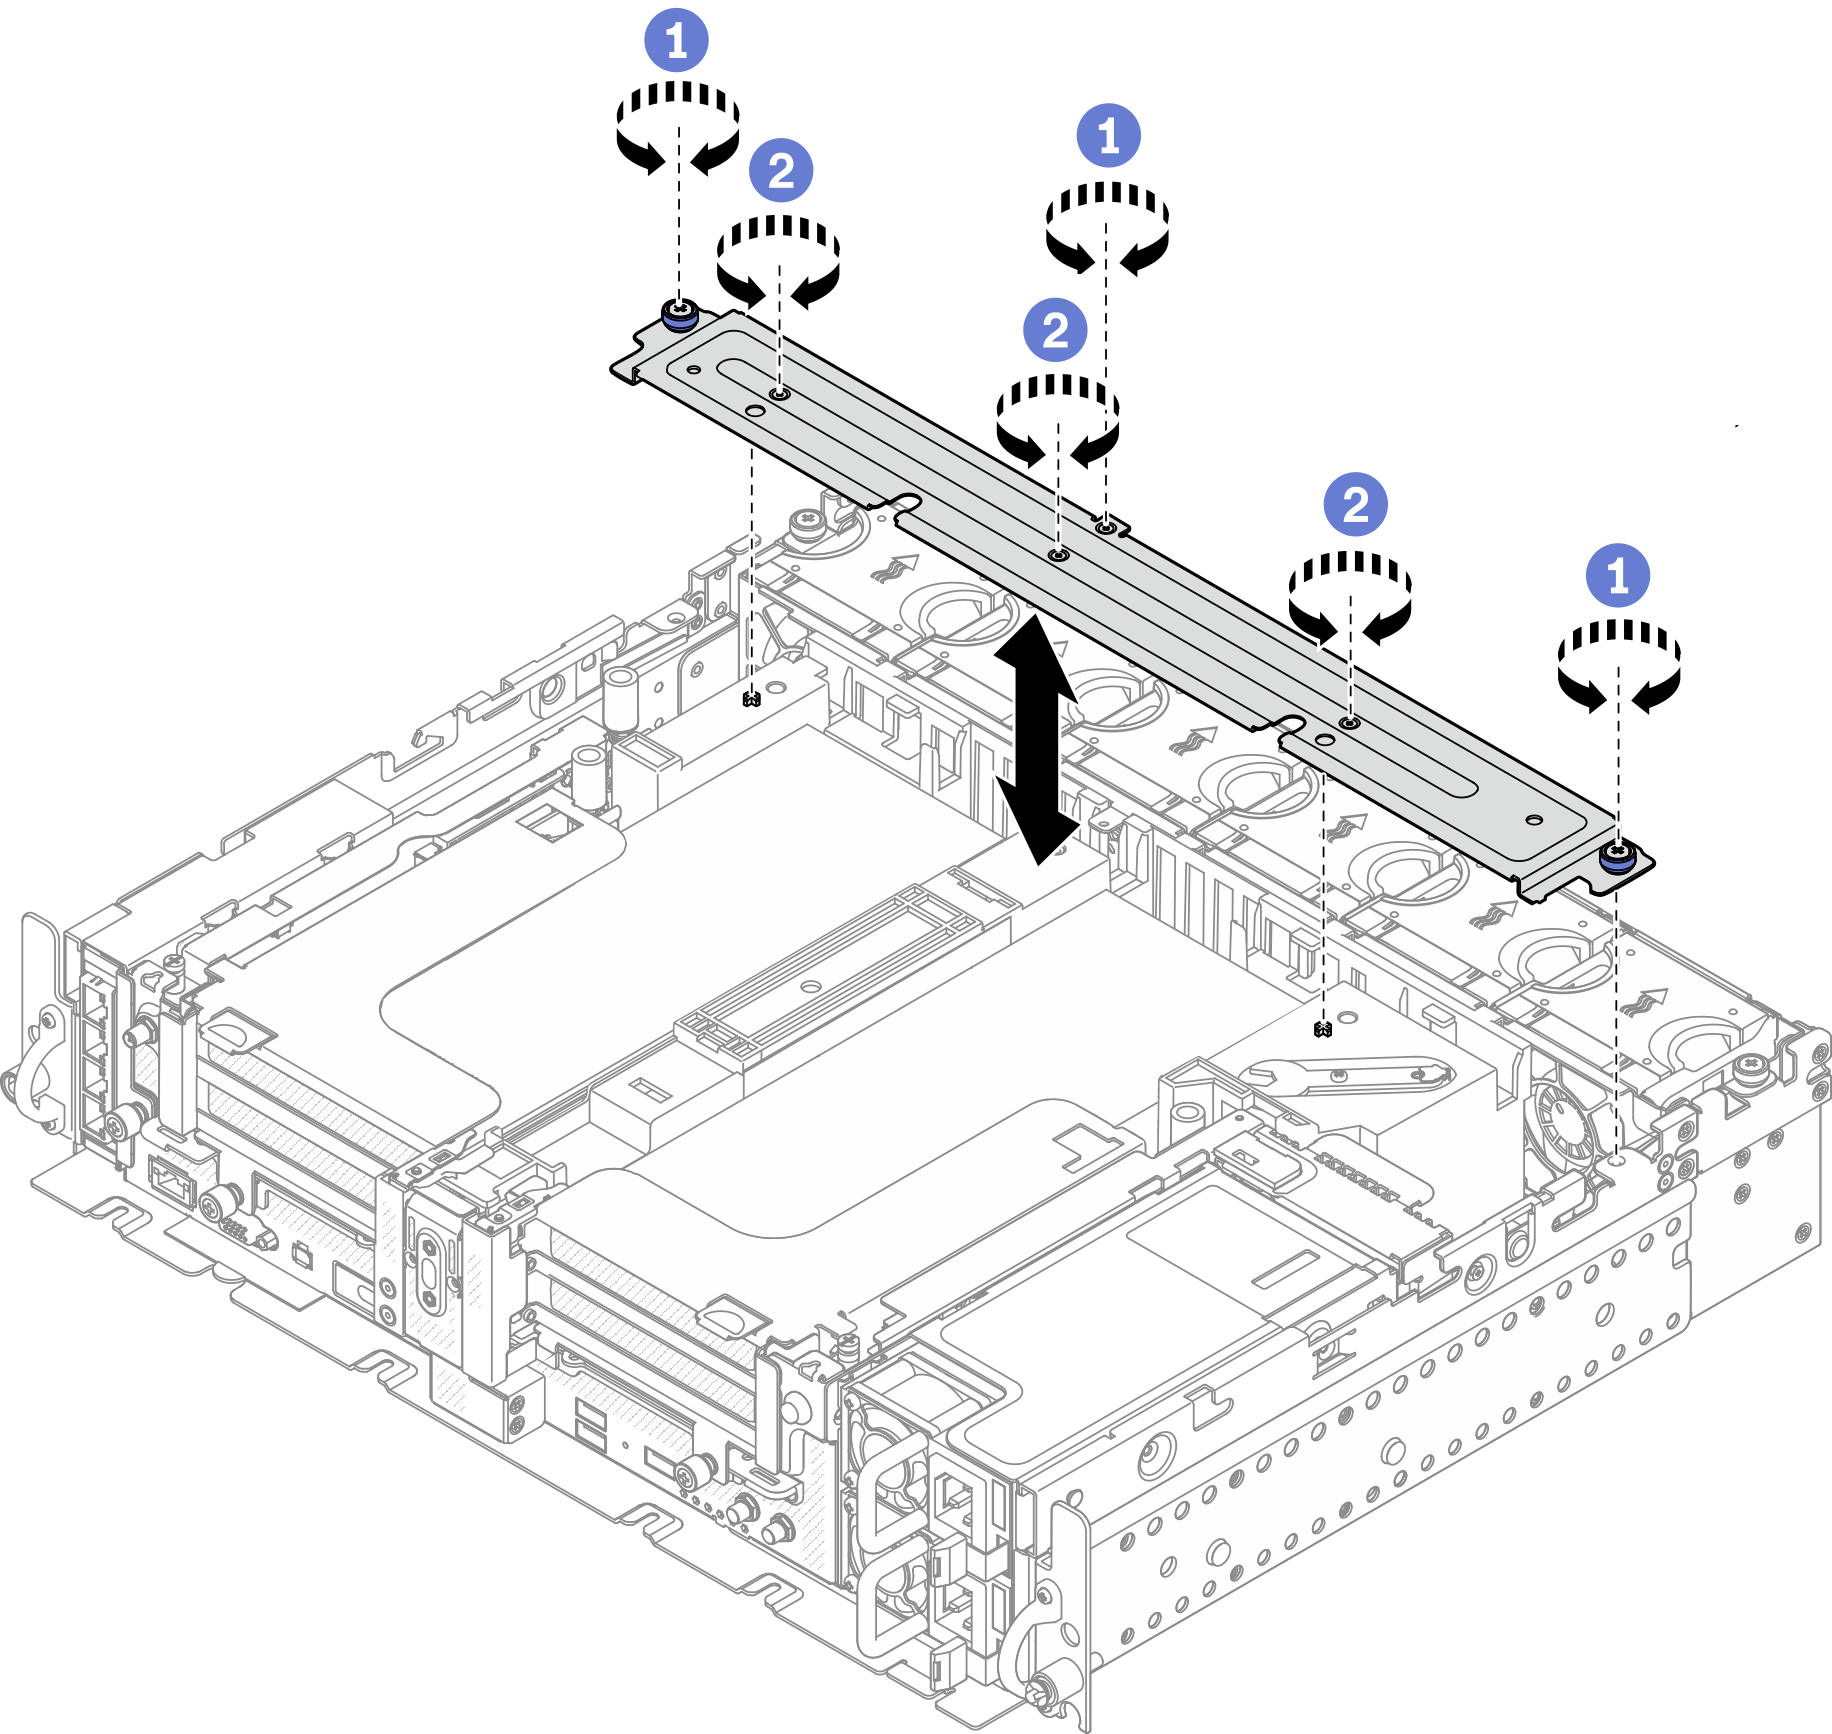
 Loosen the one captive screw and two thumbscrews that secure the bracket to the chassis.
 Loosen the other three screws, and remove the bracket from the air baffle.
- Disconnect the GPU power cables from the adapters.NoteIf there is a plan of replacing GPU power cables, make sure to remove the fan cage first (see
Remove the fans and the fan cage). Figure 5. Cable routing for GPU power cables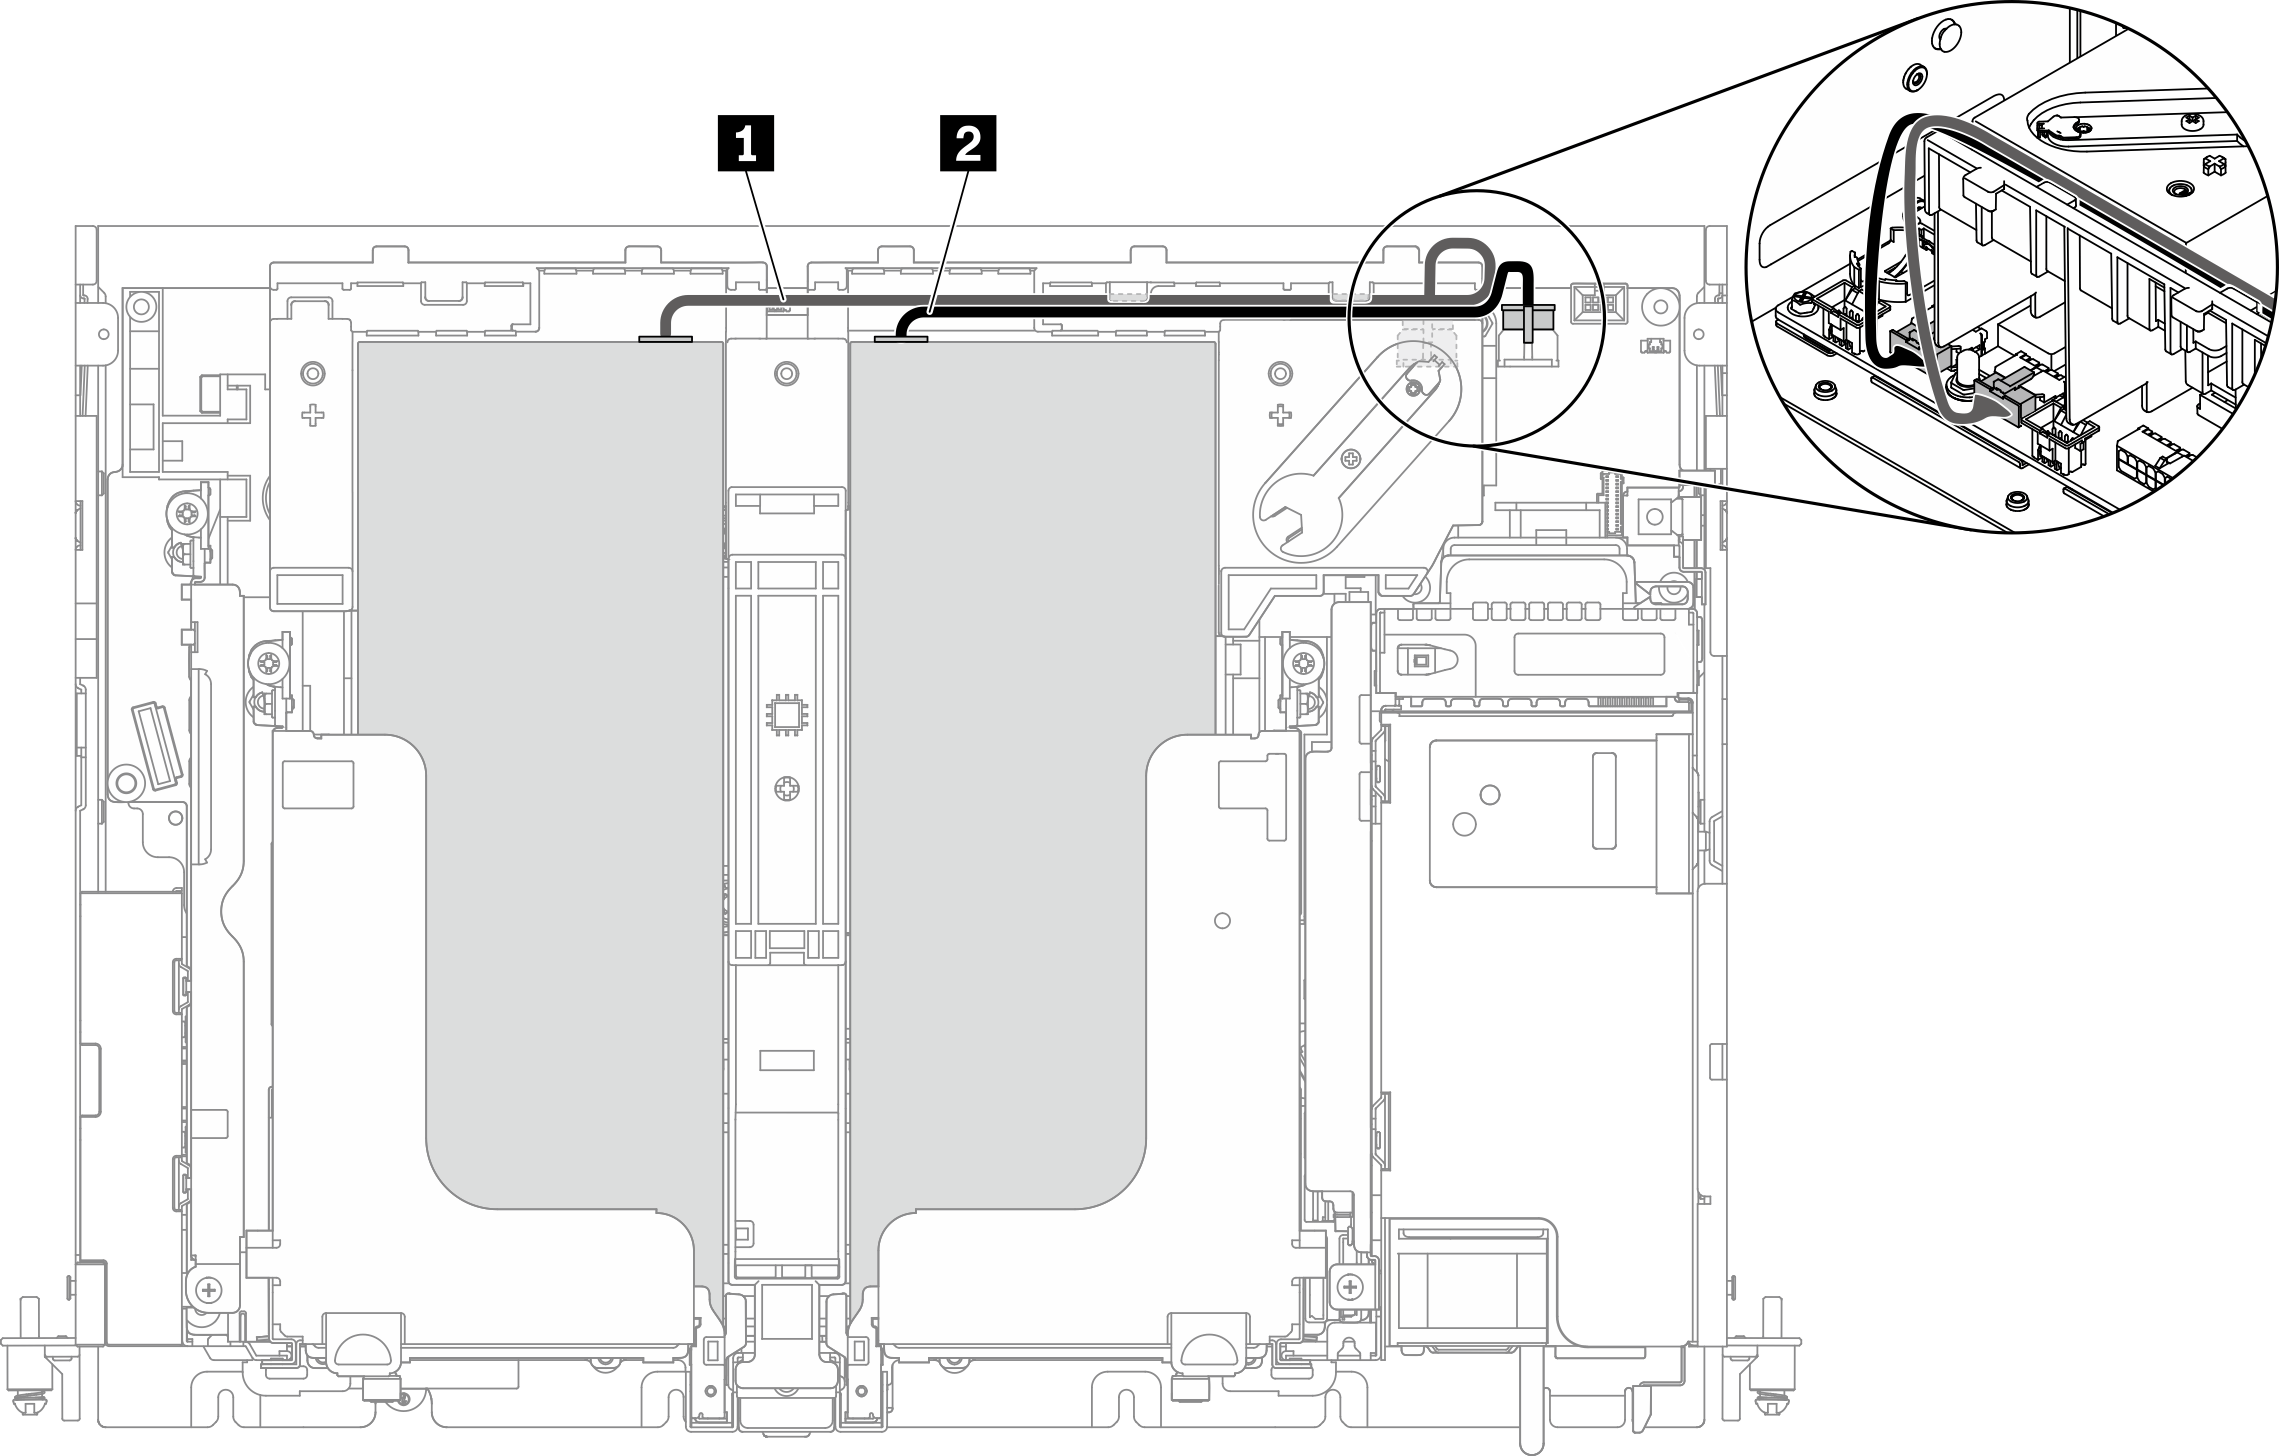
Table 1. Cable routing for GPU power cables From To 1 GPU in Slot 5, Riser 1 GPU power connector 2 2 GPU in Slot 4, Riser 2 GPU power connector 1 - Loosen the four captive screws; then lift and remove both PCIe riser assemblies.Figure 6. Removing PCIe riser assemblies with full-length adapters
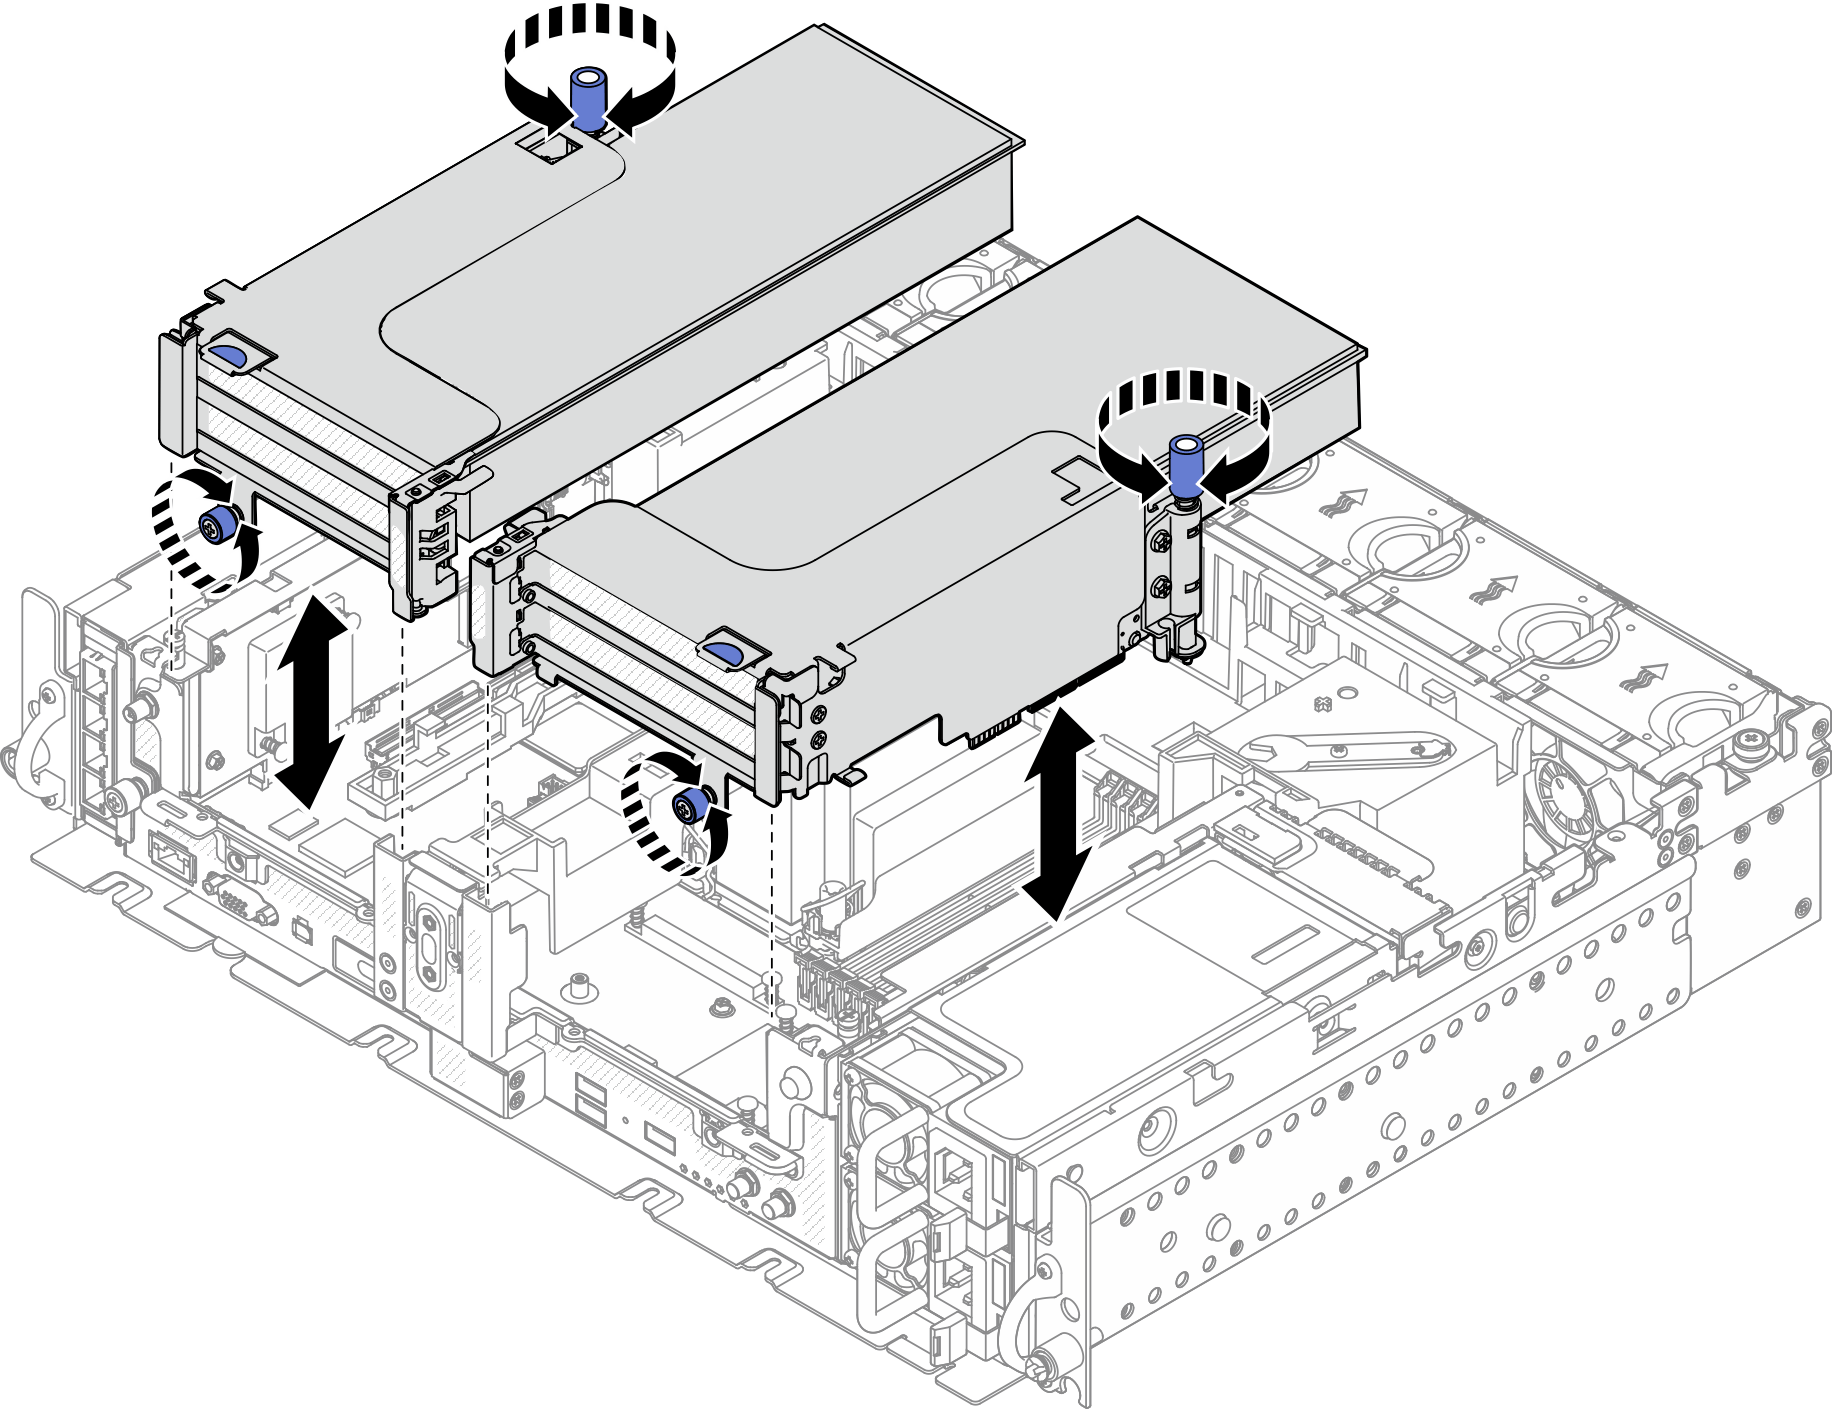
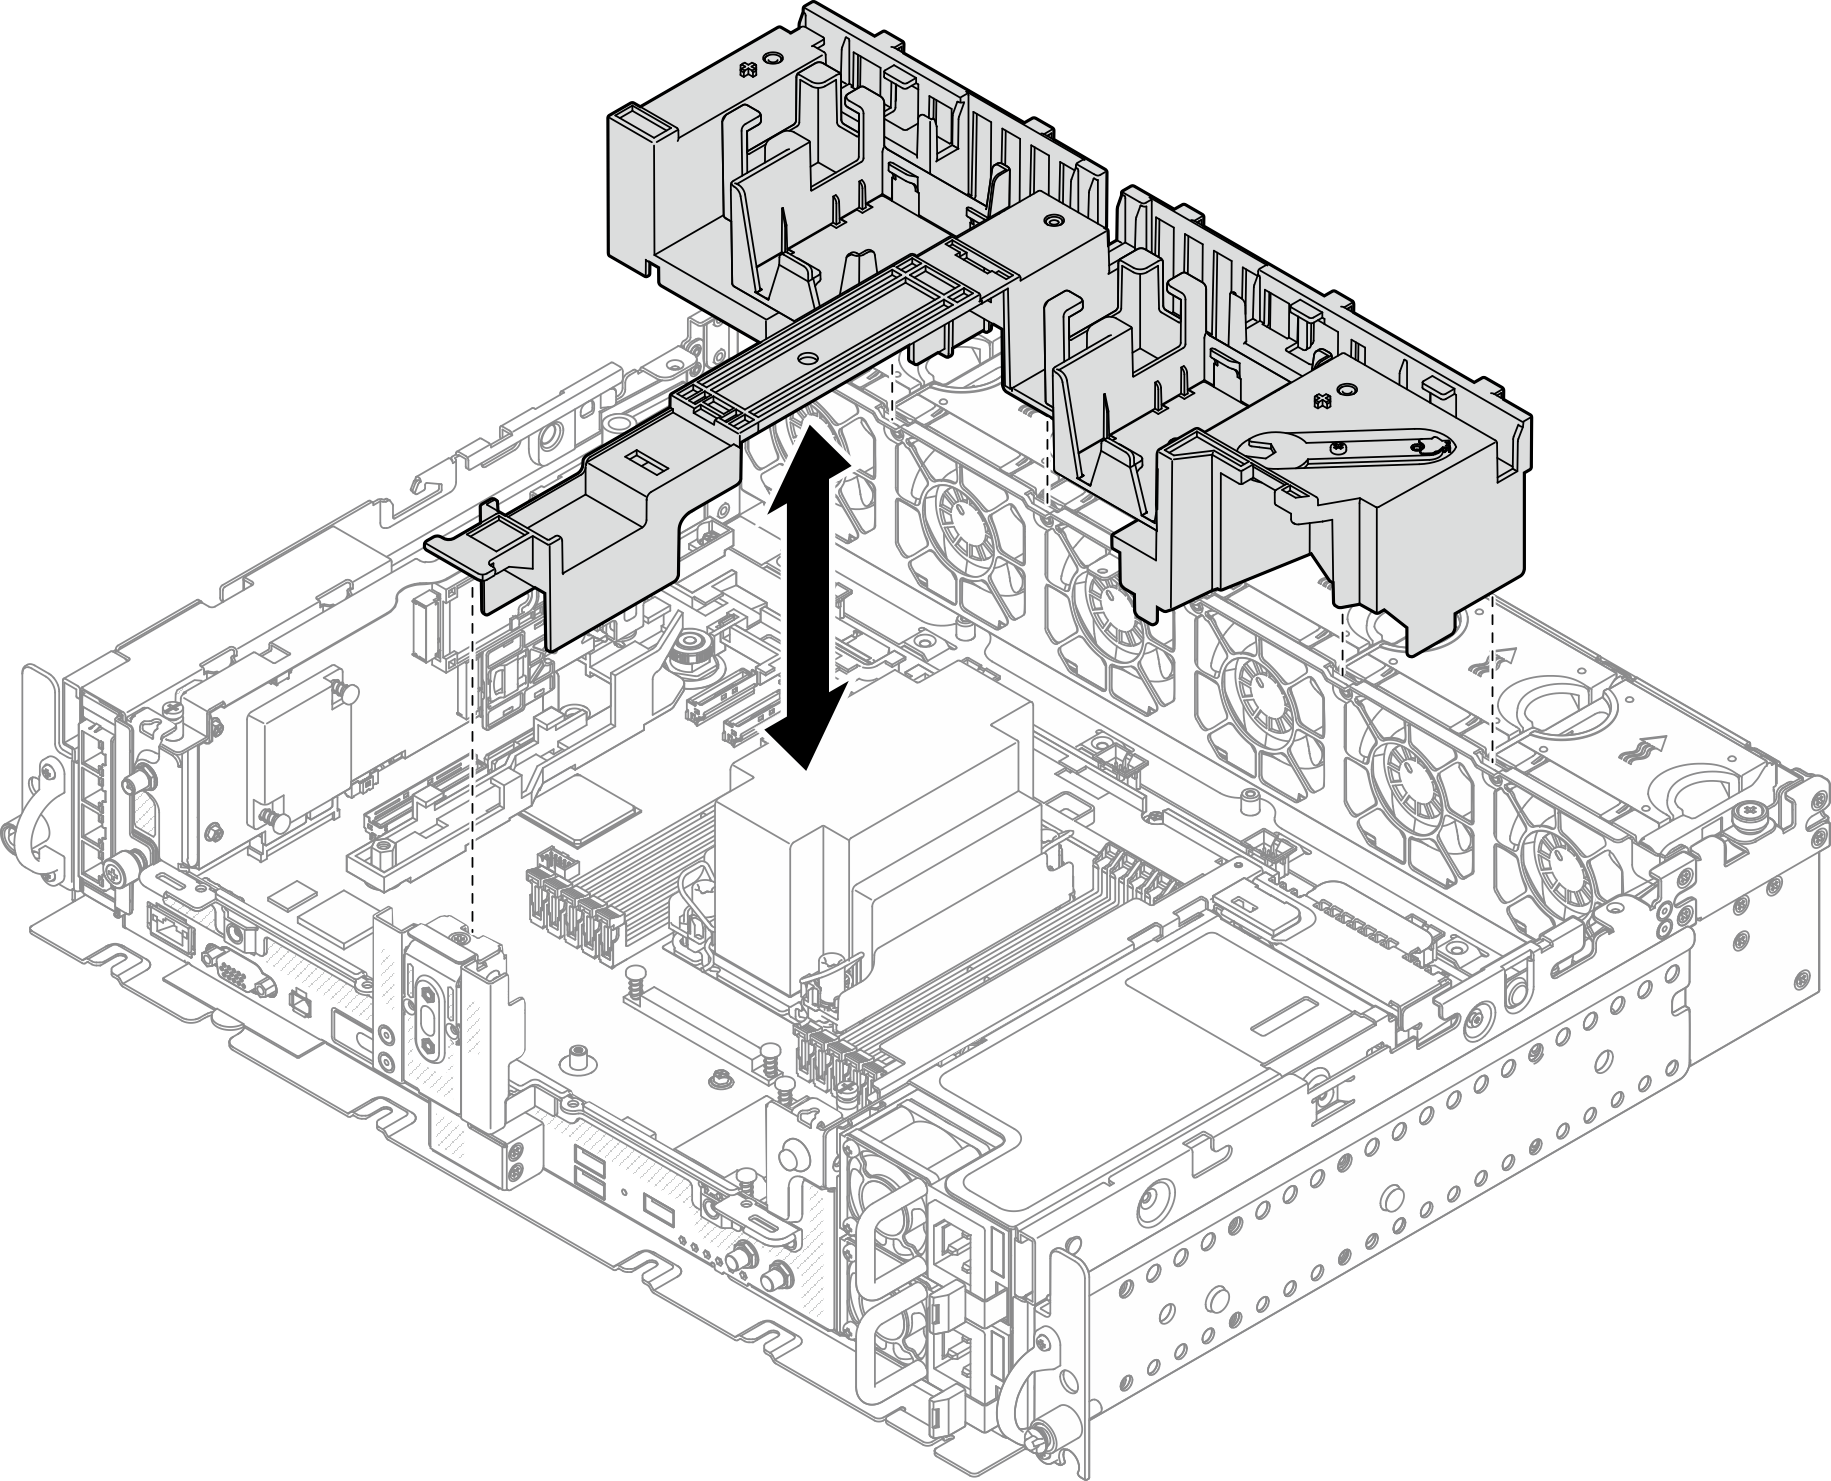
- Lift the air baffle and remove it from the chassis.Figure 7. Removing the 360mm air baffle with full-length adapters
After this task is completed
Make sure to install the air baffle back after finishing component replacement.
Attention
Air baffle is required for the airflow that creates proper cooling. Make sure to install the proper air baffle corresponding to the system configuration before power is turned on.
Give documentation feedback