Install the air baffle
See this topic to learn how to install the air baffle.
About this task
To avoid possible danger, read and follow the following safety statement.
- S012
 CAUTIONHot surface nearby.
See to the topic corresponding to the server configuration.
Install the air baffle for 300mm chassis
Procedure
- Make sure the air baffle configuration fits the present system configuration.AttentionFillers corresponding to system configuration are required for the airflow that does expected cooling. Make sure to install the proper fillers corresponding to the system configuration.
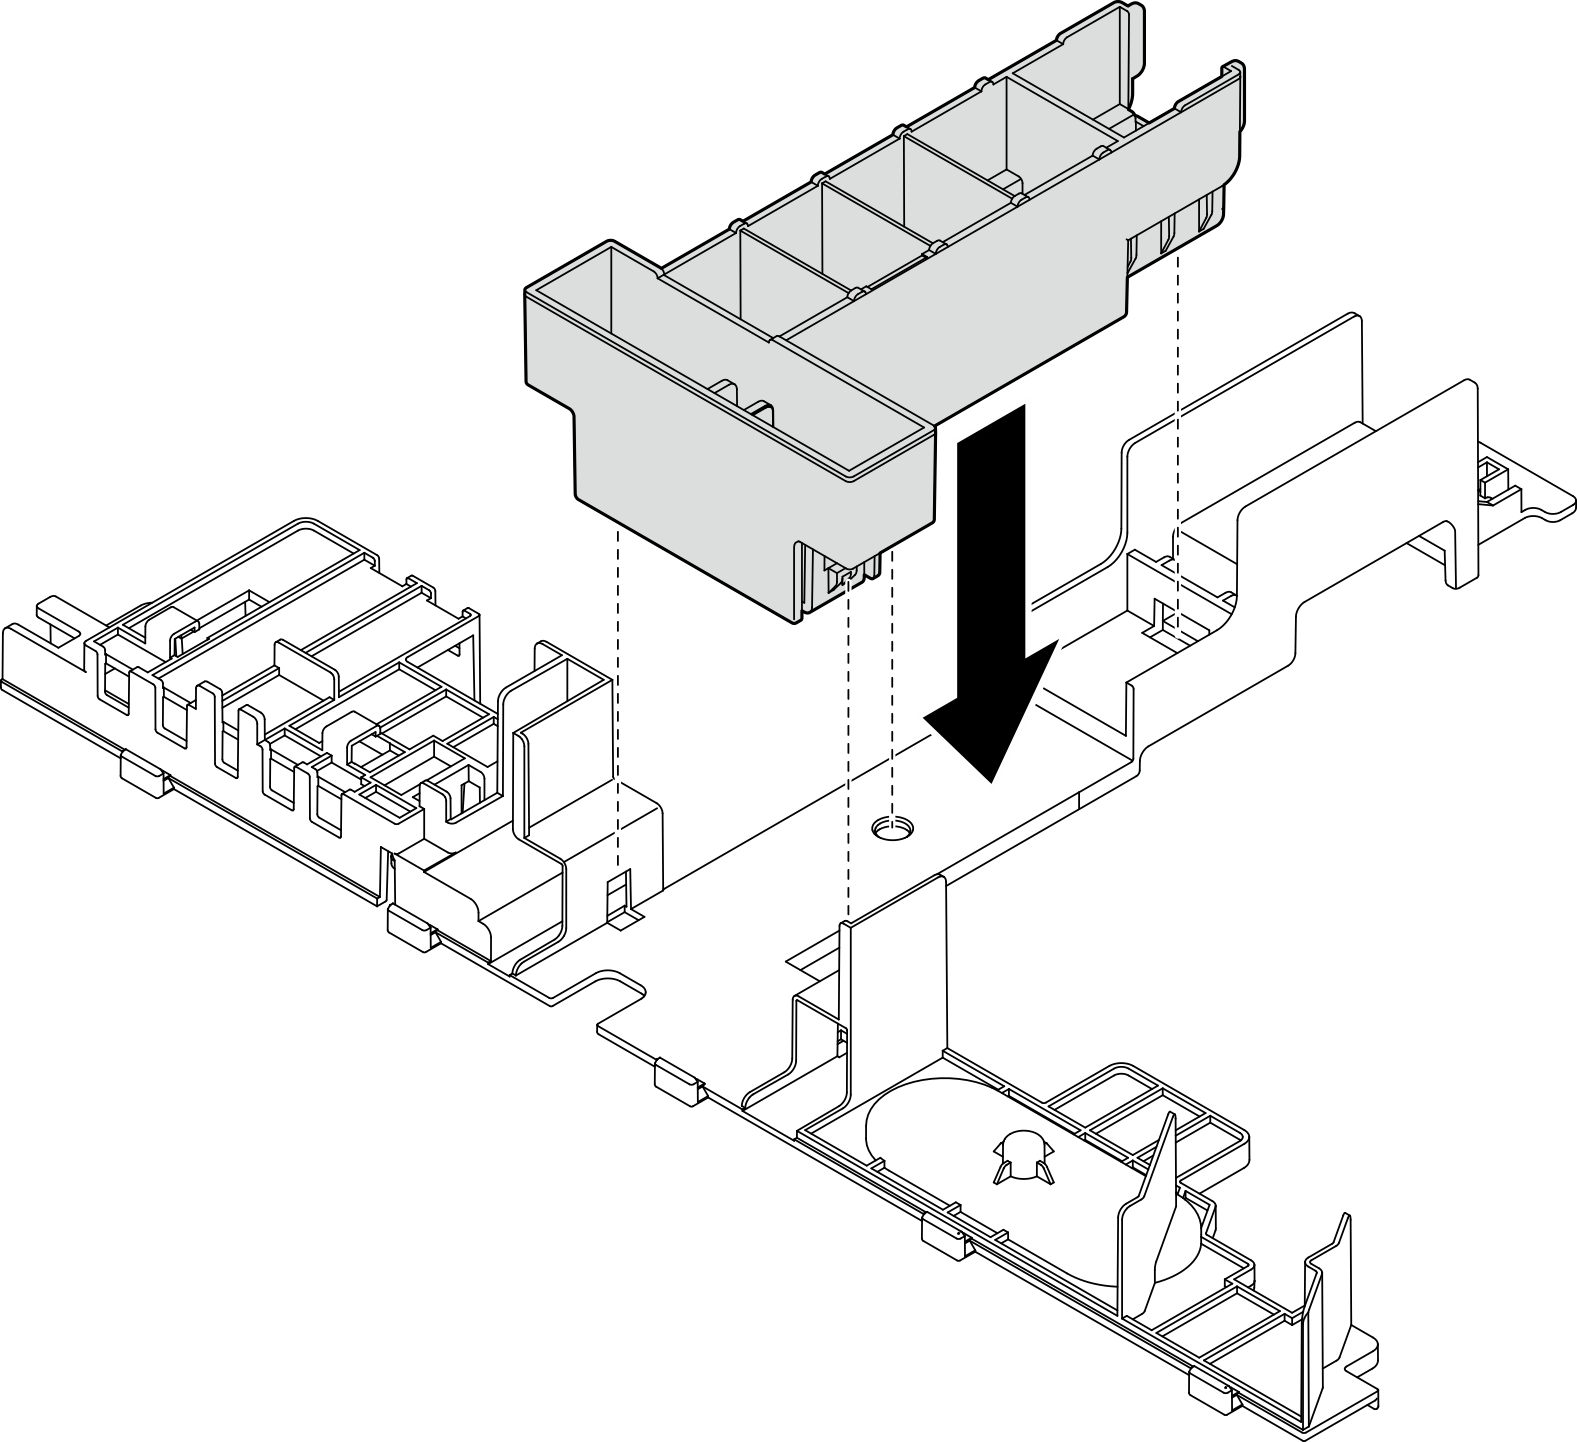
- If the heat sink is 1U, make sure the heat sink filler is installed to the air baffle.Figure 1. Installing heat sink filler
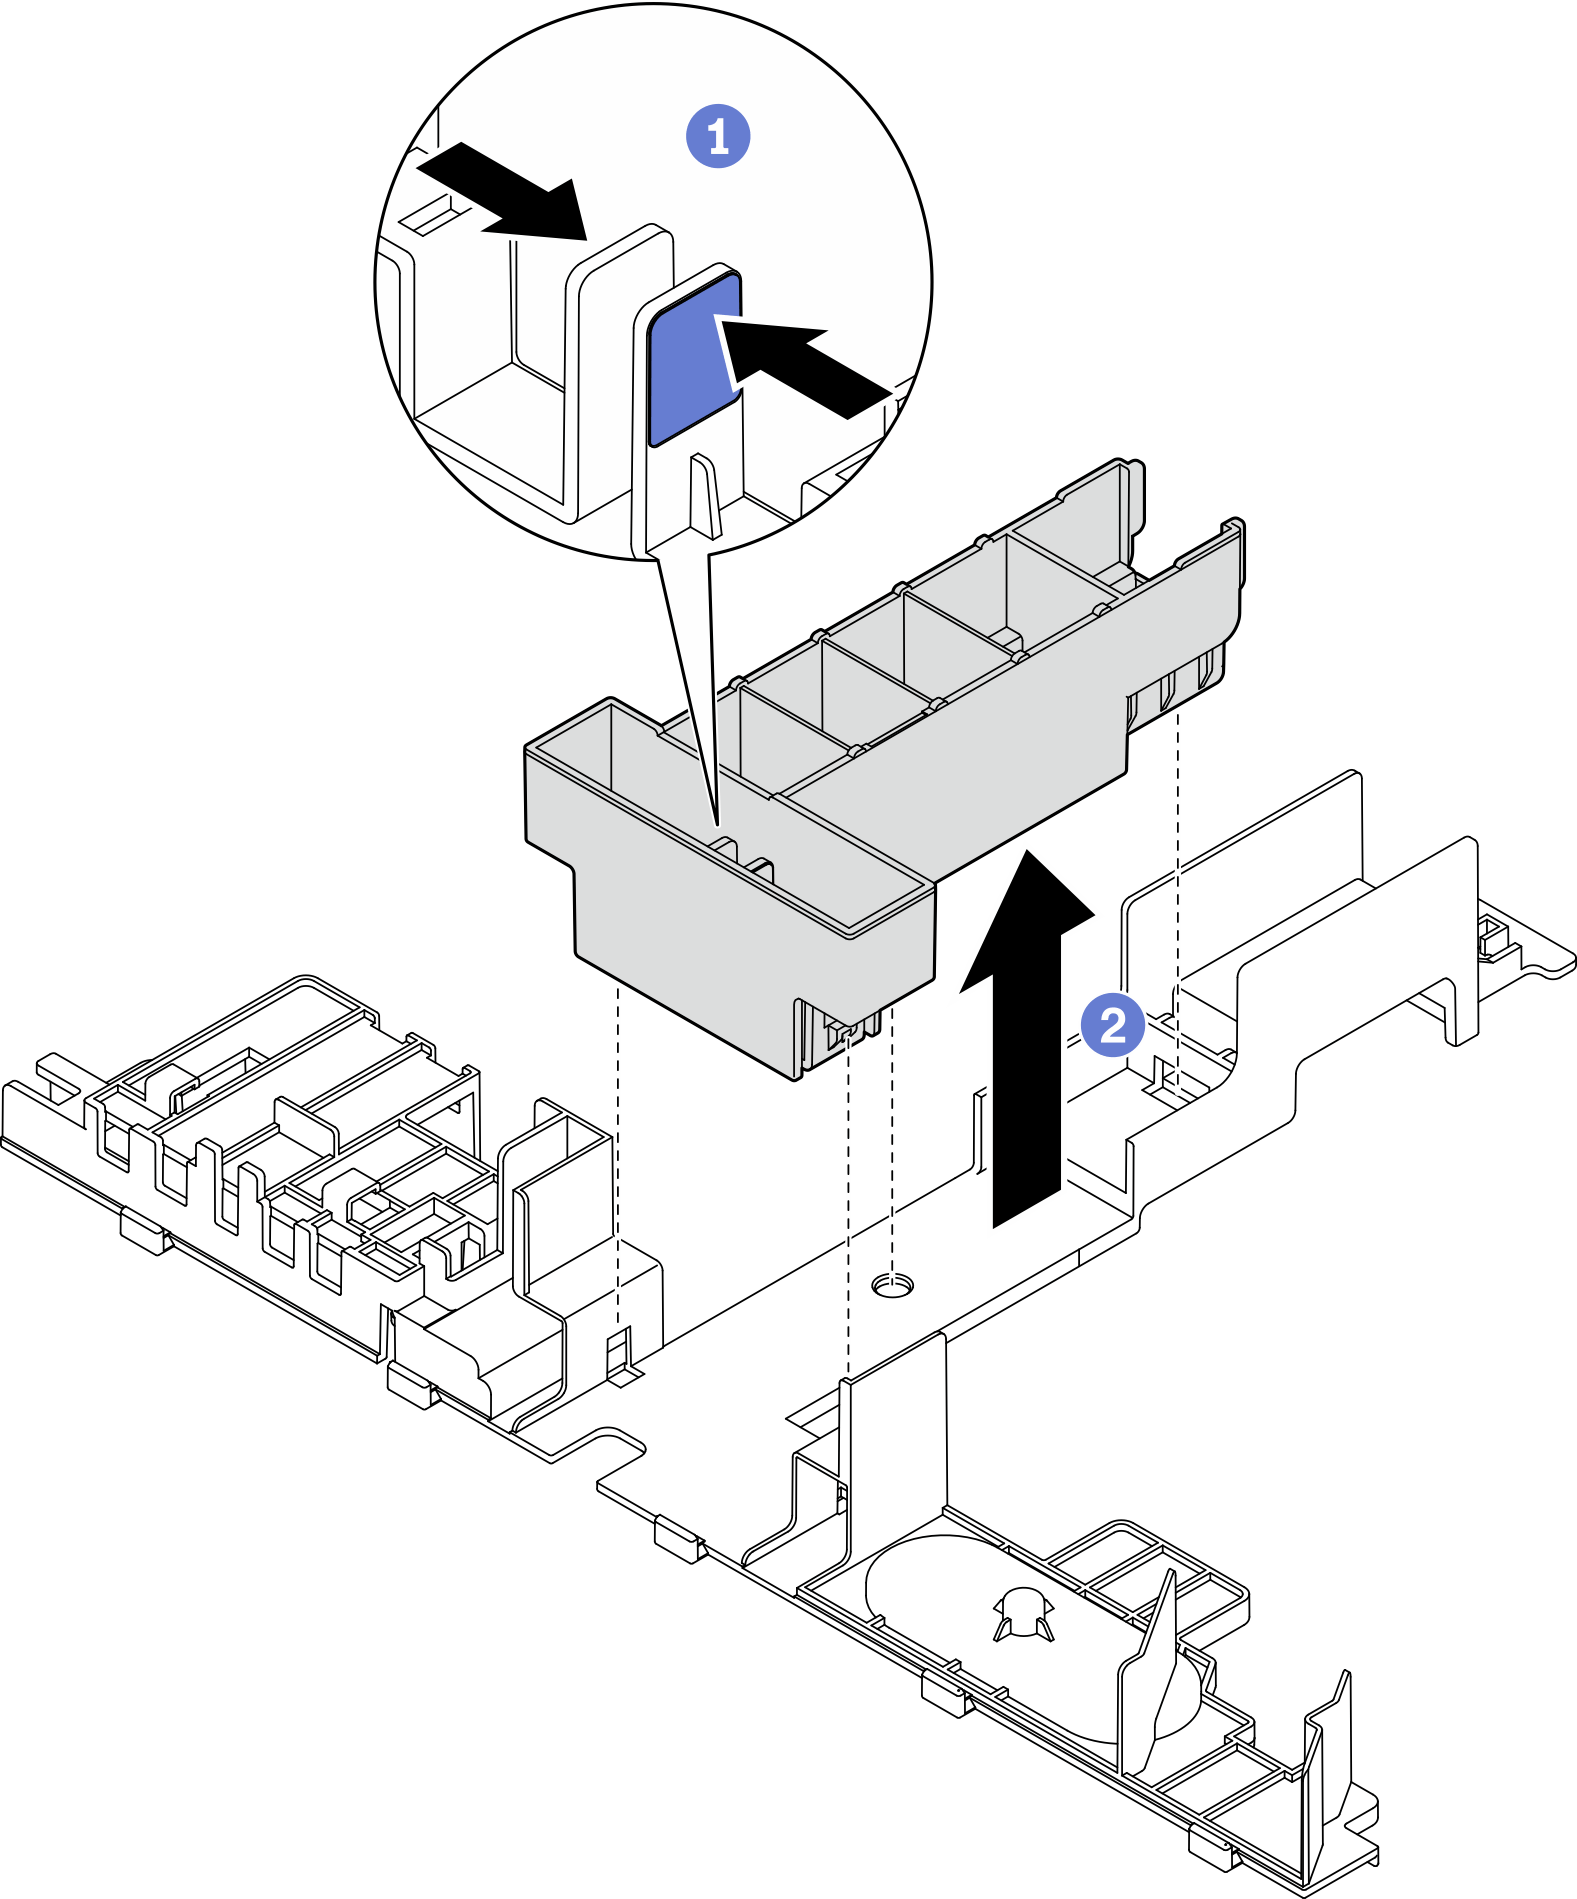
- If the heat sink is 2U, make sure the heat sink filler is removed from the air baffle.Figure 2. Installing heat sink filler
 Press the release latch on the filler.
 Remove the filler from the air baffle.
- If the heat sink is 1U, make sure the heat sink filler is installed to the air baffle.
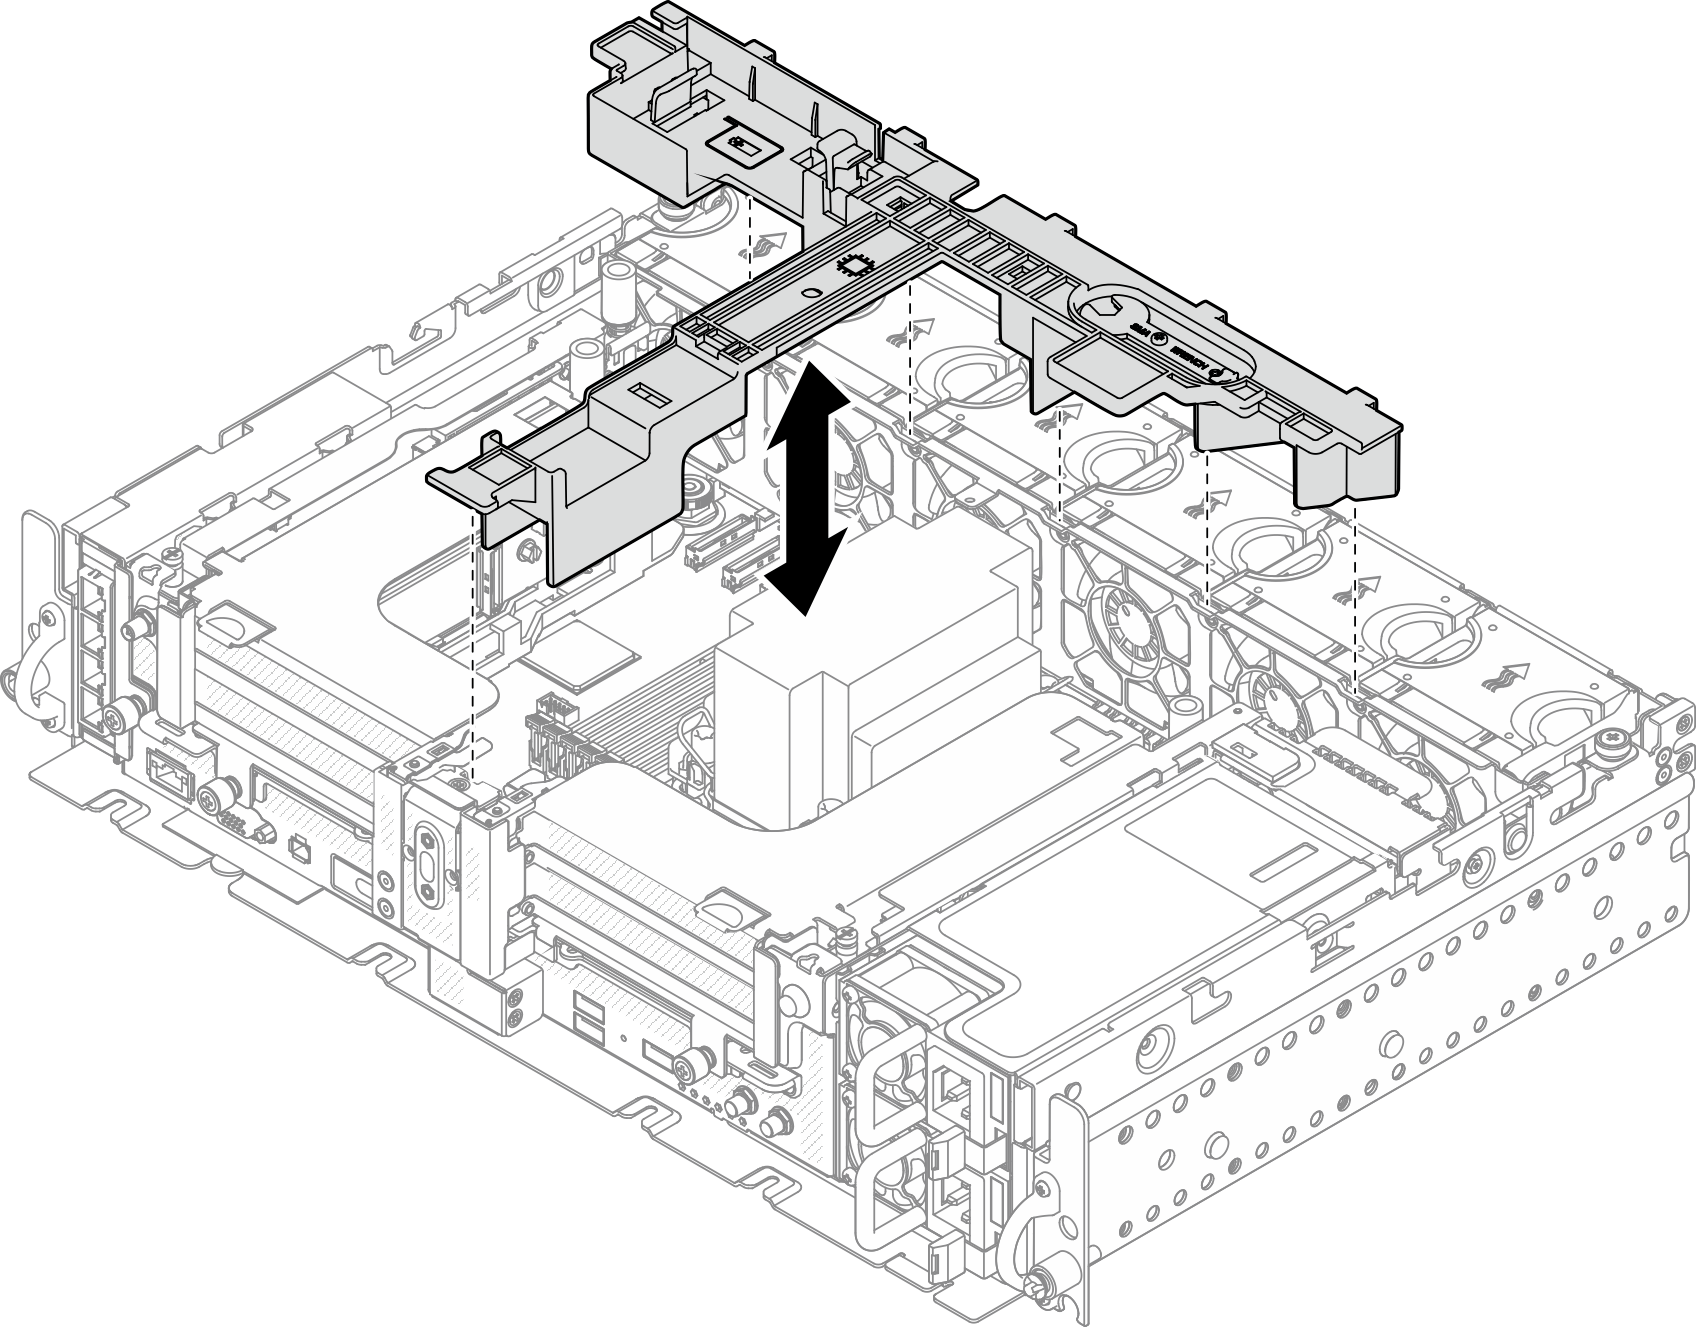
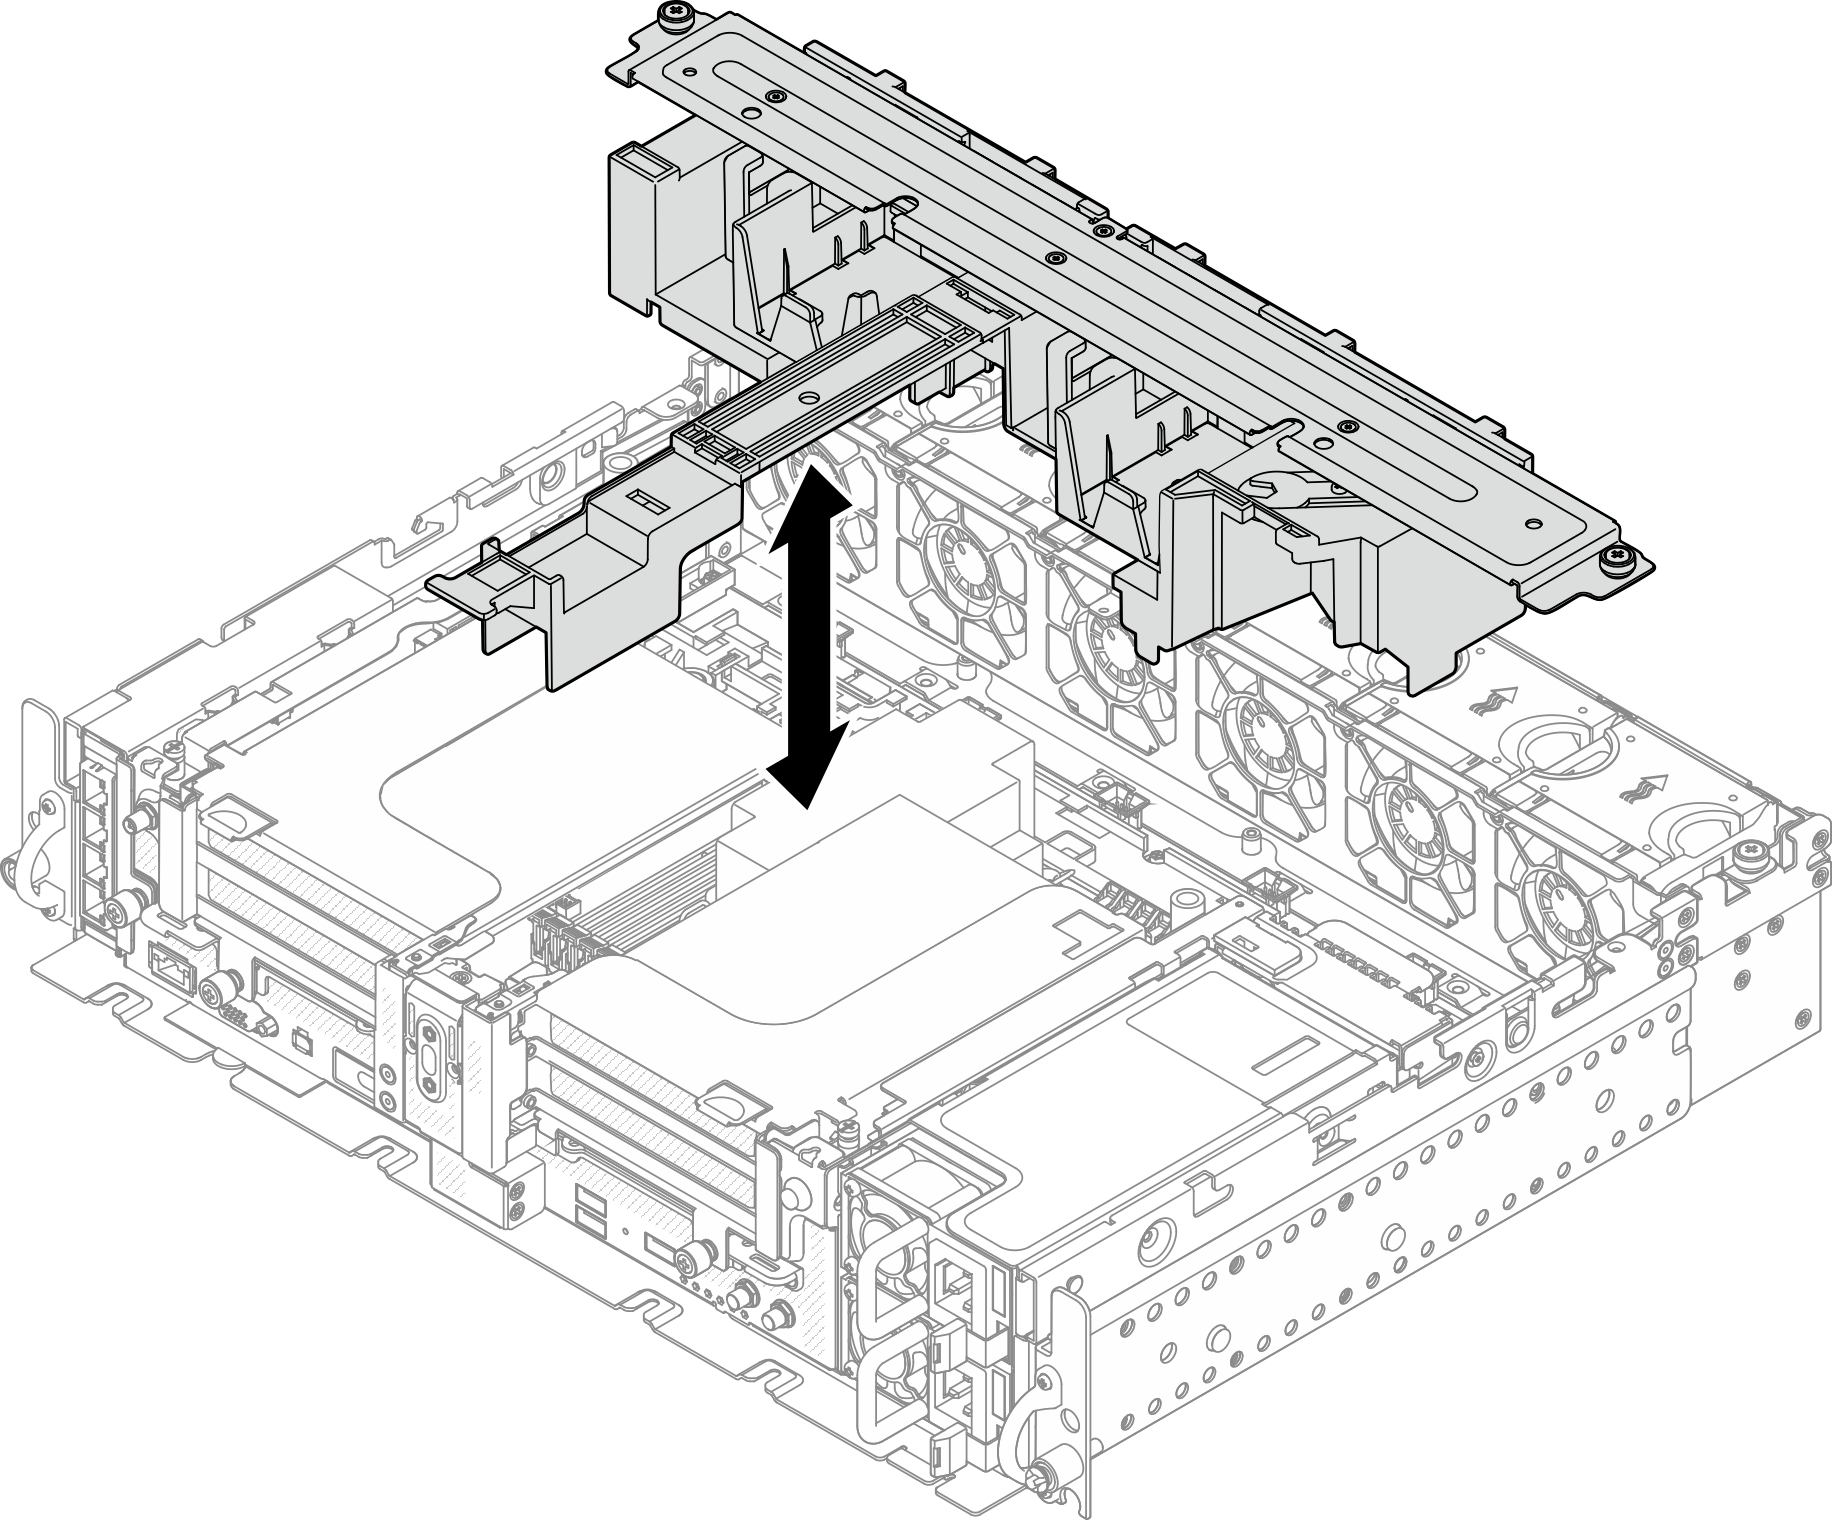
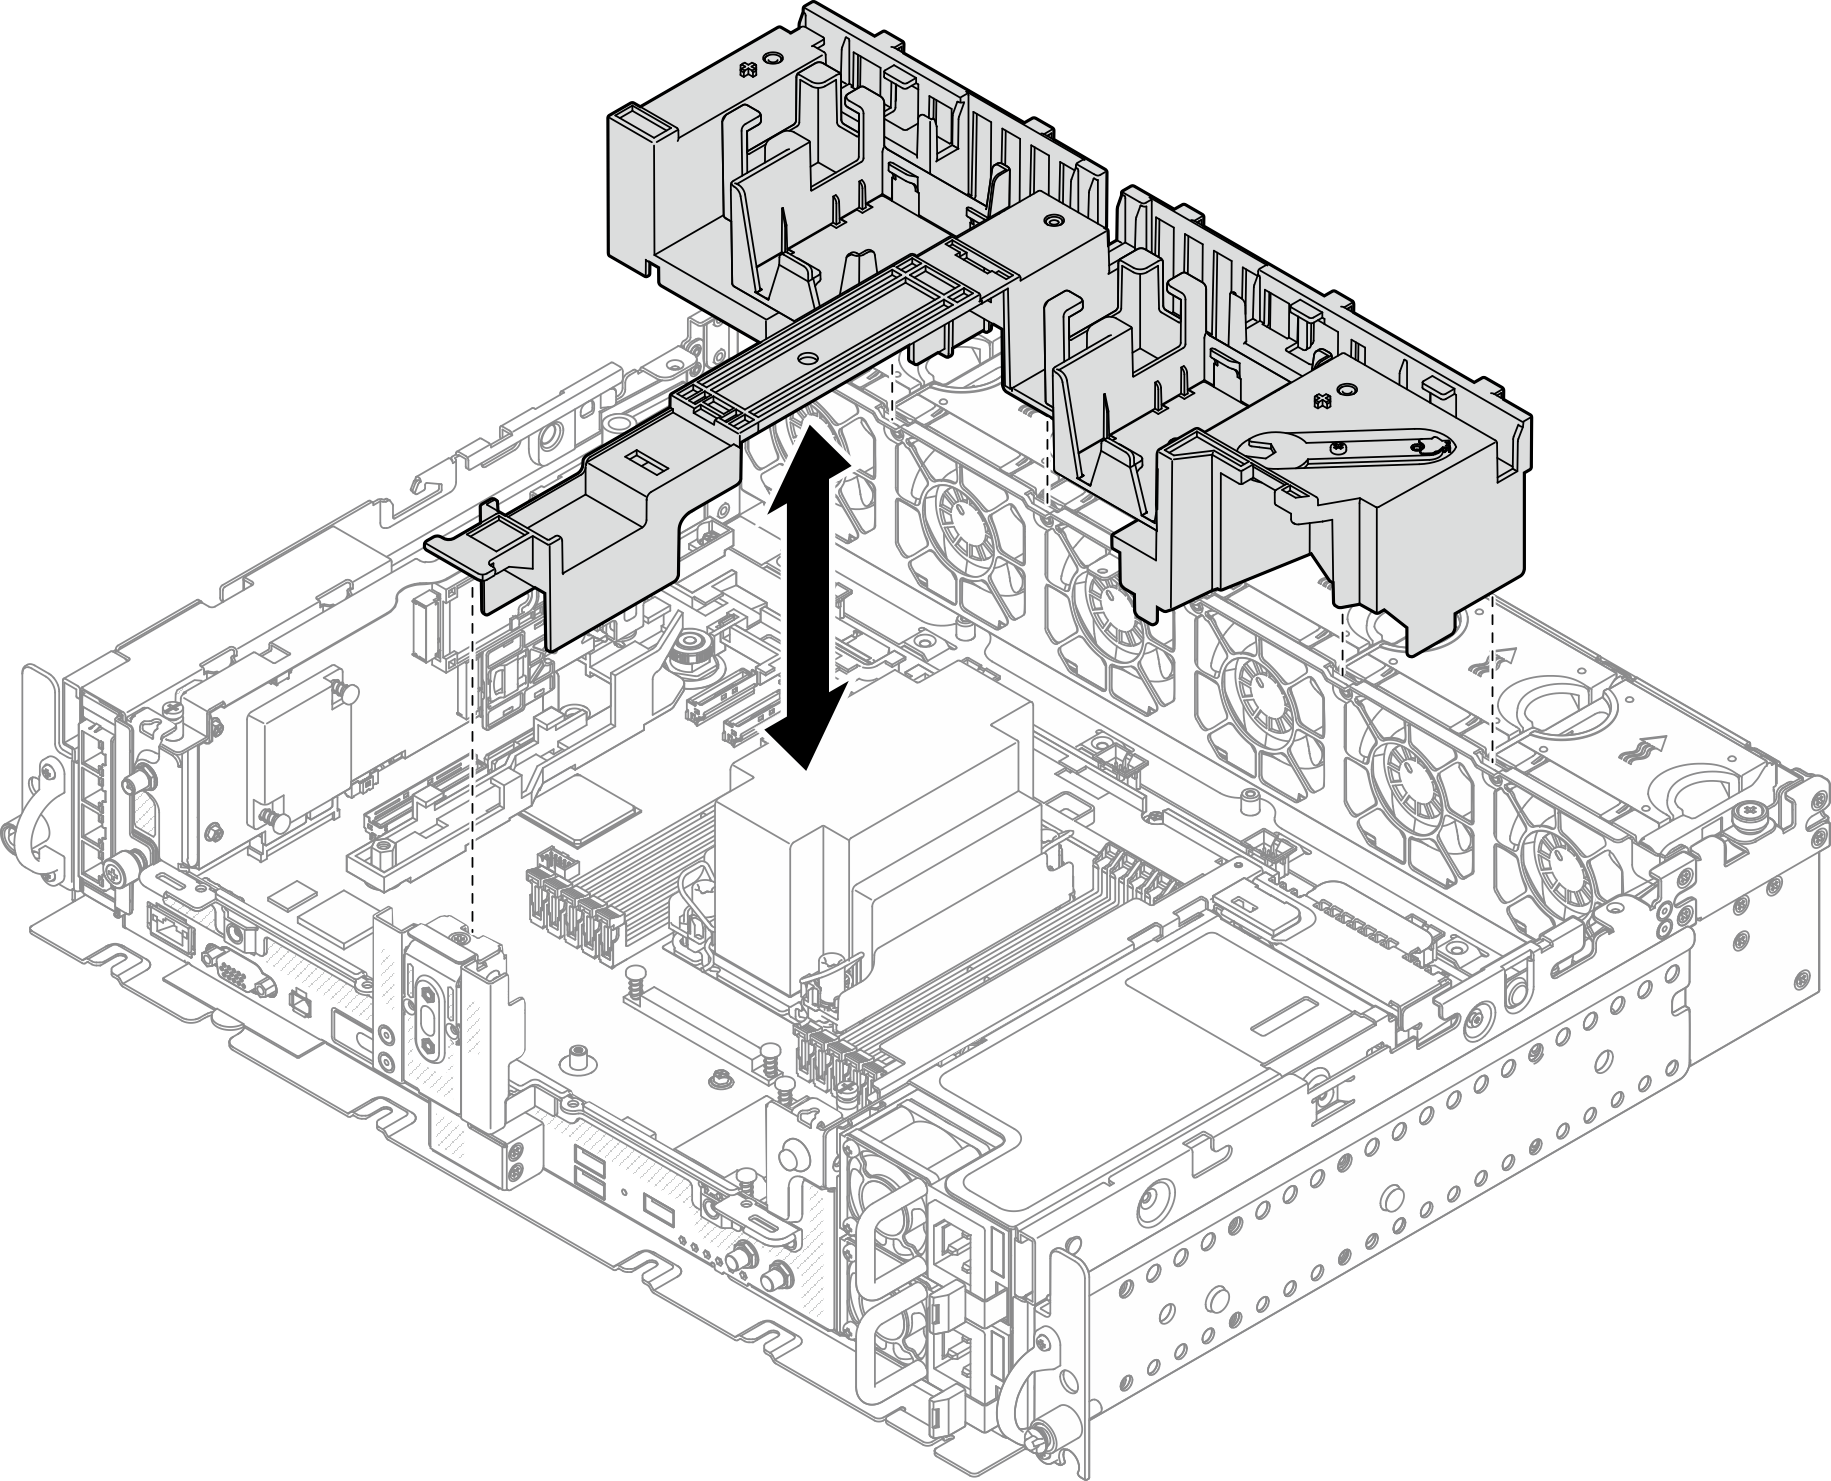
- Lower the air baffle into the chassis and press on it to ensure it is firmly seated.Figure 3. Installing the air baffle
Install the air baffle for 360mm chassis with half-length adapters
Procedure
- Make sure the air baffle configuration fits the present system configuration.AttentionFillers corresponding to system configuration are required for the airflow that does expected cooling. Make sure to install the proper fillers corresponding to the system configuration.
Heat sink filler
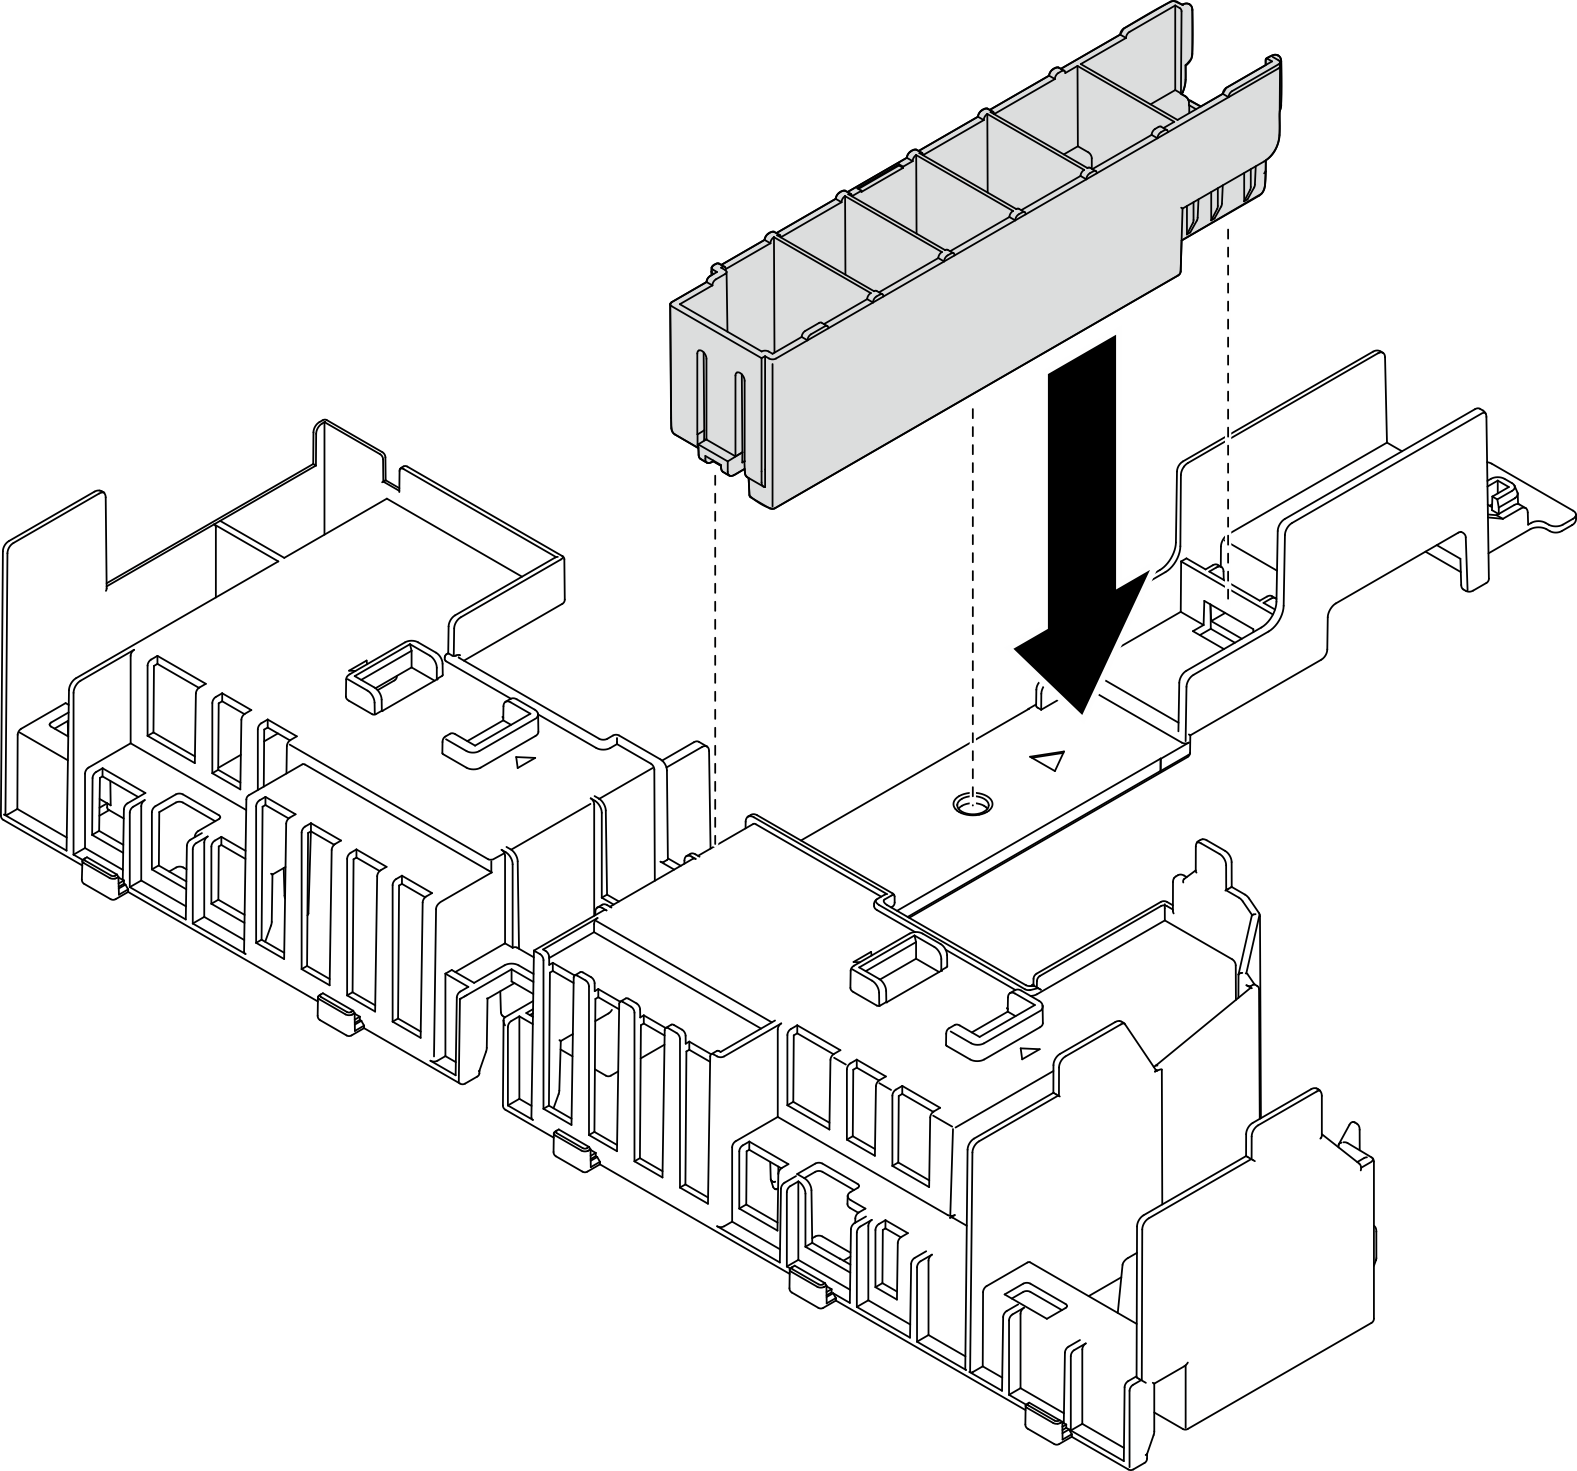
- If the heat sink is 1U, make sure the heat sink filler is installed to the air baffle.Figure 4. Installing heat sink filler
If the heat sink is 2U, make sure the heat sink filler is removed from the air baffle.
Figure 5. Installing the heat sink filler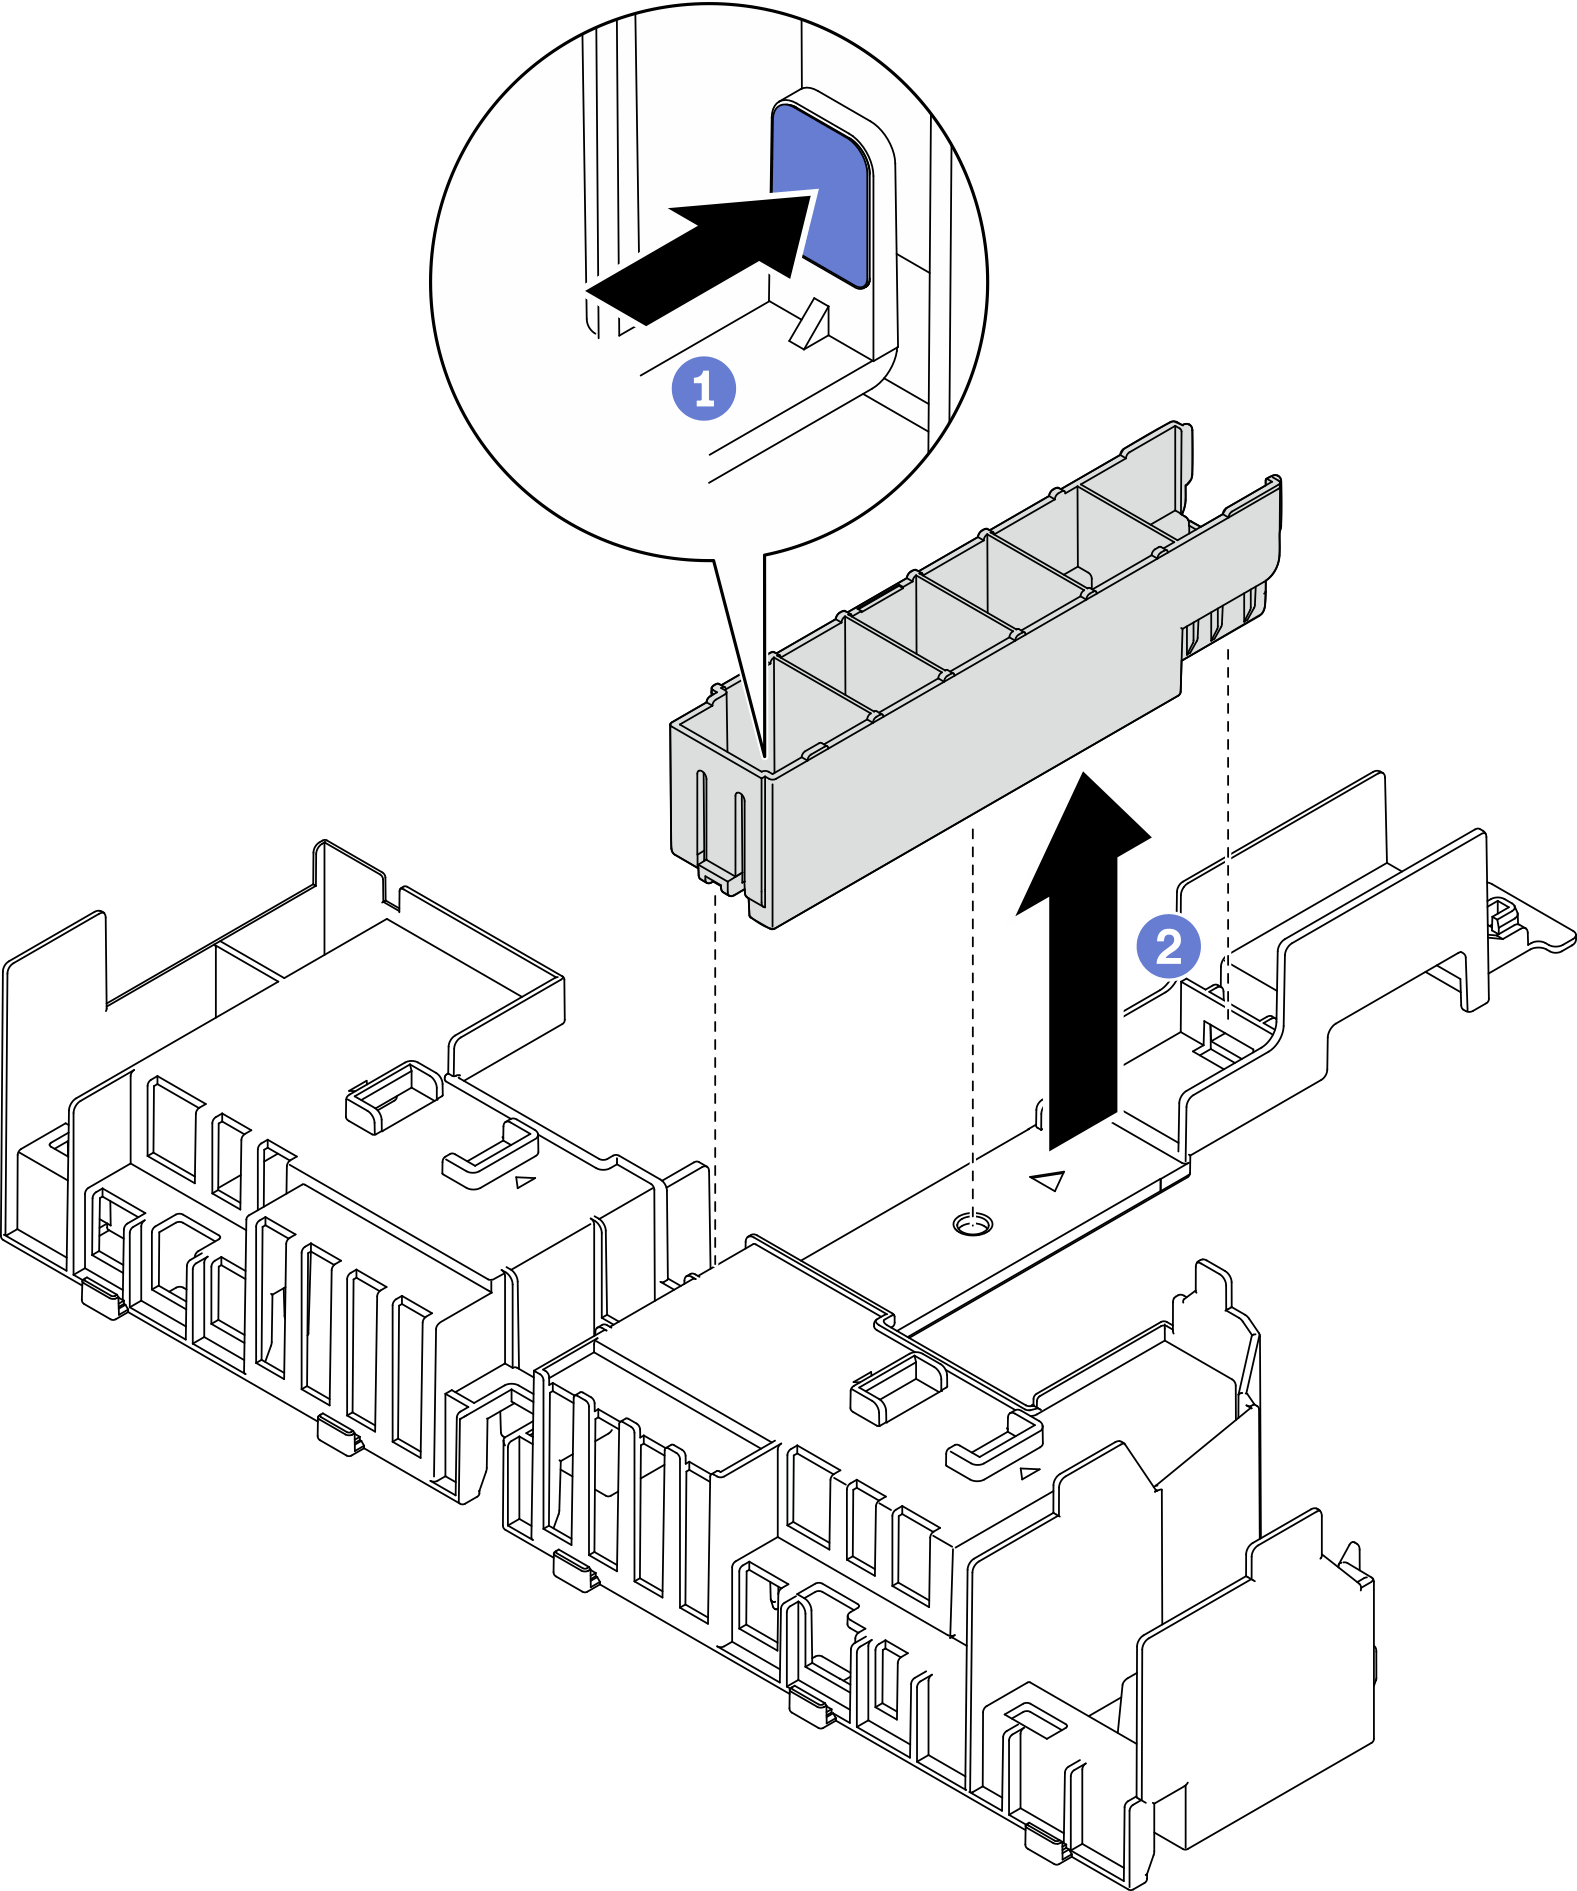
- Press the release latch on the filler.
- Remove the filler from the air baffle.
- If the heat sink is 1U, make sure the heat sink filler is installed to the air baffle.
GPU fillers
GPU fillers are required when half-length adapters are installed in a 360mm chassis. If no GPU fillers are installed, make sure to install them to the air baffle.Figure 6. Installing the GPU fillers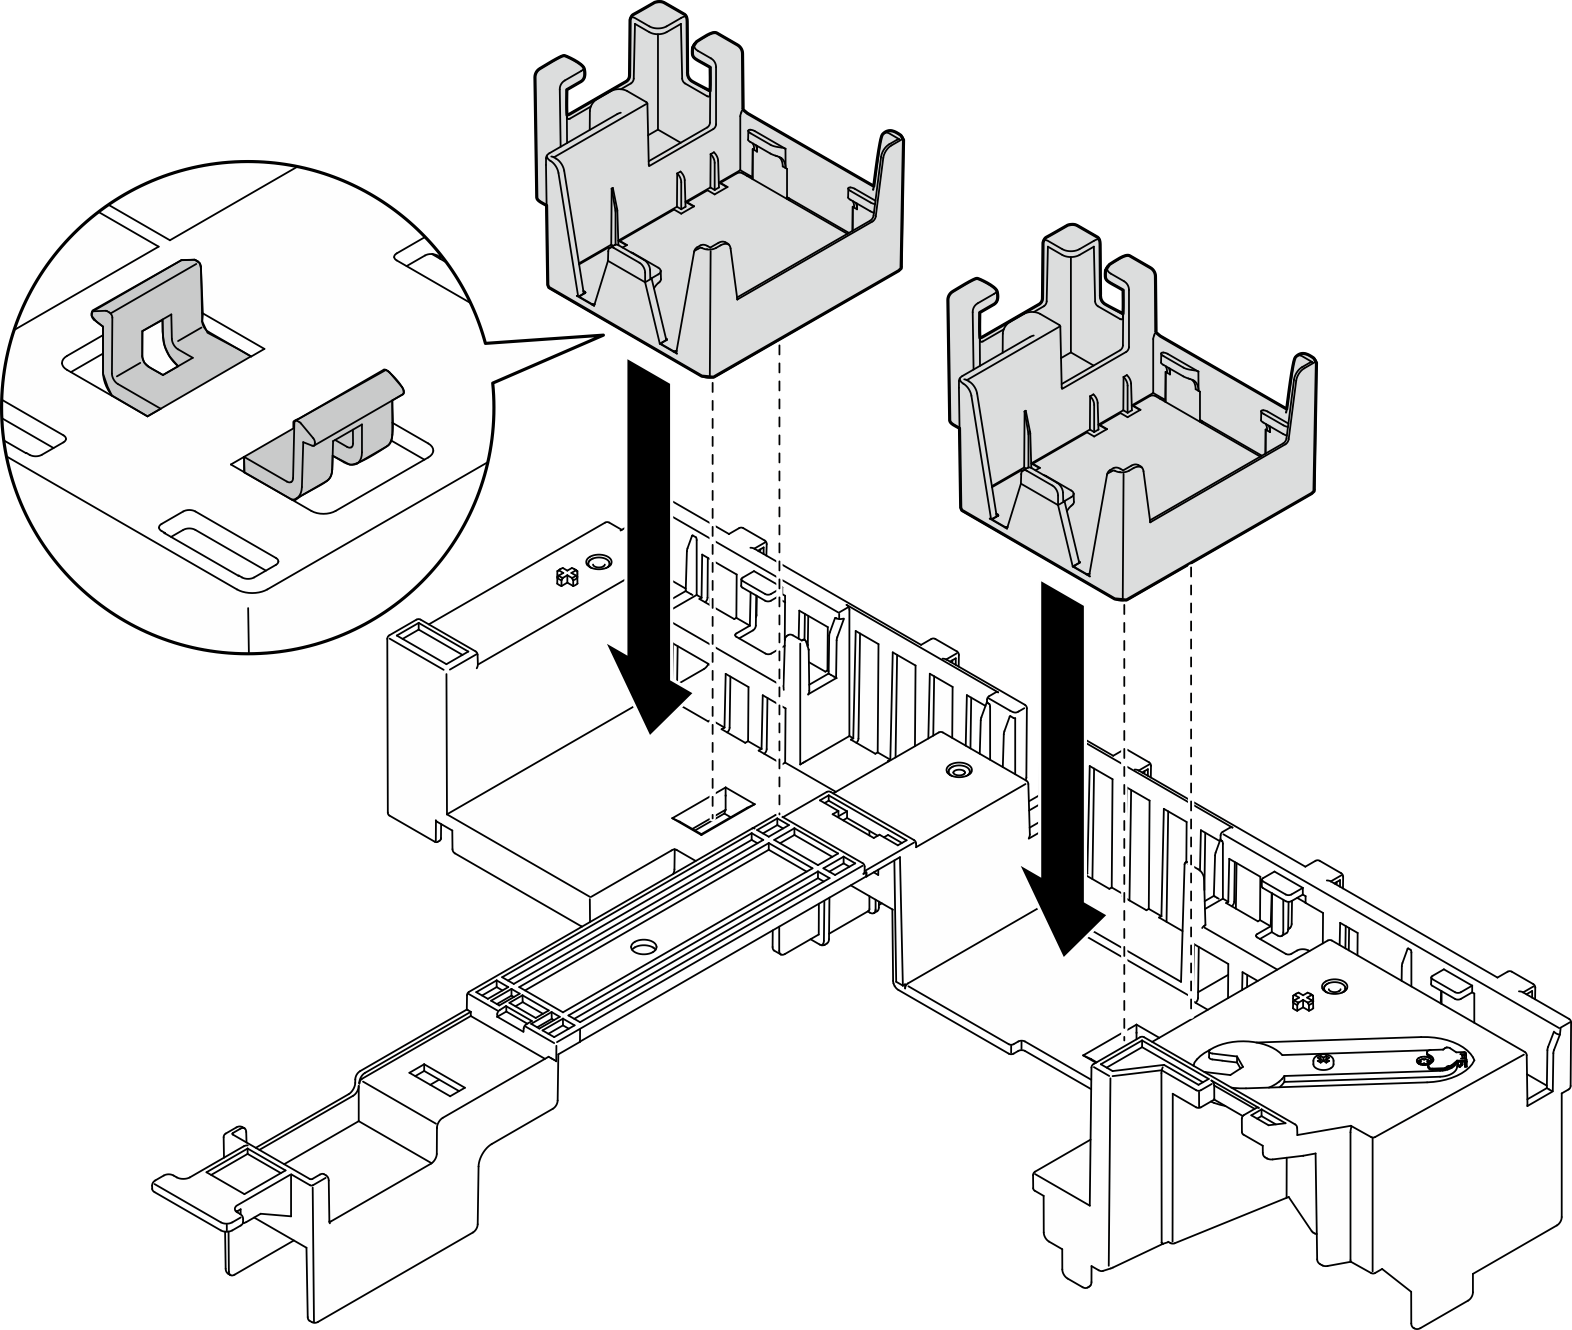
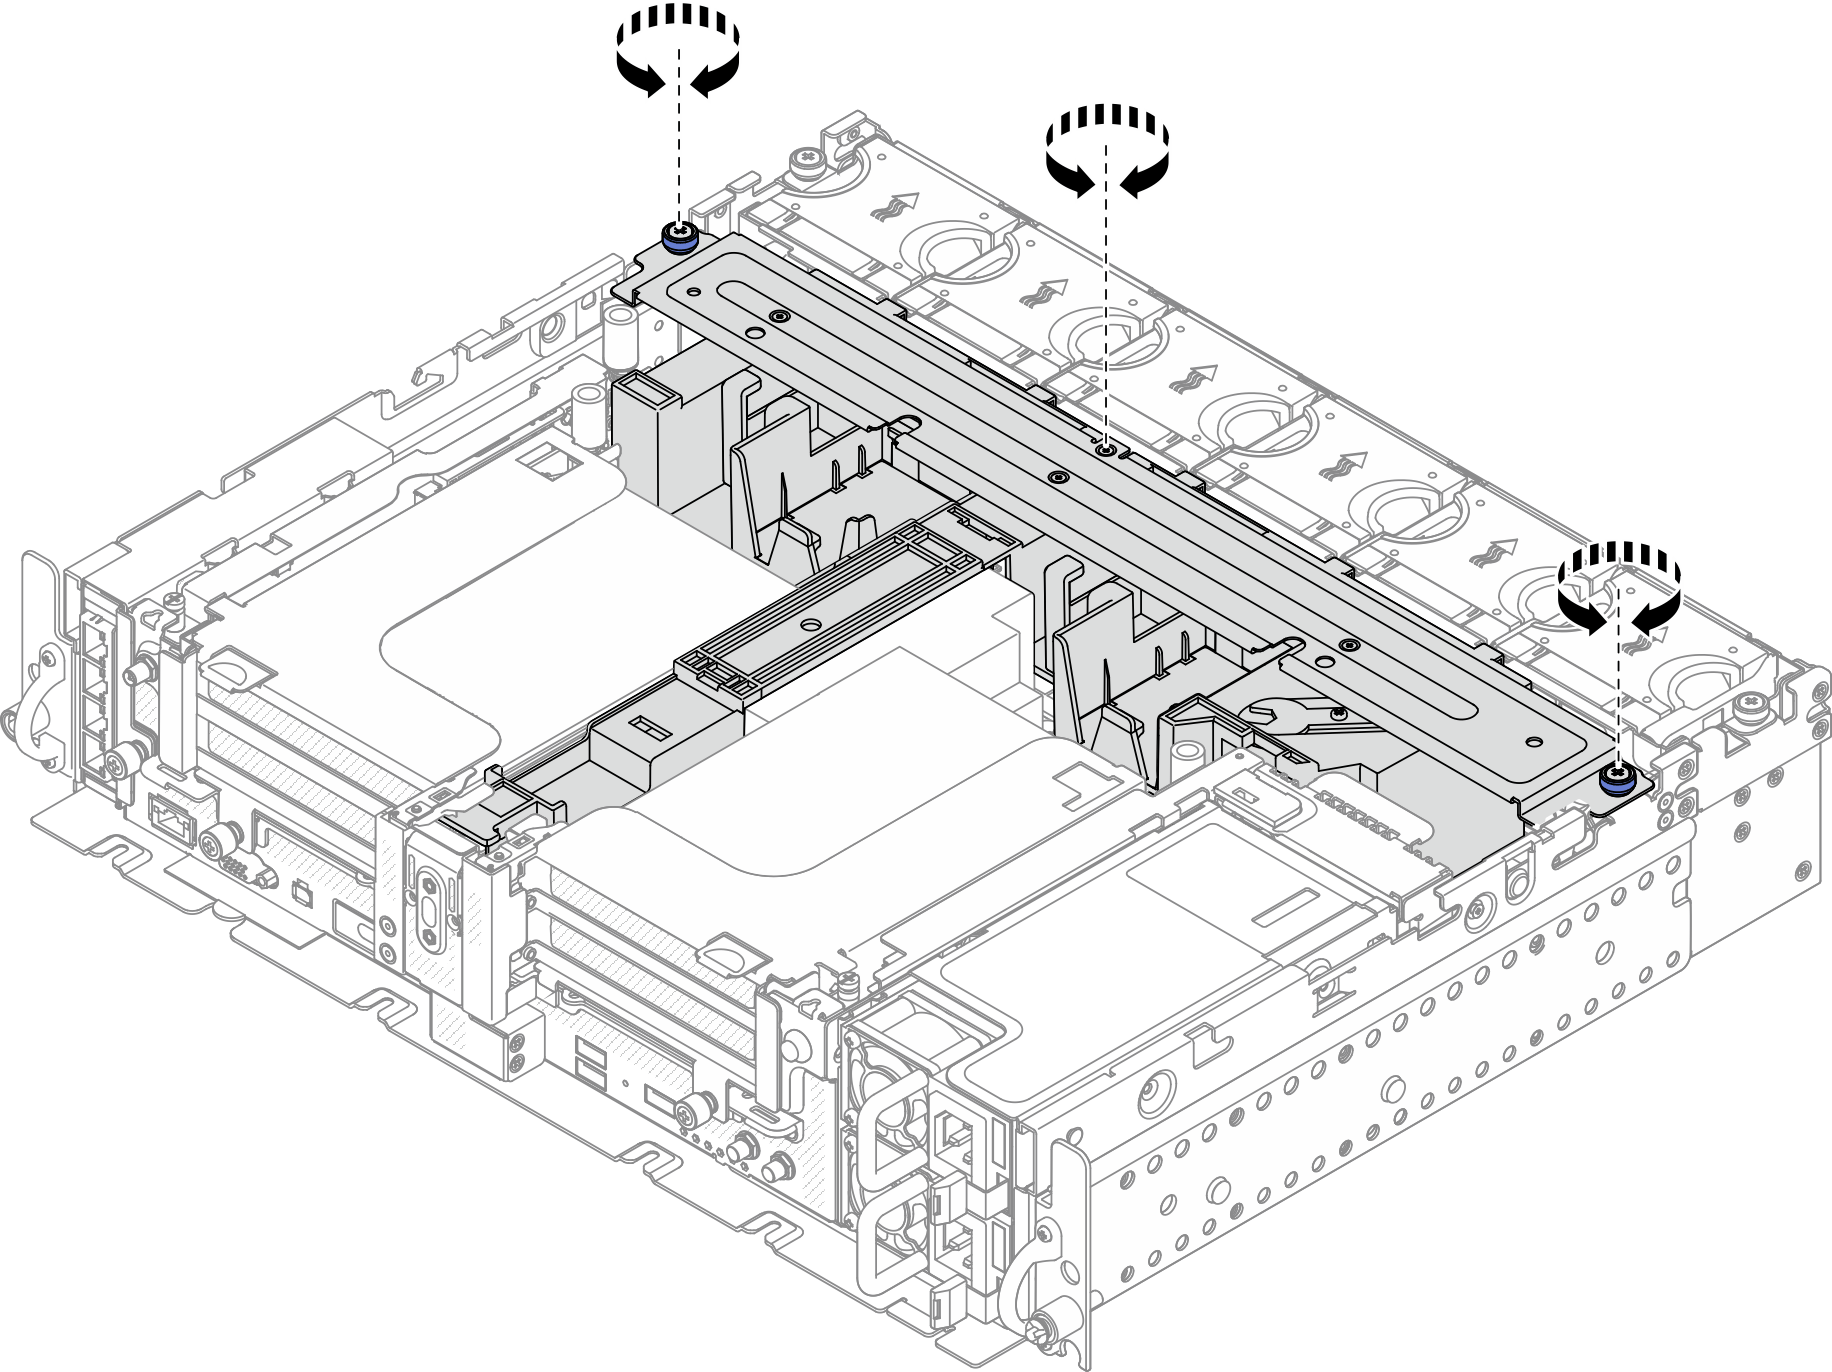
Supporting bracket
The supporting bracket is required in a 360mm chassis. Secure it to the air baffle with the three captive screws as illustrated.Figure 7. Securing the supporting bracket to the air baffle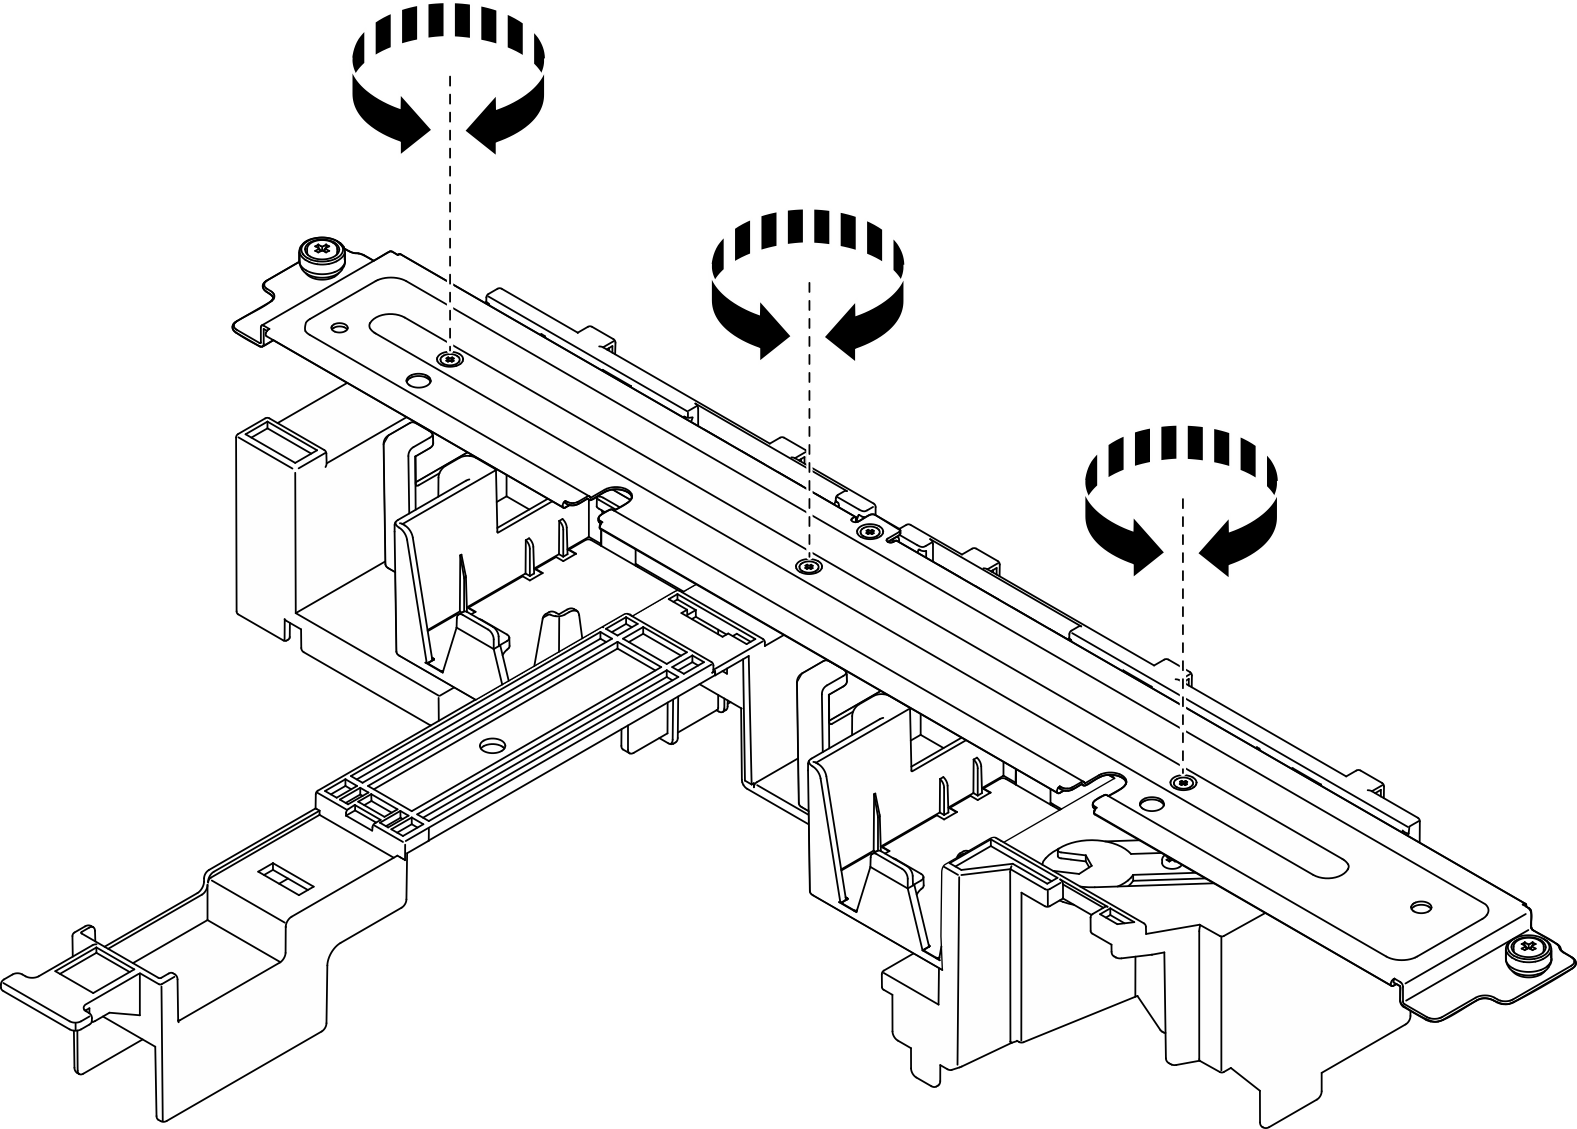
- Lower the air baffle into the chassis and press on it to ensure it is firmly seated.Figure 8. Installing the air baffle
- Tighten the one captive screw and two thumbscrews to secure the supporting bracket to the chassis.Figure 9. Securing the air baffle assembly
Install the air baffle for 360mm chassis with full-length adapters
Procedure
- Make sure the air baffle configuration fits the present system configuration.
Heat sink filler
- If the heat sink is 1U, make sure the heat sink filler is installed to the air baffle.Figure 10. Installing heat sink filler
If the heat sink is 2U, make sure the heat sink filler is removed from the air baffle.
Figure 11. Installing the heat sink filler- Press the release latch on the filler.
- Remove the filler from the air baffle.
- If the heat sink is 1U, make sure the heat sink filler is installed to the air baffle.
Supporting bracket
The supporting bracket must be removed when full-length adapters are to be installed. Loosen the three captive screws to remove the supporting bracket from the air baffle.Figure 12. Removing the supporting bracket from the air baffleGPU fillers
GPU fillers must be removed when full-length adapters s are to be installed. If GPU fillers are installed in the air baffle, remove them.
Figure 13. Removing the GPU fillers from the air baffle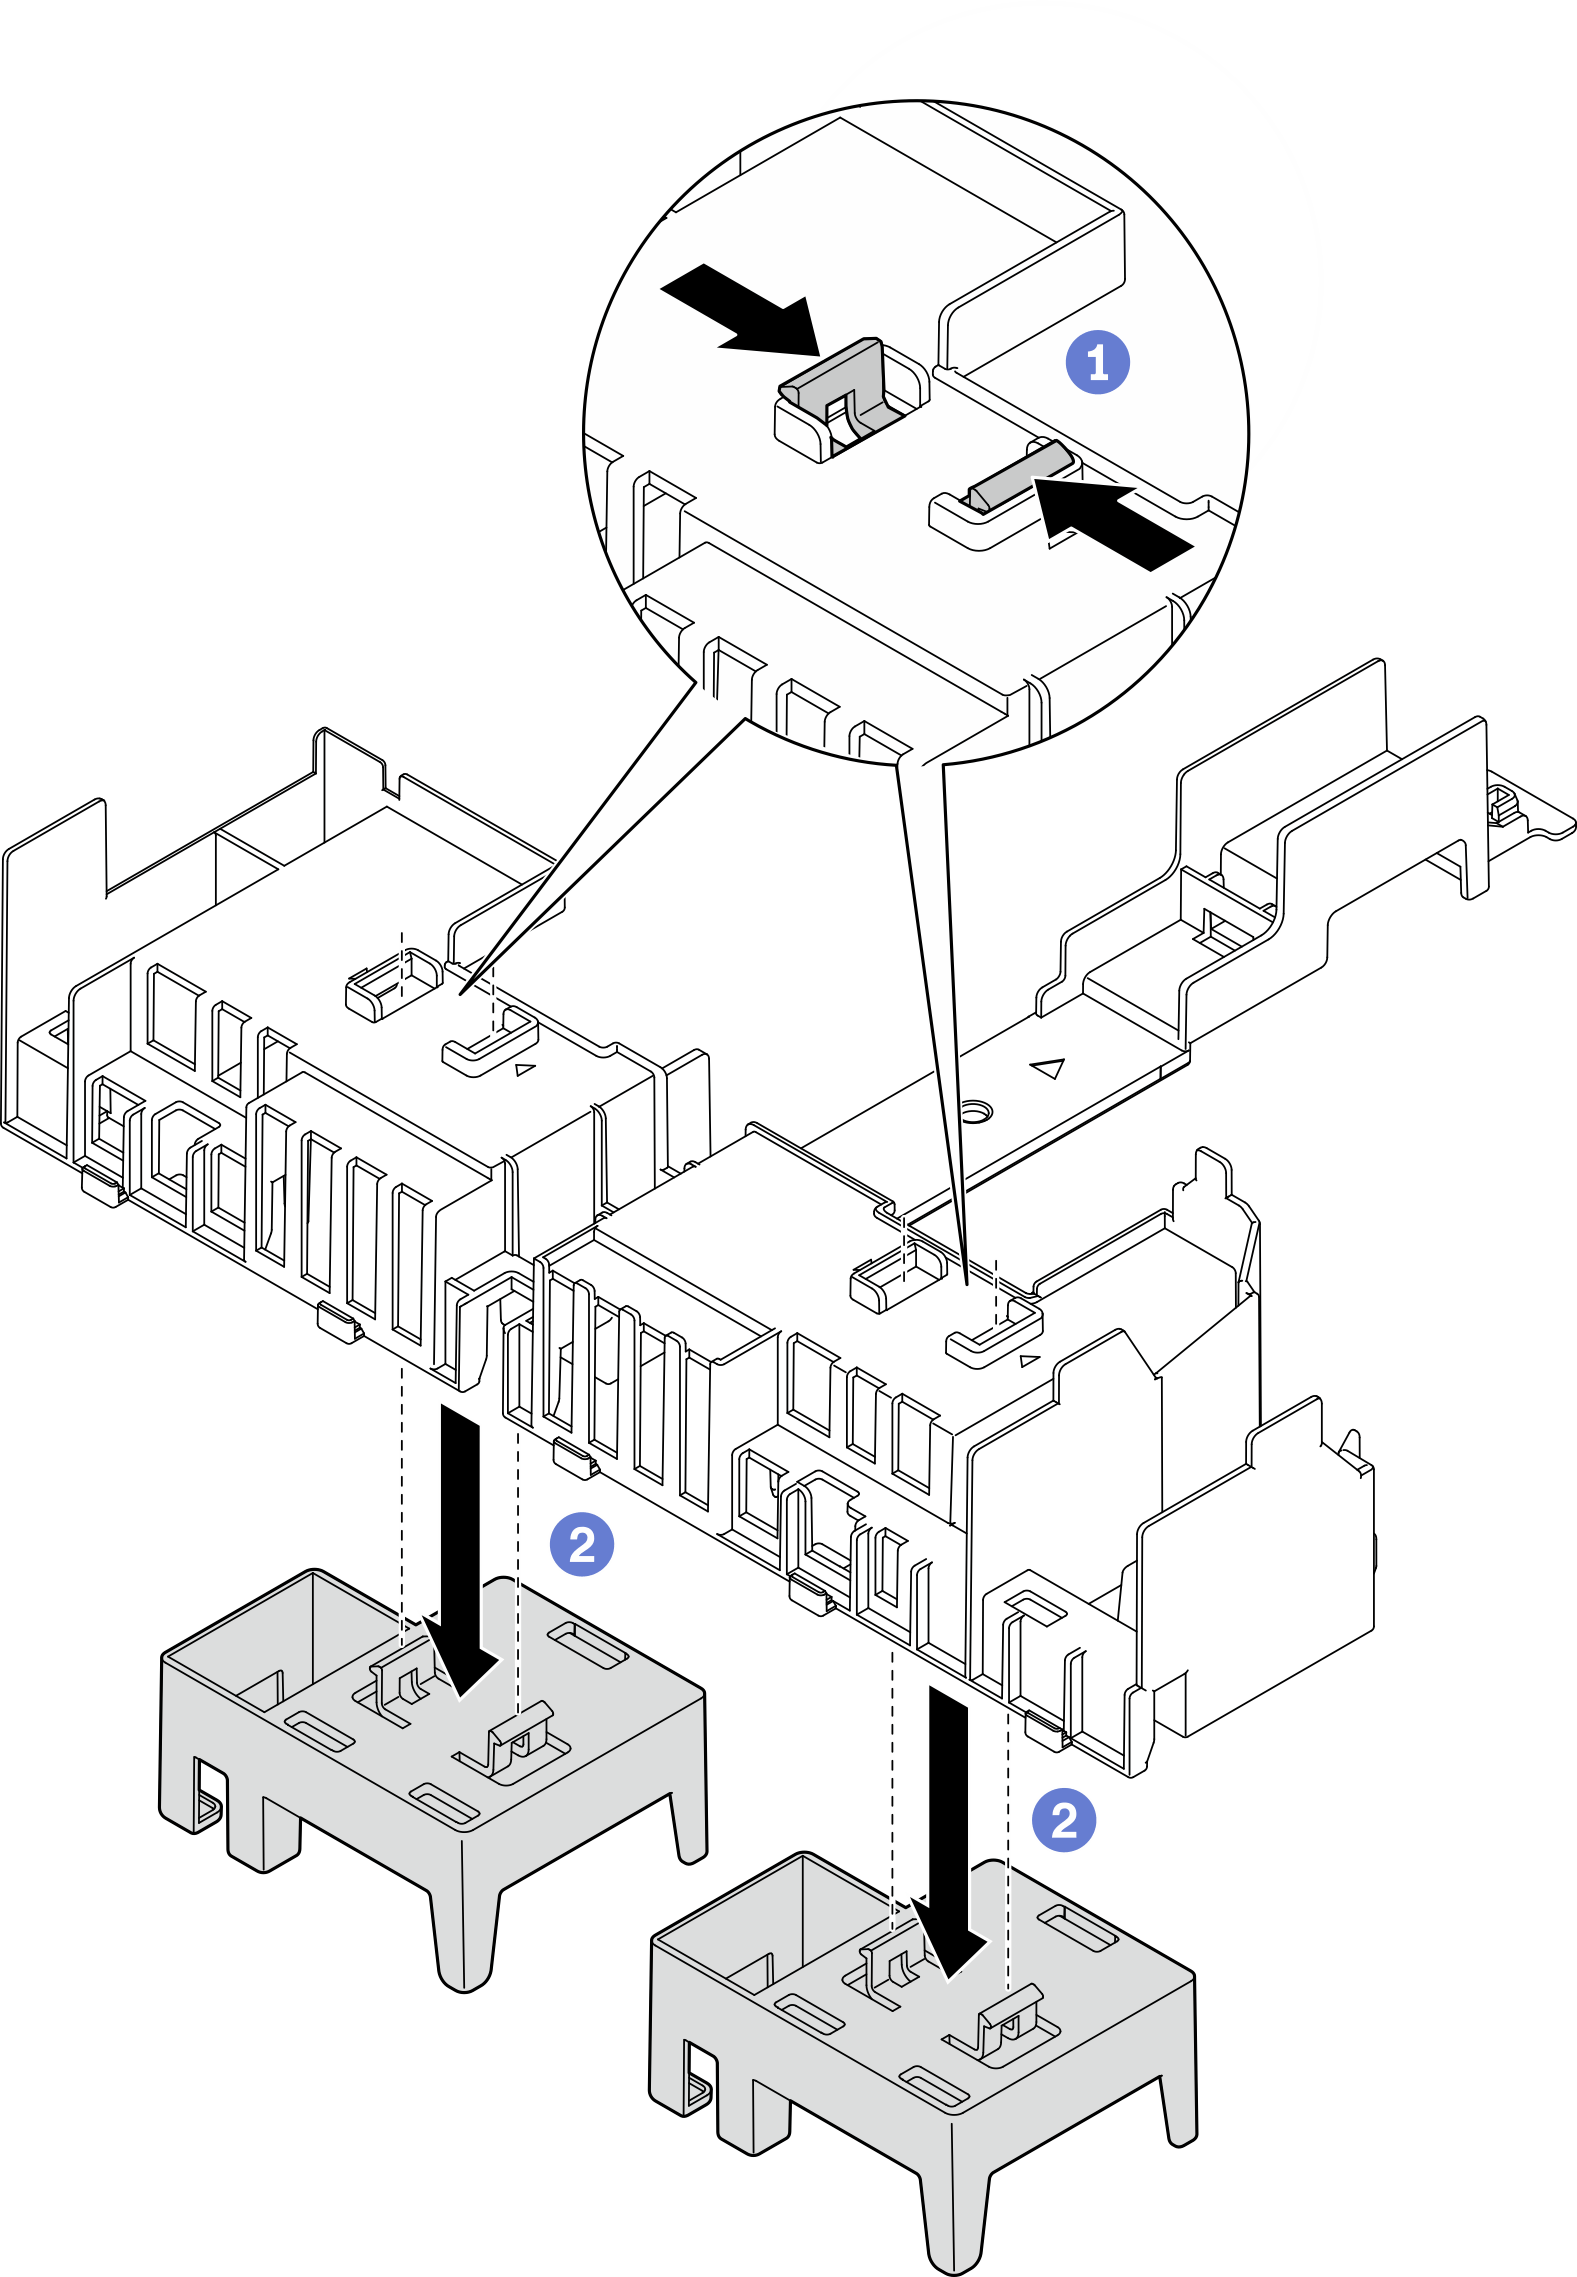
- Pinch on the retaining feet of the GPU fillers.
- Remove the GPU fillers from the air baffle.
- Lower the air baffle into the chassis and press on it to ensure it is firmly seated.Figure 14. Installing the air baffle
After this task is completed
Proceed to complete the parts replacement (see Complete the parts replacement).
Give documentation feedback