Install a CMOS battery (CR2032)
Follow instructions in this section to install a CMOS battery (CR2032).
About this task

When replacing the lithium battery, use only Lenovo specified part number or an equivalent type of battery recommended by the manufacturer. If your system has a module containing a lithium battery, replace it only with the same module type made by the same manufacturer. The battery contains lithium and can explode if not properly used, handled, or disposed of.
- Throw or immerse into water
- Heat to more than 100°C (212°F)
- Repair or disassemble
Dispose of the battery as required by local ordinances or regulations.
- Lenovo has designed this product with user safety in mind. The lithium battery must be handled properly to avoid potential danger. Make sure to follow instructions in this topic while replacing the battery.
- The CMOS battery must be replaced with another unit of the same type (CR2032).
- For high temperature operation environment, it is recommended to use CR2032HR instead.
- After replacement is completed, it is required to reconfigure the server and reset the system date and time.
- Dispose of the CMOS battery as required by local ordinances or regulations.
- If you replace the original lithium battery with a heavy-metal battery or a battery with heavy-metal components, be aware of the following environmental consideration. Batteries and accumulators that contain heavy metals must not be disposed of with normal domestic waste. They will be taken back free of charge by the manufacturer, distributor, or representative, to be recycled or disposed of in a proper manner.
Read Installation Guidelines and Safety inspection checklist to ensure that you work safely.
Touch the static-protective package that contains the component to any unpainted metal surface on the server; then, remove it from the package and place it on a static-protective surface.
To avoid potential damage, do not let the CMOS battery contact any metal surface.
Make sure that all the server power cords are disconnected from power source before performing this procedure.
Procedure
- Locate the CMOS battery socket on the system board.Figure 1. CMOS battery locations on the system board
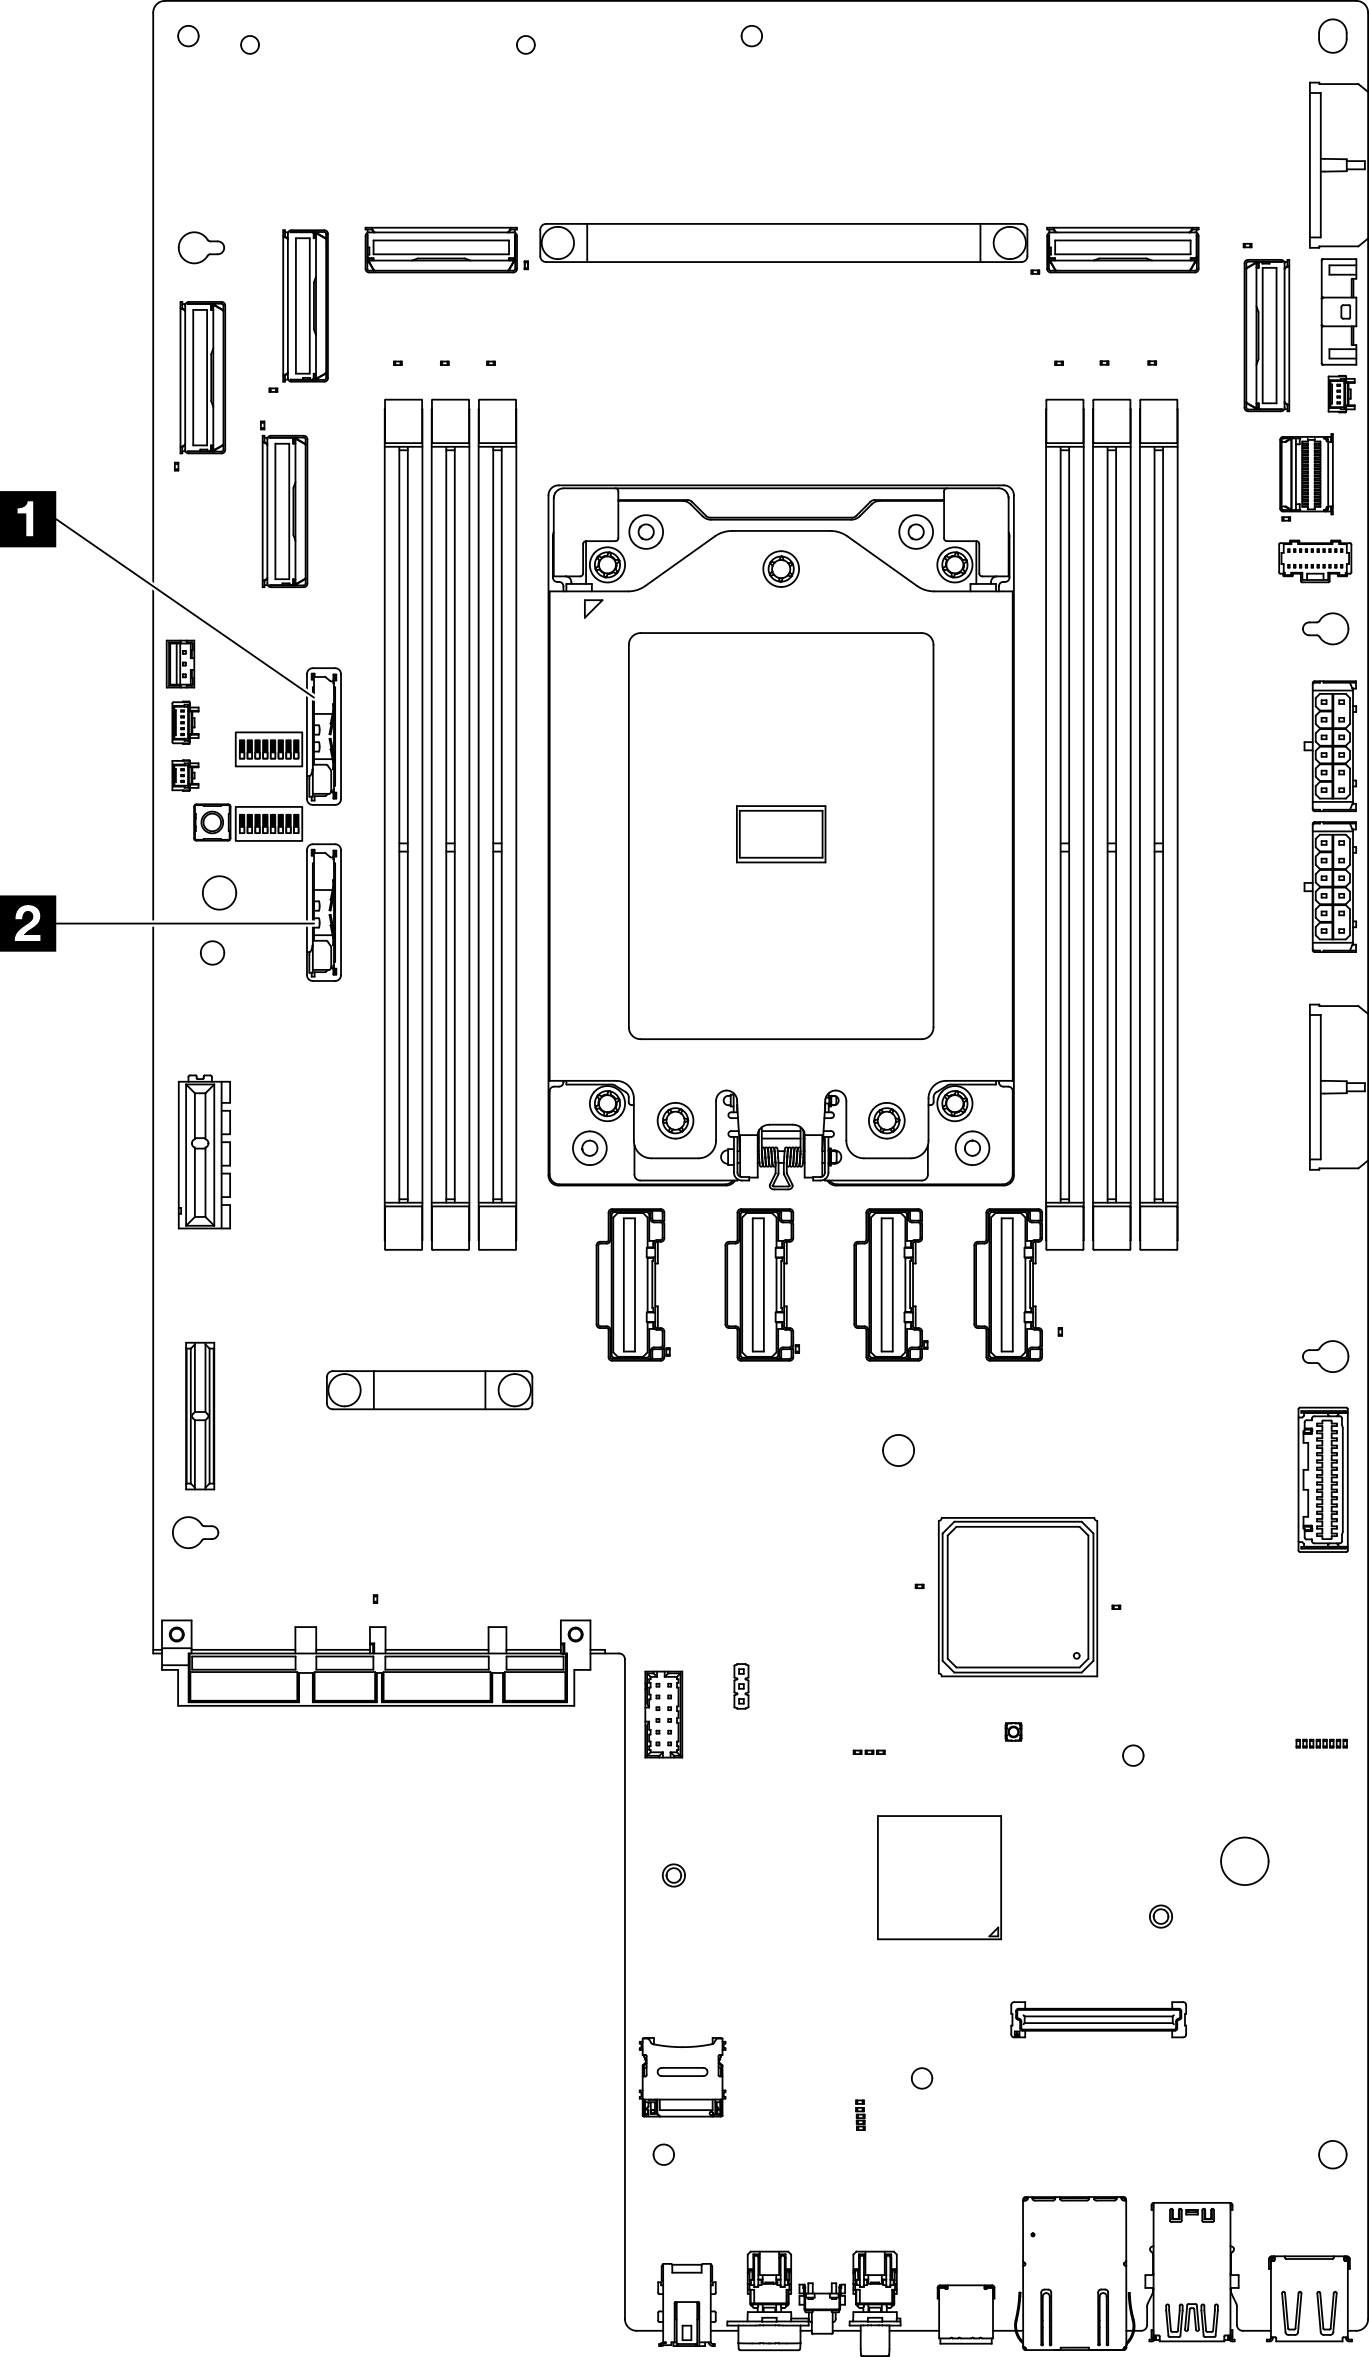
1 3V security battery (CR2032) 2 3V system battery (CR2032) NoteIf one of the following situations occurs, the system enters System Lockdown Mode and needs to be activated or unlocked. See Activate or unlock the system.The 3V security battery (CR2032) is replaced.
When Chassis Intrusion Detection is Enabled in Lenovo XClarity Controller, the 3V system battery (CR2032) is replaced, or CMOS is cleared.
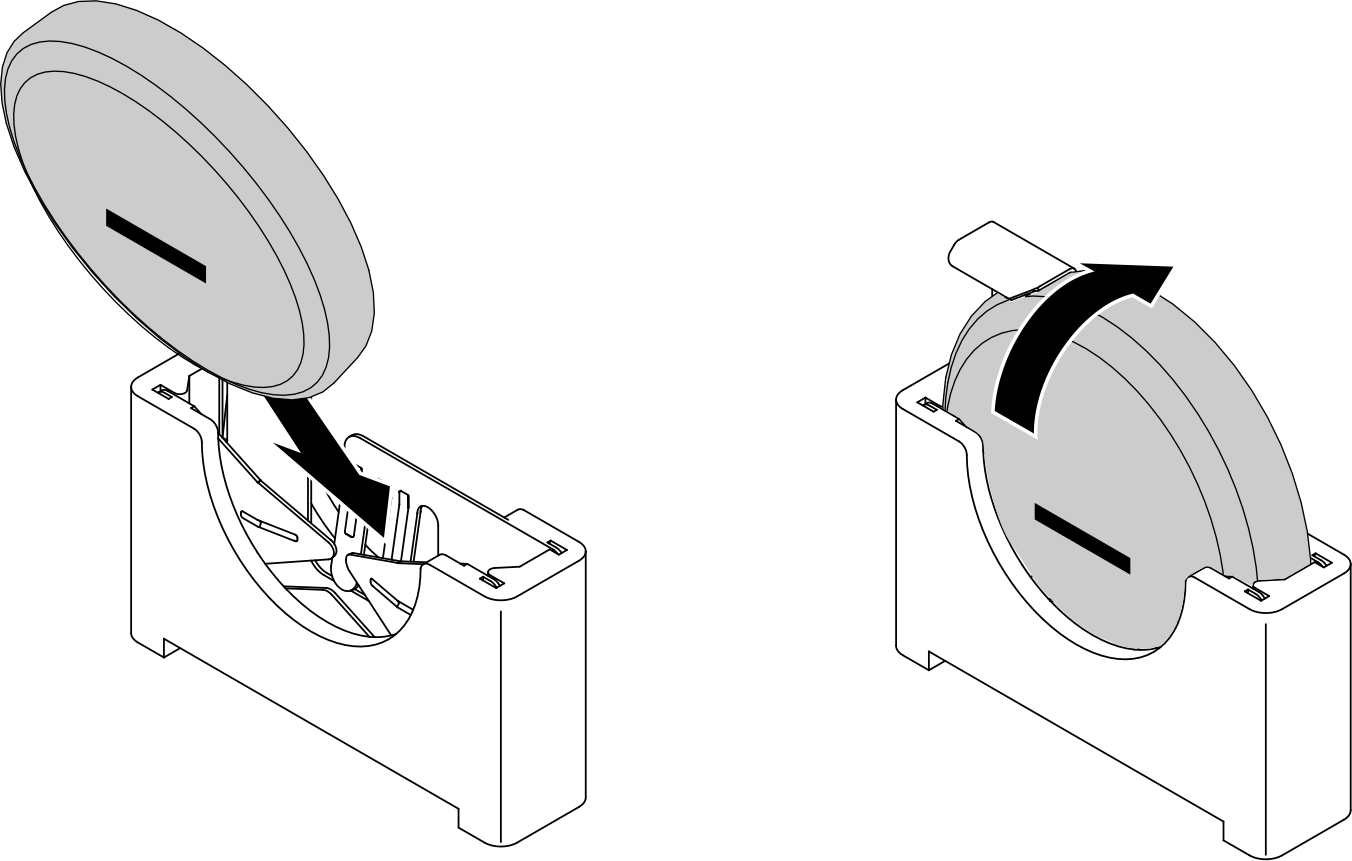
- Align the CMOS battery with the base of the seat, with negative (-) side faces middle of the chassis. Then, pivot the top of the battery until the battery clicks in place.Figure 2. Installing the CMOS battery
After this task is completed
Complete the parts replacement. See Complete the parts replacement.
- If one of the following situations occurs, the system enters System Lockdown Mode and needs to be activated or unlocked. See Activate or unlock the system.
The 3V security battery (CR2032) is replaced.
When Chassis Intrusion Detection is Enabled in Lenovo XClarity Controller, the 3V system battery (CR2032) is replaced, or CMOS is cleared.
Power on the server; then, reset date, time, and all the passwords.
Demo Video