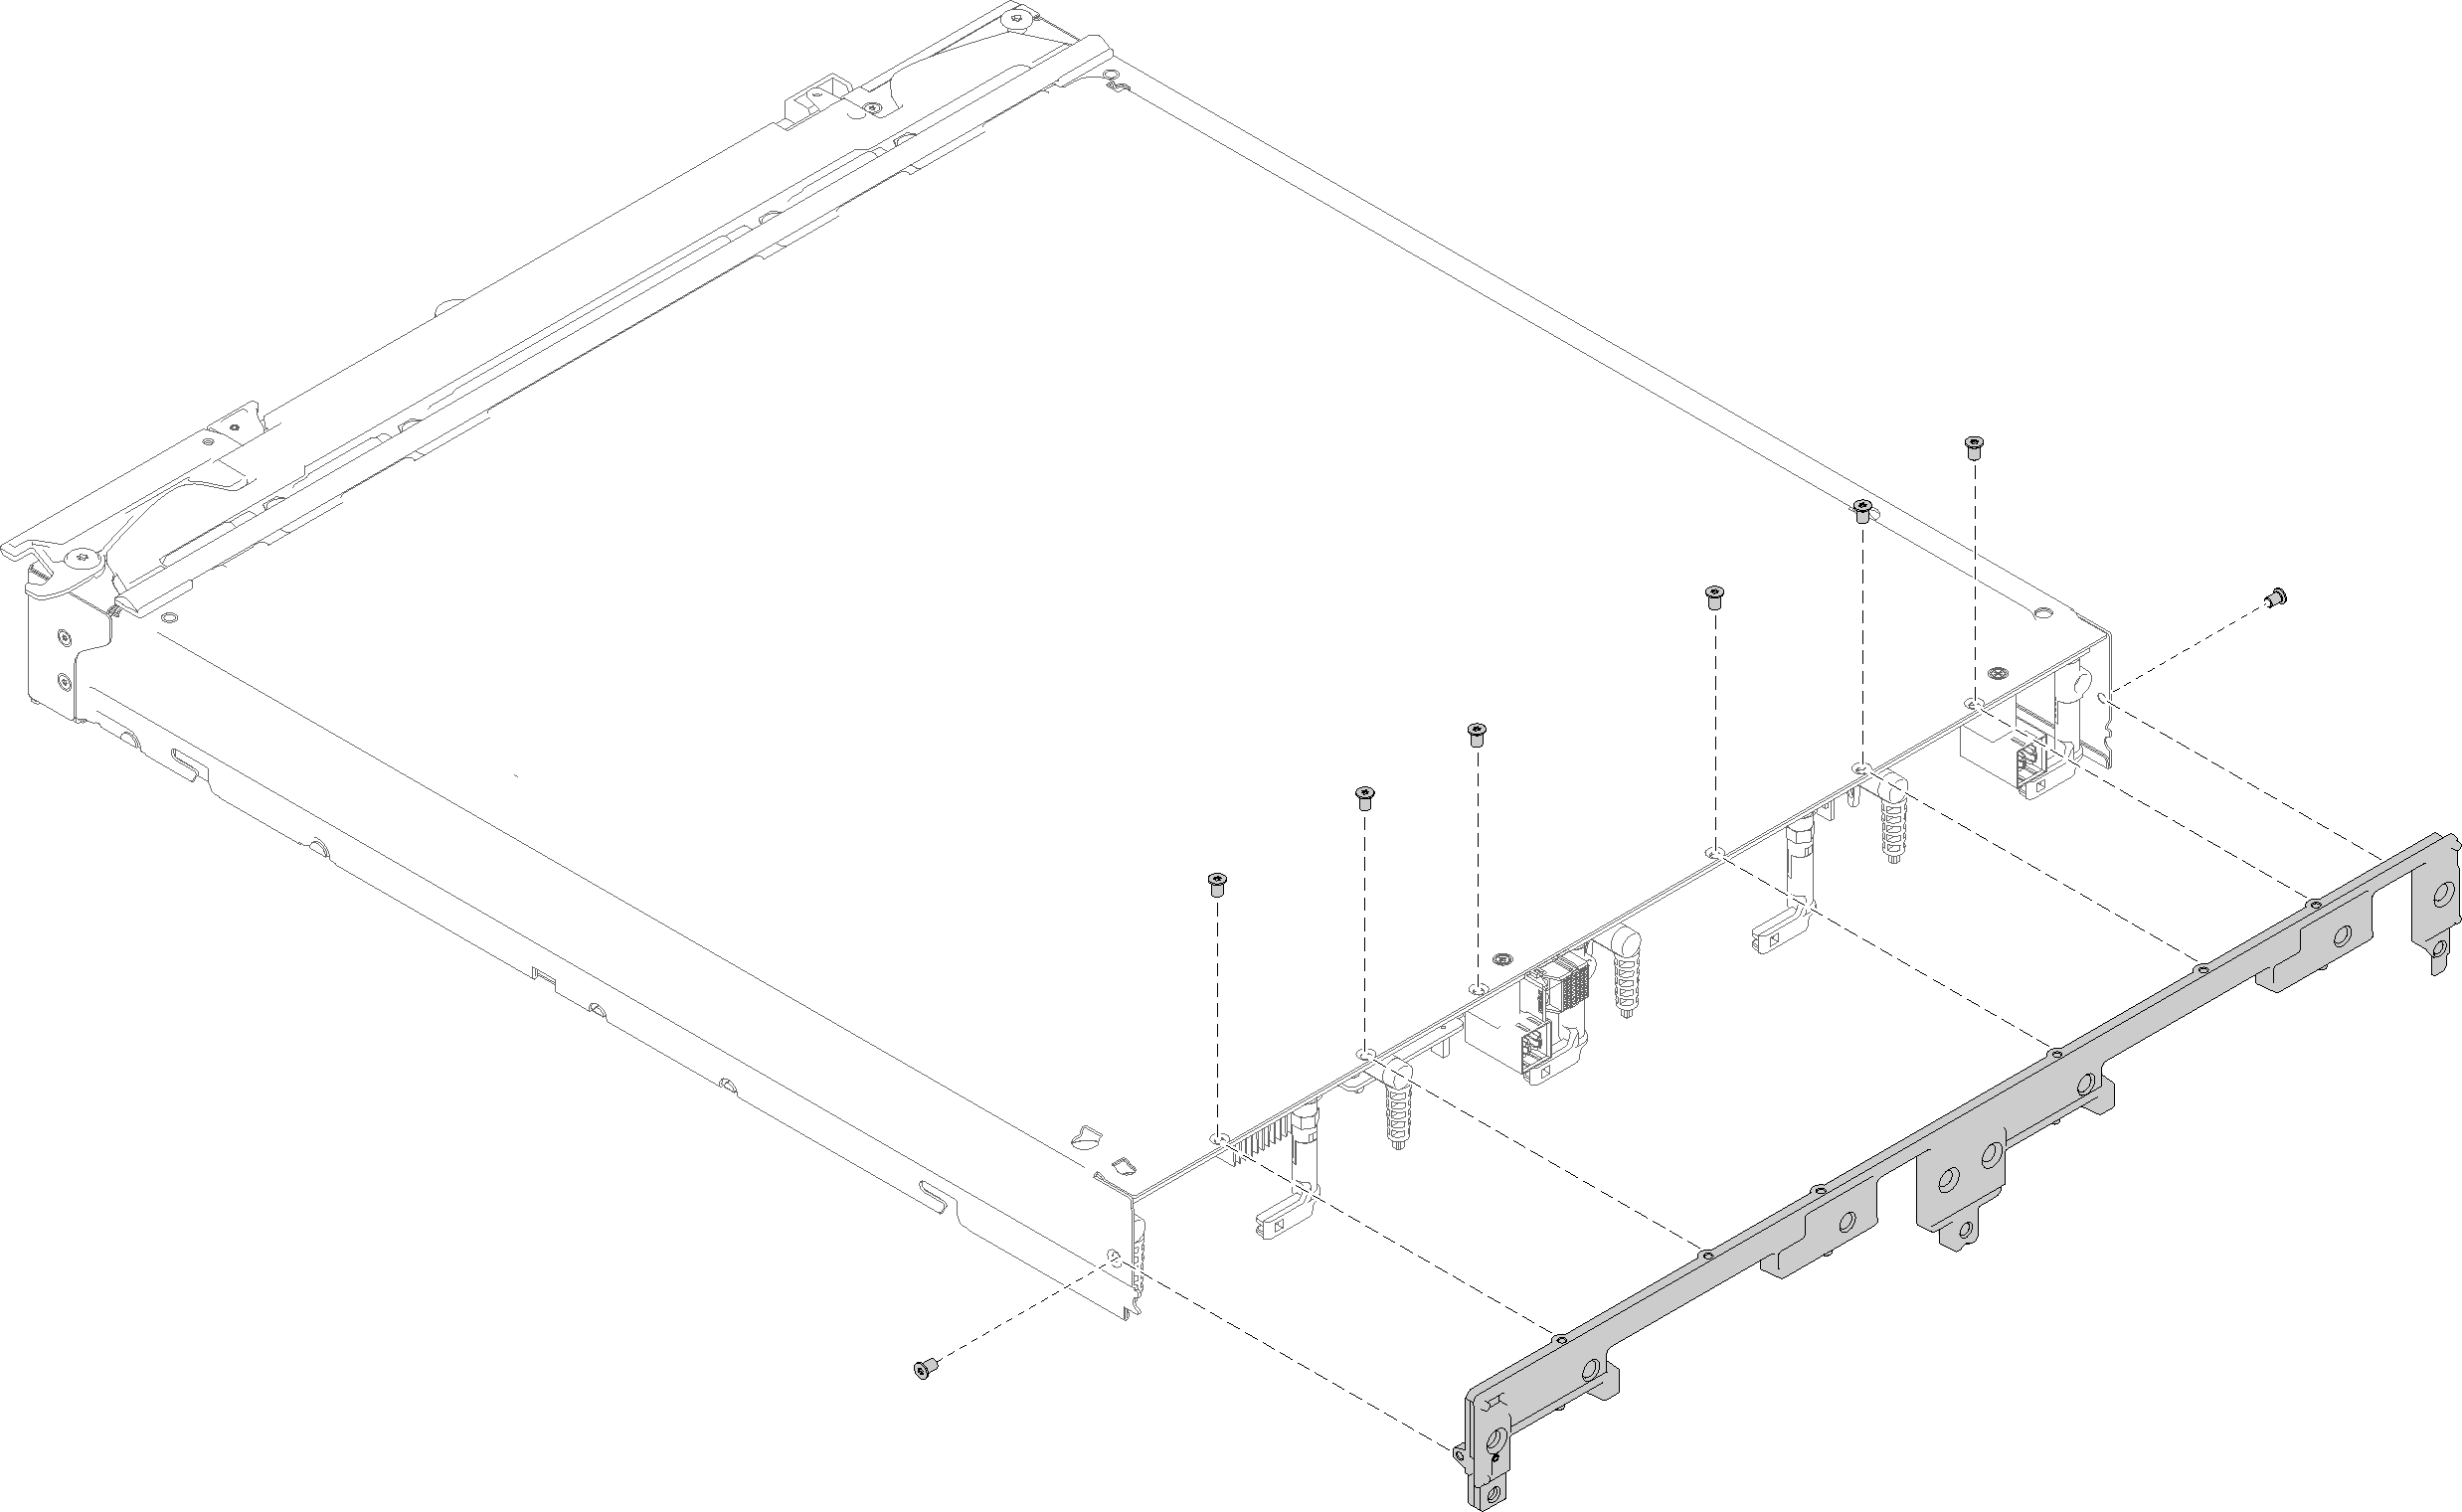
Install the bulkhead
Use this information to install the bulkhead.
Before you install the bulkhead, complete the following steps:
Read Installation Guidelines to ensure that you work safely.
- If the compute node is installed in a chassis, remove it (see Remove a compute node for instructions).
- Carefully lay the compute node on a flat, static-protective surface, orienting the compute node with the bezel pointing away from you.
Remove the compute node cover (see Remove the compute node cover for instructions).
To install the bulkhead, complete the following steps:
Figure 1. Bulkhead installation


After you install the bulkhead, complete the following steps:
Install the I/O expansion adapters (see Install an I/O expansion adapter for instructions).
Install the air baffle (see Install the air baffle for instructions).
- Install the compute node cover onto the compute node (see Install the compute node cover for instructions).
- Install the compute node into the chassis (see Install a compute node for instructions).
Give documentation feedback