Install a GPU adapter

Use this information to install a GPU adapter.

About this task

Higher GPU power requires higher PSU power. Use Lenovo Capacity Planner to calculate the required power capacity for what is configured for the server. More information about Lenovo Capacity Planner is available at:

Lenovo Capacity Planner website

Attention
  • Read Installation Guidelines to ensure that you work safely.

  • Power off the server and disconnect all power cords for this task.

  • Prevent exposure to static electricity, which might lead to system halt and loss of data, by keeping static-sensitive components in their static-protective packages until installation, and handling these devices with an electrostatic-discharge wrist strap or other grounding system.

  • GPU adapters are supported on some server models with requirements. See Thermal rules.

  • All installed GPU adapters must be identical.

Procedure
  1. Locate the appropriate PCIe slot for the GPU adapter. See PCIe slots and PCIe adapters
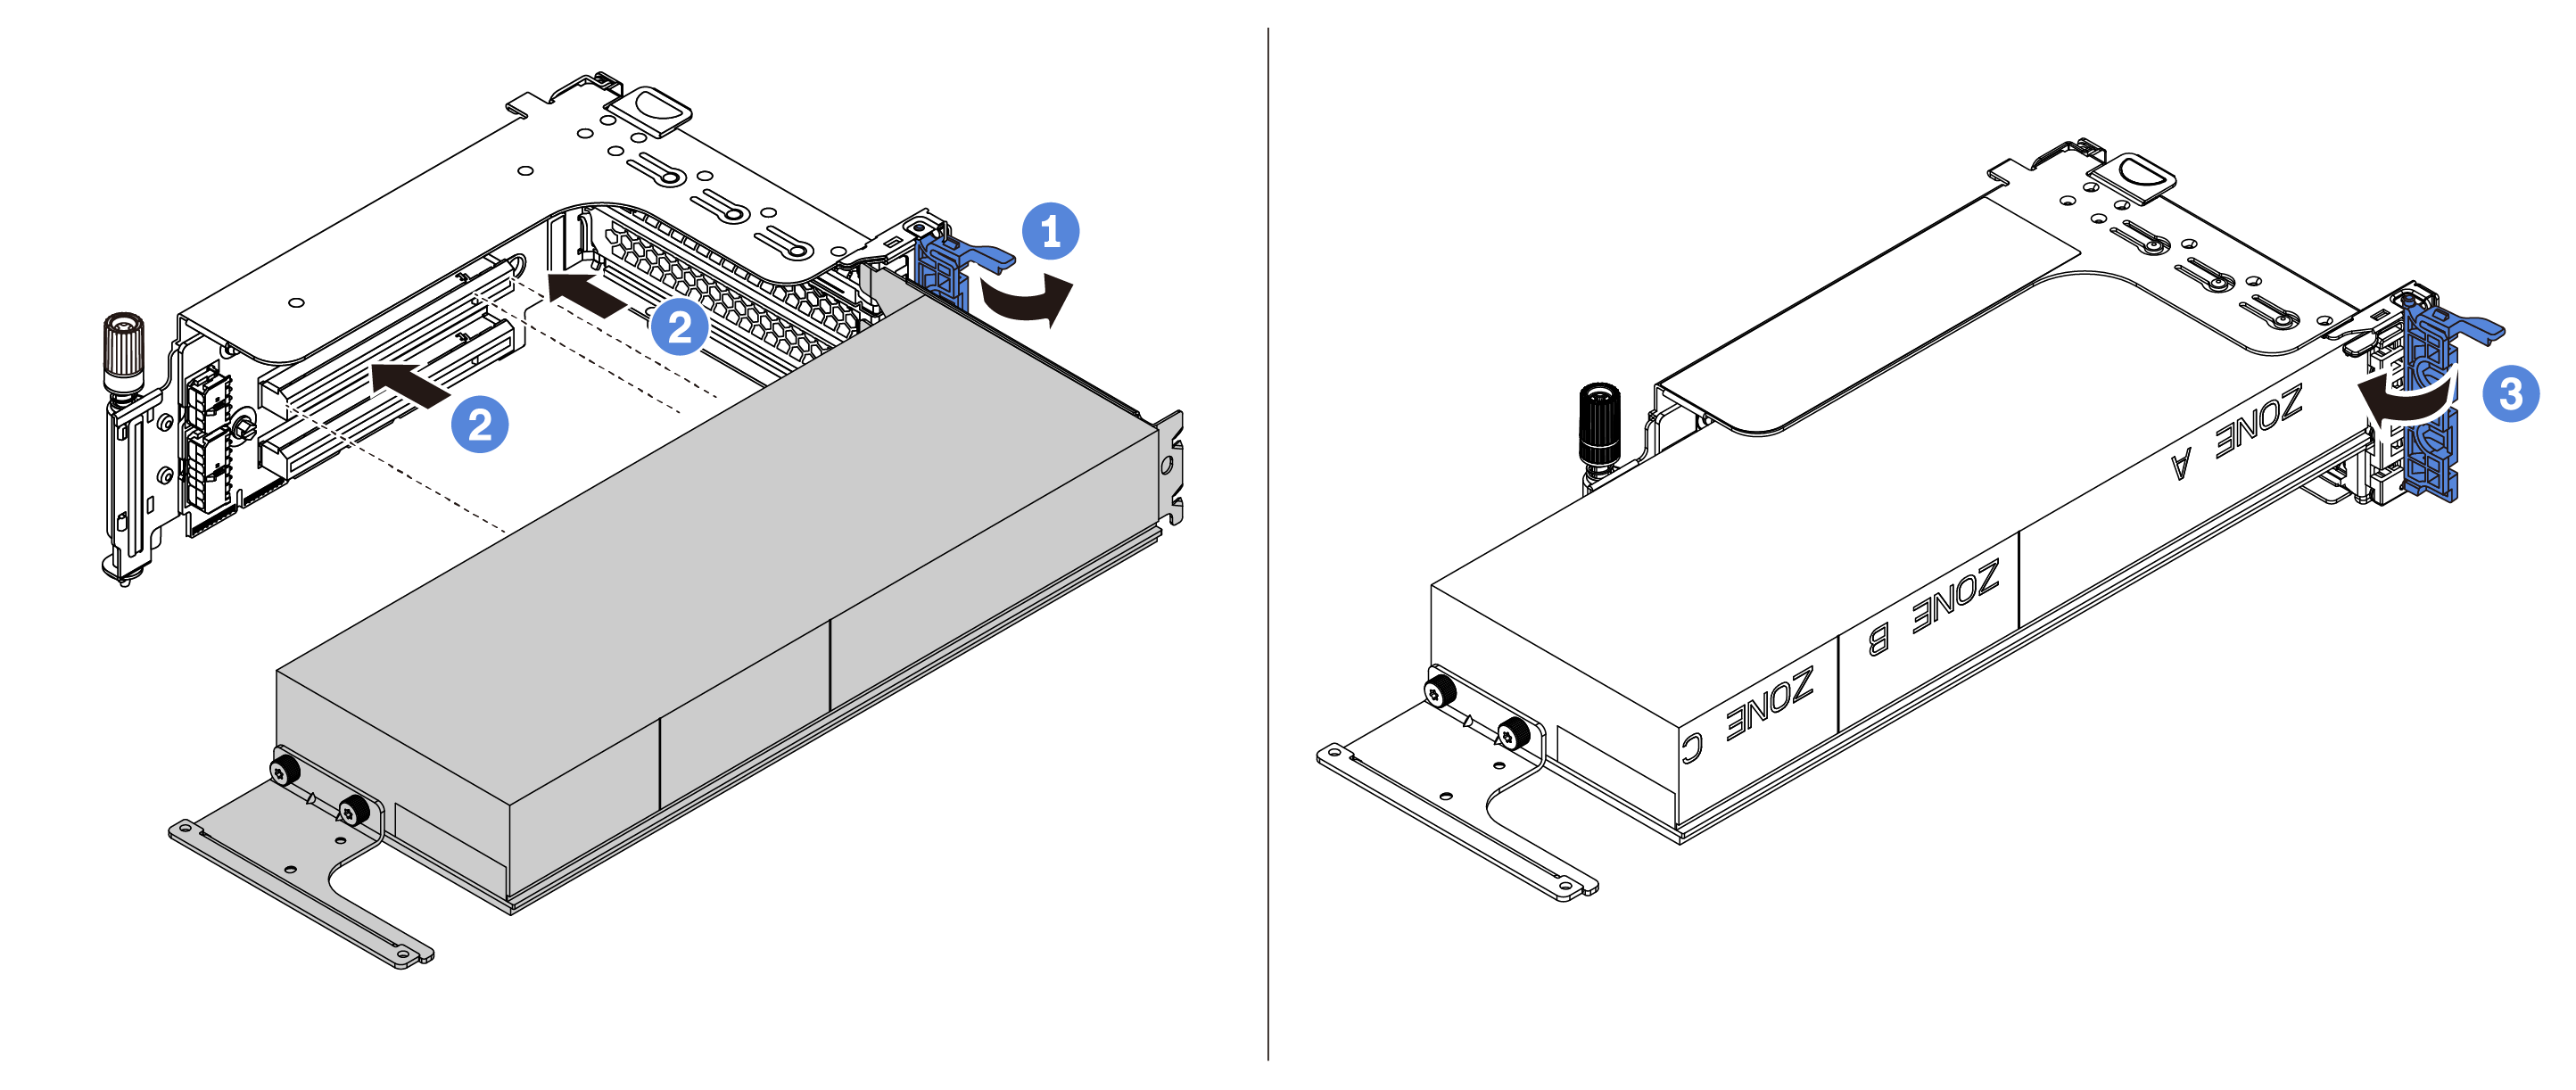
  2. Install the GPU adapter into the PCIe slot on the riser card.
    Figure 1. Installing the GPU adapter
    Installing the GPU adapter

    1. Open the blue latch on the riser cage.
    2. Align the GPU adapter with the PCIe slot on the riser card. Then, carefully press the GPU adapter straight into the slot until it is securely seated.
    3. Close the blue latch.
  3. Connect the GPU power cable to the GPU power connector on the riser card or system board. See GPUs.
  4. Install the GPU air baffle.
    Note
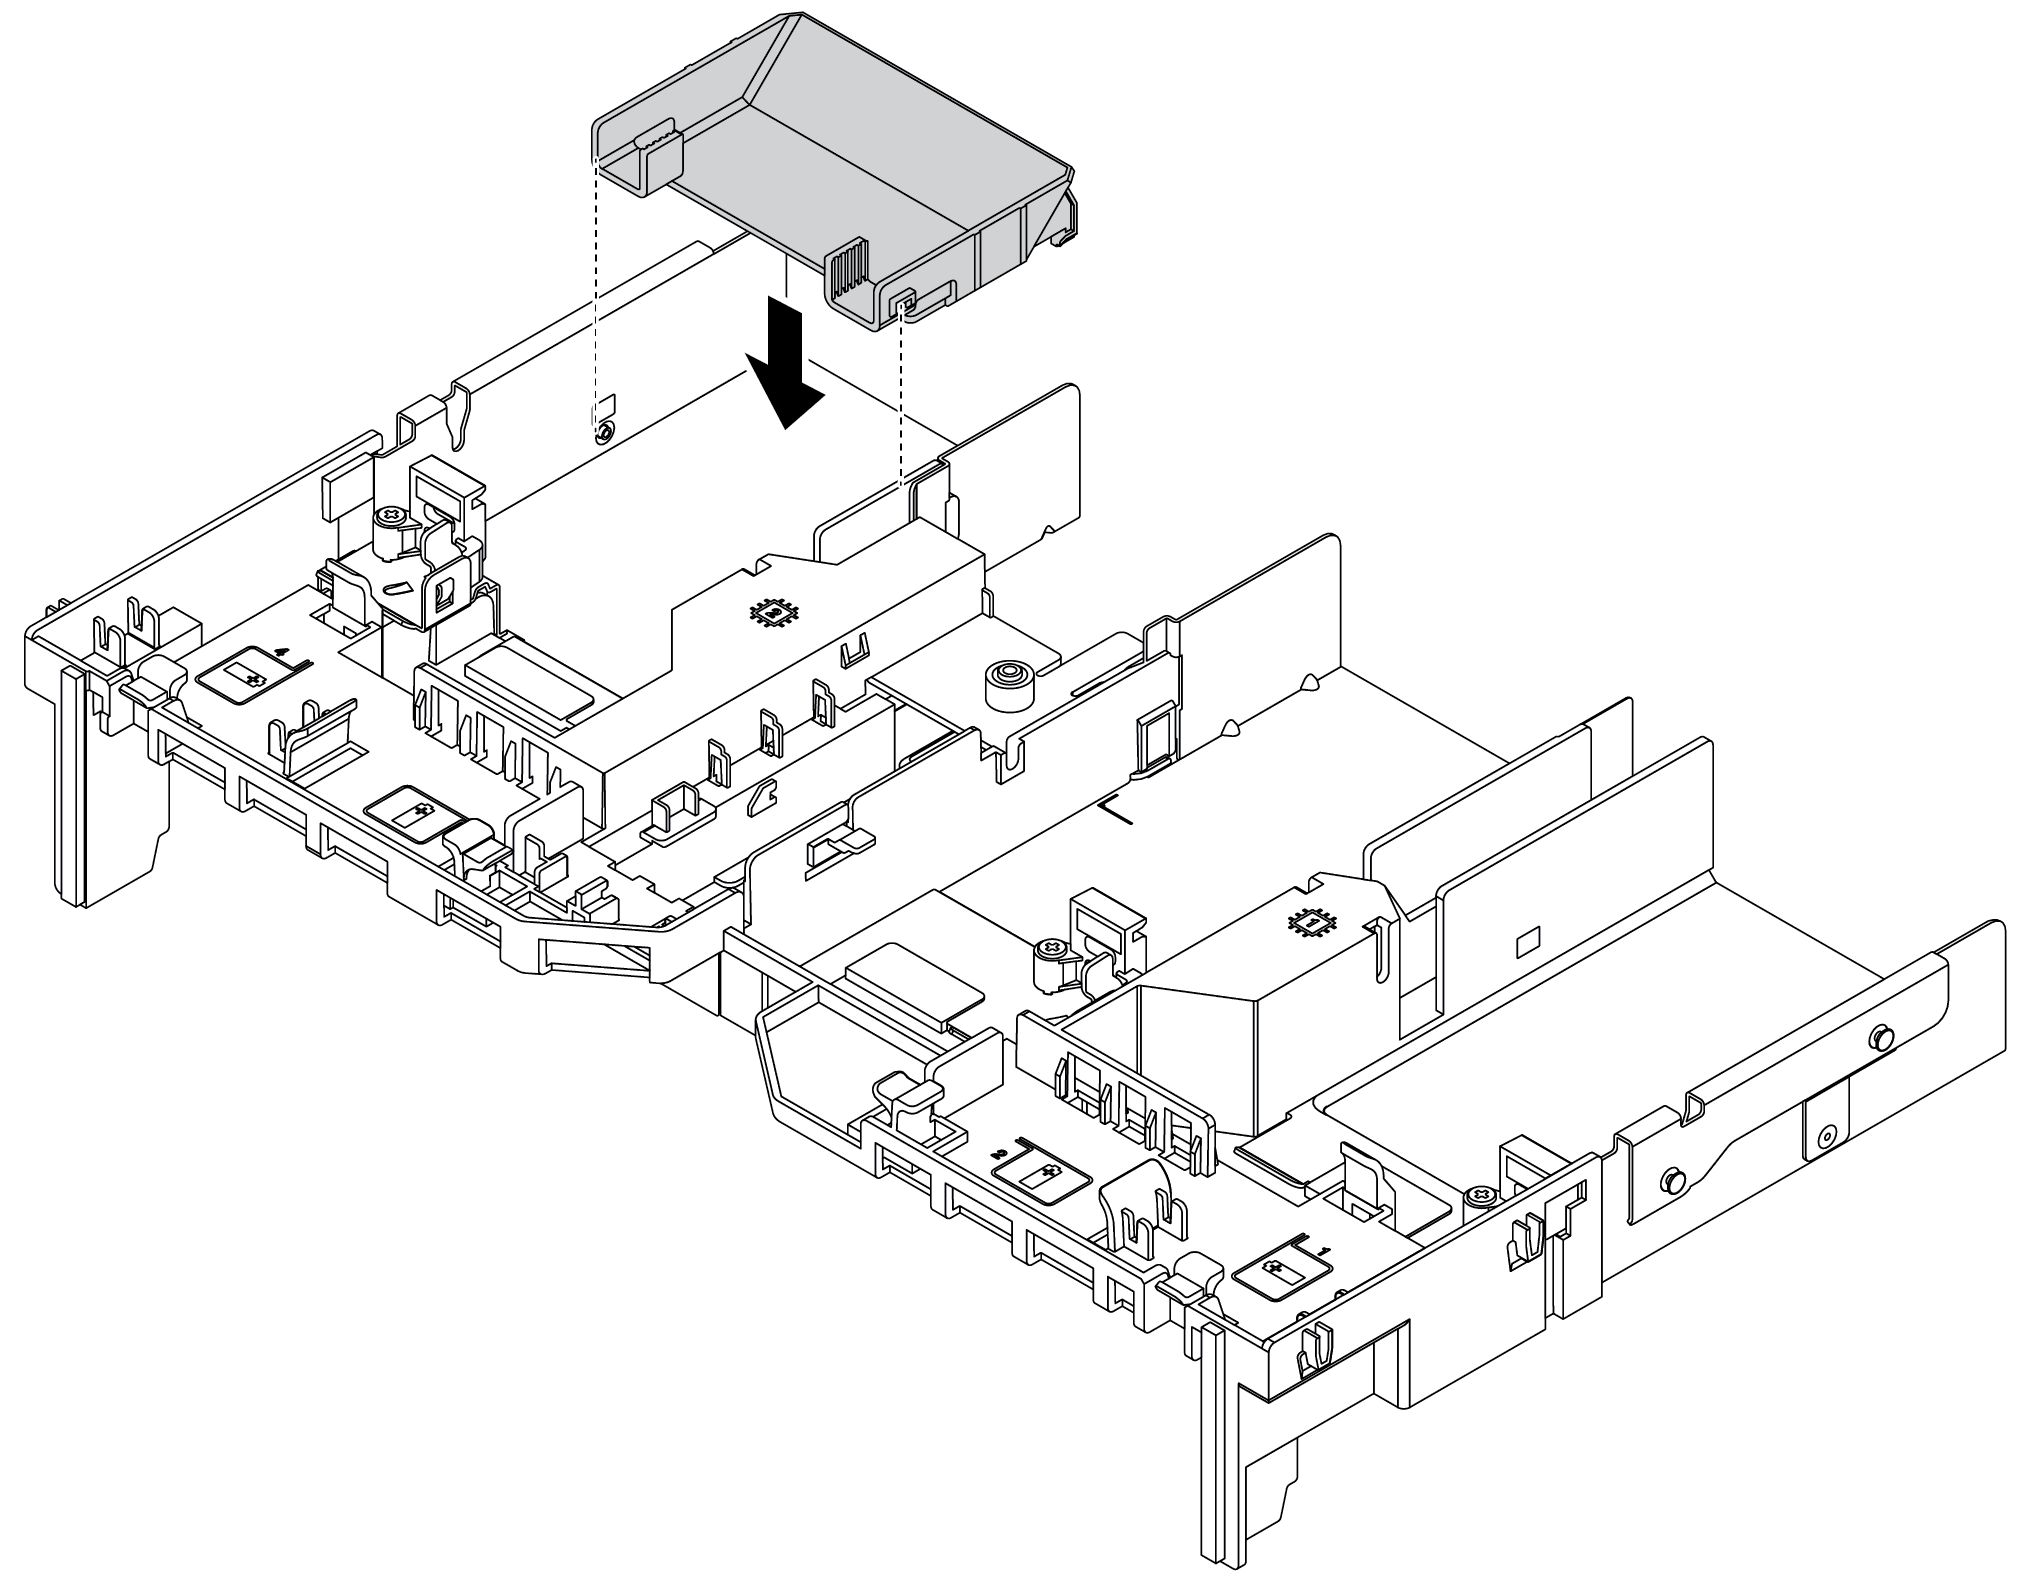
    If a single-wide 150W GPU adapter (FHFL) is to be installed but the adjacent slot will be left empty or installed with a half-length adapter, install an add-on air baffle on the GPU air baffle first.
    Figure 2. Installing an add-on air baffle
    Installing an add-on air baffle

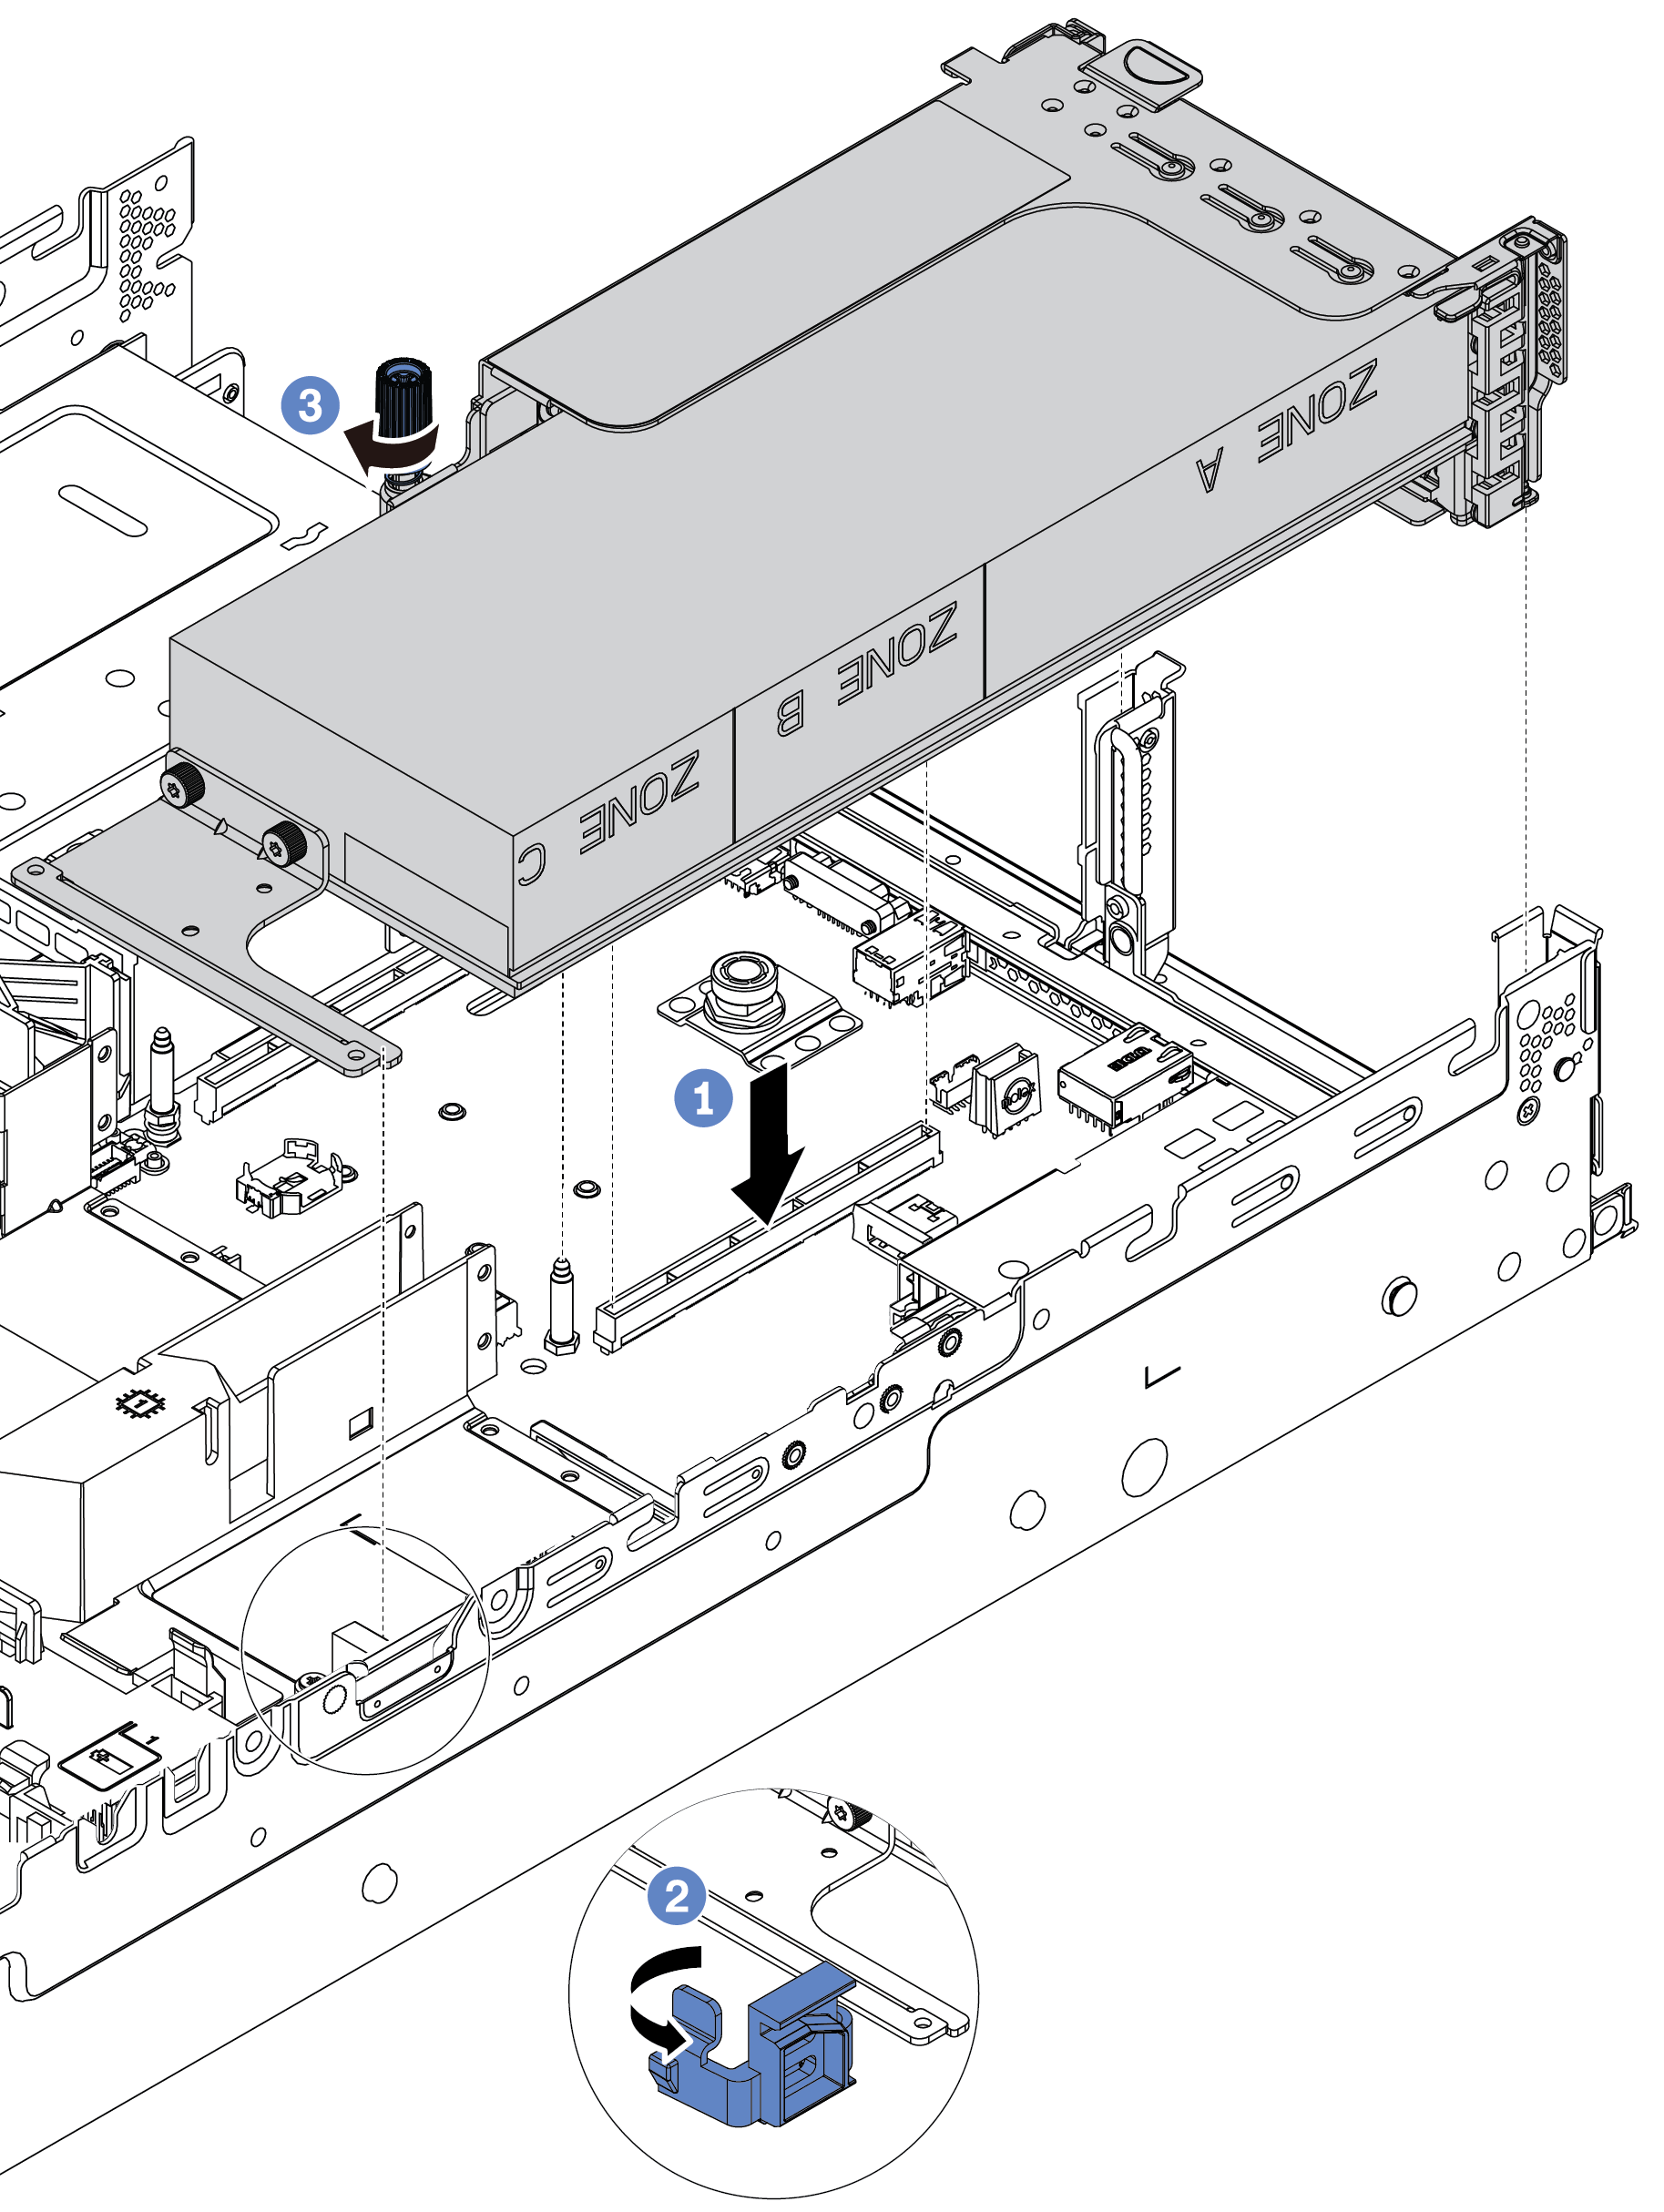
  5. Install the riser assembly.
    Figure 3. Installing the riser assembly
    Installing the riser assembly

    1. Align the riser card with the PCIe slot on the system board. Carefully press the riser card straight into the slot until it is securely seated.
    2. If you are installing a full-length GPU adapter, open the blue latch on the GPU air baffle and fix the end of the GPU adapter. Then, close the blue latch.
    3. Tighten the screw to fix the riser cage.
  6. Connect the GPU power cable to the power connector on the GPU adapter, and route the power cable properly. See GPUs.
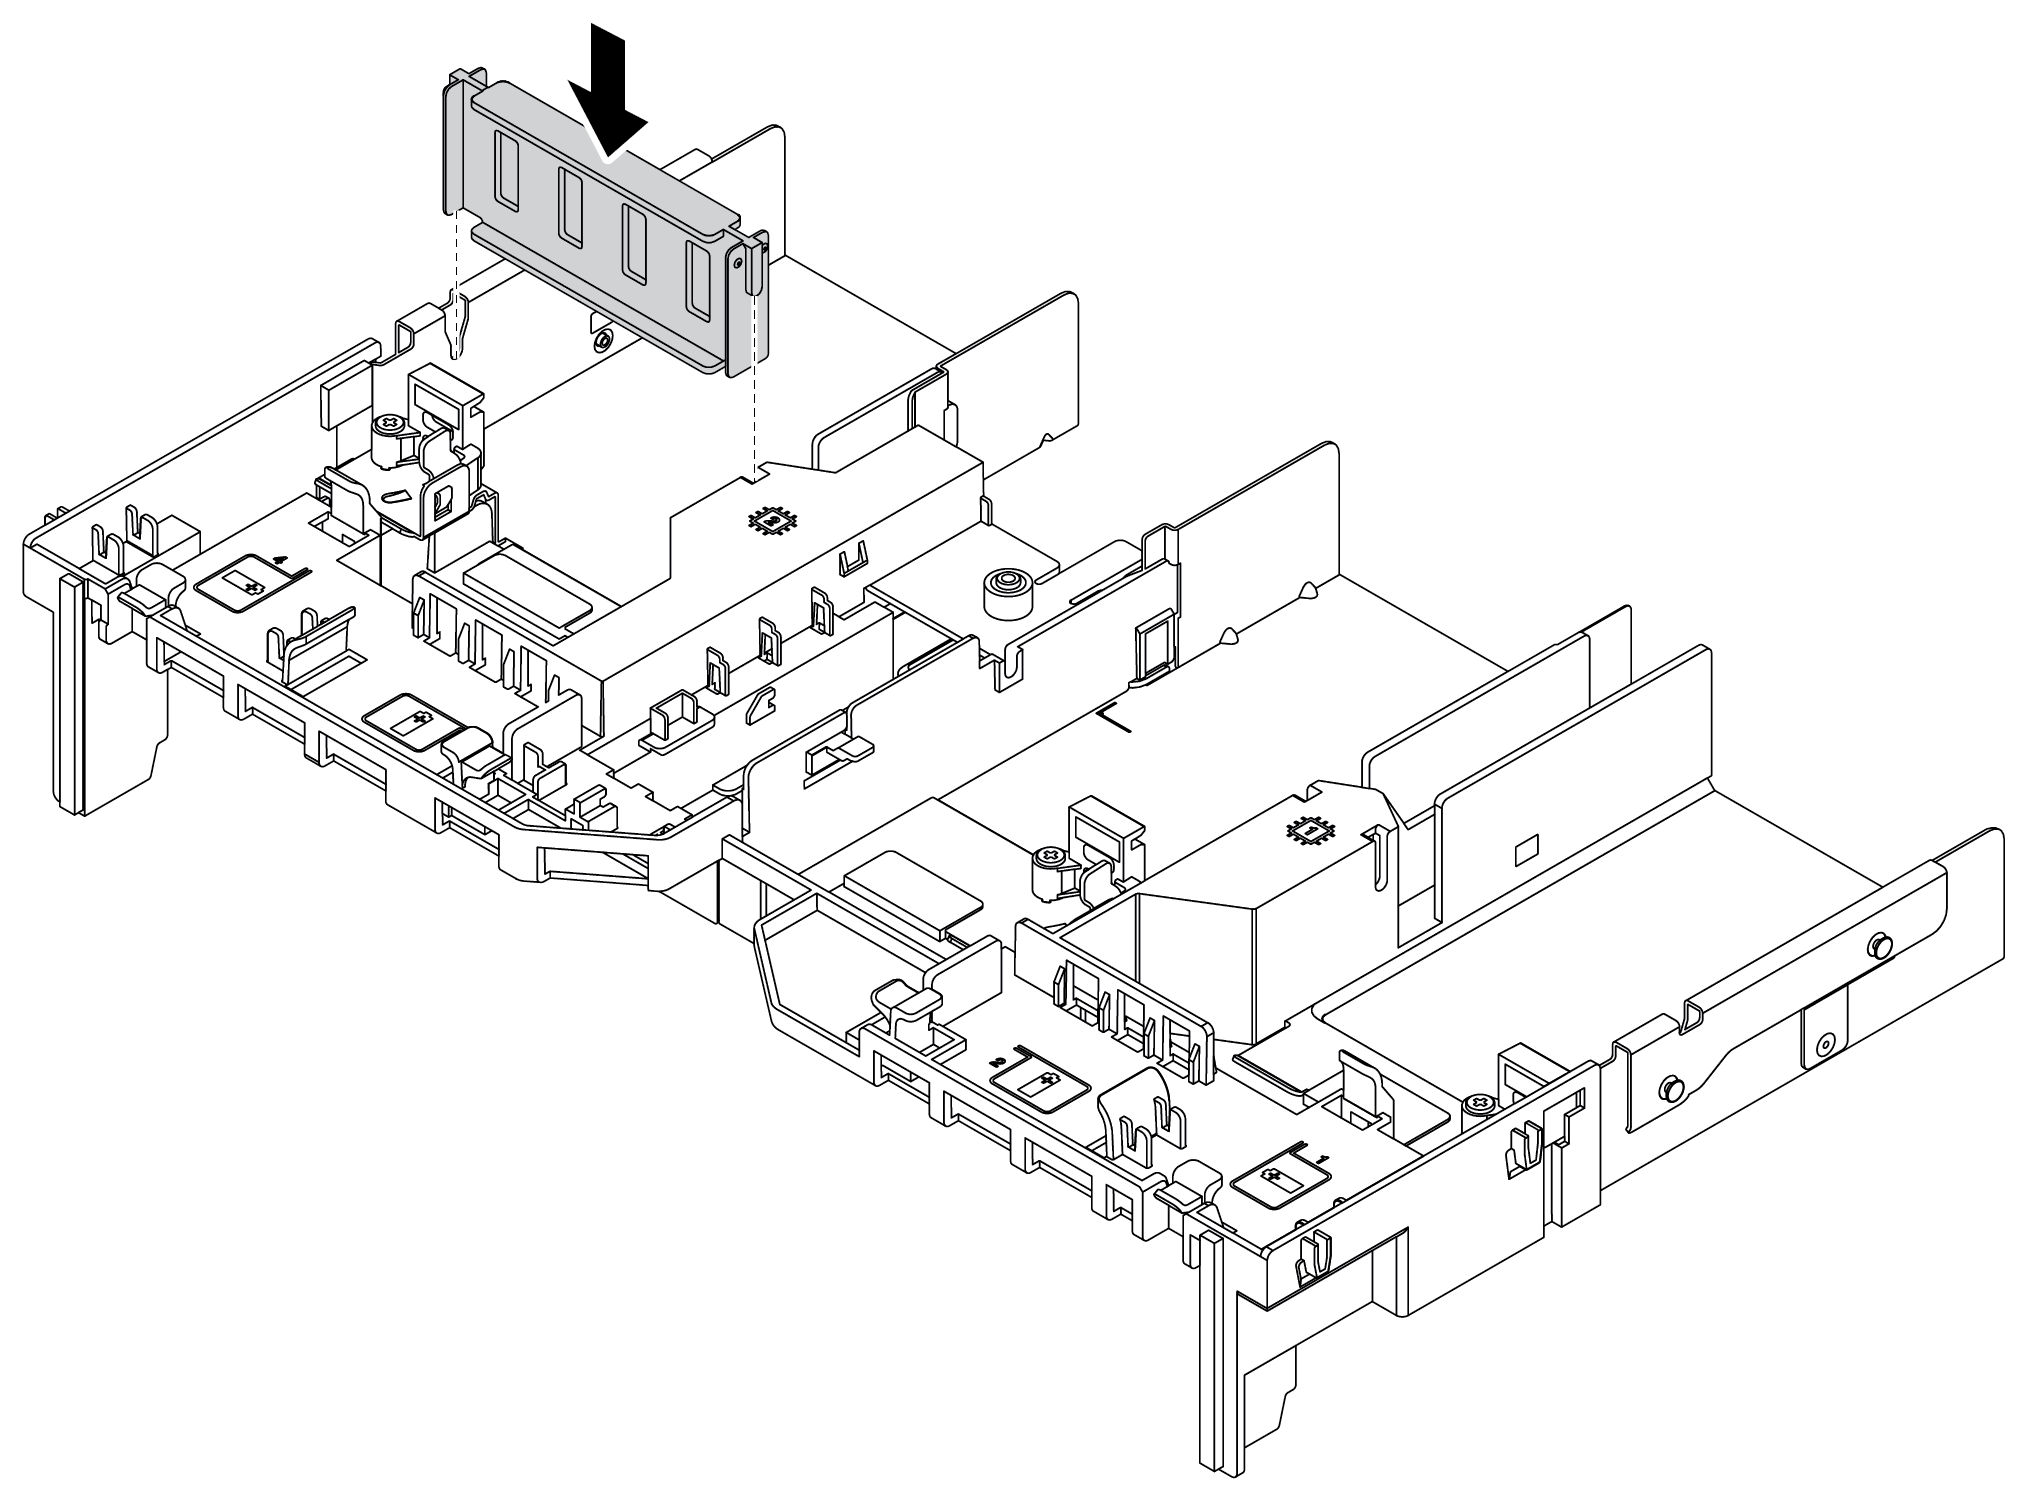
  7. (Optional) If a certain slot is not installed with a GPU adapter, install a filler on the GPU air baffle.
    Figure 4. Installing the GPU air baffle filler
    Installing the GPU filler

After you finish

Complete the parts replacement. See Complete the parts replacement.

Demo video

Watch the procedure on YouTube