Install an SXM GPU
Follow instructions in this section to install a GPU.
About this task
Removing and installing this component requires trained technicians. Do not attempt to remove or install it without proper training.
Read Installation Guidelines and Safety inspection checklist to ensure that you work safely.
Touch the static-protective package that contains the component to any unpainted metal surface on the server; then, remove it from the package and place it on a static-protective surface.
A torque screwdriver is available for request if you do not have one at hand.
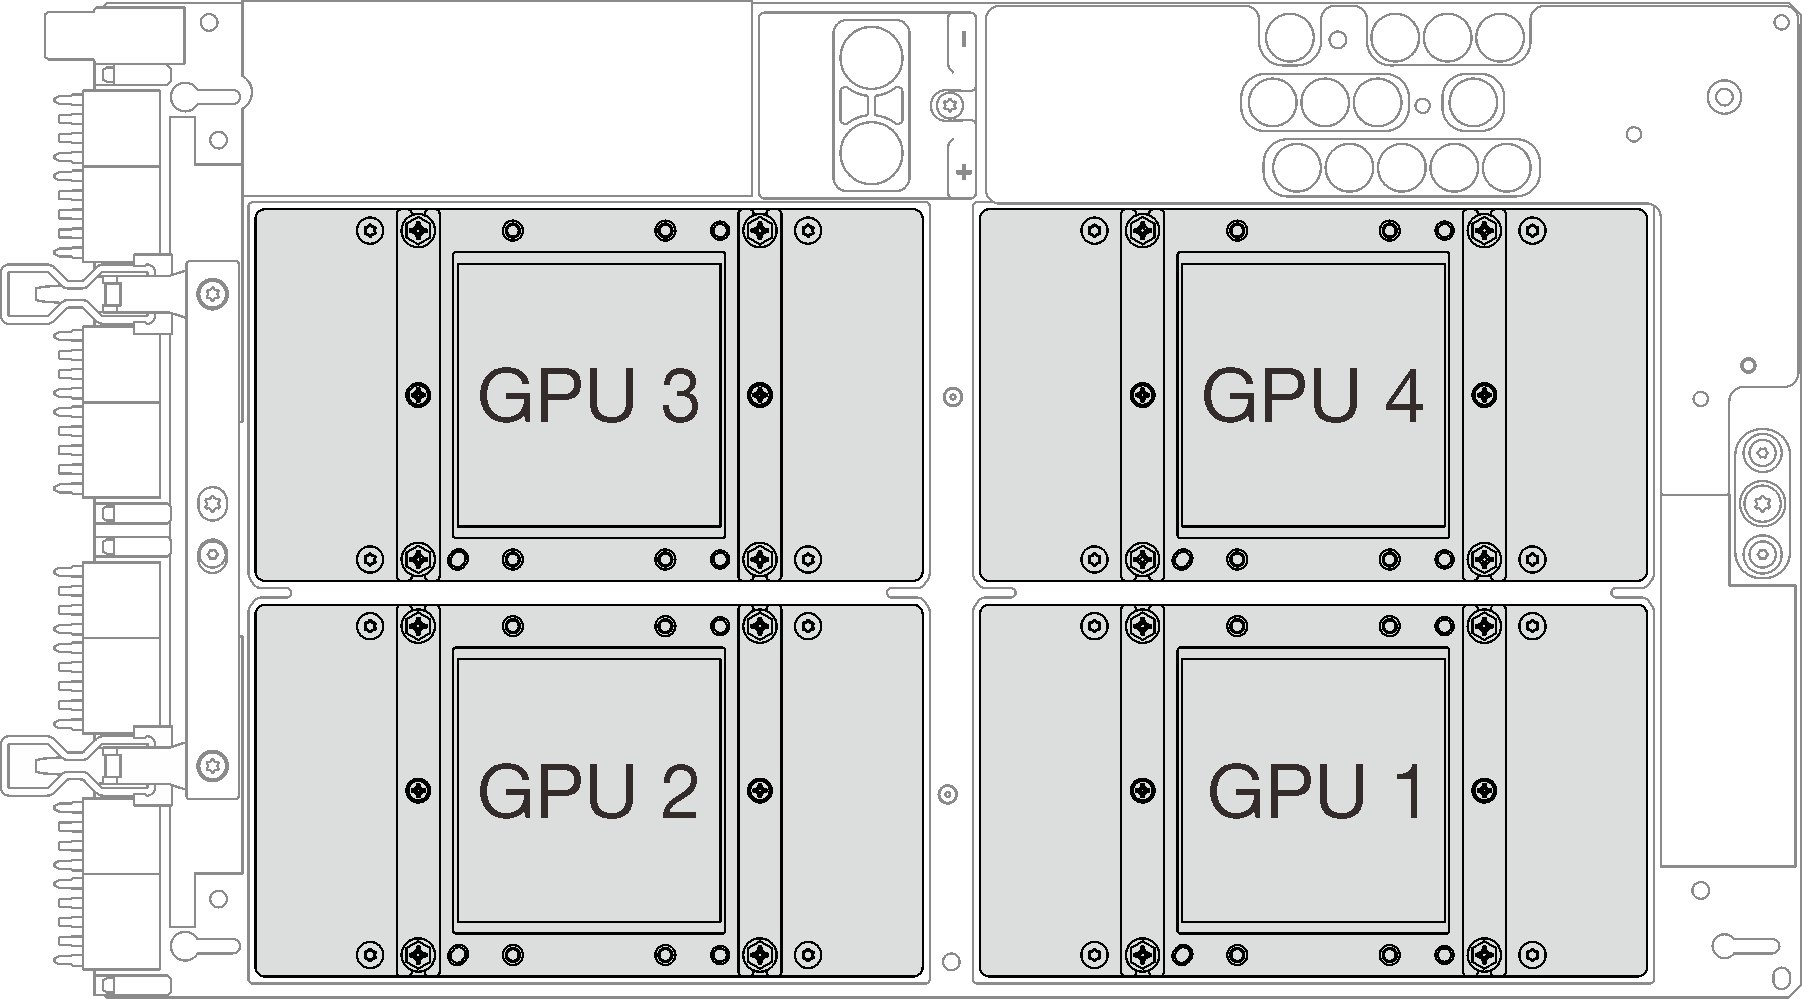
The server is equipped with a GPU adapter.
The UEFI firmware version is U8E128A or later.
| Torque screwdriver type list | Screw type |
| PH 2 head screwdriver | Philips #2 |
| Torx 10 screwdriver | Torx T10 screw |
Procedure
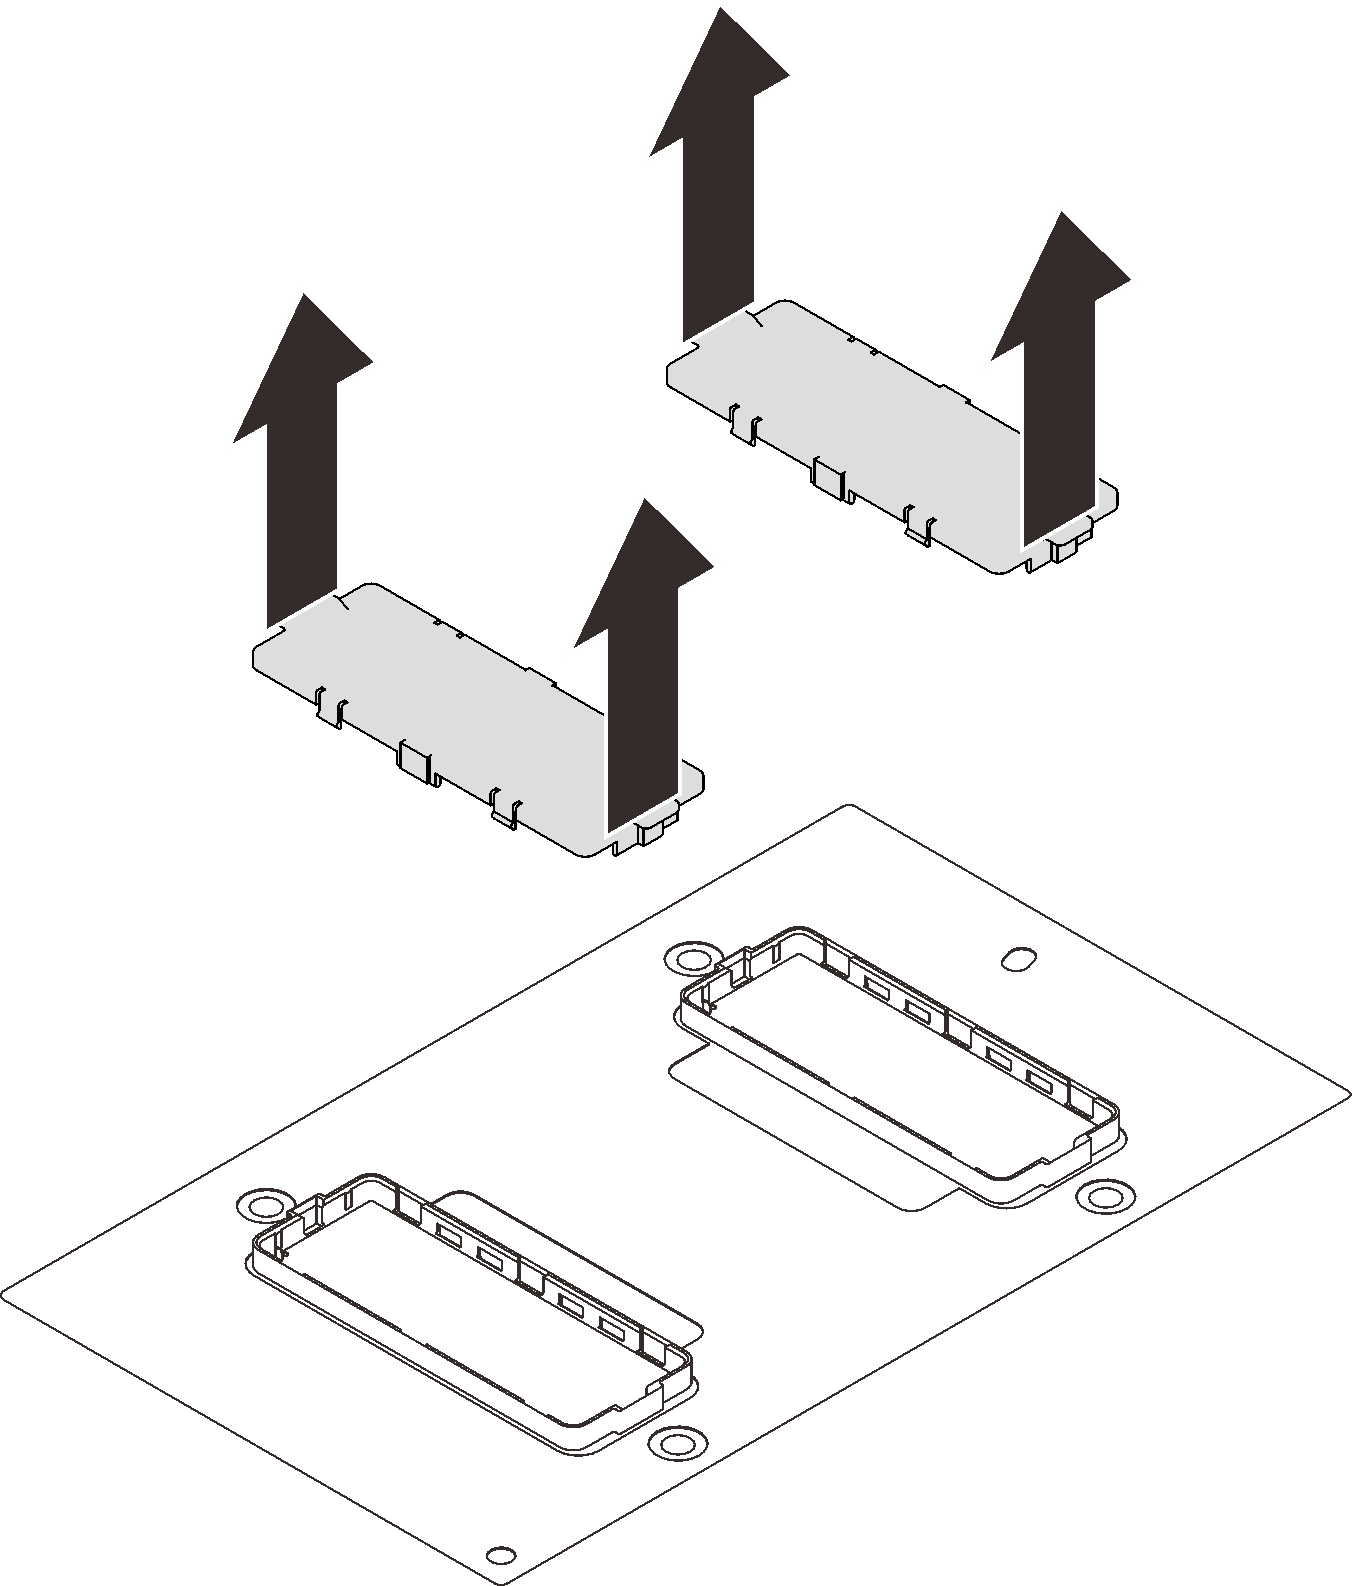
- Remove protective covers from the GPU if they are installed.Figure 2. Removing the protective covers
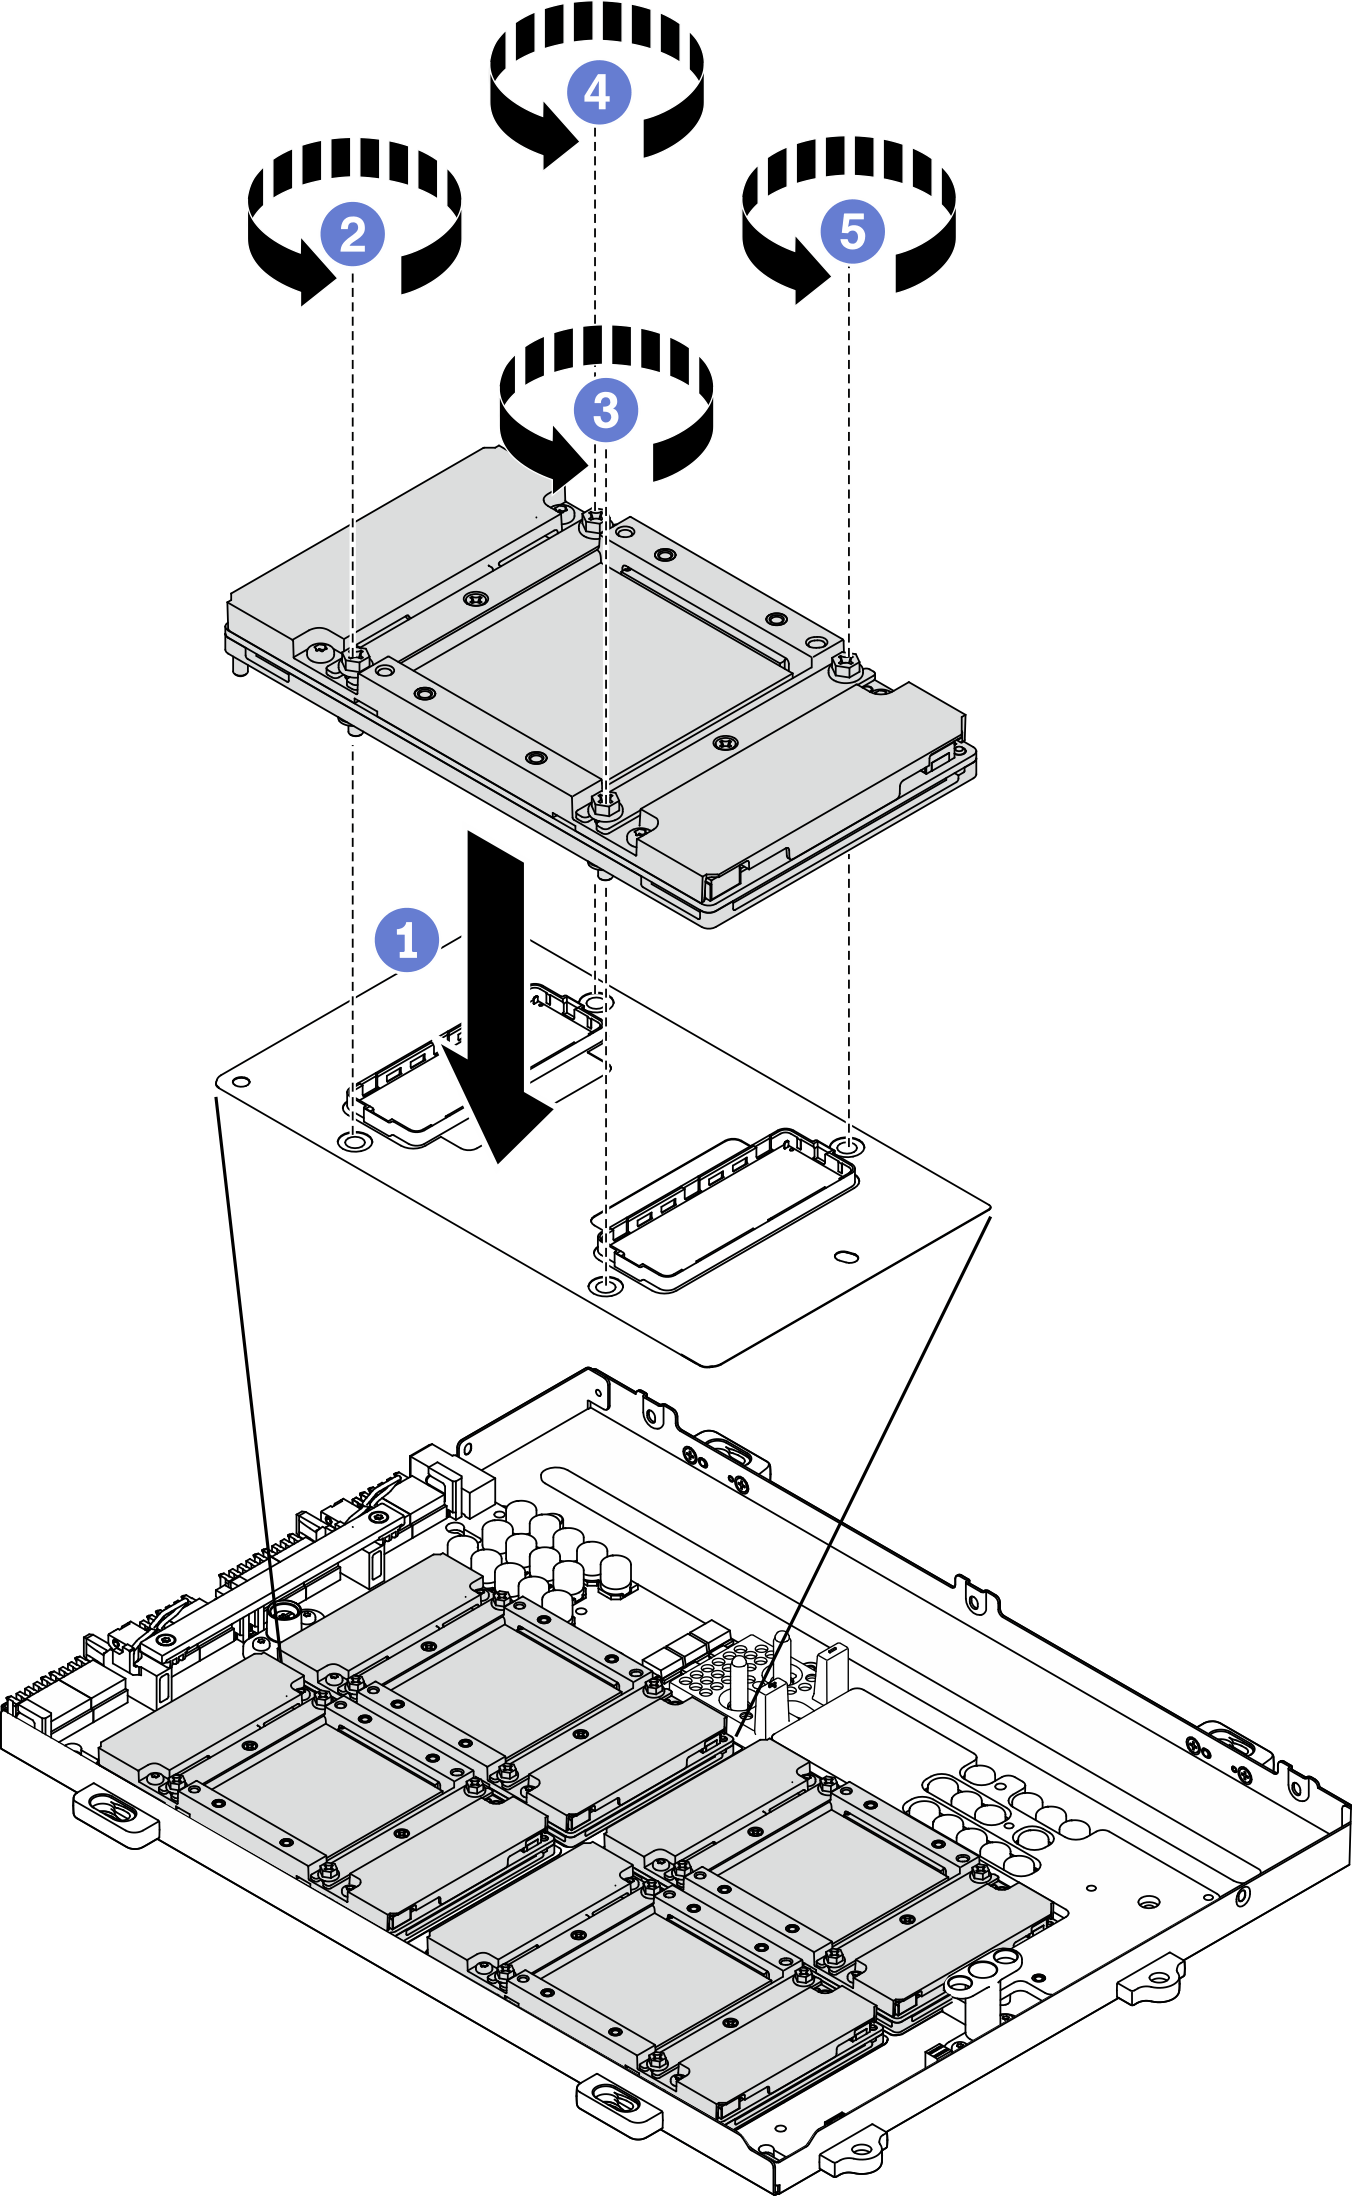
- Gently place the GPU down on the SXM GPU board; then fasten the four Philips #2 screw to secure the GPU to the SXM GPU board.AttentionTighten and remove the screws with a torque screwdriver sets to the proper torque. For reference, the torque required for the screws to fully tighten/removal is 0.5±0.05 newton-meter, 4.5±0.5 pound-inch.Figure 3. Installing a GPU to the SXM GPU board
After you finish
Reinstall the SXM GPU board. See Install the SXM GPU board.
Reinstall the Lenovo Neptune® liquid-to-air (L2A) hybrid cooling module. See Install the Lenovo Neptune(TM) liquid-to-air (L2A) hybrid cooling module.
Reinstall the retimer assembly. See Install the retimer assembly.
Reinstall the front I/O expansion board module. See Install the front I/O expansion board module.
Reinstall the network adapter. See Install a network adapter.
Reinstall the 2.5-inch drive assembly. See Install the 2.5-inch drive cage assembly.
Complete the parts replacement. See Complete the parts replacement.
Demo video