Remove the SXM GPU board

Follow instructions in this section to remove the SXM GPU board.

About this task

Attention
When the HGX A100 80GB 500W 4-GPU Board is installed and if the ambient temperature is above 30°C, the GPUs may be instructed by the system to enter an emergency power reduction state whereby GPU performance will be impacted.
Important

Removing and installing this component requires trained technicians. Do not attempt to remove or install it without proper training.

Note
Make sure you have an alcohol cleaning pad available.
Attention
Prepare the following screwdriver to ensure you can install and remove the corresponding screws properly
Table 1. Torque screwdriver type list
Torque screwdriver type listScrew type
PH 2 head screwdriver

Four Philips #2

One Phillips #2 screw (18mm)

Torx 10 screwdriverTorx T10 screw (captive screw)
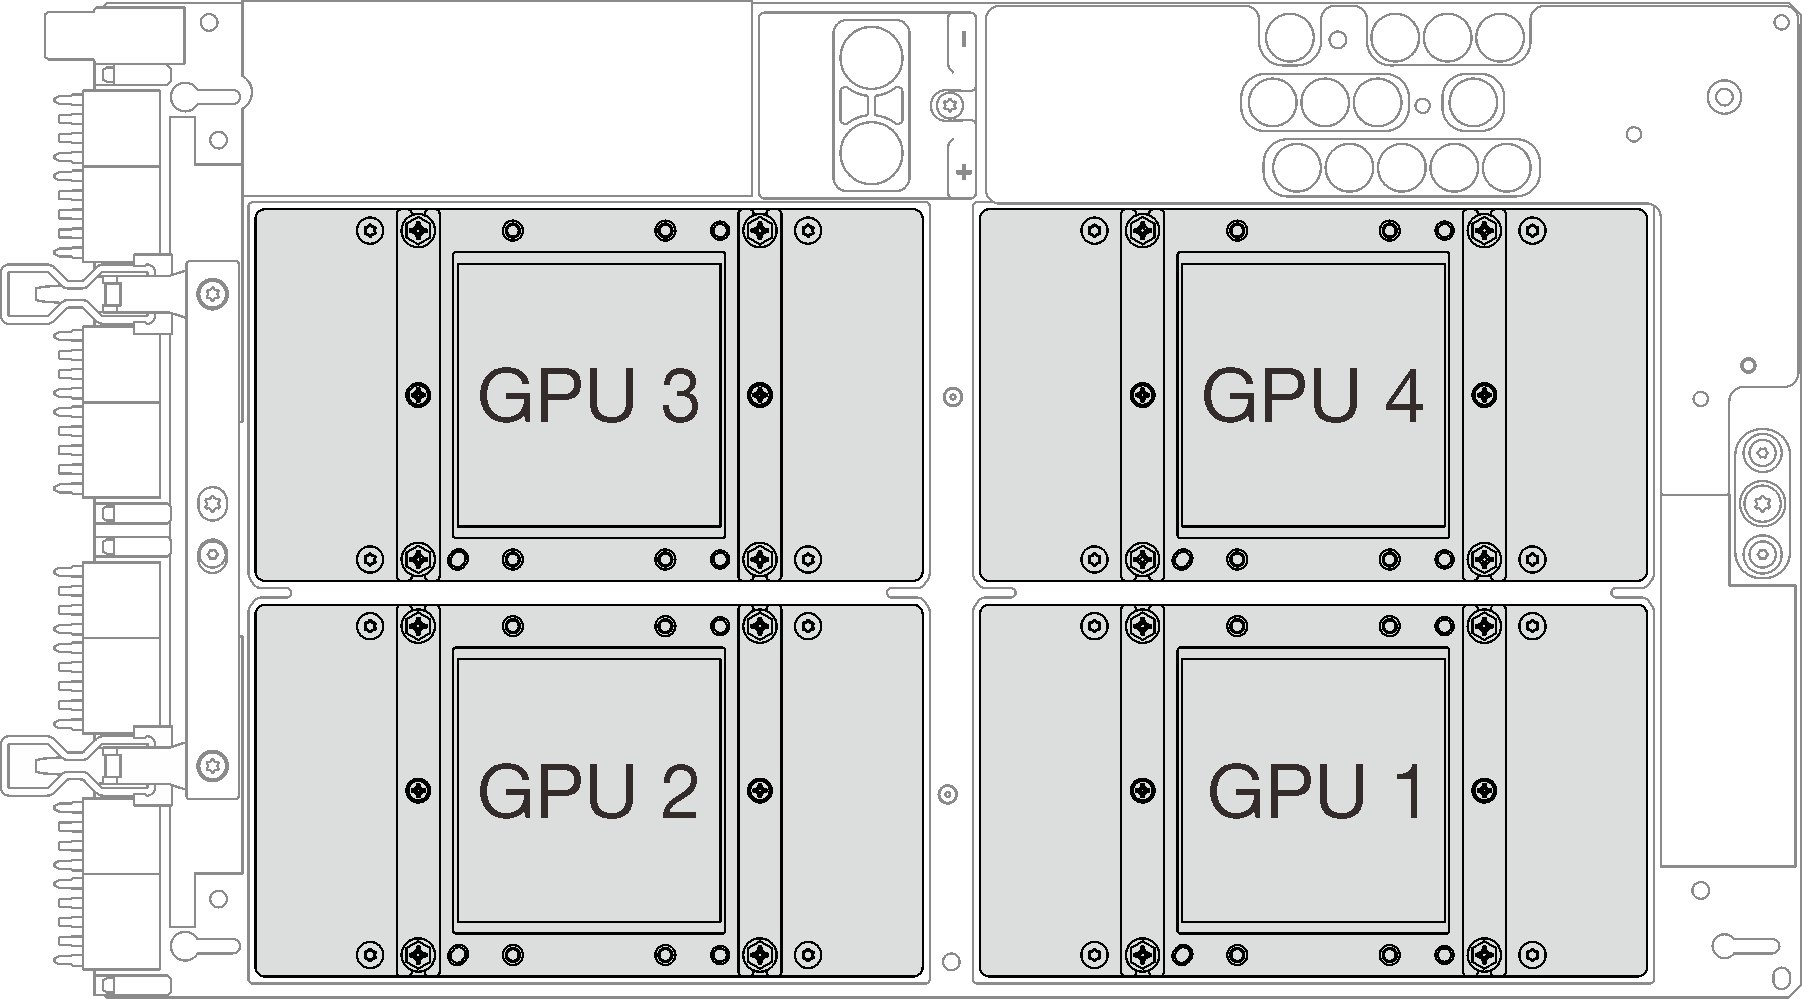
The following illustration shows the GPU numbering.
Figure 1. SXM GPU Numbering

Procedure

  1. Prepare your server.
    1. Remove the top cover. See Remove the top cover.
    2. Remove the 2.5-inch drive cage assembly. See Remove the 2.5-inch drive cage assembly.
    3. Remove the network adapters. See Remove a network adapter.
    4. Remove the front I/O expansion board module. See Remove the front I/O expansion board module.
    5. Remove the retimer assembly. See Remove the retimer assembly.
    6. Remove the Lenovo NeptuneTM liquid-to-air (L2A) hybrid cooling module. See Remove the Lenovo Neptune(TM) liquid-to-air (L2A) hybrid cooling module.
  2. If there is any old thermal grease on the four GPUs and the cold plates, gently clean the top of the four GPUs and the cold plates with an alcohol cleaning pad.
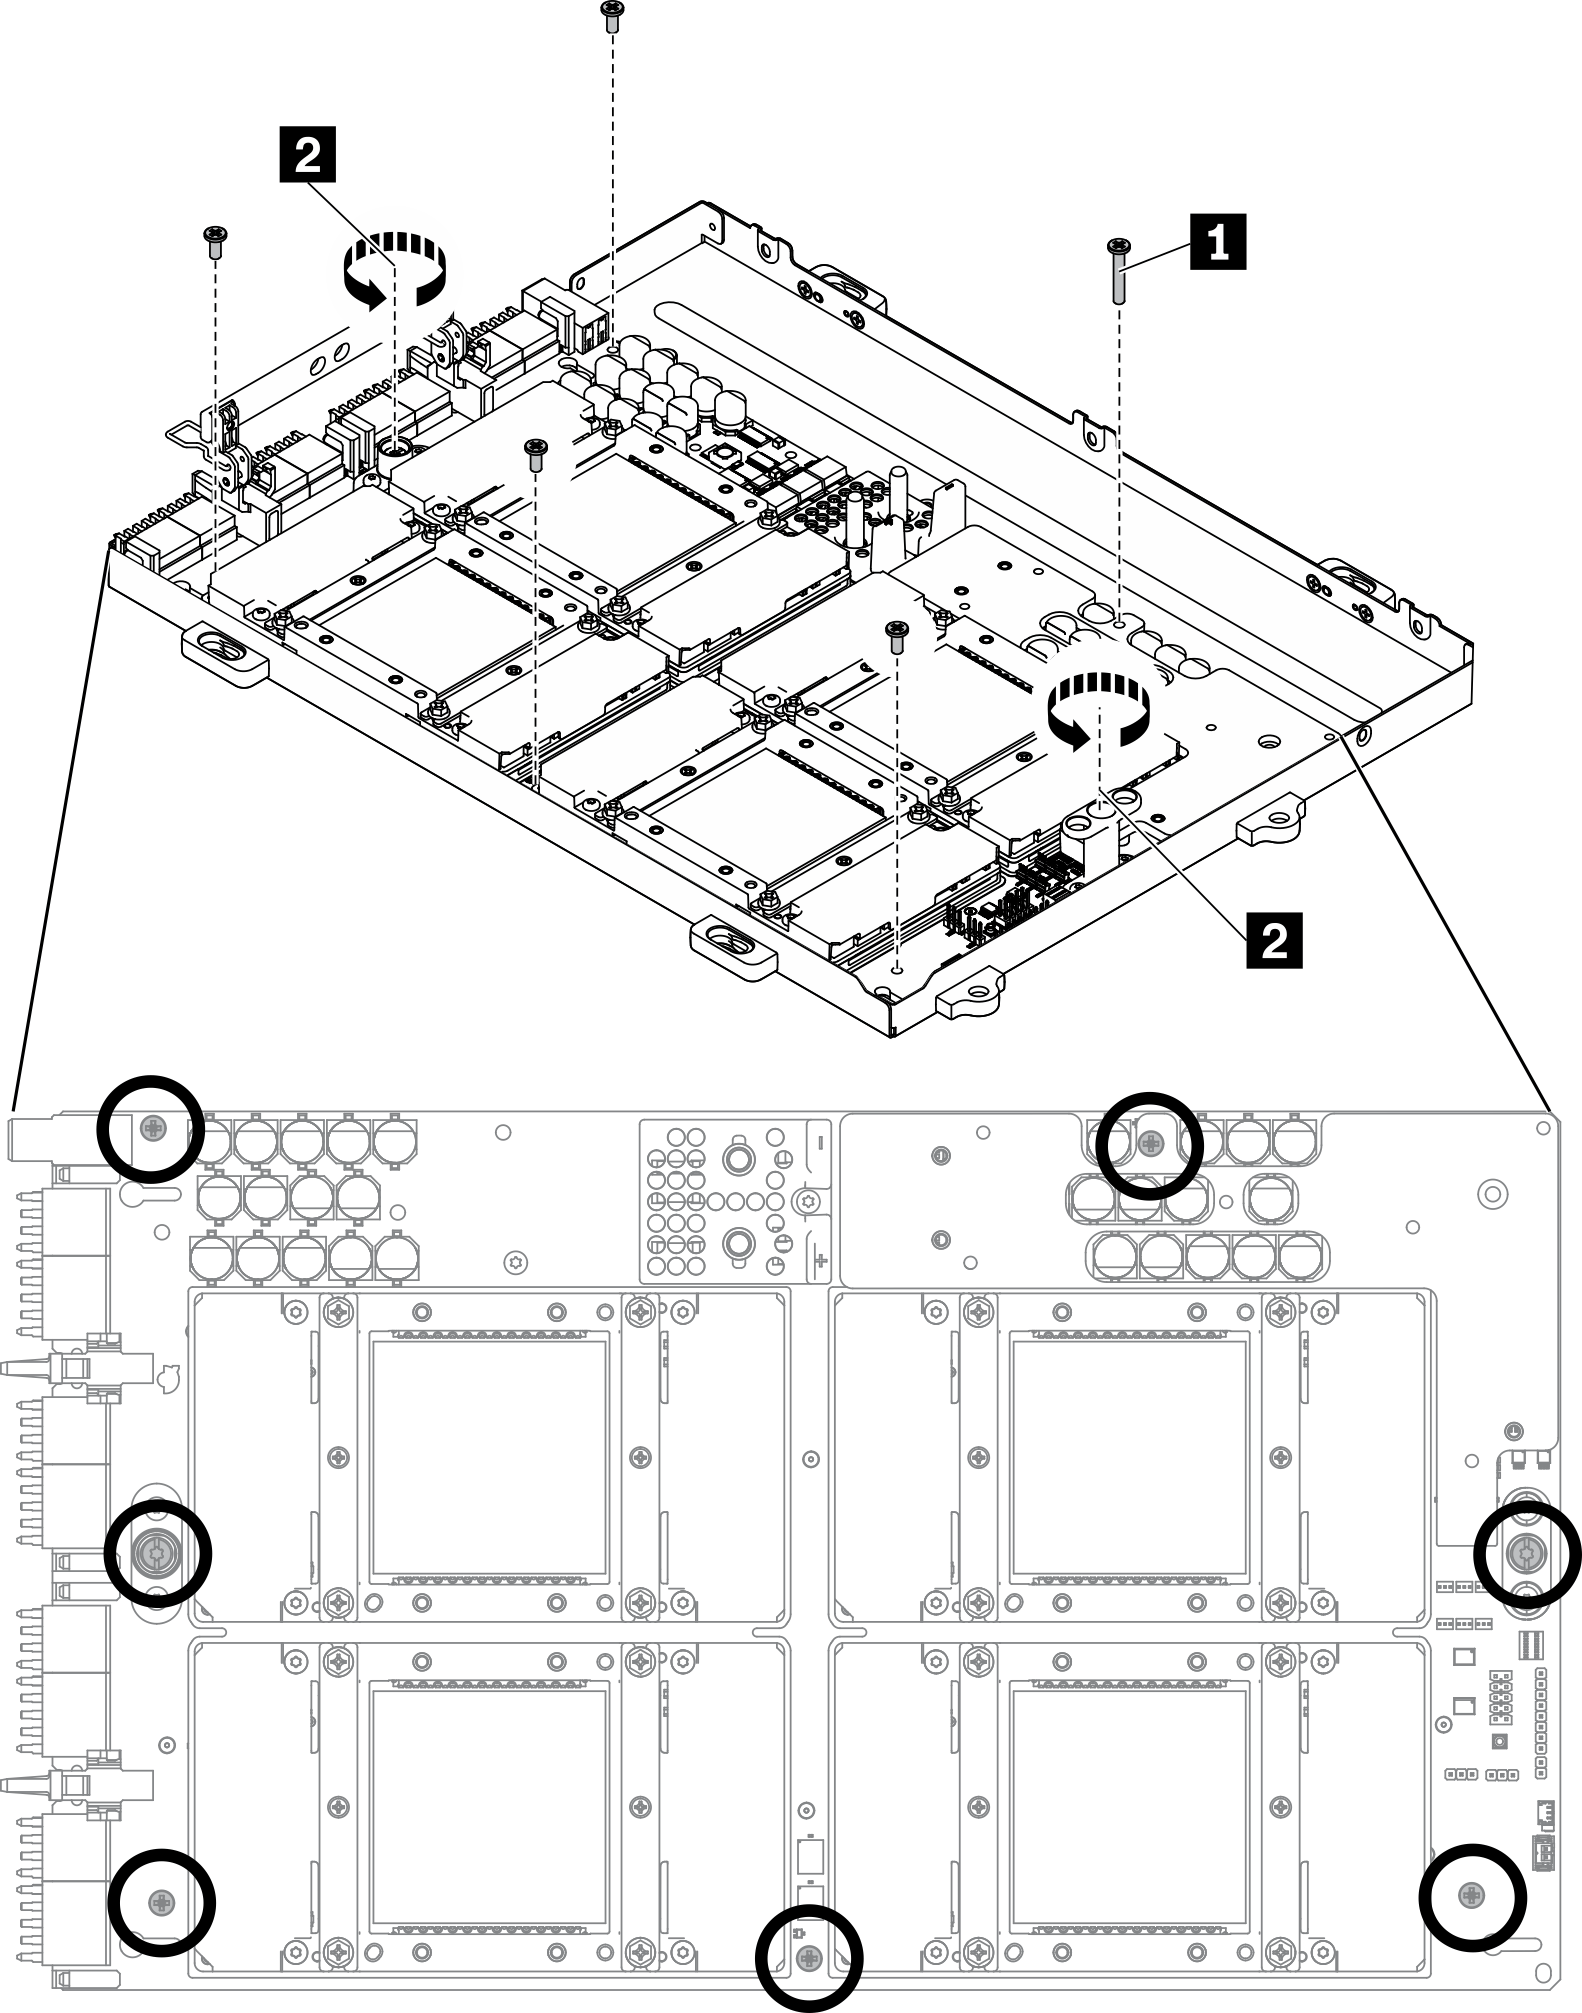
  3. With a PH 2 head screwdriver, unfasten the five screws that secure the SXM GPU board to the GPU tray. Then, with a Torx T10 screwdriver, unfasten the two captive screws on the SXM GPU board handles. Remove the screws with a torque screwdriver sets to the proper torque. For reference, the torque required for the screws to fully tighten/removal is 0.6±0.06 newton-meter, 5±0.5 pound-inch.
    Figure 2. Unfastening the screws on the SXM GPU board
    Unfastening the screws on the SXM GPU board
    1Phillips #2 screw (18mm)
    2Torx T10 screw (captive screw)
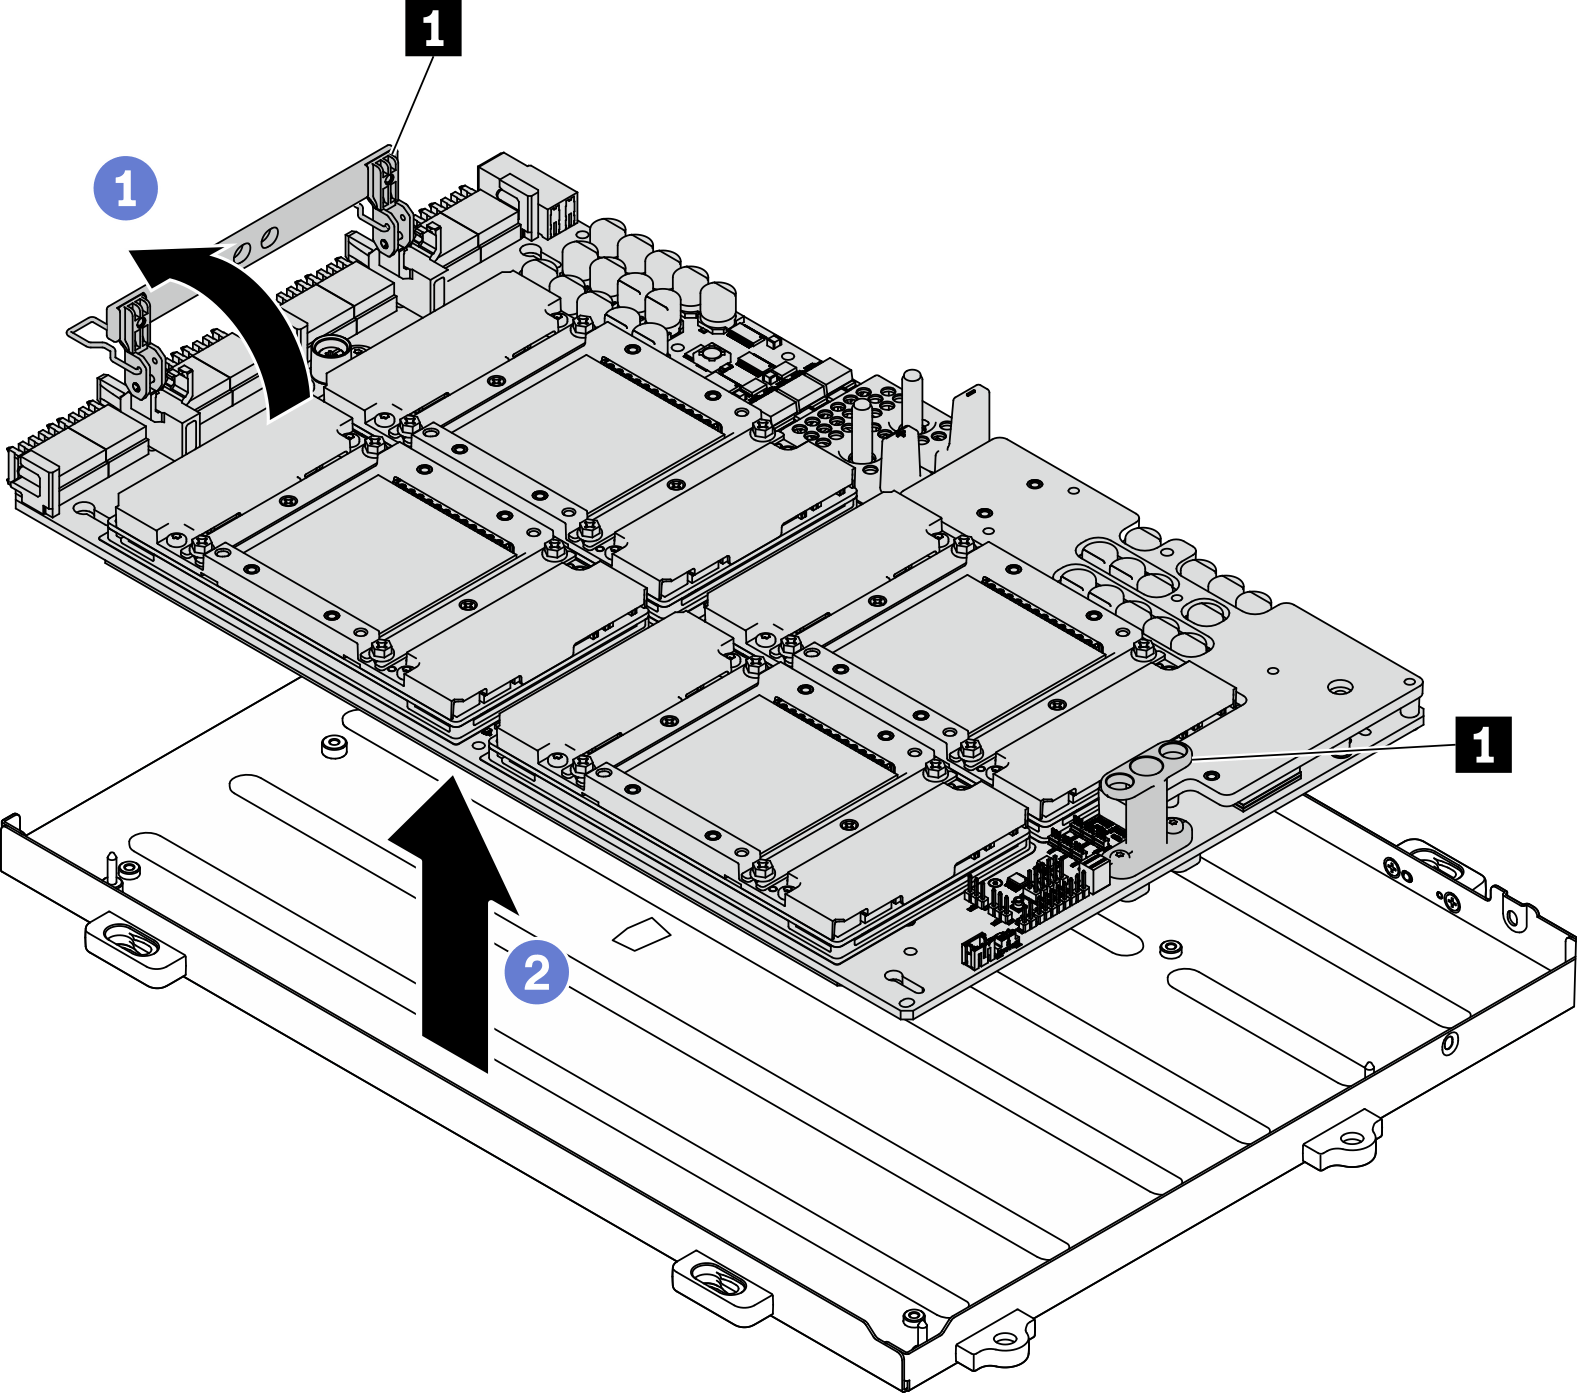
  4. Remove the SXM GPU board from the GPU tray.
    1. Rotate up the clips and handle on the SXM GPU board.
    2. Hold the handles on both sides of the SXM GPU board, and lift it up from the GPU tray.
      Figure 3. Removing the SXM GPU board
      1SXM GPU board handle

      Removing the SXM GPU board
After you finish
  • Install a replacement unit. See Install the SXM GPU board.

  • If you are instructed to return the component or optional device, follow all packaging instructions, and use any packaging materials for shipping that are supplied to you.

Demo video
Watch the procedure on YouTube