Install a DIMM
Use this information to install a DIMM.
The Product_name supports memory configurations in capacities of 8, 12, 16, and 24.
All installed DIMMs must be of the same type and capacity.


Disconnect both power cords for this task.
DIMMs are sensitive to static discharge and require special handling. In addition to the standard guidelines for Handling static-sensitive devices:
Always wear an electrostatic-discharge strap when removing or installing DIMMs. Electrostatic-discharge gloves can also be used.
Never hold two or more DIMMs together so that they touch. Do not stack DIMMs directly on top of each other during storage.
Never touch the gold DIMM connector contacts or allow these contacts to touch the outside of the DIMM connector housing.
Handle DIMMs with care: never bend, twist, or drop a DIMM.
Do not use any metal tools (such as jigs or clamps) to handle the memory modules, because the rigid metals may damage the memory modules.
Do not insert memory modules while holding packages or passive components, which can cause package cracks or detachment of passive components by the high insertion force.
Before installing a DIMM, touch the static-protective package that contains the new DIMM to any unpainted surface on the outside of the server. Then, take the new DIMM out of the package and place it on a static-protective surface.
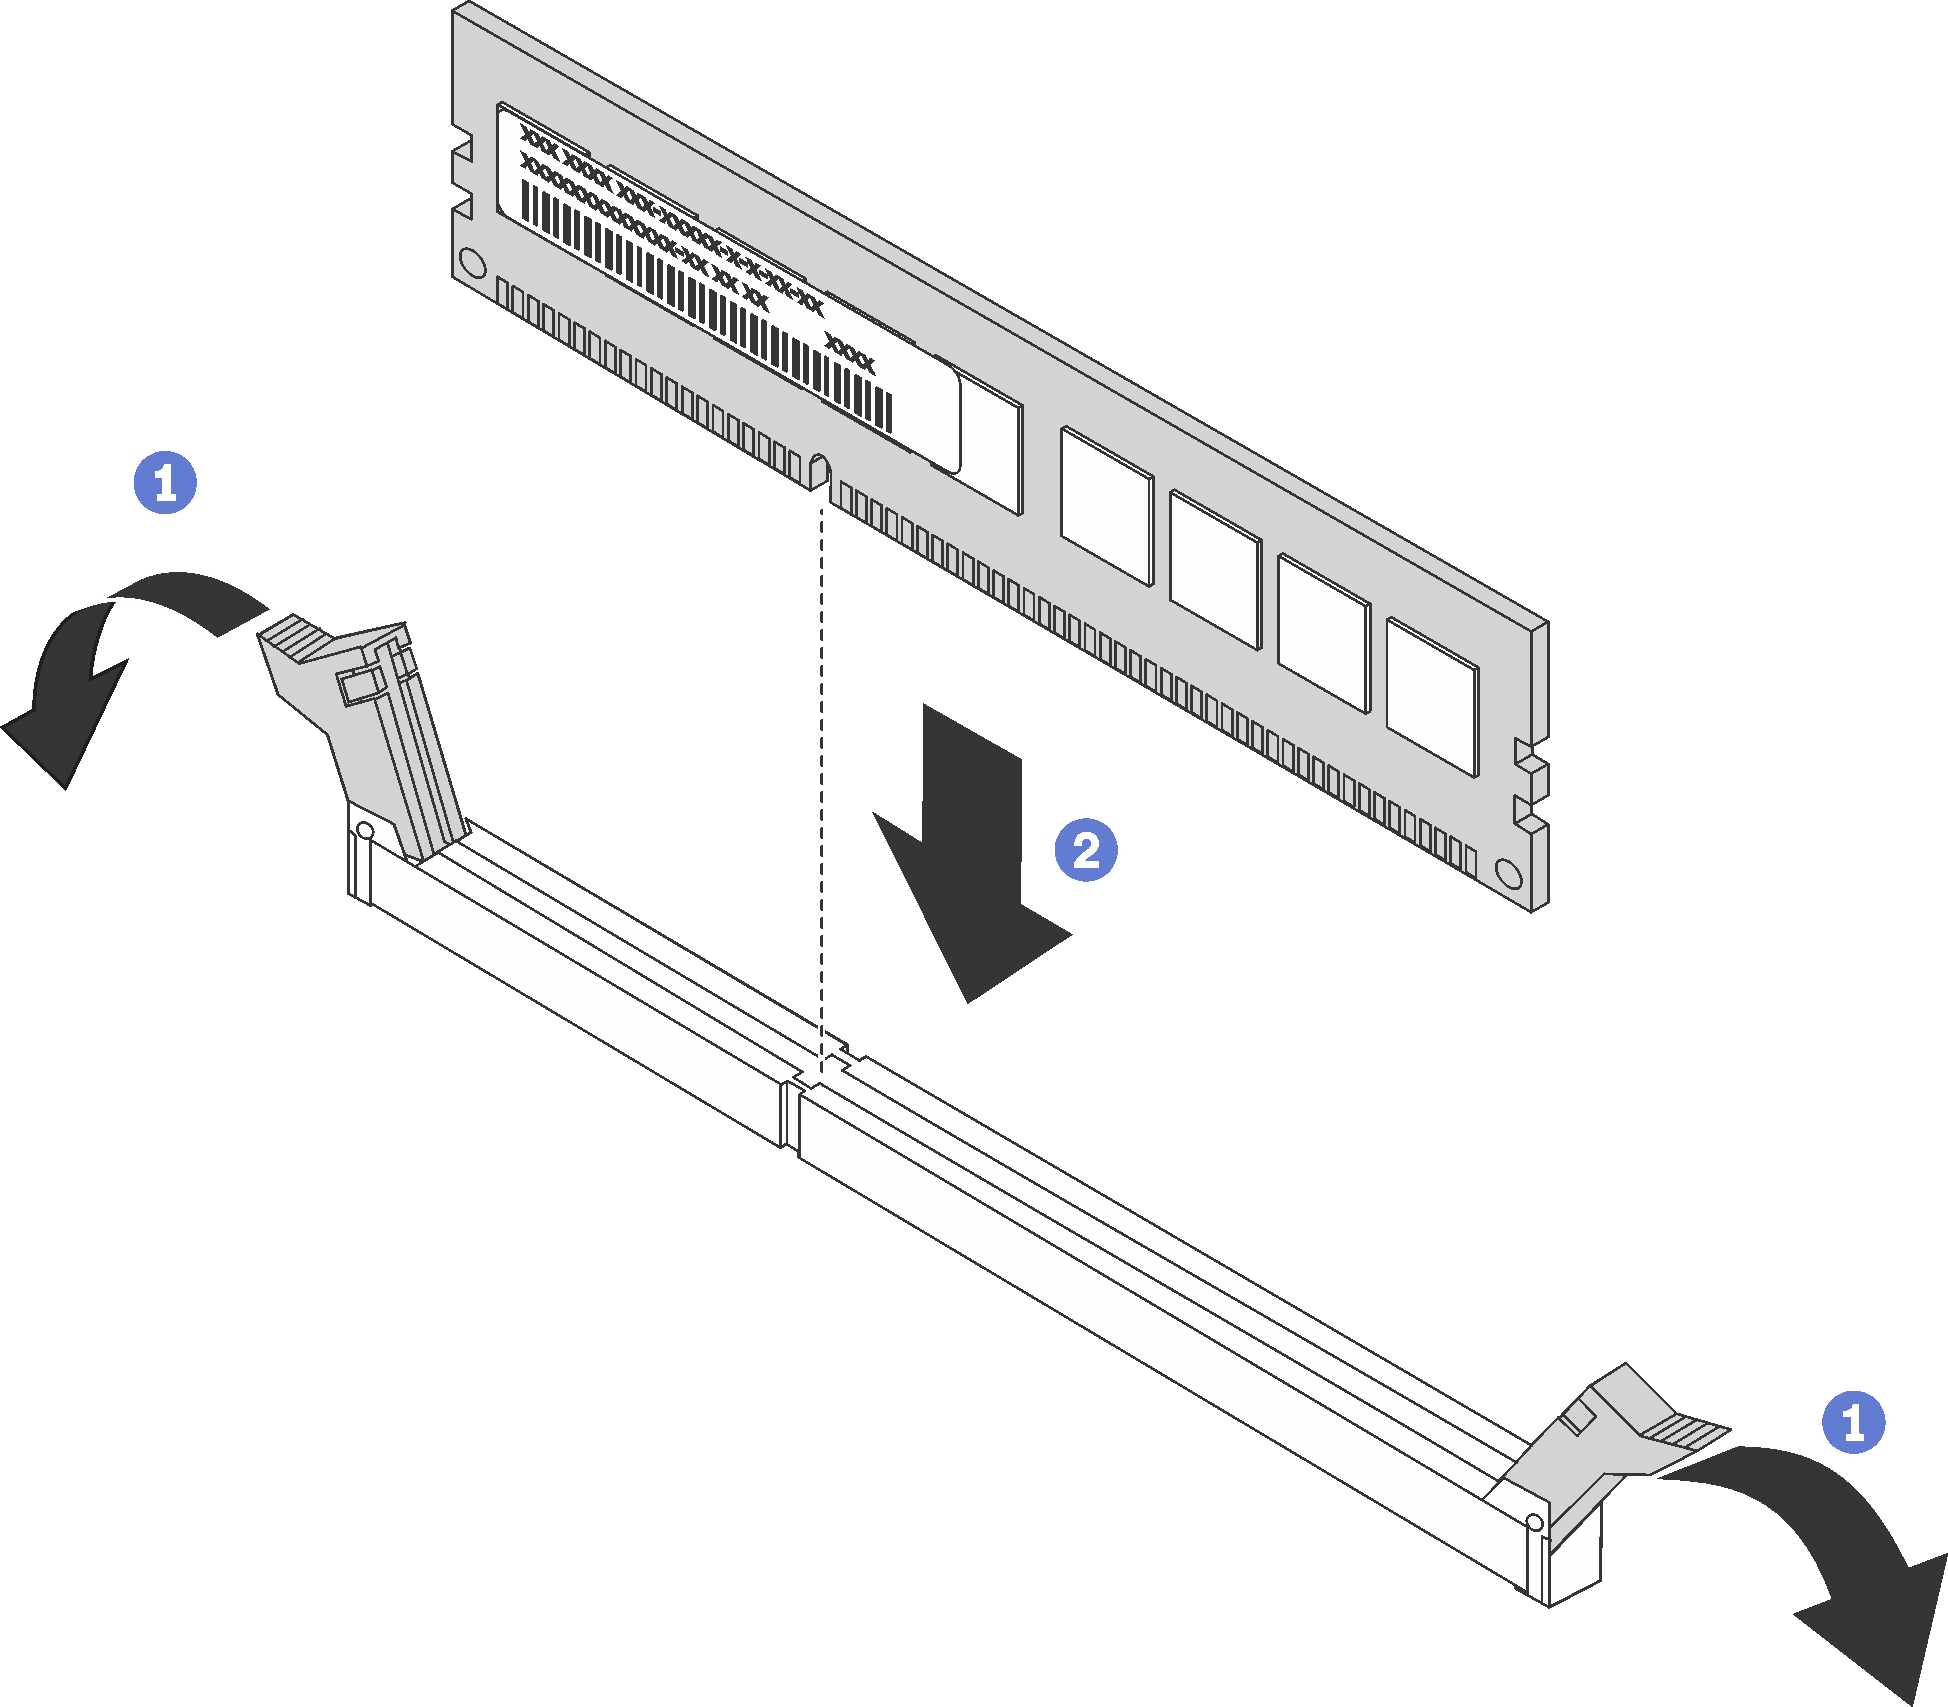
To install a DIMM, complete the following steps:
Install the air baffle. See Install the air baffle.
Install the top cover. See Install the top cover.
Push up on the latches on the slide rails and push the server back into the rack.
Tighten the two captive screws located on the front of the server to secure the server in the rack.
NoteAlways secure the system in the rack if your are moving the rack.Connect all cables to the ports on the front of the server, including the management port, if necessary, and all PCIe adapter ports. The management port and PCIe adapter ports are located in the I/O expansion cage.
Connect power cords to both power supplies, which are located at the rear of the server.
Demo video