Install the serial port module
Follow instructions in this section to install the serial port module.
About this task
Attention
Read Installation Guidelines and Safety inspection checklist to ensure that you work safely.
Procedure
- Open the retention latch on the PCIe riser.
- Install the serial port module.
 Insert the serial port module into the PCIe riser.
 Fasten the screw to secure the serial port module to the PCIe riser.
 Close the retention latch.
 Route the serial port cable through the cable clip.Figure 1. Serial port module installation
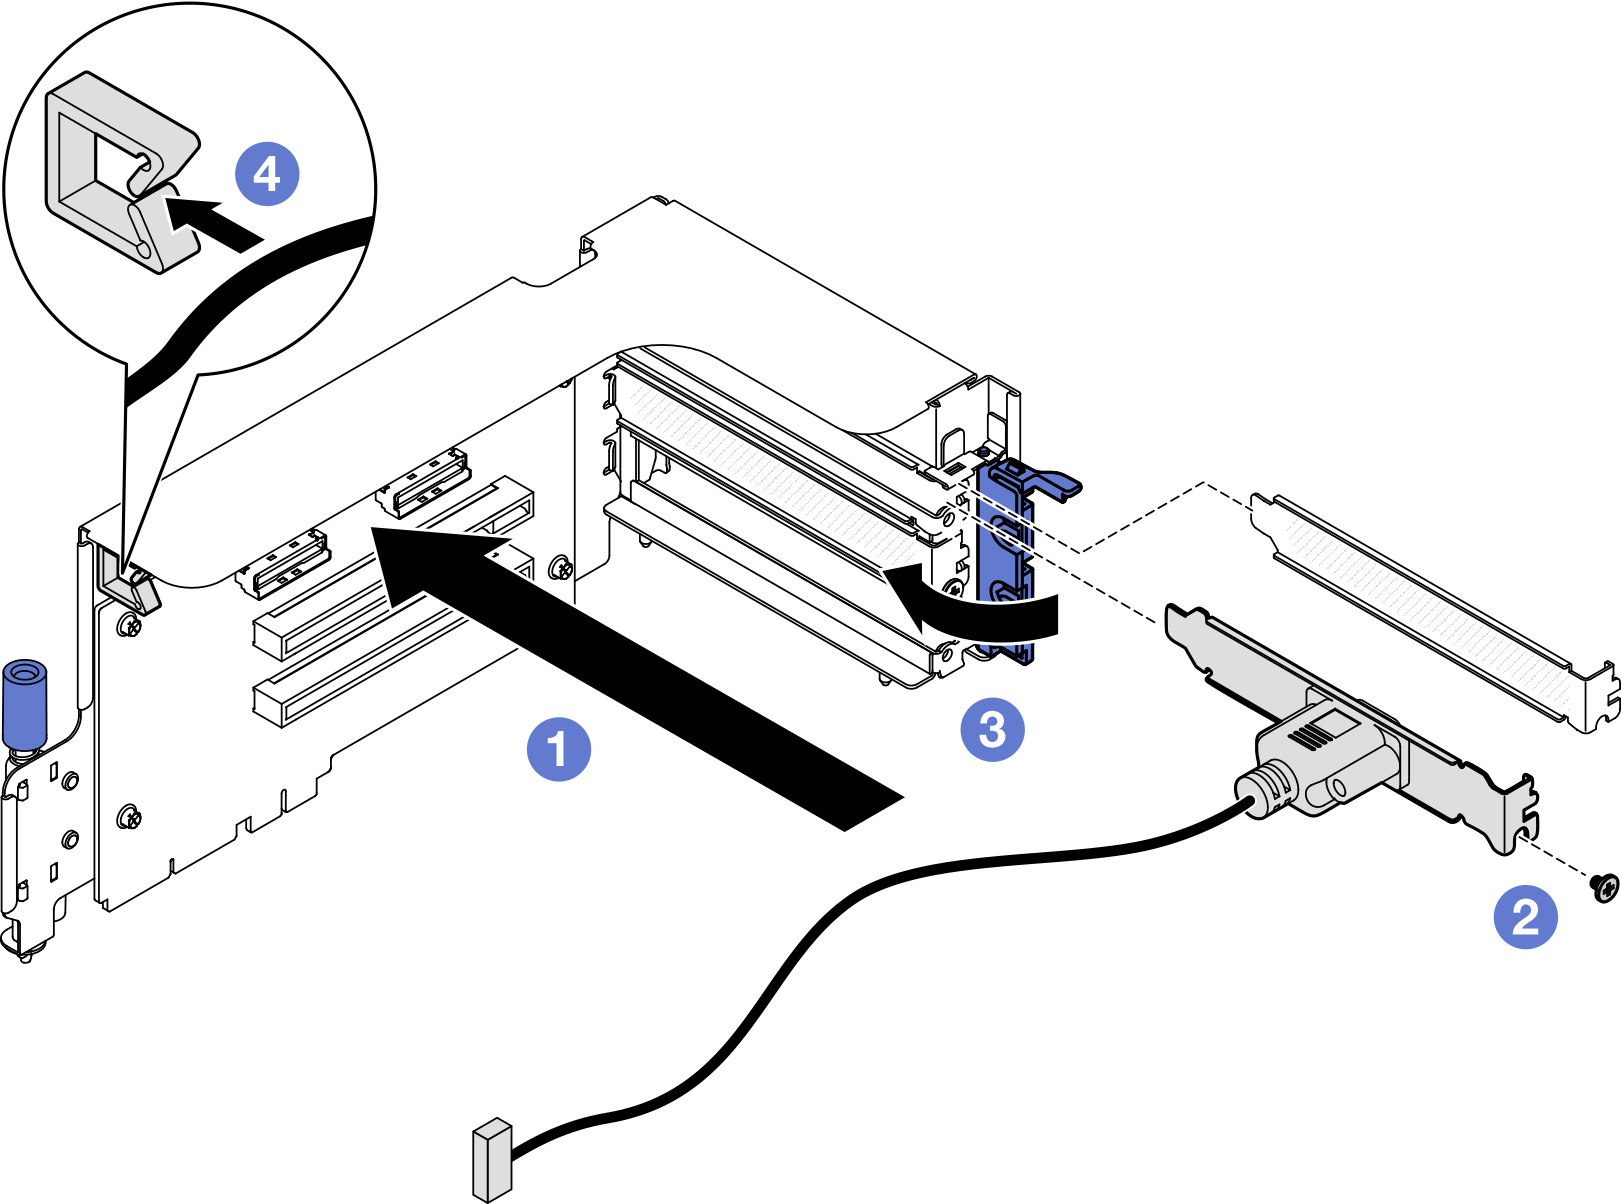
After you finish
- Connect the serial port cable to the serial port connector on the system board assembly.
- Reinstall the PCIe riser. See Install a PCIe riser.
- Complete the parts replacement. See Complete the parts replacement.
- To enable the serial port module on Linux or Microsoft Windows, do one of the followings according to the installed operating system:NoteIf the Serial over LAN (SOL) or Emergency Management Services (EMS) feature is enabled, the serial port will be hidden on Linux and Microsoft Windows. Therefore, it is required to disable SOL and EMS to use the serial port on operating systems for serial devices.
For Linux:
Open the ipmitool and enter the following command to disable the Serial over LAN (SOL) feature:
-I lanplus -H IP -U USERID -P PASSW0RD sol deactivateFor Microsoft Windows:
Open the ipmitool and enter the following command to disable the SOL feature:
-I lanplus -H IP -U USERID -P PASSW0RD sol deactivateOpen Windows PowerShell and enter the following command to disable the Emergency Management Services (EMS) feature:
Bcdedit /ems offRestart the server to ensure that the EMS setting takes effect.
Demo video
Give documentation feedback