Remove the SXM5 PCIe switch board
Follow instructions in this section to remove the SXM5 PCIe switch board. The procedure must be executed by a trained technician.
About this task
Attention
- Read Installation Guidelines and Safety inspection checklist to ensure that you work safely.
- Power off the server and peripheral devices and disconnect the power cords and all external cables. See Power off the server.
- If the server is installed in a rack, slide the server out on its rack slide rails to gain access to the top cover, or remove the server from the rack. See Remove the server from rack.
Procedure
- Make preparation for this task.
- Remove the top cover. See Remove the top cover.
- Disconnect the cables that are connected to the SXM5 PCIe switch board.
- Remove the SXM5 PCIe switch board.
 Loosen the thumbscrew that secures the SXM5 PCIe switch board to the front drive tray.
 Rotate the SXM5 PCIe switch board handle up.
 Press down the rubber pad on the SXM5 PCIe switch board handle so that the rubber pad is located underneath the front drive tray handle.
 Push the SXM5 PCIe switch board handle toward the interposer card to disconnect the SXM5 PCIe switch board from the interposer card.NoteMake sure the two retention clips are in the slots on the interposer card before pushing the
SXM5 PCIe switch board handle.  Release the two retention clips from the slots on the interposer card; then, rotate the SXM5 PCIe switch board handle down so that the rubber pad is facing up.
 Slightly slide the SXM5 PCIe switch board backward; then, hold the SXM5 PCIe switch board handle and the SXM5 PCIe switch board tab, and lift the SXM5 PCIe switch board out from the chassis.Figure 1. SXM5 PCIe switch board removal
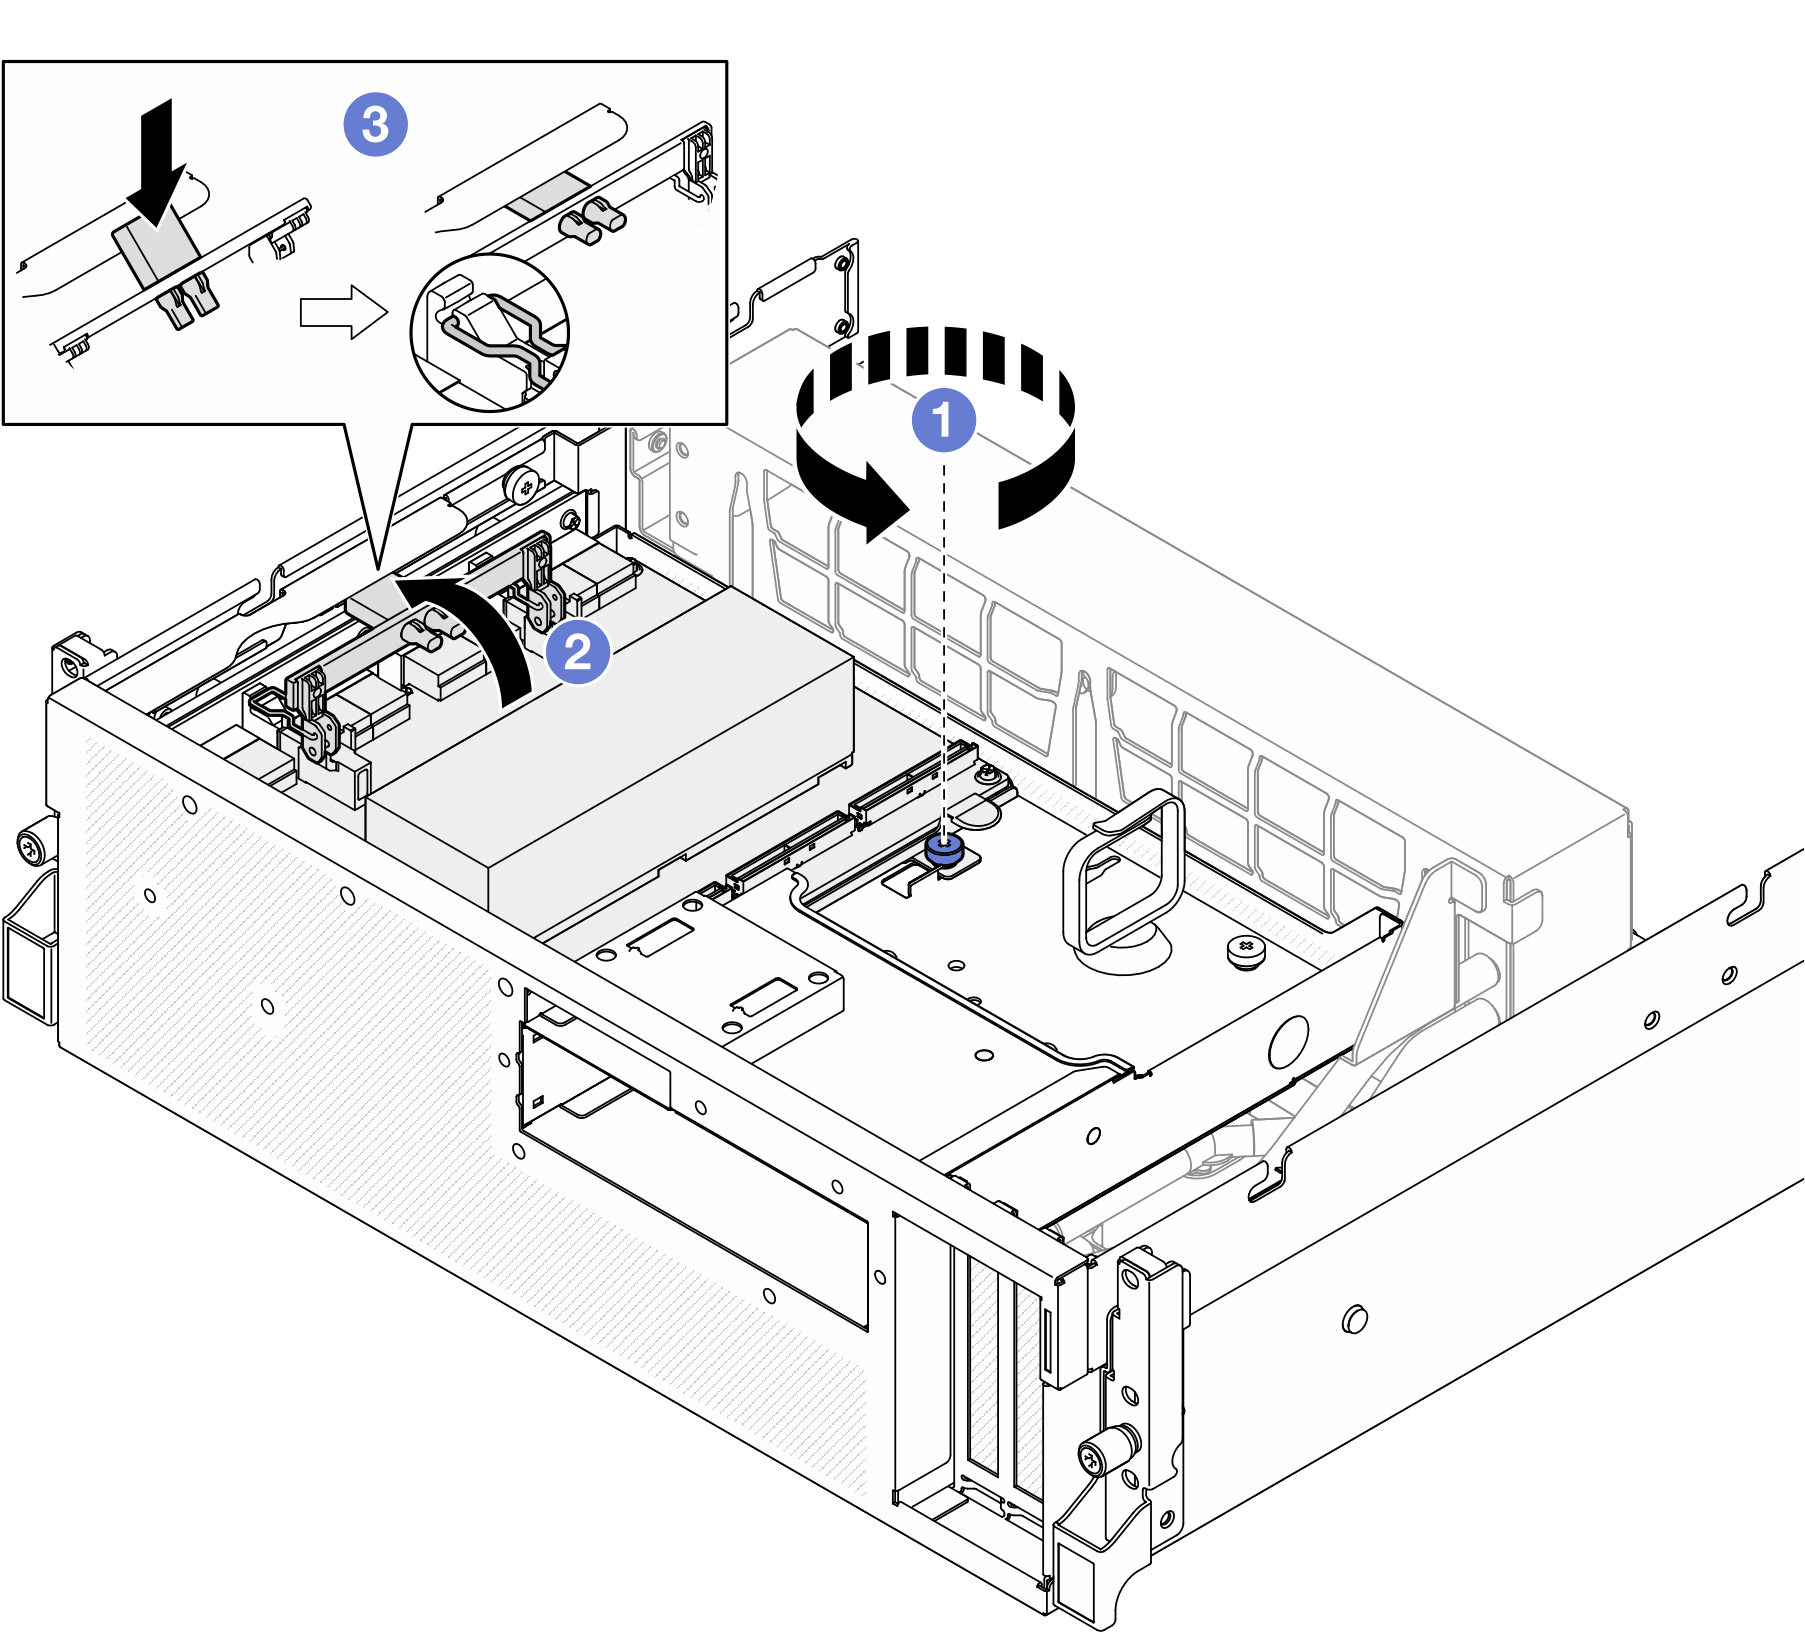
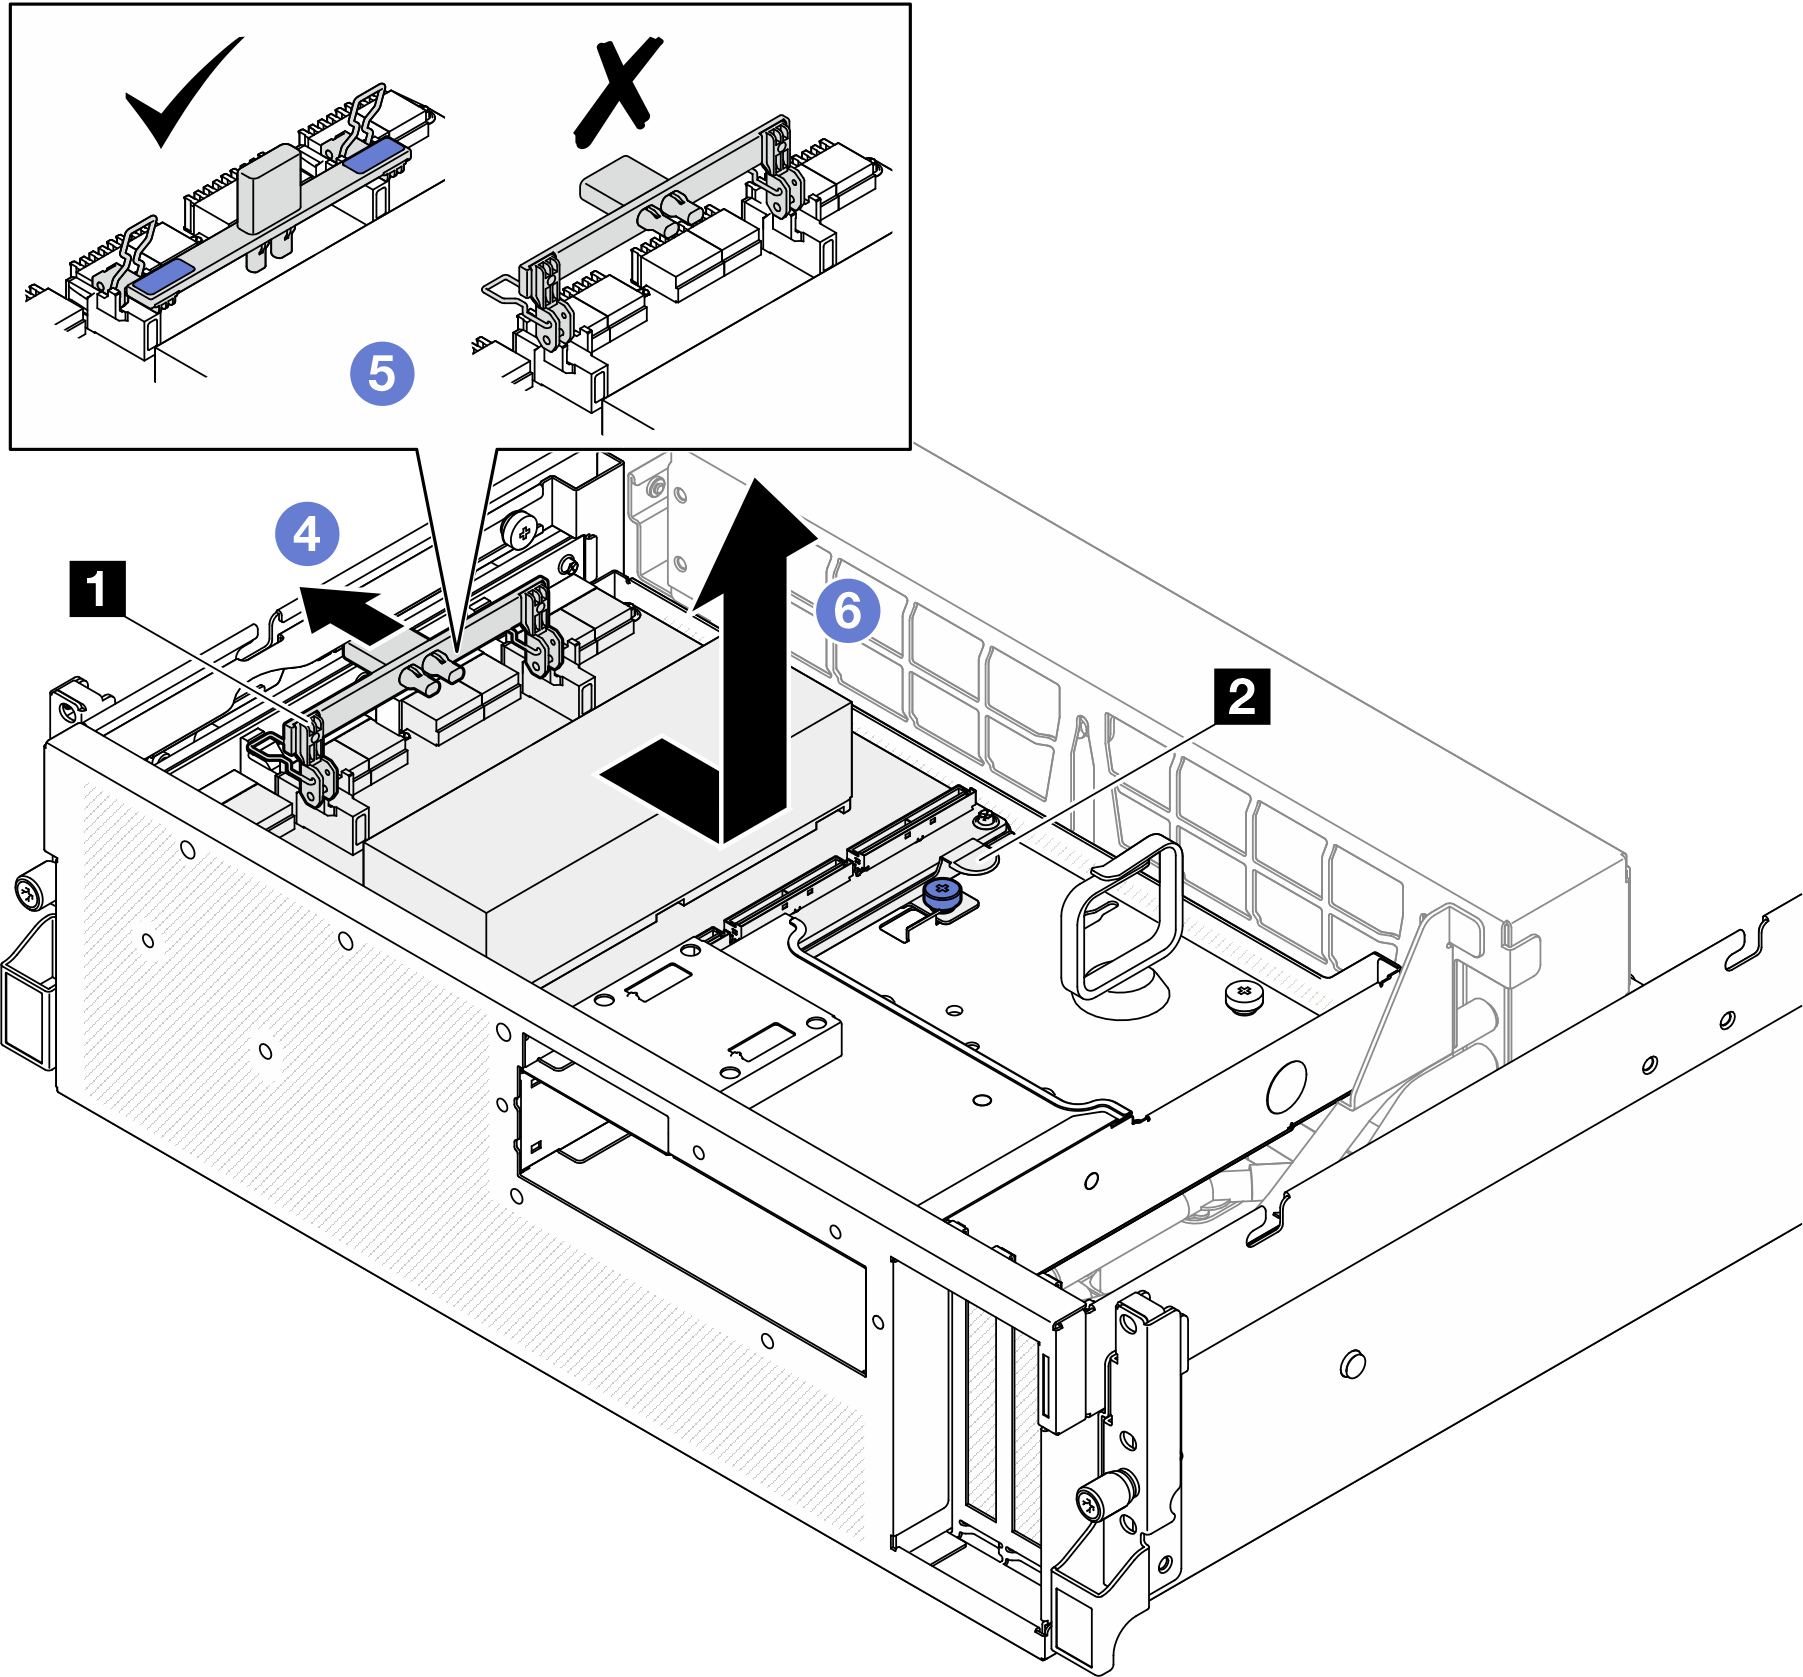
1 SXM5 PCIe switch board handle 2 SXM5 PCIe switch board tab
After you finish
- If you are instructed to return the component or optional device, follow all packaging instructions, and use any packaging materials for shipping that are supplied to you.
- If you plan to recycle the component:
- Remove the heat sink from the SXM5 PCIe switch board.
- Remove the six screws that secure the heat sink to the SXM5 PCIe switch board in the sequence shown in the illustration.
 Remove the heat sink from the SXM5 PCIe switch board.
Figure 2. SXM5 PCIe switch board heat sink removal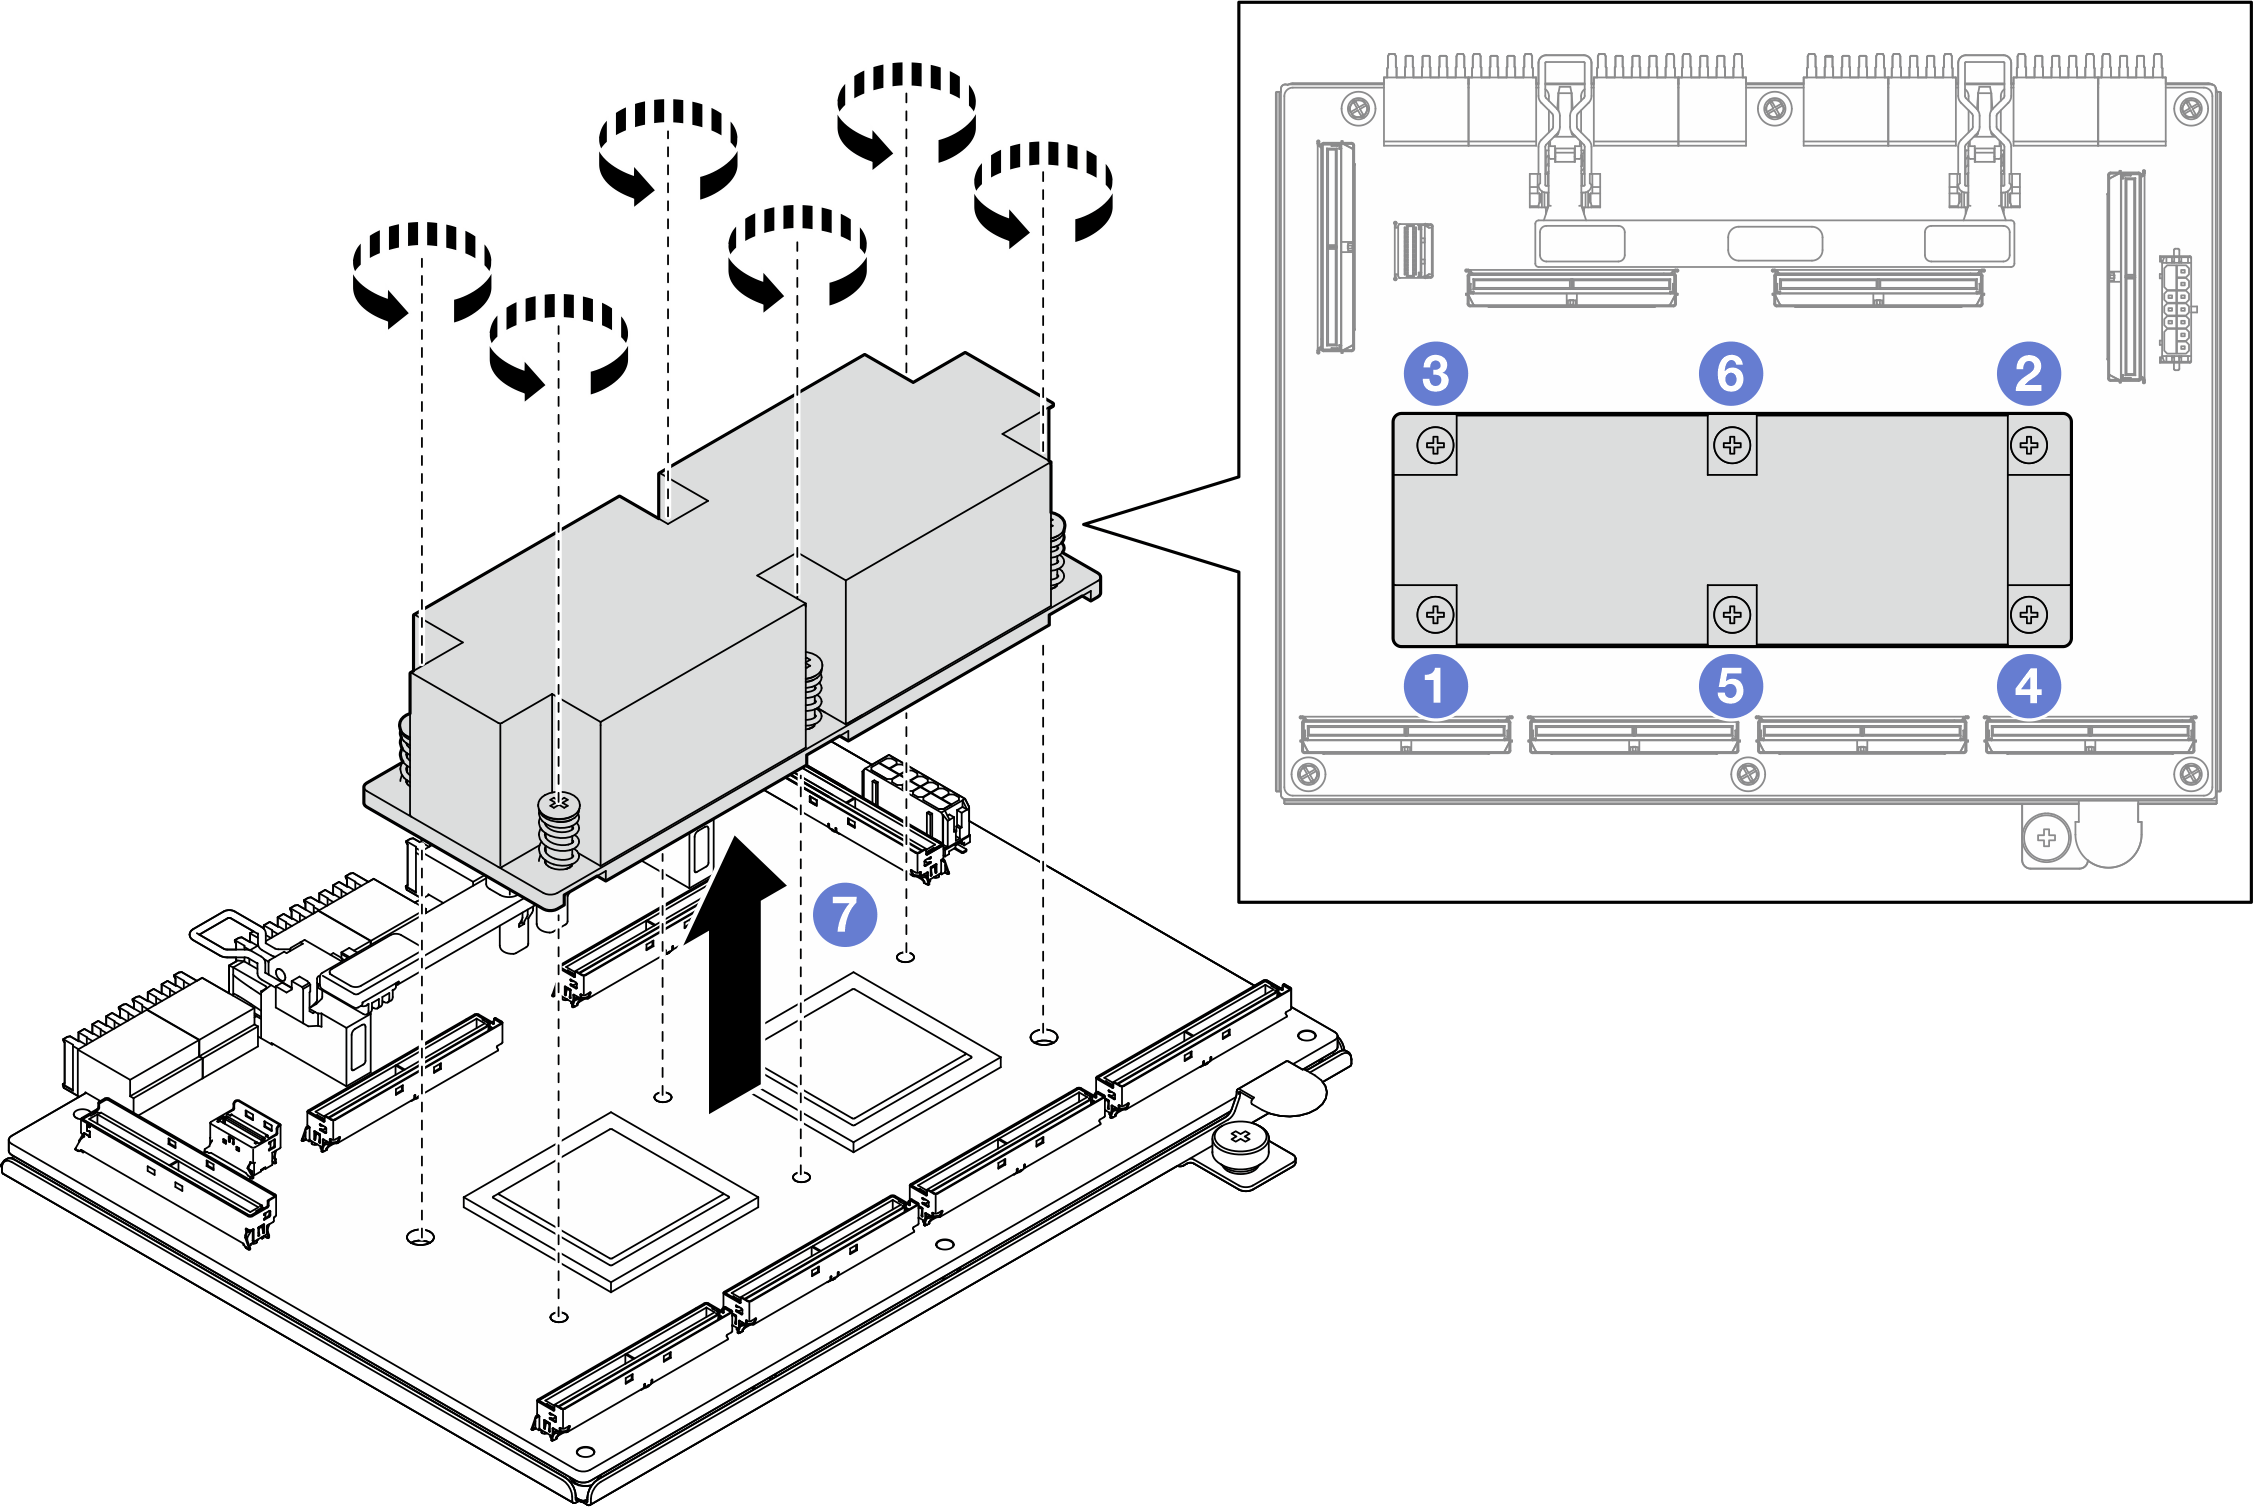
- Remove the six screws from the SXM5 PCIe switch board to separate it from the supporting sheet metal.Figure 3. SXM5 PCIe switch board disassembly

- Recycle the component in compliance with local regulations.
- Remove the heat sink from the SXM5 PCIe switch board.
Demo video
Give documentation feedback