Install a hot-swap power supply unit
Follow instructions in this section to install a hot-swap power supply unit.
About this task
CAUTION

High touch current. Connect to earth before connecting to supply.
Attention
- Read Installation Guidelines and Safety inspection checklist to ensure that you work safely.
- Touch the static-protective package that contains the component to any unpainted metal surface on the server; then, remove it from the package and place it on a static-protective surface.
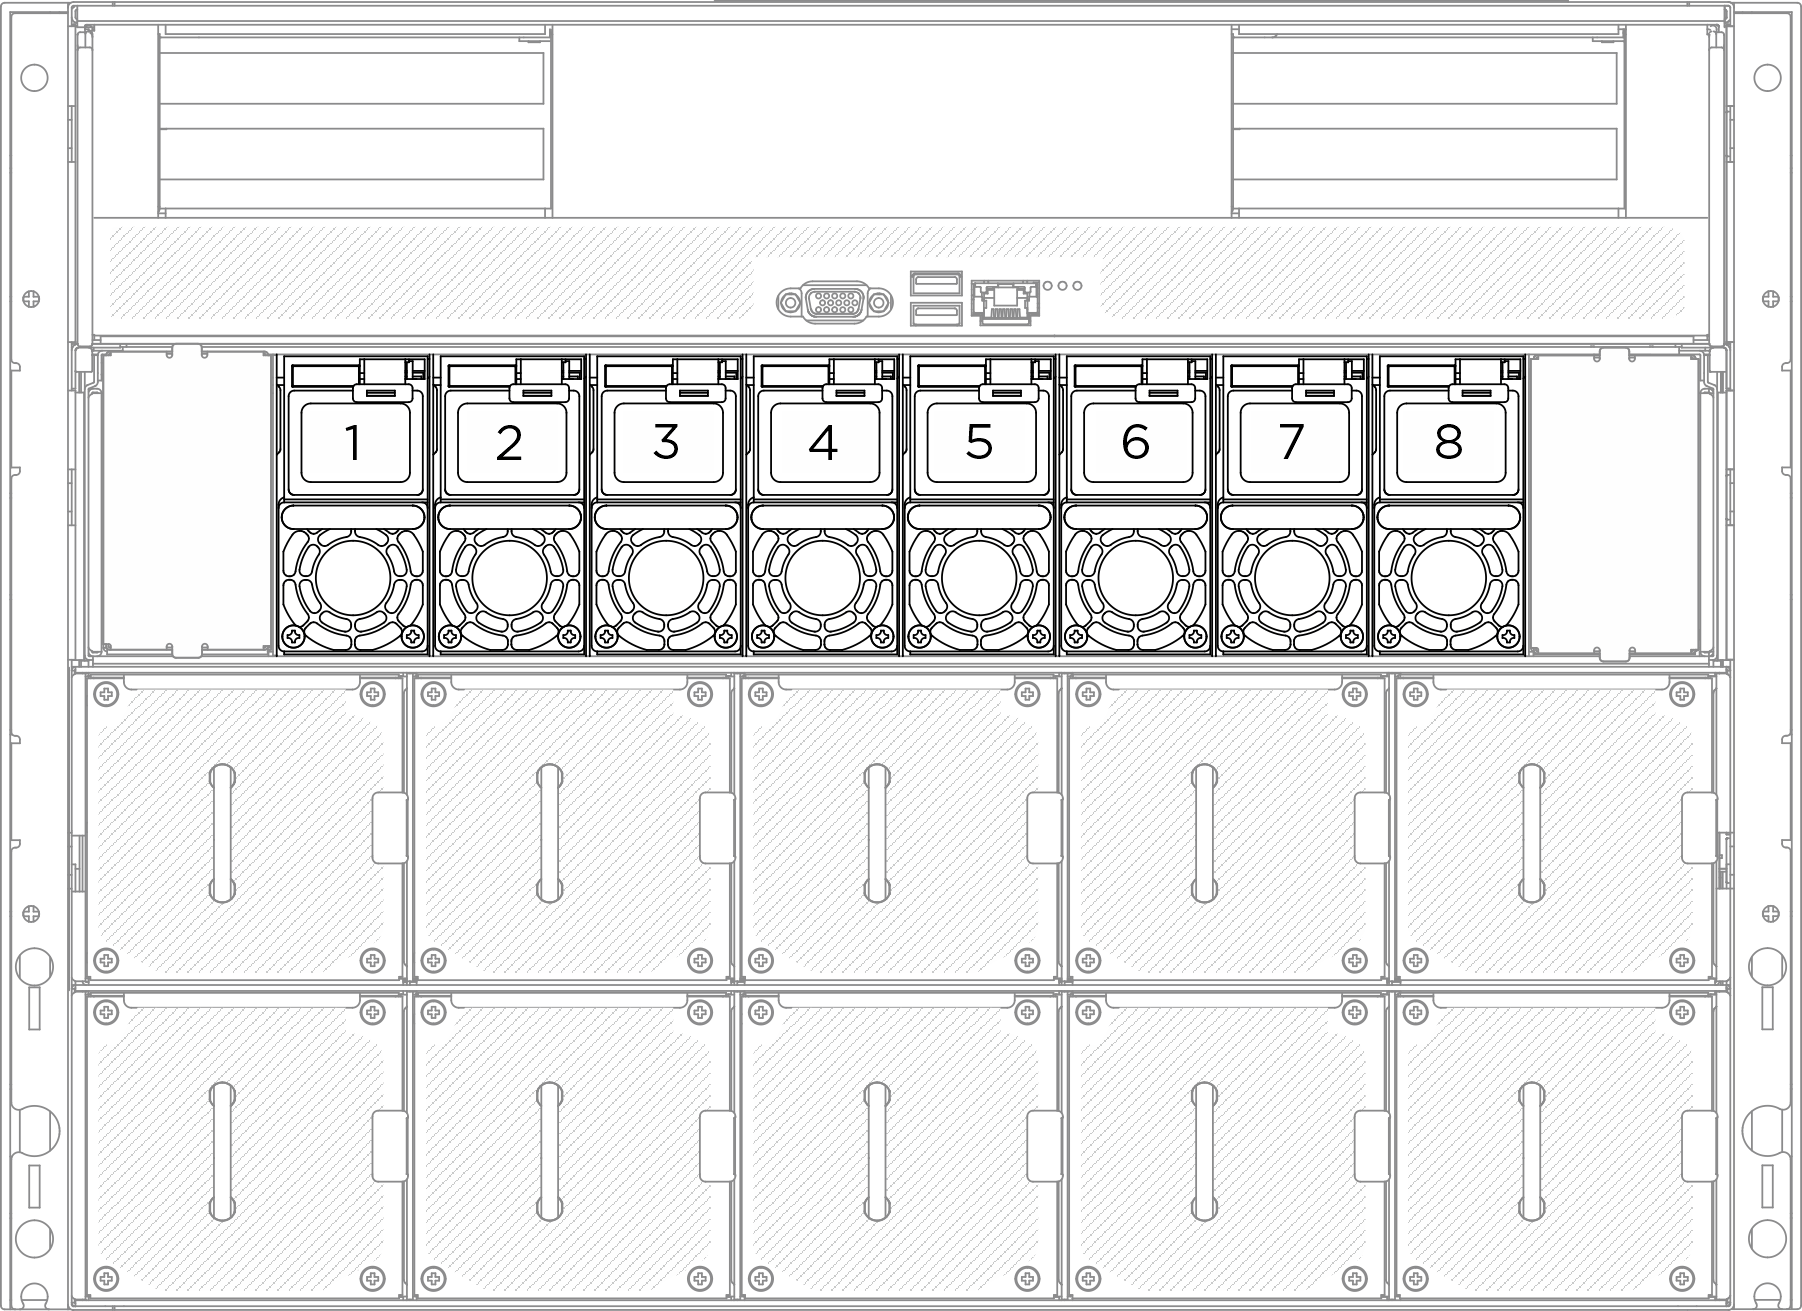
- The following illustration shows the power supply bay numbering:Figure 1. Power supply bay numbering

Firmware and driver download: You might need to update the firmware or driver after replacing a component.
Go to Drivers and Software download website for ThinkSystem SR680a V3 to see the latest firmware and driver updates for your server.
Go to Update the firmware for more information on firmware updating tools.
Procedure
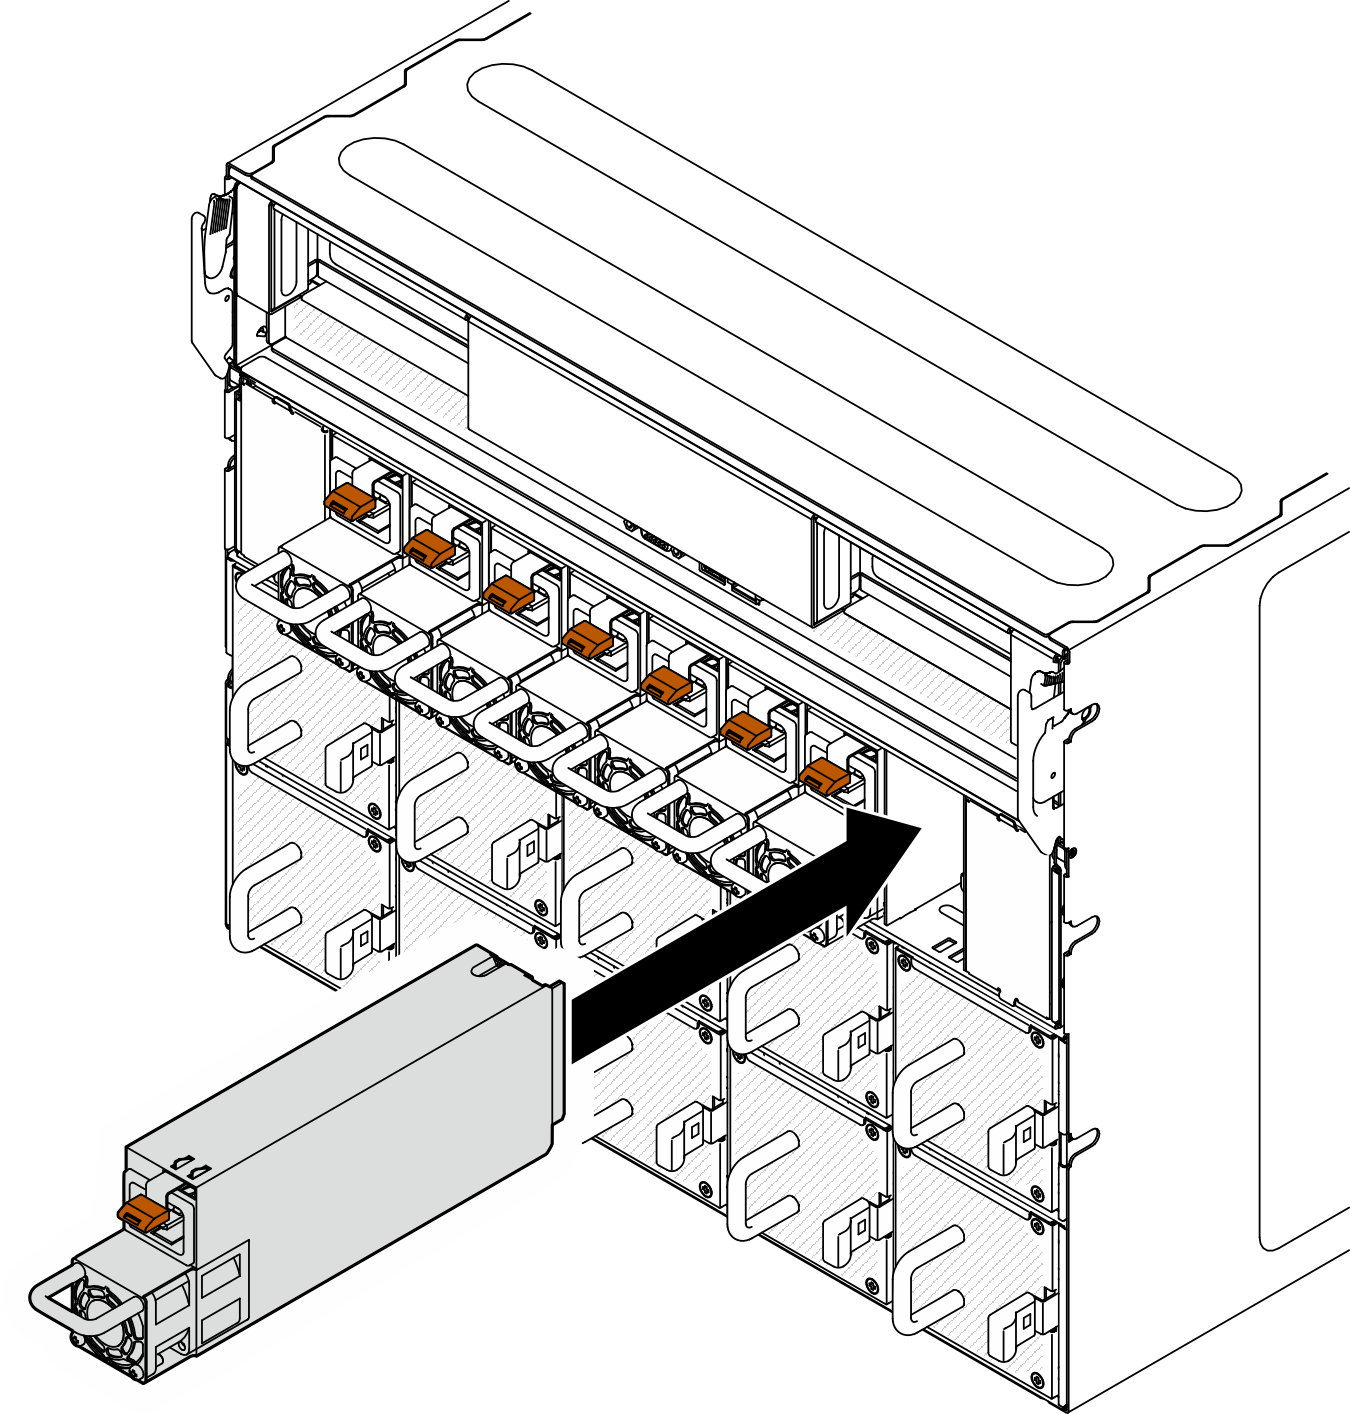
Grasp the handle and slide the power supply unit into the power supply bay until it clicks into place.
Figure 2. Power supply unit installation


After you finish
- Pull the handle to see if the power supply unit is properly installed. If it slides out, reinstall it.
- Connect the power cord to the power supply unit, and make sure it's properly connected to the power.
- Complete the parts replacement. See Complete the parts replacement.
- If the server is turned off, turn on the server. Ensure that both the power input LED and the power output LED on the power supply are lit, indicating that the power supply is operating properly.
Give documentation feedback