Install a hot-swap power supply unit
Use this procedure to install a hot-swap power supply unit.

To avoid a shock hazard:
- Connect all power cords to a properly wired and grounded electrical outlet/source.
- Connect any equipment that will be attached to this product to properly wired outlets/sources.
- When possible, use one hand only to connect or disconnect signal cables.
- Never turn on any equipment when there is evidence of fire, water, or structural damage.
- The device might have more than one power cord, to remove all electrical current from the device, ensure that all power cords are disconnected from the power source.
To avoid a shock hazard:
- To connect or disconnect -48V dc power cords when you need to remove/install redundancy power supply unit(s).
| To Connect: | To Disconnect: |
|---|---|
|
|
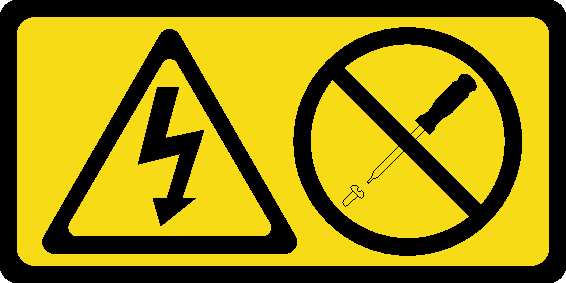
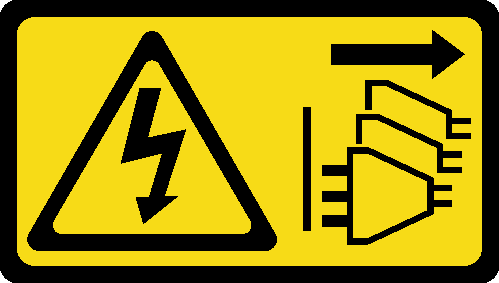
Never remove the cover on a power supply or any part that has this label attached. Hazardous voltage, current, and energy levels are present inside any component that has this label attached. There are no serviceable parts inside these components. If you suspect a problem with one of these parts, contact a service technician.
- 750-watt platinum power supply
- Input power 115V or 220V ac
- 1100-watt platinum power supply
- Input power 115V or 220V ac
- 1600-watt platinum power supply
- Input power 115V or 220V ac
Before installing a hot-swap power supply:
Read the safety information and installation guidelines (see Safety and Installation Guidelines).
Touch the static-protective package that contains the component to any unpainted metal surface on the server; then, remove it from the package and place it on a static-protective surface.
- If the server is in a rack, adjust the cable management arm (CMA) to gain access to the power supply bay.Figure 1. CMA adjustmentIf you have installed the 2U CMA Upgrade Kit for Toolless Slide Rail or Toolless Slide Rail Kit with 2U CMA, do the following:
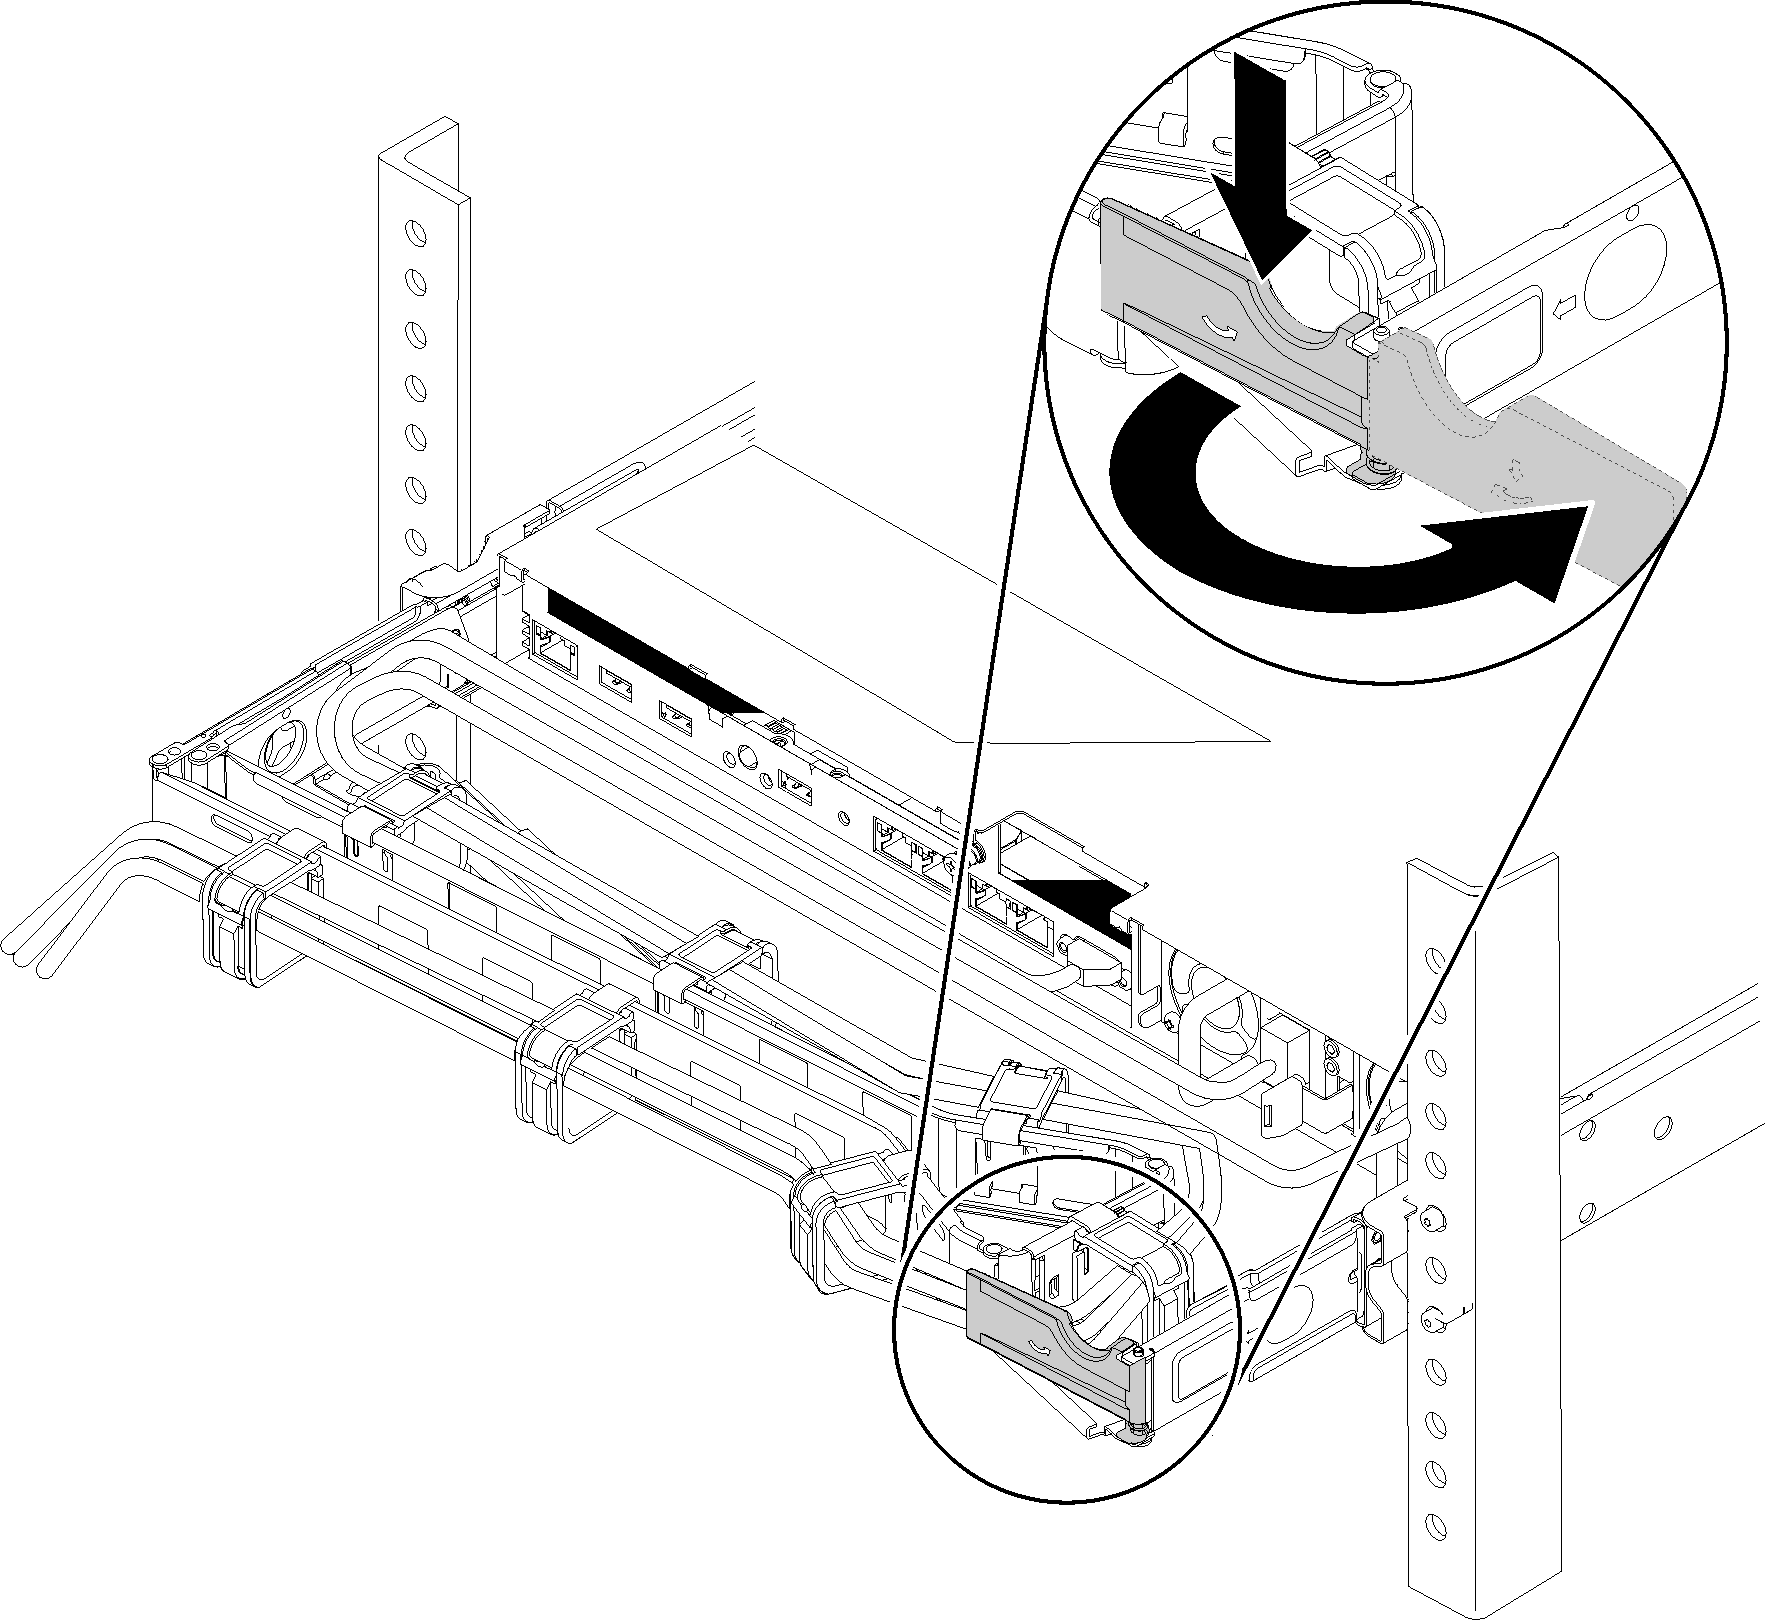
- Press down the stop bracket and rotate it to the open position.
- Rotate the CMA out of the way to gain access to the power supply bay.
If the power supply unit to be installed comes with different wattage than the one that is already installed, turn off the server and peripheral devices, and disconnect the power cords and all external cables; then, remove the installed power supply unit (see Remove a hot-swap power supply unit).
ImportantDo not mix power supplies with different wattages in the same server.
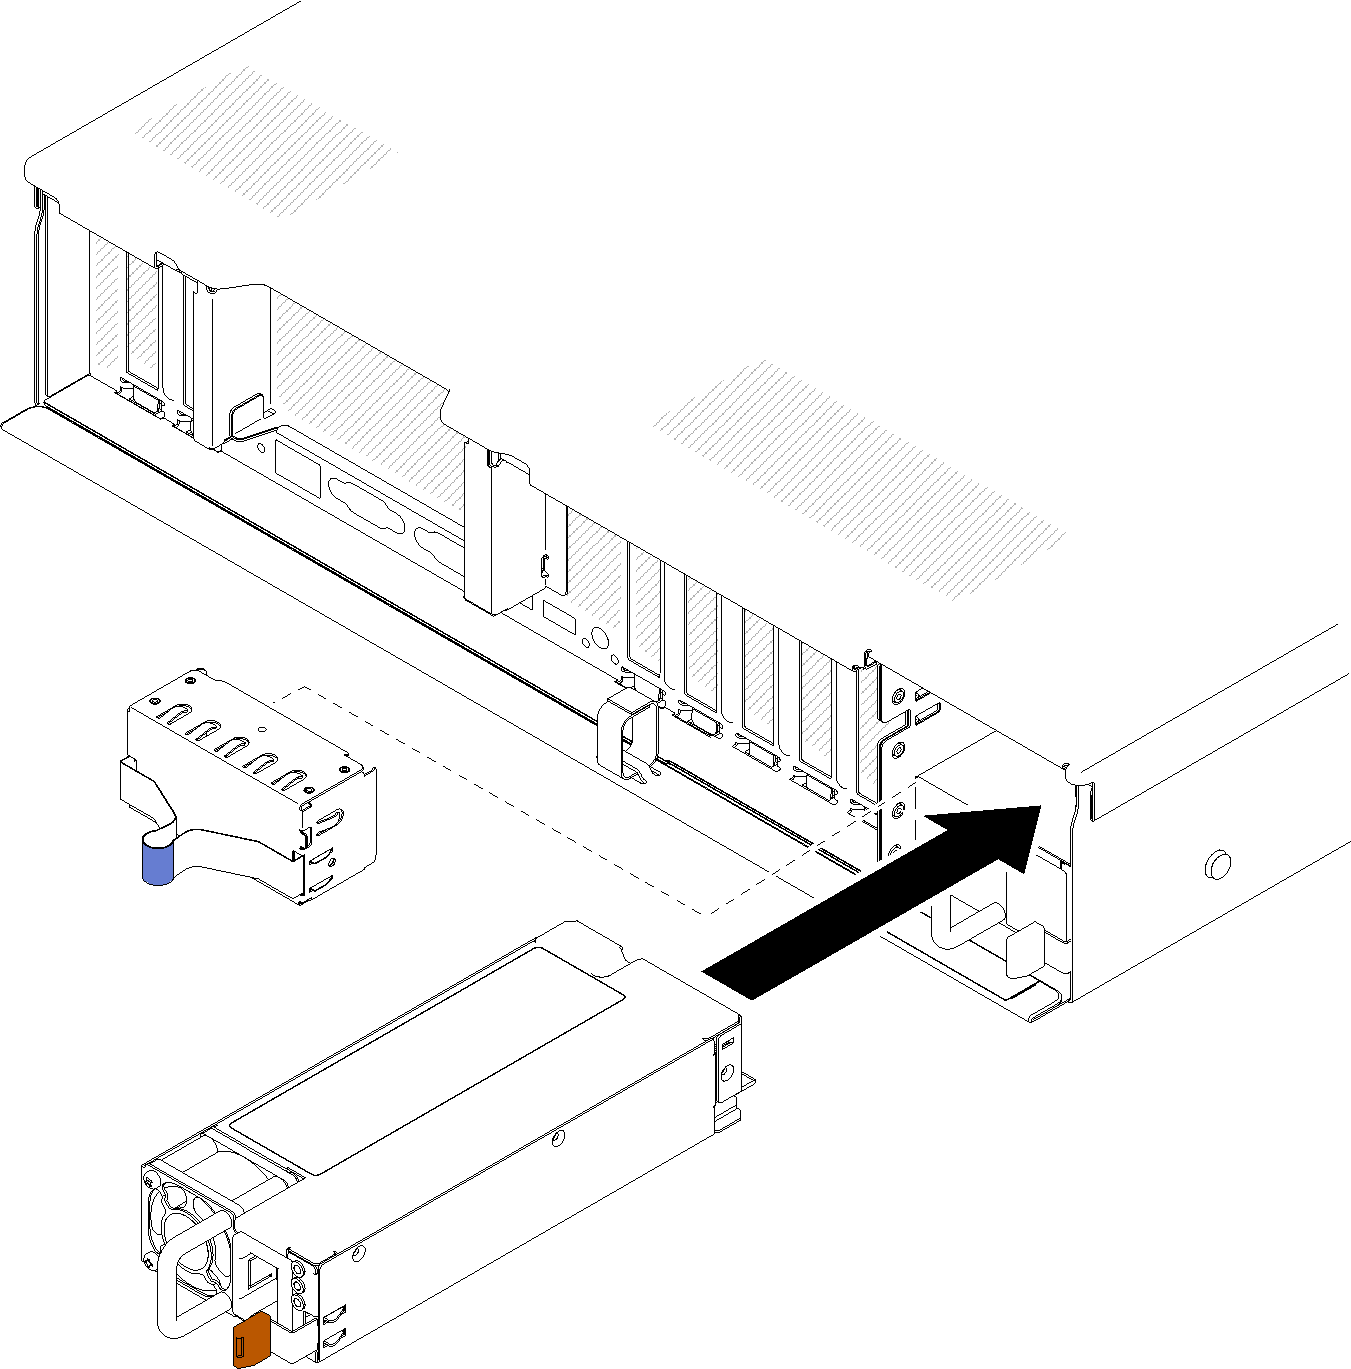
To install a power supply unit, complete the following steps:
- Grasp the handle on the rear of the power supply, and slide it into the power-supply bay until it clicks into place. Figure 2. Power supply unit installation
 Note
Note- Pull the handle to try if the power supply unit is properly installed. If it slides out, reinstall it.
- Power supply 1 is on the bottom, while power supply 2 is on the top. For more details, see Rear view.
Demo video