Remove the 3.5-inch/2.5-inch hot-swap drive backplane
Follow instructions in this section to remove the 3.5-inch/2.5-inch hot-swap drive backplane.
About this task
- S002
 CAUTIONThe power-control button on the device and the power switch on the power supply do not turn off the electrical current supplied to the device. The device also might have more than one power cord. To remove all electrical current from the device, ensure that all power cords are disconnected from the power source.
Read the Installation guidelines to ensure that you work safely.
Turn off the server and peripheral devices, and disconnect the power cords and all external cables (see Power off the server).
If the server is in a rack, remove it from the rack.
Remove any locking device that secures the server cover, such as a Kensington lock or a pad lock.
Procedure
- Disconnect the cables from the backplane.Attention
- Follow the instructions below to disconnect the cable from the SATA hard disk drive connector (especially SATA hard disk drive 4 and 5 connectors):
 Press on the sides of the connector on the cable with your thumb and middle finger.
 Release the latch with your index finger as illustrated.
 Carefully pull the cable out of the connector on the system board.
Figure 1. Disconnecting the cable from the SATA hard disk drive connector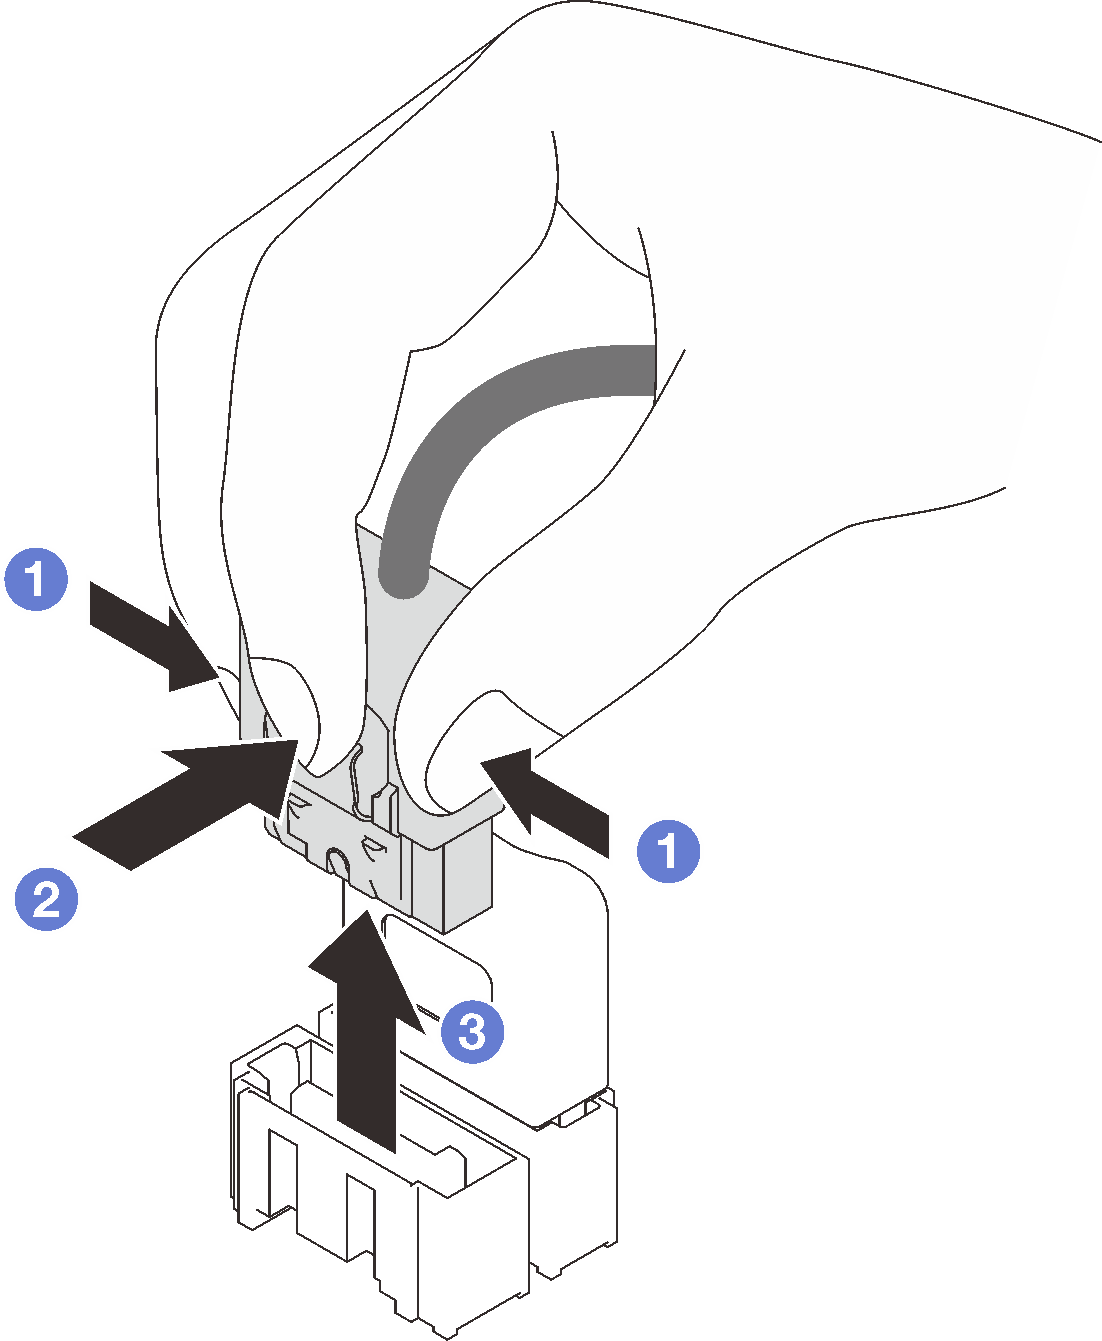
To avoid damaging the system board, make sure to follow the instructions in Internal cable routing when disconnecting cables from the system board.
- Remove the hot-swap drive backplane.
- Pull out the blue plunger that secures the backplane.
- Slightly lift the backplane to disengage it from the drive cage.
- Remove the backplane from the drive cage.
Figure 2. Removing the hot-swap drive backplane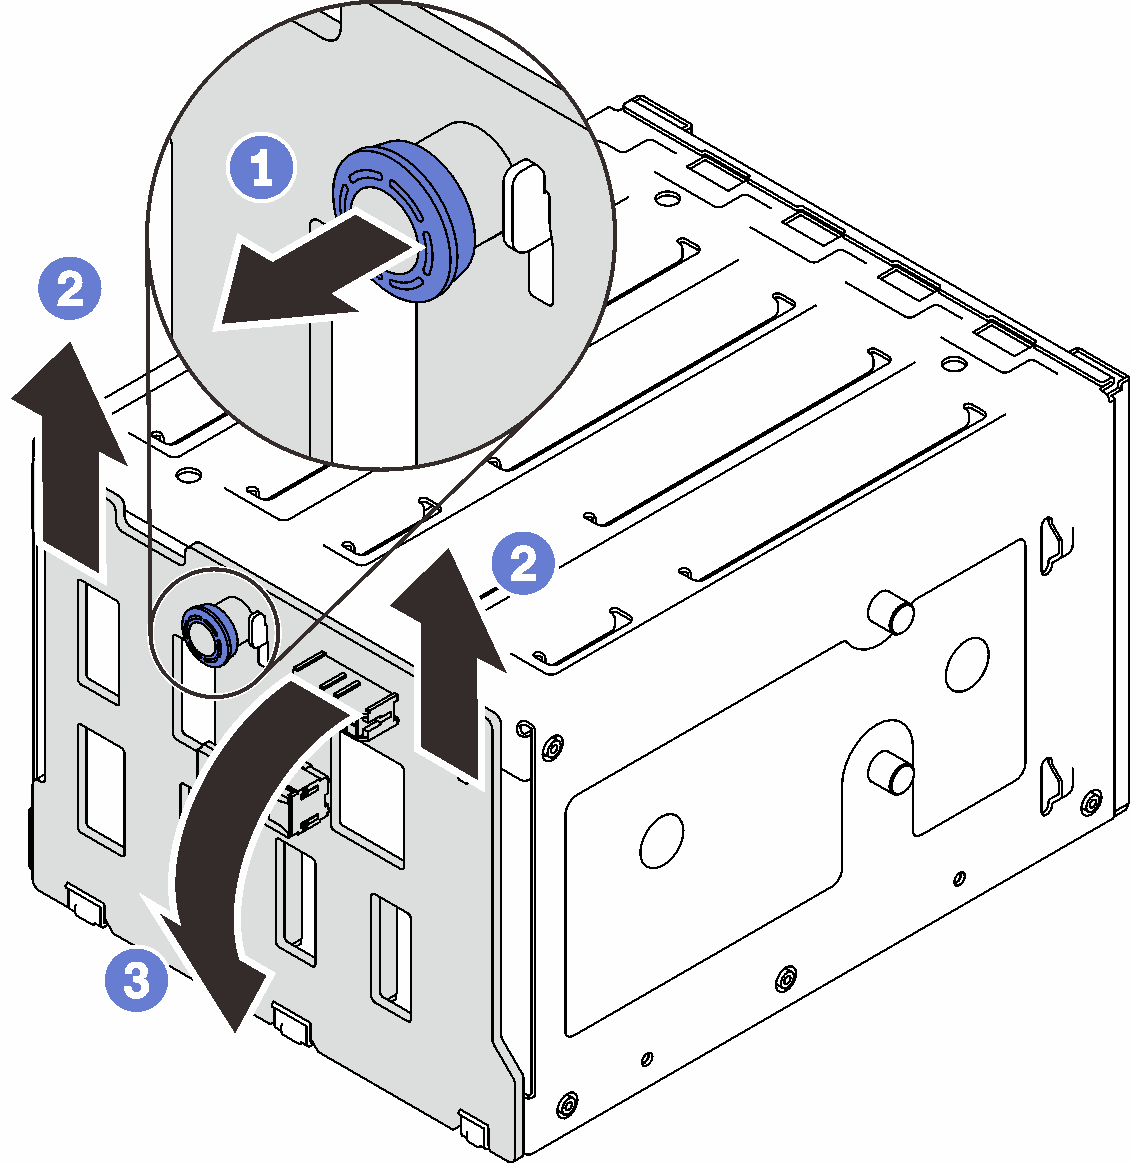
After this task is completed
If you are instructed to return the component or optional device, follow all packaging instructions, and use any packaging materials for shipping that are supplied to you.
Demo video