Install the drive cage (bay 0-1)

Follow instructions in this section to install the bay 0 drive cage or bay 1 drive cage.

About this task

S002
disconnect all power
CAUTION
The power-control button on the device and the power switch on the power supply do not turn off the electrical current supplied to the device. The device also might have more than one power cord. To remove all electrical current from the device, ensure that all power cords are disconnected from the power source.
Attention

Procedure

Note
Install the bay 0 drive cage first; then, proceed to install the bay 1 drive cage.

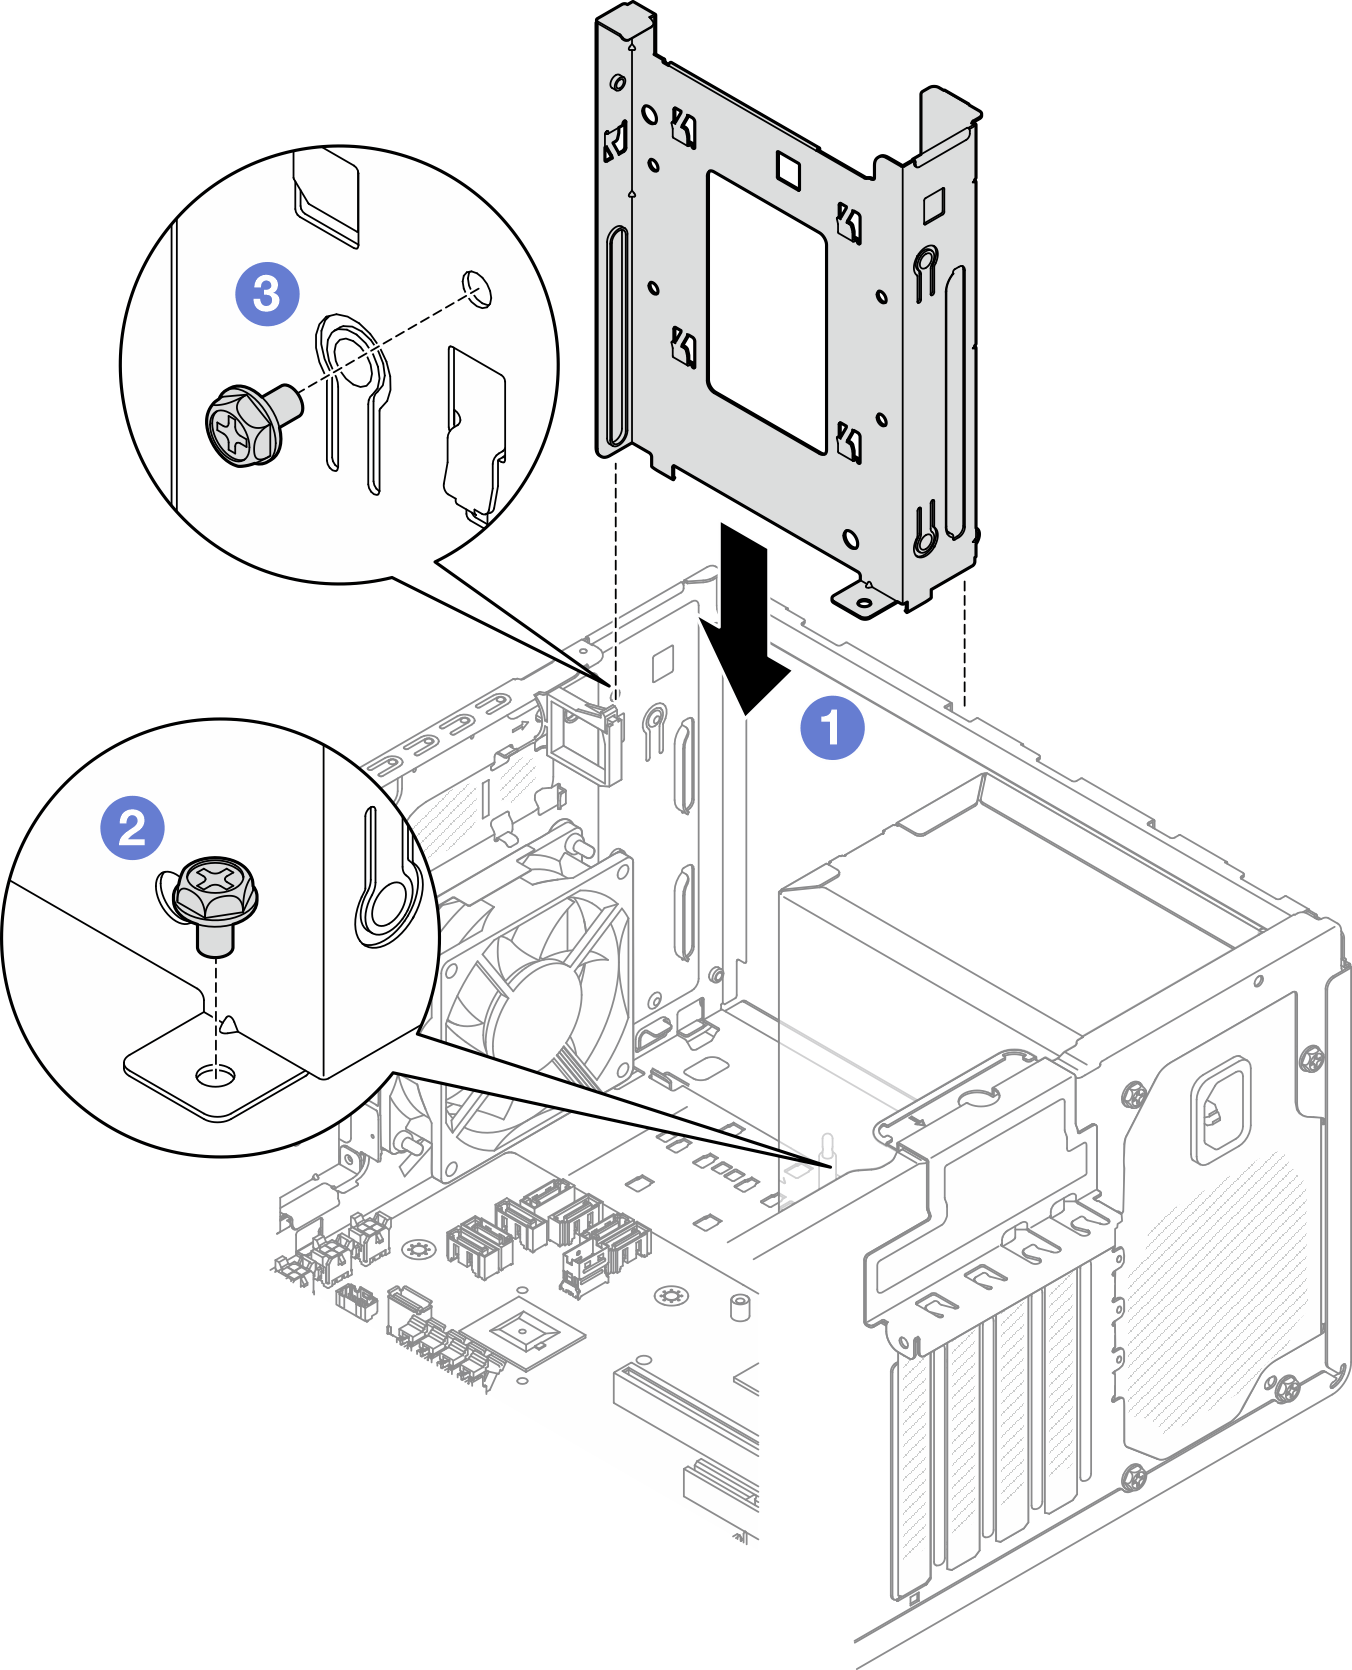
  1. Install the bay 0 drive cage.
    1. Align the bay 0 drive cage to the slots on chassis; then, install it into the chassis. Make sure the drive cage is seated correctly in the chassis.
    2. From the inside of the chassis, fasten the screw that secures the bay 0 drive cage to the chassis.
    3. From the outside of the chassis, fasten the screw that secures the bay 0 drive cage to the chassis.
      Figure 1. Installing drive cage to bay 0
      Installing drive cage to bay 0
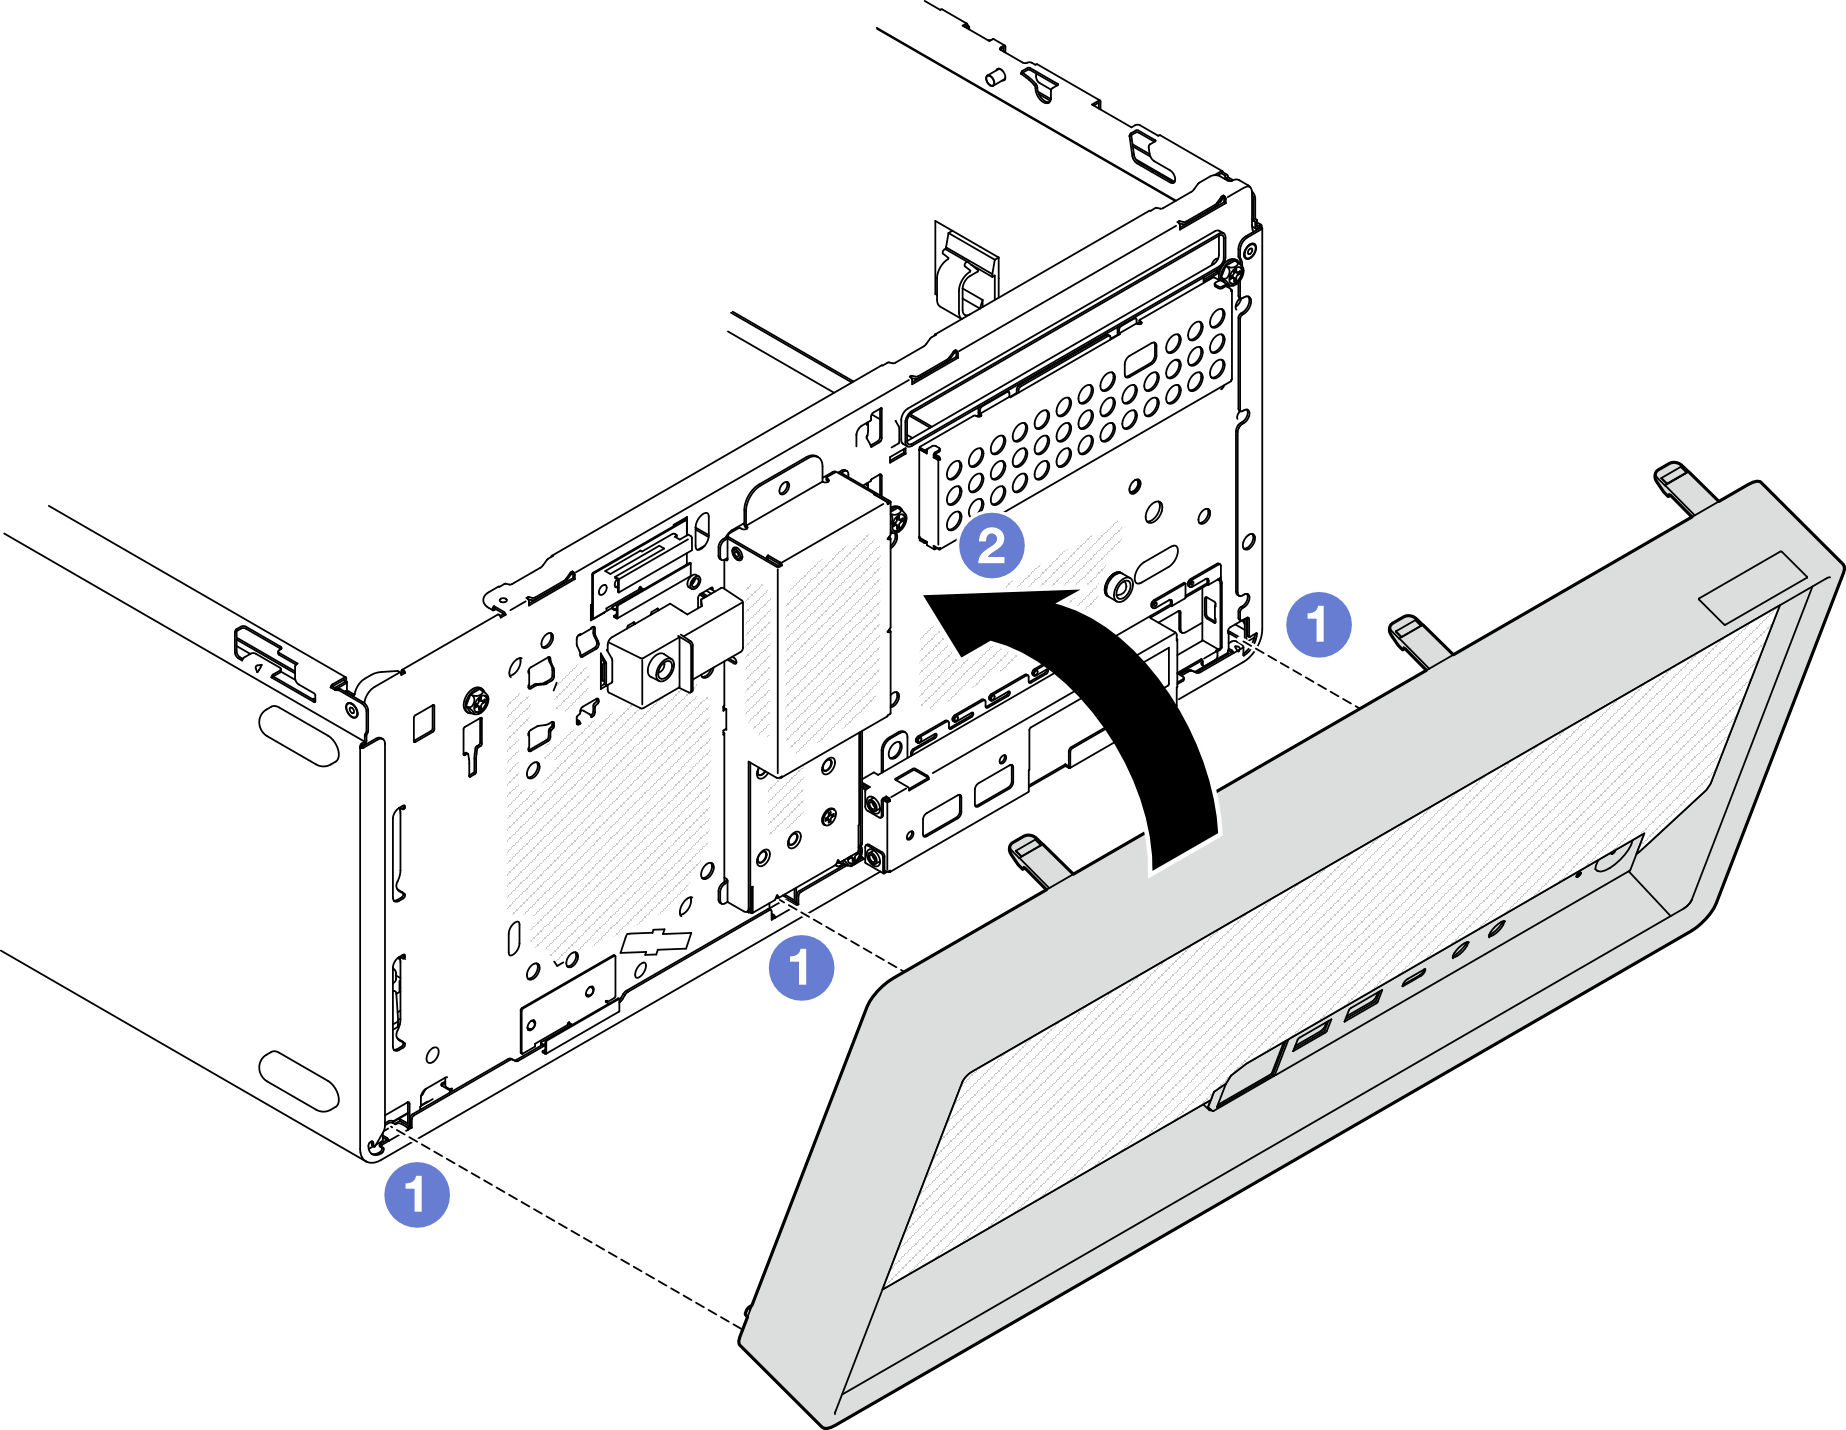
  2. Install the front bezel.
    1. Insert the three plastic tabs on the bottom of the front bezel with the corresponding slots on the front of the chassis.
    2. Pivot the front bezel towards to chassis until it snaps into place.
      Figure 2. Installing the front bezel
      Installing the front bezel
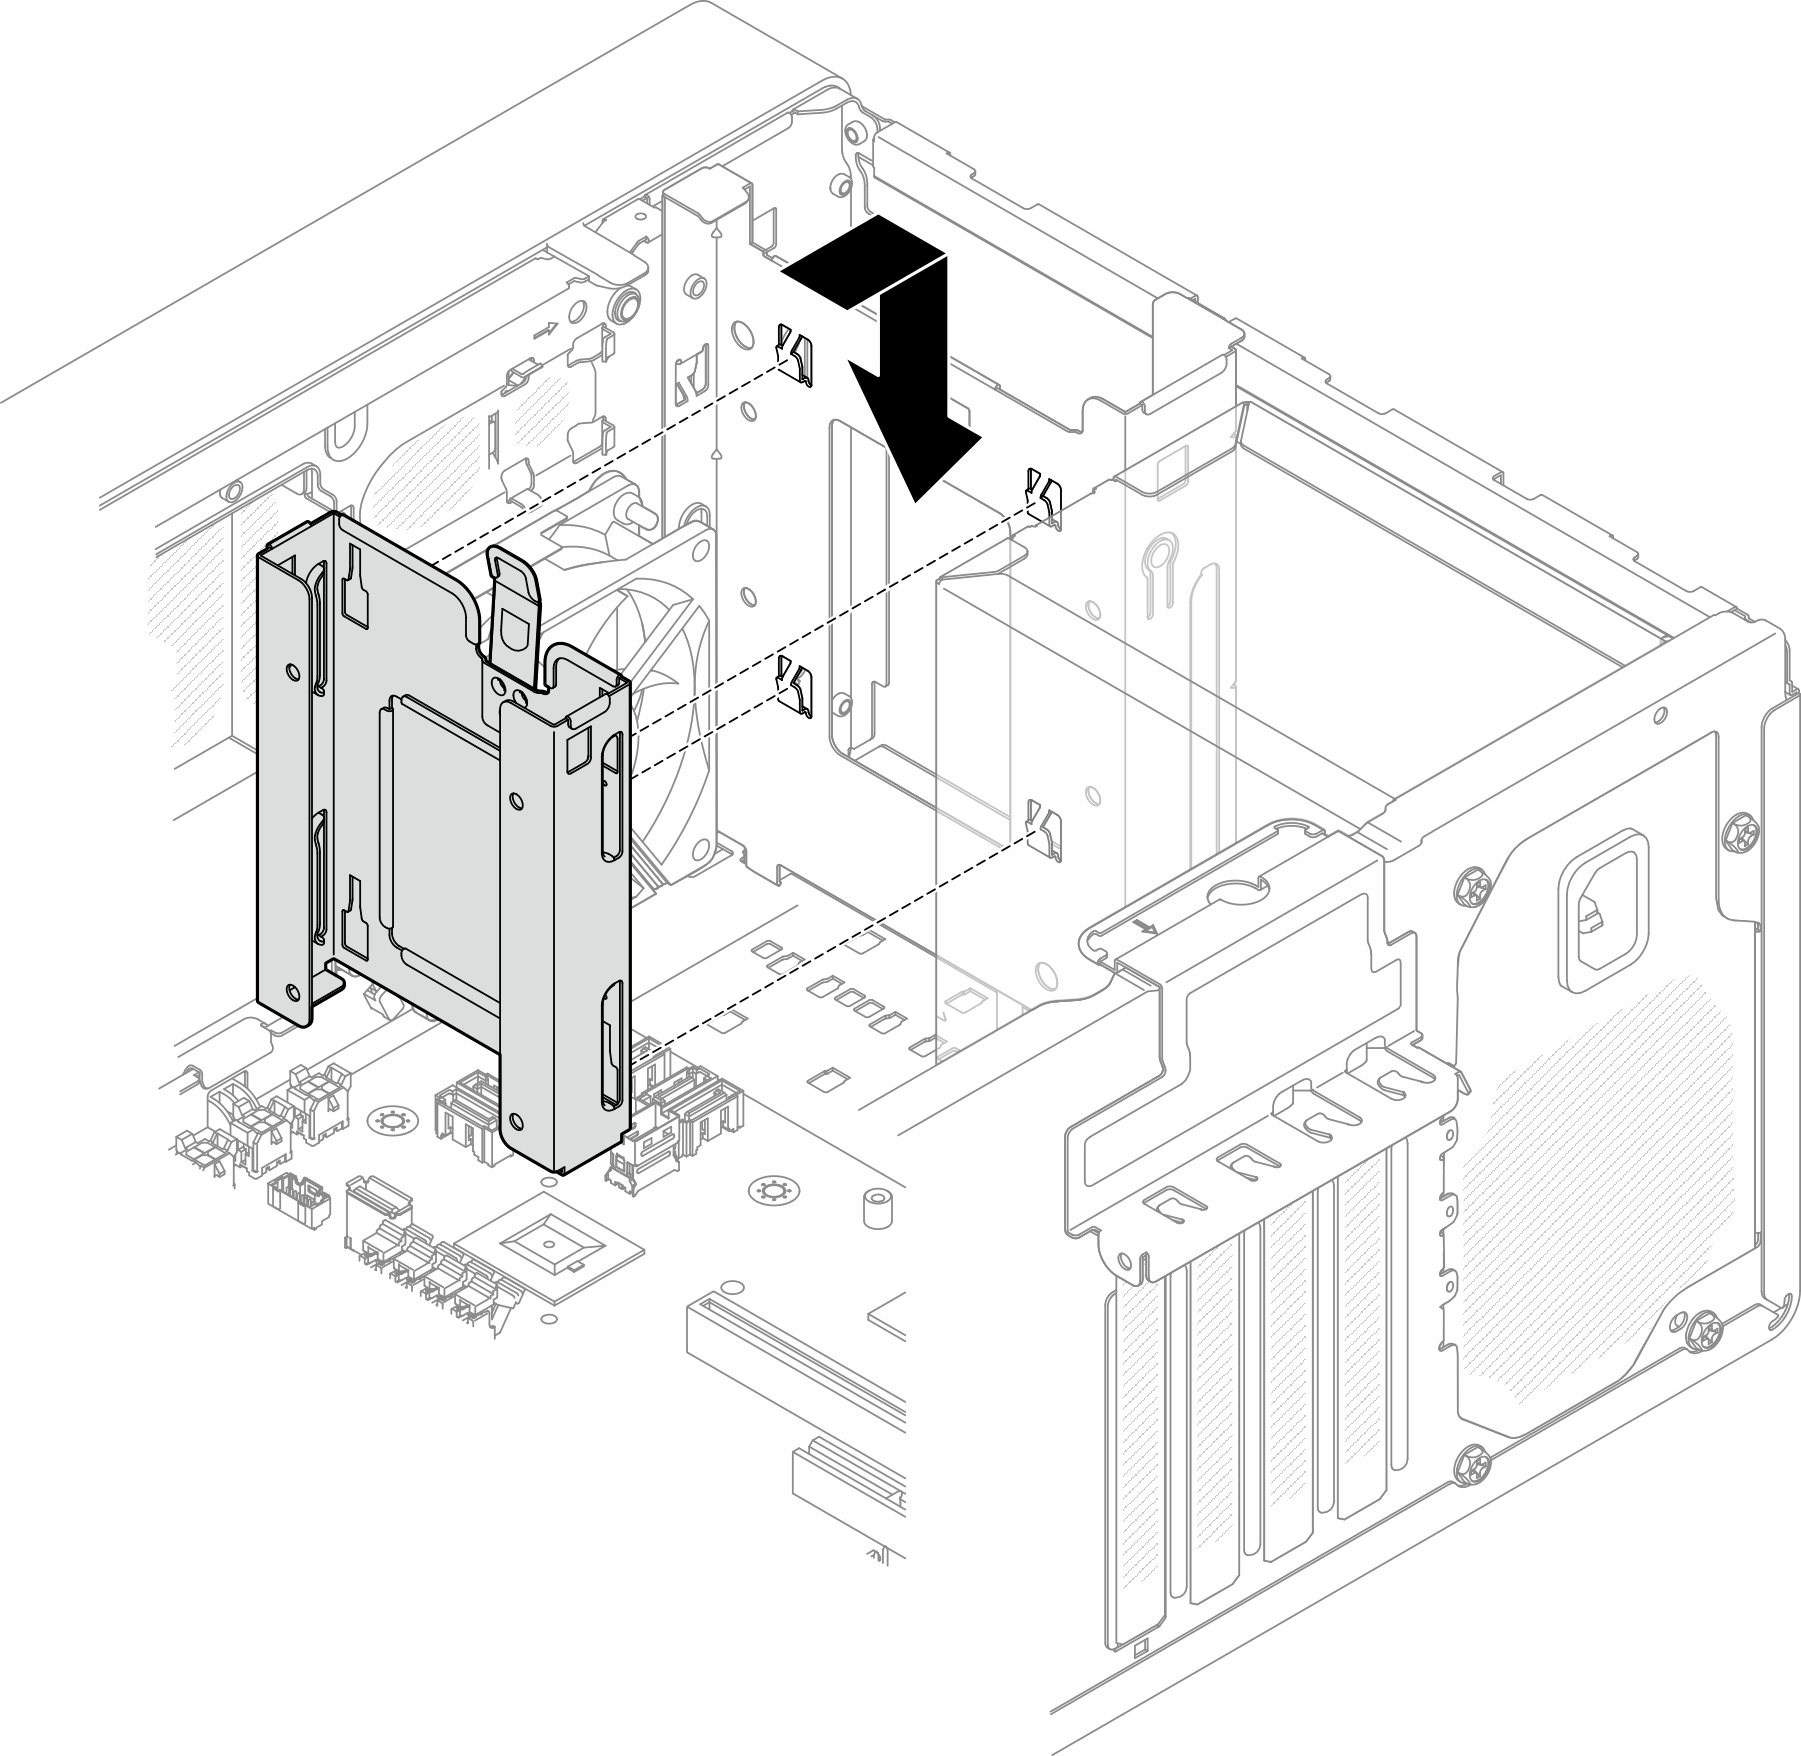
  3. Install the bay 1 drive cage.

    Align the four hooks on both drive cages, and attach bay 1 drive cage to bay 0 drive cage; then, slide the bay 1 drive cage downward until the four hooks on both drive cages are fully engaged. Make sure the latch on the bay 1 drive cage is also engaged with the hook on bay 0 drive cage.

    Figure 3. Installing the drive bay 1 cage
    Installing the drive bay 1 cage
After you finish
  1. Install simple-swap drives if necessary. See Install a simple-swap drive (bay 0-1).

  2. Install the server cover. See Install the server cover.

  3. Complete the parts replacement. See Complete the parts replacement.

Demo video

Watch the procedure on YouTube