Remove a simple-swap drive (bay 0-1)

Follow instructions in this section to remove a simple-swap drive from bay 0 or bay 1.

S002
disconnect all power
CAUTION
The power-control button on the device and the power switch on the power supply do not turn off the electrical current supplied to the device. The device also might have more than one power cord. To remove all electrical current from the device, ensure that all power cords are disconnected from the power source.

About this task

Attention

Procedure

  1. Make preparation for this task.
    1. Remove the server cover. See Remove the server cover.
      Attention

      The heat sinks and processor could be very hot. To avoid burning yourself, wait for a few minutes after turning off the server before you remove the server cover.

  2. Disconnect the cables from the drive assembly.
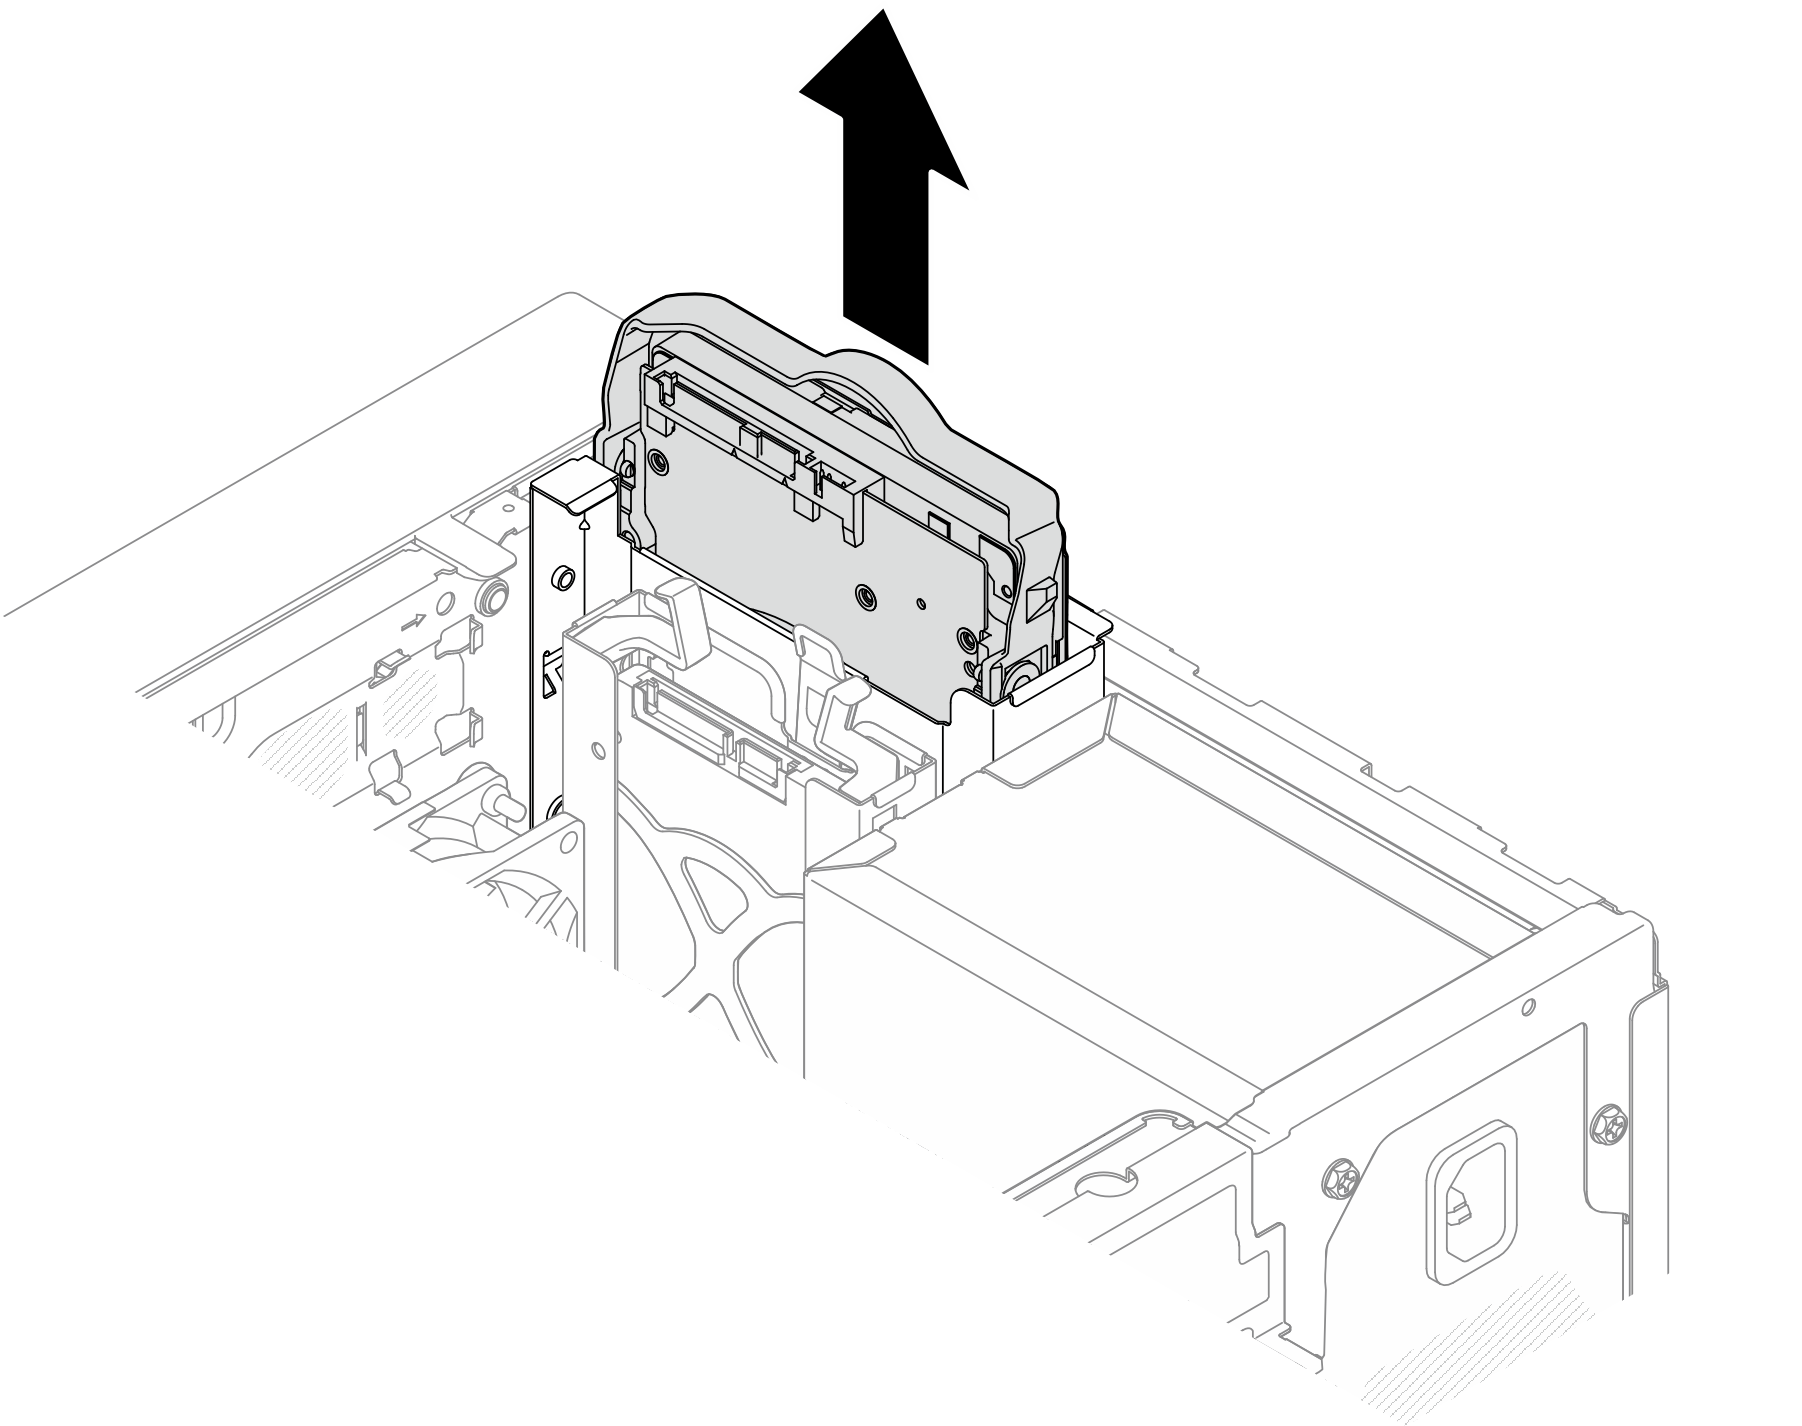
  3. Remove the drive assembly.

    Remove the 3.5-inch drive assembly from drive bay 0

    Hold the retainer handle, and lift the drive assembly out of the drive bay.
    Figure 1. Removing drive assembly from drive bay 0

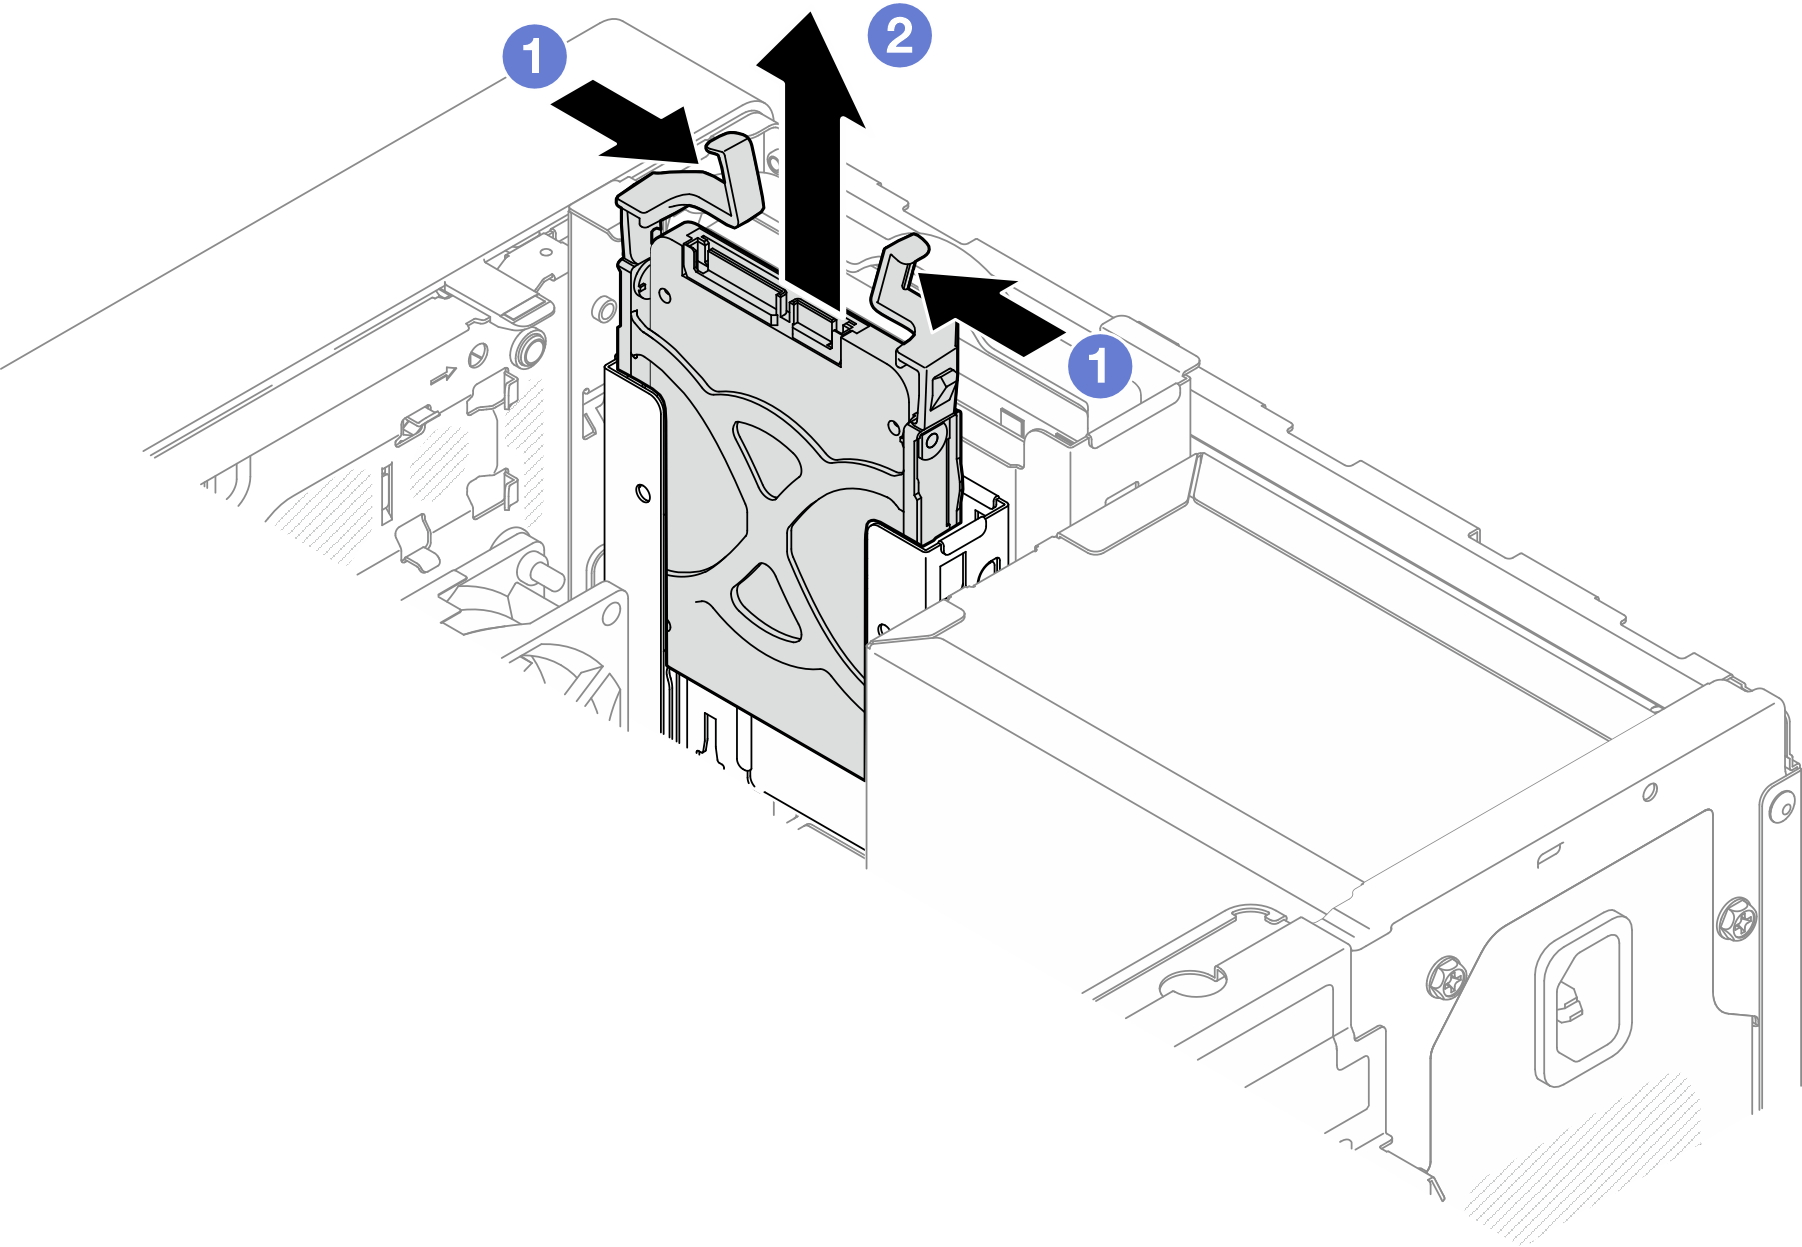
    Remove the 2.5-inch drive assembly from drive bay 1

    1. Pinch the retainer handles.
    2. Lift the drive assembly out from the drive bay.
      Figure 2. Removing drive assembly from drive bay 1
      Removing drive assembly from drive bay 2
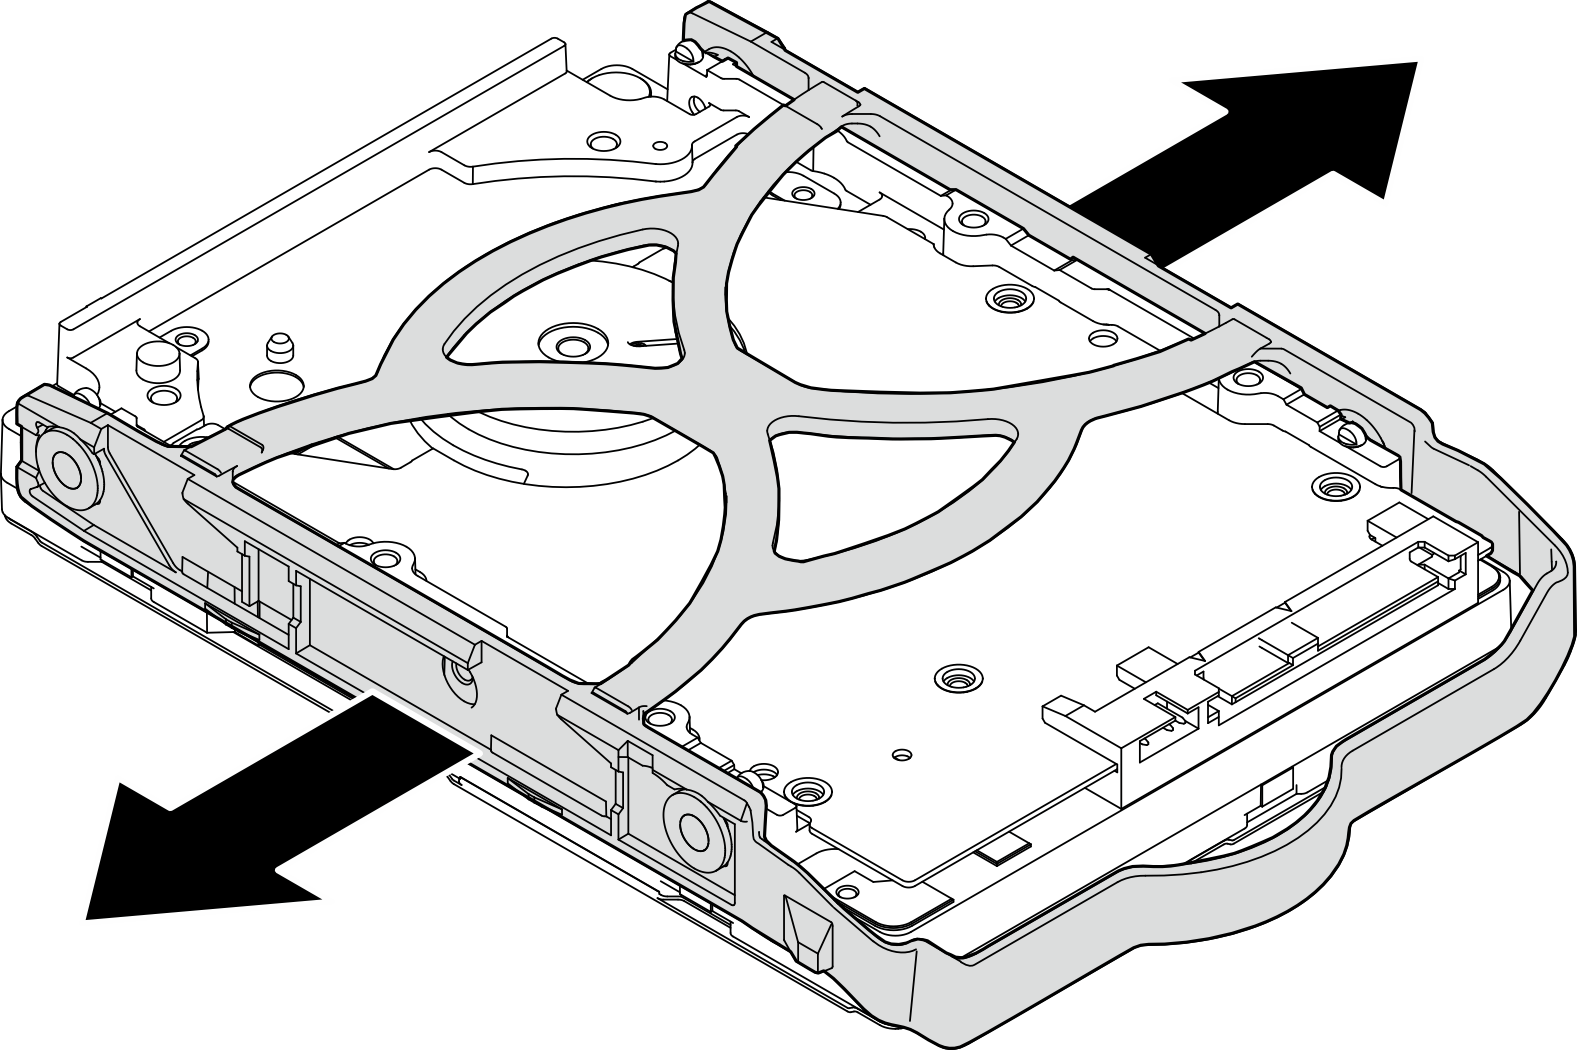
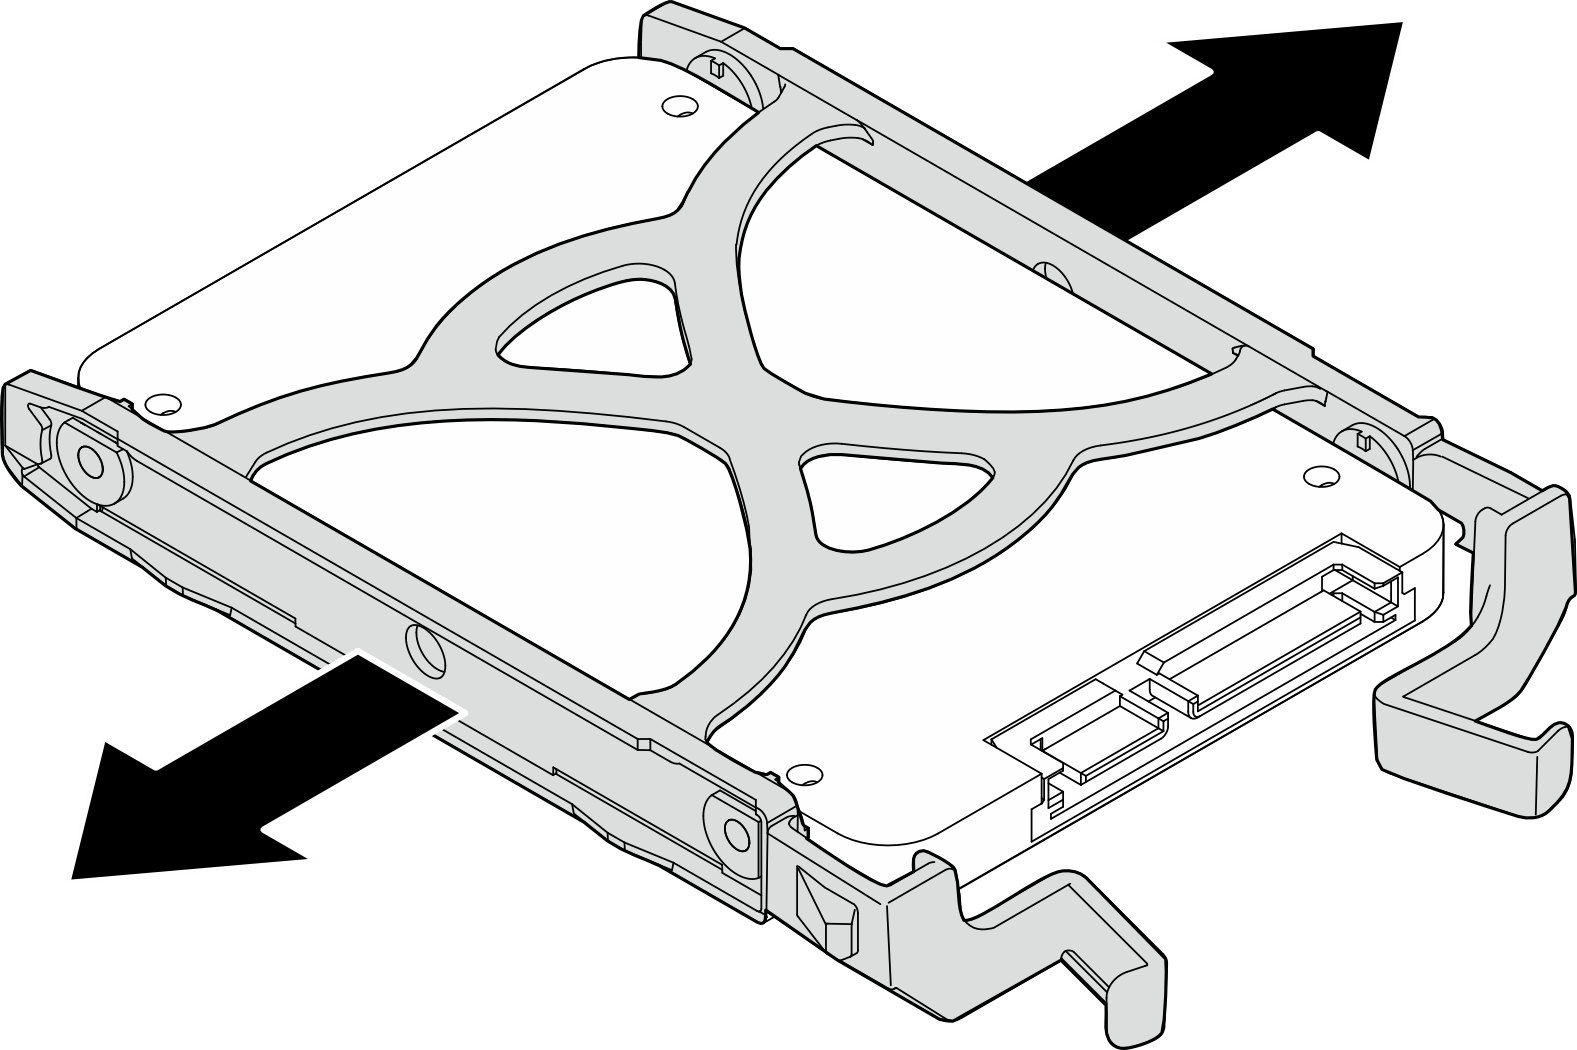
  4. If necessary, remove the drive from the retainer. Tear both sides of the retainer apart, and remove the drive.
    Remove a 3.5-inch drive from the retainer
    Figure 3. Removing a 3.5-inch drive from the retainer
    Removing a 3.5-inch drive from the retainer
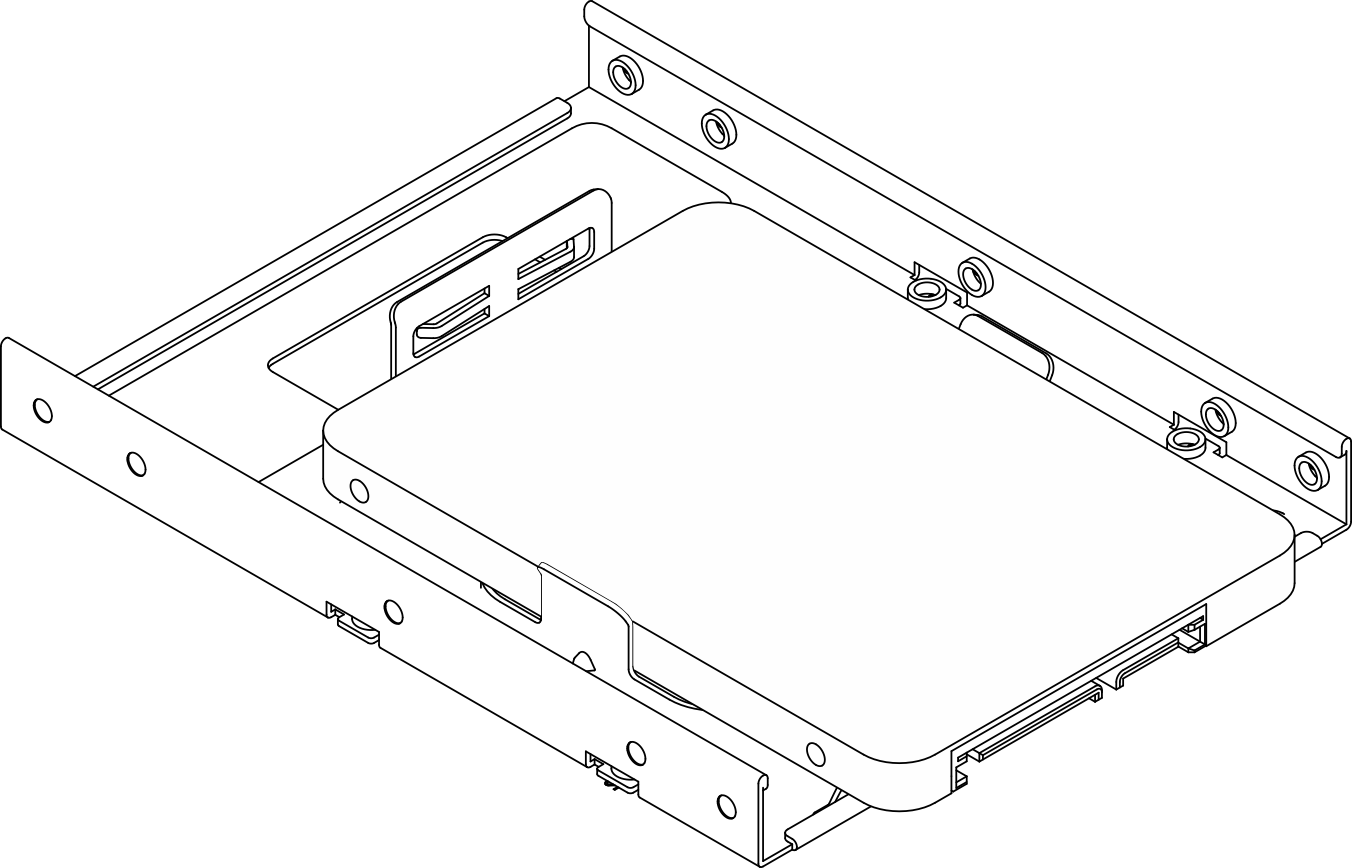
    Note
    Depending on the configuration, the 3.5-inch drive may be the model in the illustration below.

    Remove a 2.5-inch drive from the retainer
    Figure 4. Removing a 2.5-inch drive from the retainer
    Removing a drive from drive retainer
After you finish
  1. Install a 3.5-inch drive to drive bay 0 or a 2.5-inch drive to drive bay 1. See Install a simple-swap drive (bay 0-1).

  2. If you are instructed to return the component or optional device, follow all packaging instructions, and use any packaging materials for shipping that are supplied to you.

Demo video
Watch the procedure on YouTube