Install the EIOM
Use this information to install the EIOM.


Before you install the EIOM, touch the static-protective package that contains the new EIOM to any unpainted surface on the outside of the server. Then, take the new EIOM out of the package and place it on a static-protective surface.
The minimum networking speed requirement for the EIOM is 1Gbps.
Procedure performed by: customer or field service
Complete the following steps to install the 10GbE cage (SFP+) model EIOM.
- Turn the thumbscrews clockwise.Figure 1. EIOM installation
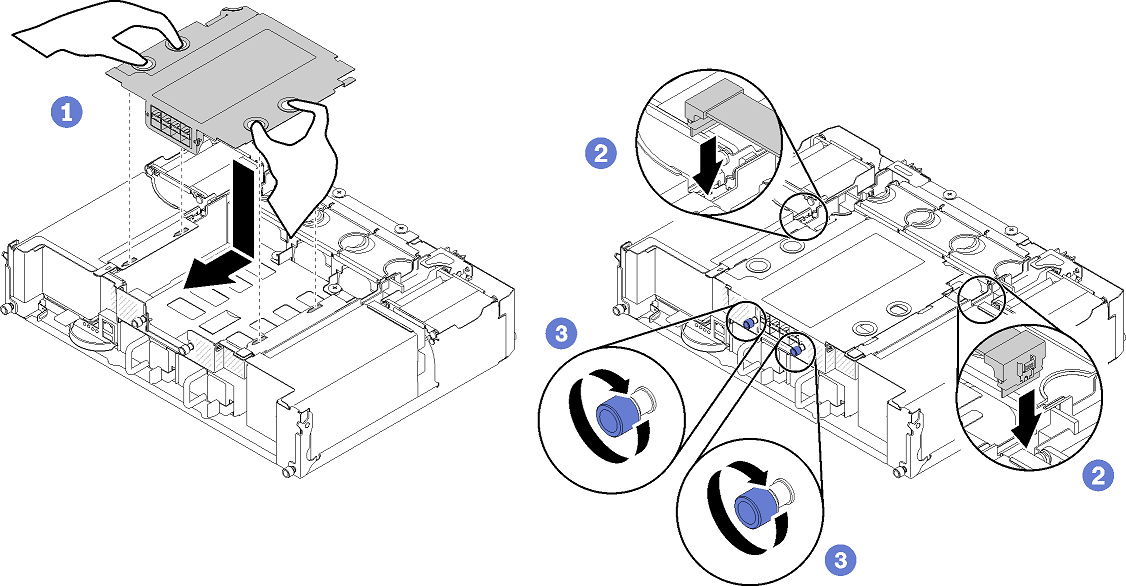
The installation of the EIOM is now complete.
After you install the EIOM, complete the following steps:
Reinstall the shuttle (see http://thinksystem.lenovofiles.com/help/topic/7X21/install_the_shuttle.html).
If the cable management arm is removed, install it (see http://thinksystem.lenovofiles.com/help/topic/7X21/install_the_cable_management_arm.html).
Reconnect the power cords and any cables that you removed.
Push all compute nodes back into the enclosure (see http://thinksystem.lenovofiles.com/help/topic/7X21/install_a_compute_node_in_the_chassis.html).
Turn on all compute nodes.
Exit maintenance mode.
Check the following to verify whether the EOIM has been successfully replaced:
The amber warning light on the node front panel is off.
All the network ports on the EIOM are fully functional.
If you are instructed to return the component or optional device, follow all packaging instructions, and use any packaging materials for shipping that are supplied to you.