Installing a DVD drive
Use this information to install a DVD drive
- You have all the cables and other equipment that are specified in the documentation that comes with the new drive.
- You have checked the instructions that come with the new drive to determine whether you must set any switches or jumpers in the drive.
- You have removed the blue optical drive rails from the side of the old drive and have them available for installation on the new drive.
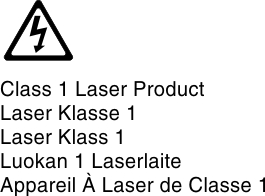
Statement 3

- Do not remove the covers. Removing the covers of the laser product could result in exposure to hazardous laser radiation. There are no serviceable parts inside the device.
- Use of controls or adjustments or performance of procedures other than those specified herein might result in hazardous radiation exposure.
Some laser products contain an embedded Class 3A or Class 3B laser diode.
Note the following. Laser radiation when open. Do not stare into the beam, do not view directly with optical instruments, and avoid direct exposure to the beam.
To install a DVD drive on 4U server models with non-hot-swap power supplies, complete the following steps. For the 5U server model with hot-swap power supplies (Model name: 2582-F4x), please see the next sub-section.
- Read the safety information in Safety and Installation guidelines.
- Follow the instructions that come with the drive to set jumpers or switches, if there are any.NoteYou might find it easier to install the new drive from the front and then attach the cables.
- Turn off the server and all peripheral devices; then, disconnect the power cords and all external cables.
- Remove the bezel (see Removing the bezel).
- Carefully turn the server on its side so that it is lying flat, with the cover facing up.AttentionDo not allow the server to fall over.
- Remove the side cover (see Removing the side cover).
- Touch the static-protective package that contains the new DVD drive to any unpainted metal surface on the server; then, remove the DVD drive from the package and place it on a static-protective surface.
- Stand the server back up in its vertical position.
- Remove the drive retainer clip from the side of the drive cage of bay 1 or bay 2. Slide the drive retainer clip to the front to remove it from the drive cage; then, snap the drive retainer clip into the screw holes on the side of the drive.
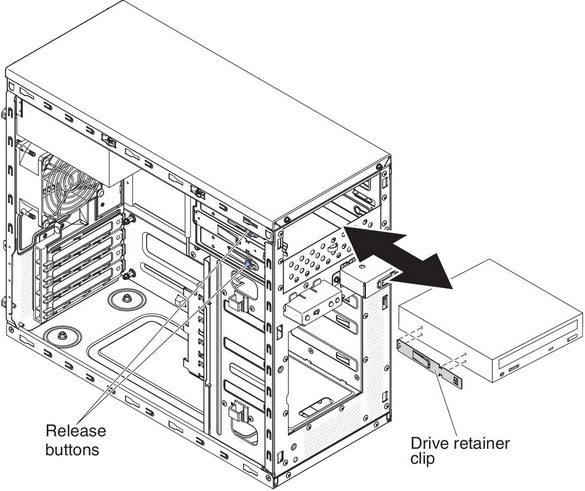
- Push the drive into the bay.
- Carefully turn the server on its side so that it is lying flat.AttentionDo not allow the server to fall over.
- Connect the power (power connector P9) and signal cables to the drive.NoteRoute the signal cable so that it does not block the airflow to the rear of the drives or over the microprocessor and dual inline memory modules (DIMMs).
If you have other devices to install, do so now. Otherwise, go to Completing the installation.
To install a DVD drive on the 5U server model with hot-swap power supplies (Model name: 2582-F4x), complete the following steps. For 4U server models with non-hot-swap power supplies, please see the above sub-section.
- Touch the static-protective package that contains the new DVD drive to any unpainted metal surface on the server; then, remove the DVD drive from the package and place it on a static-protective surface.
- Follow the instructions that come with the drive to set jumpers or switches, if there are any.NoteYou might find it easier to install the new drive from the front and then attach the cables.
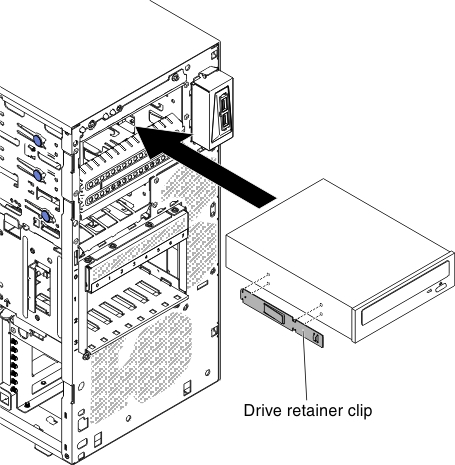
- Attach the drive retainer clip that you removed from the previous drive to the side of the new drive.
- Push the drive into the bay.
- Connect the power and signal cables to the drive.NoteRoute the signal cable so that it does not block the airflow to the rear of the drives or over the microprocessor and dual inline memory modules (DIMMs).
If you have other devices to install, do so now. Otherwise, go to Completing the installation.