Replacing the hard disk drive fan duct
This procedure applies only to the 5U server model with hot-swap power supplies (Model name: 2582-F4x).
Attention
To ensure proper cooling and airflow, do not operate the server for more than 30 minutes with the side cover removed.
To install the hard disk drive fan duct on the 5U server model with hot-swap power supplies (Model name: 2582-F4x), complete the following steps.
- Unlock and remove the side cover (see Replacing the side cover).
- Carefully turn the server on its side so that it is lying flat, with the system board facing up.AttentionDo not allow the server to fall over.
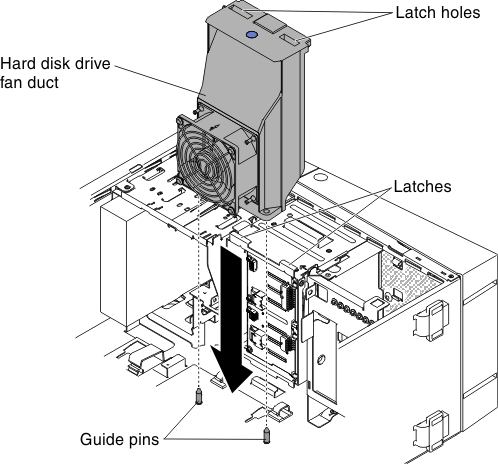
- Lower the hard disk drive fan duct into the chassis, making sure the two guide pins and two latches on the chassis protrude through the respective holes on the hard disk drive fan duct.
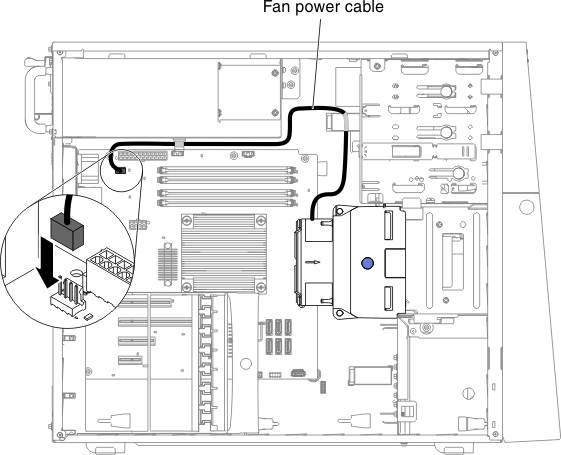
- Connect the hard disk drive fan duct cable to the system board (see System-board internal connectors for the location of the fan assembly connector). Remember to insert the hard disk drive fan duct cable into the relevant retention clips.
- Stand the server back up in its vertical position.
- Install and lock the side cover (see Replacing the side cover).
- Reconnect the external cables and power cords; then, turn on the attached devices and turn on the server.
Give documentation feedback