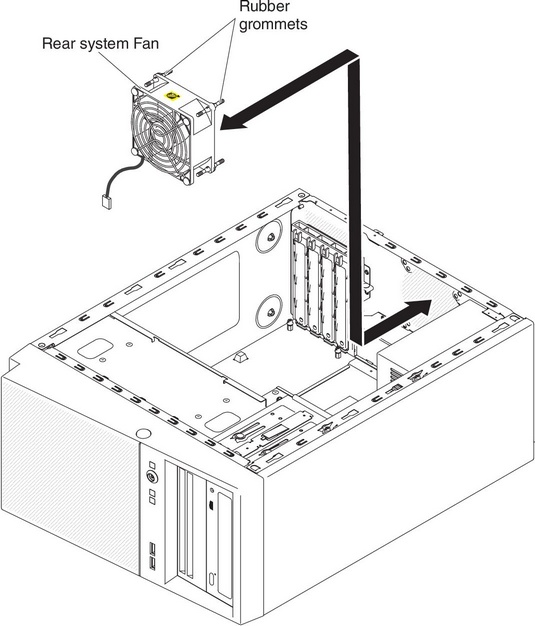
Replacing the rear system fan
This procedure applies only to 4U server models with non-hot-swap power supplies.
Attention
To ensure proper cooling and airflow, do not operate the server for more than 30 minutes with the side cover removed.
To install the rear system fan on 4U server models with non-hot-swap power supplies, complete the following steps.
- The replacement fan comes with the rubber grommets installed; however, they might have come out during shipment. If any of the rubber grommets are missing from the fan, install them on the fan before you continue. Use needle-nosed pliers to pull the grommets through the holes in the fan.
- Carefully turn the server on its side so that it is lying flat, with the cover facing up.AttentionDo not allow the server to fall over.
- Remove the side cover (see Removing the side cover).
- Remove the air duct.
- Position the fan so that the grommets protrude through the holes in the chassis; then, use needle-nosed pliers to pull the grommets through the holes from outside the chassis.
- Connect the fan cable to the system board (see System-board internal connectors for the location of the rear fan connector).
- Install any adapters that you removed (see Replacing a ServeRAID adapter).
- Install the air duct.
- Install the side cover (see Replacing the side cover).
- Stand the server back up in its vertical position.
- Install the bezel (see Replacing the bezel).
- Reconnect the external cables and power cords; then, turn on the attached devices and turn on the server.
Give documentation feedback