Removing and installing internal drives
Use this information to remove and install internal drives.
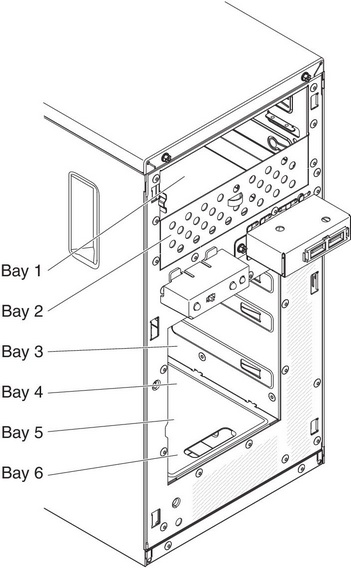
The following figure shows the locations of the drive bays in 4U server models with non-hot-swap power supplies.
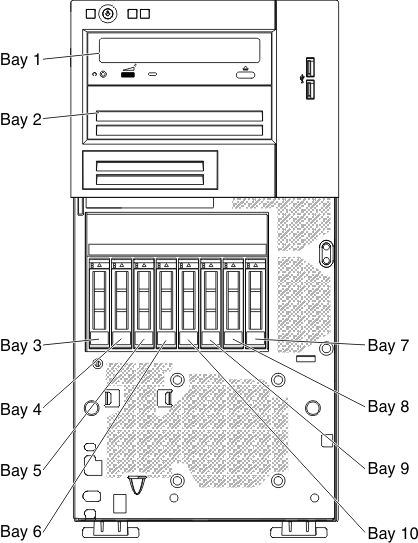
The following figure shows the locations of the drive bays in the 5U server model with hot-swap power supplies (Model name: 2582-F4x).
- Make sure that you have all the cables and other equipment that is specified in the documentation that comes with the drive.
- Check the instructions that come with the drive to see whether you have to set any switches or jumpers on the drive. If you are installing a SATA device, be sure to set the SATA ID for that device.
- Optional external tape drives, DVD-ROM drive are examples of removable-media drives. You can install removable-media drives only in bays 1 and 2.
- The electromagnetic interference (EMI) integrity and cooling of the server are protected by having all bays and PCI slots covered or occupied. When you install a drive or PCI adapter, save the EMC shield and filler panel from the bay or the PCI adapter slot cover in the event that you later remove the drive or adapter.
- For a complete list of supported options for the server, see the Lenovo ServerProven website.
Give documentation feedback