Replacing the air baffle
This procedure applies only to 4U server models with non-hot-swap power supplies.
To install the air baffle on 4U server models with non-hot-swap power supplies, complete the following steps.
- Read the safety information in Safety and Installation guidelines.
- Align the tabs on the air baffle with the slots on the chassis.
- Lower the air baffle into the server.Attention
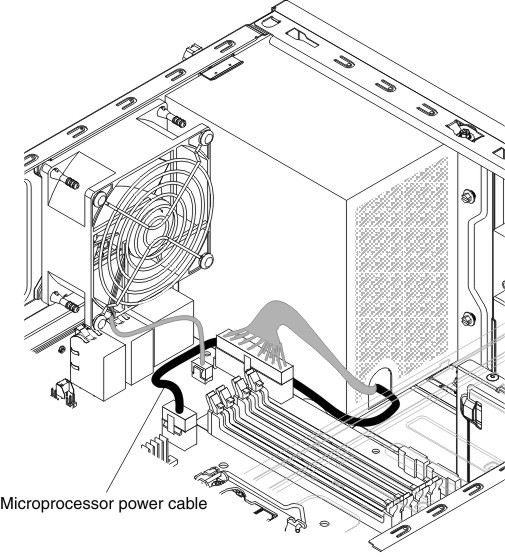
- Make note of the microprocessor power cable routing, as the cable may interfere with the air baffle installation.Figure 1. Microprocessor power cable routing when installing air baffle for 4U server model with non-hot-swap power supplies
- Make sure that the tabs on the air baffle are inserted into the holes on the chassis and no cables are not caught or pinched.
- For proper cooling and airflow, reinstall the air baffle before you turn on the server. Operating the server with the air baffle removed might damage server components.
Figure 2. Air baffle installation for 4U server model with non-hot-swap power supplies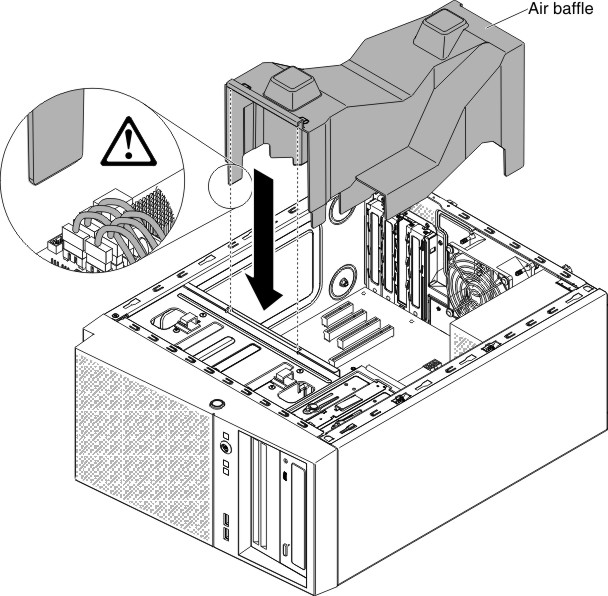
- Make note of the microprocessor power cable routing, as the cable may interfere with the air baffle installation.
- Install and lock the side cover (see Replacing the side cover).
- Reconnect the external cables and power cords; then, turn on the attached devices and turn on the server.
Give documentation feedback