Replacing the hard disk drive cage
Use this information to replace the hard disk drive cage
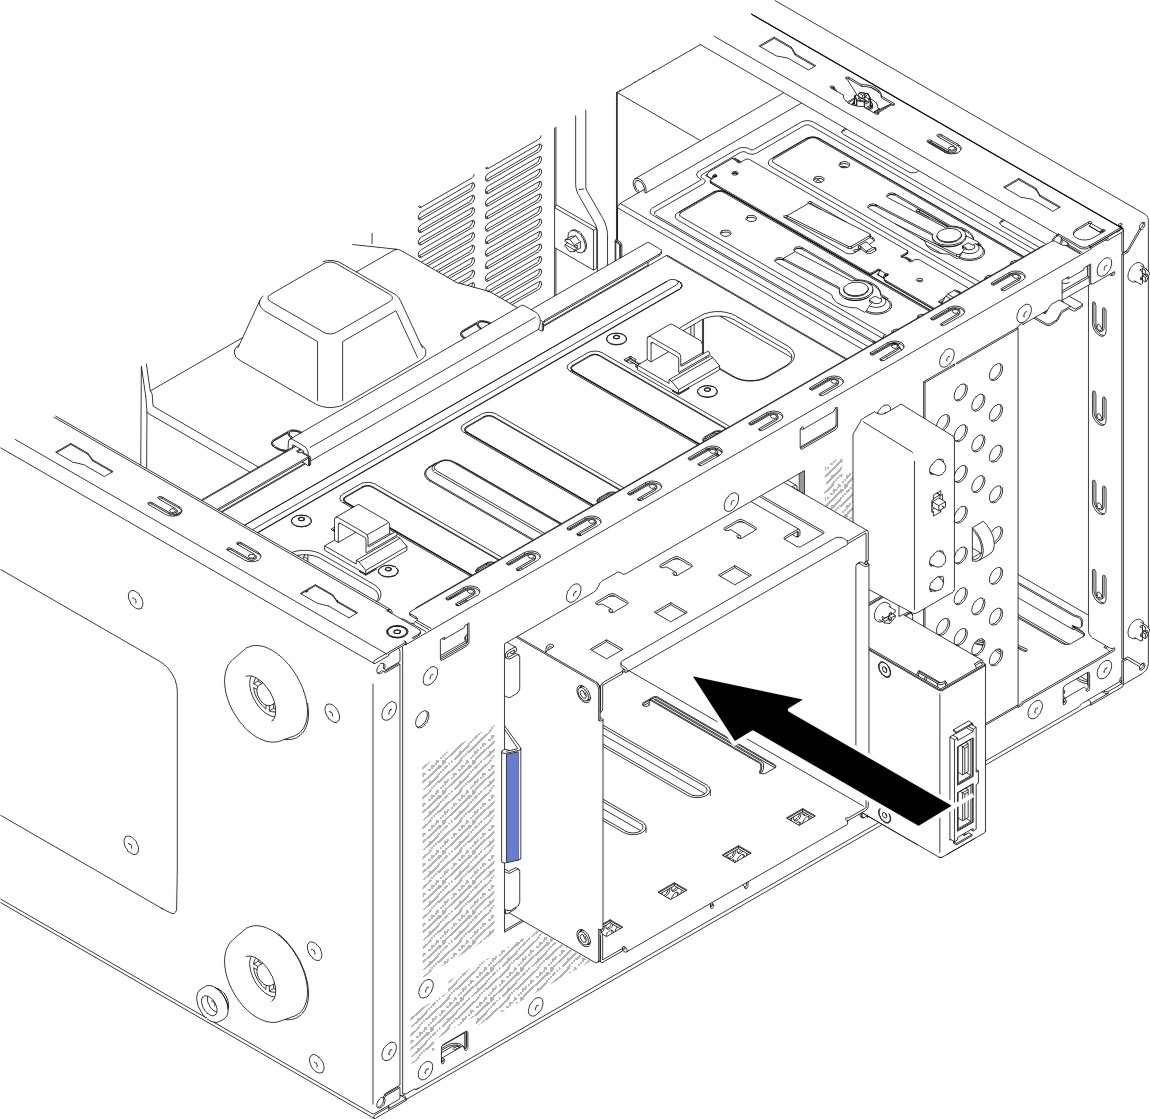
To install the hard disk drive cage on 4U server models with non-hot-swap power supplies, complete the following steps. For the 5U server model with hot-swap power supplies, please see the next sub-section.
- Read the safety information in Safety and Installation guidelines.
- Press the hard disk drive cage in until the release latches click into place.Figure 1. Hard disk drive cage installation for 4U server model with non-hot-swap power supplies
 NoteMake sure the backplate is already installed on the disk drive cage (see
Replacing the simple-swap backplate). - Install the air baffle (see Replacing the air baffle).
- Install the side cover (see Replacing the side cover).
- Stand the server back up in its vertical position.
- Install the bezel (see Replacing the bezel).
- Reconnect the external cables and power cords; then, turn on the attached devices and turn on the server.
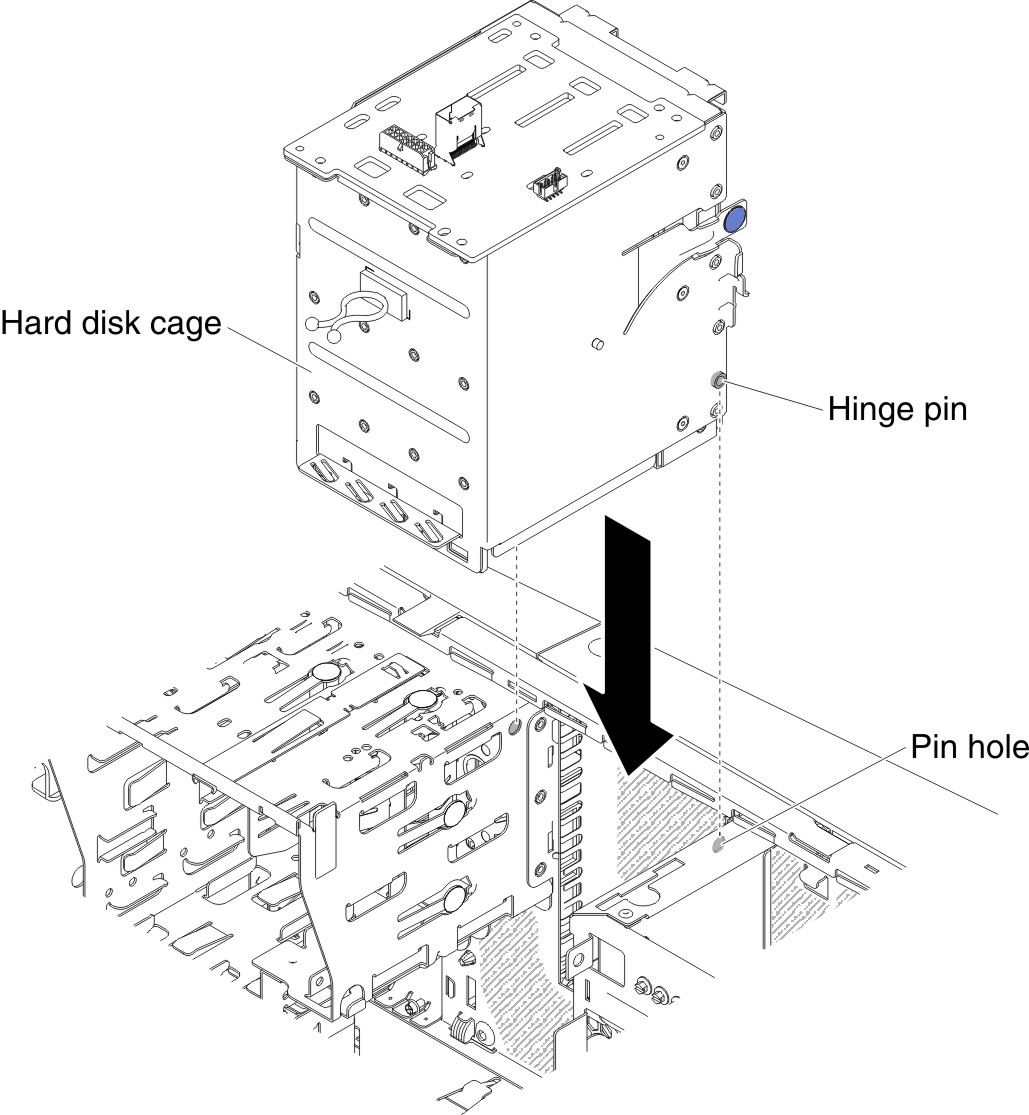
To install the hard disk drive cage on 5U server models with hot-swap power supplies, complete the following steps. For 4U server models with non-hot-swap power supplies, please see the above sub-section.
- Read the safety information in Safety and Installation guidelines.
- Lower the hard disk drive cage into the chassis.Figure 2. Hard disk drive cage installation for 5U server model with hot-swap power supplies

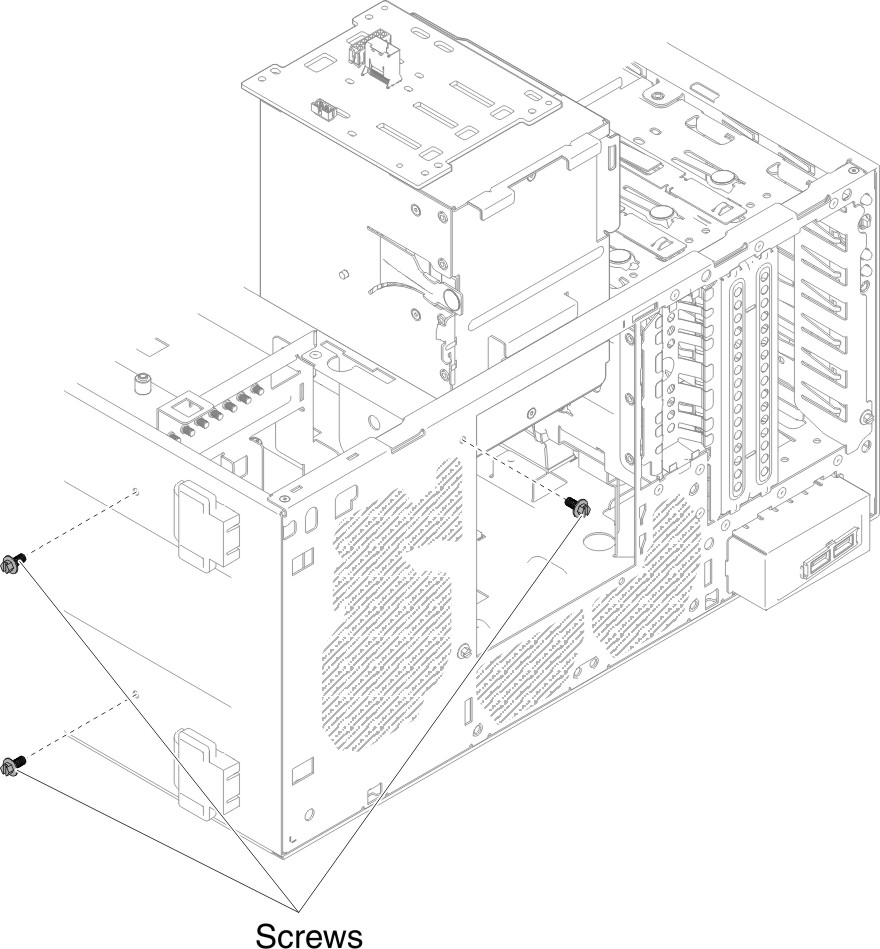
- Install the screws to secure the hard disk drive cage into the chassis.Figure 3. Hard disk drive cage screw installation for 5U server model with hot-swap power supplies

- Connect the power, signal and configuration cables to the hard disk drive backplane (for details regarding the cabling, see Replacing the hot-swap hard disk drive backplane).
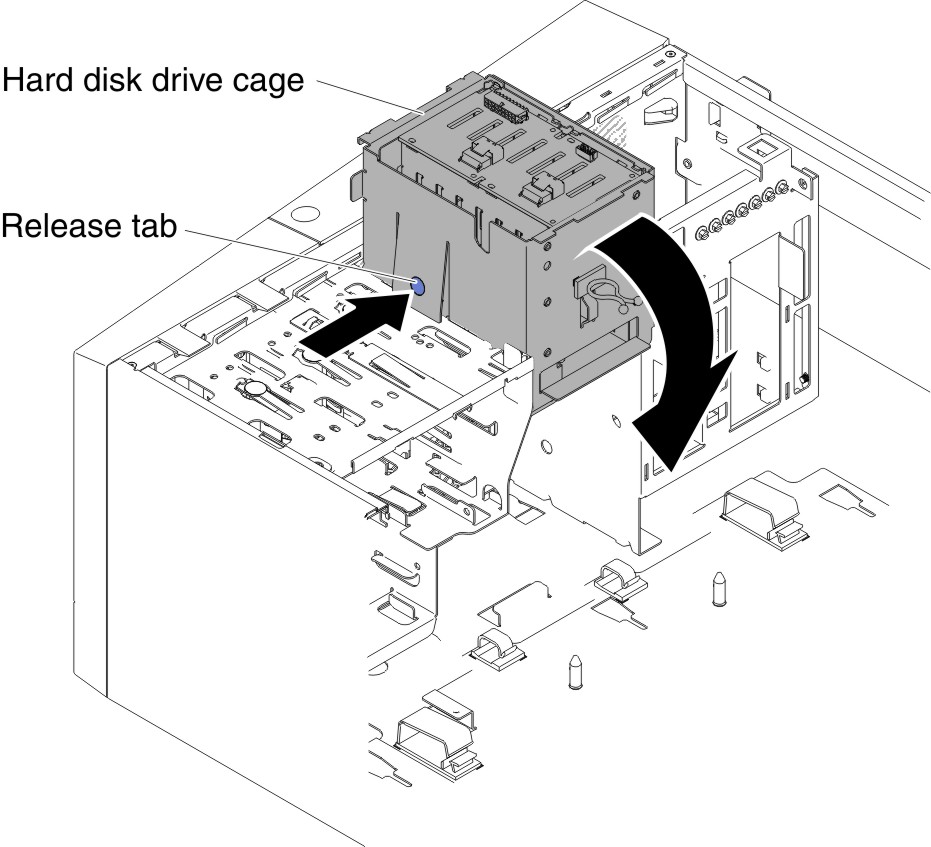
- Press and hold the retaining tab on the side of the cage; then, rotate the drive cage into the chassis until it locks into place.NoteYou may need to slightly lift up the cage in order to press and hold the retaining tab.Figure 4. Rotating hard disk drive cage into chassis for 5U server model with hot-swap power supplies

- Install the hard disk drive fan duct onto the hard disk drive cage (see Replacing the hard disk drive fan duct).
- Stand the server back up in its vertical position.
- Install the hot-swap hard disk drives that you removed from the hard disk drive cage (see Replacing a hot-swap hard disk drive).
- Install the lower bezel (see Replacing the lower bezel).
- Install and lock the side cover (see Replacing the side cover).
- Reconnect the external cables and power cords; then, turn on the attached devices and turn on the server.
Give documentation feedback