
Installing the rear fan

Use this information to install the rear fan.

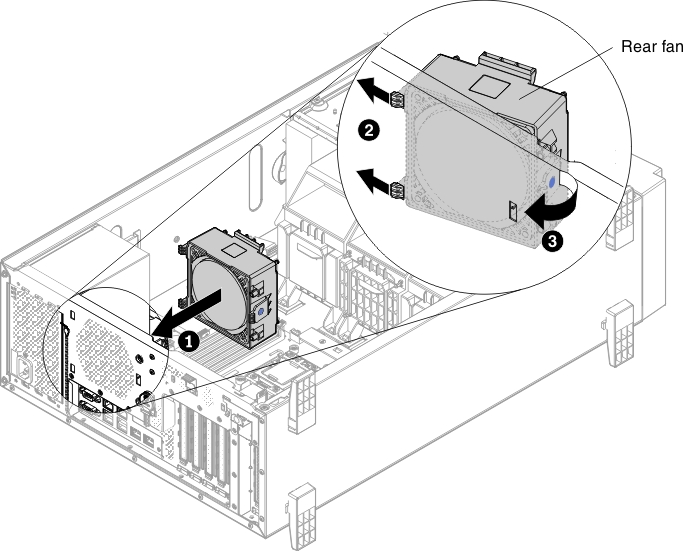
To install the rear fan, complete the following steps:

  1. Read the safety information that begins in Safety and Installation guidelines.
  2. Turn off the server (see Turning off the server) and all attached peripheral devices. Disconnect all power cords; then, disconnect all external cables as necessary to replace the device.
  3. Carefully turn the server on its side so that it is lying flat, with the cover facing up.
    Attention
    Do not allow the server to fall over.
  4. Unlock and remove the left-side cover (see Removing the left-side cover).
  5. Remove the air baffle (see Removing the air baffle).
  6. Touch the static-protective package that contains the fan to any unpainted metal surface on the server; then, remove the fan from the package.
  7. Locate the rear fan position of the server chassis (see step 1 in the following illustration).
  8. Insert two tabs of the rear fan into the holes of the server chassis, and rotate the rear fan to click into the server chassis (see step 1 in the following illustration).

  9. Connect the rear fan power cable on the system board. (see Internal Cable Routing and Connectors).