Installing a 3.5-inch simple-swap hard disk drive
Use this information to install a 3.5-inch simple-swap hard disk drive.
Before installing a 3.5-inch simple-swap hard disk drive, read the following information:
- Inspect the drive tray for signs of damage.
- To maintain proper system cooling, do not operate the server for more than 10 minutes without either a drive or a filler panel installed in each drive bay.
Read the safety information in Safety and Installation guidelines.
If you are replacing a server component in the server, you need to turn off the server and peripheral devices, and disconnect the power cords and all external cables.
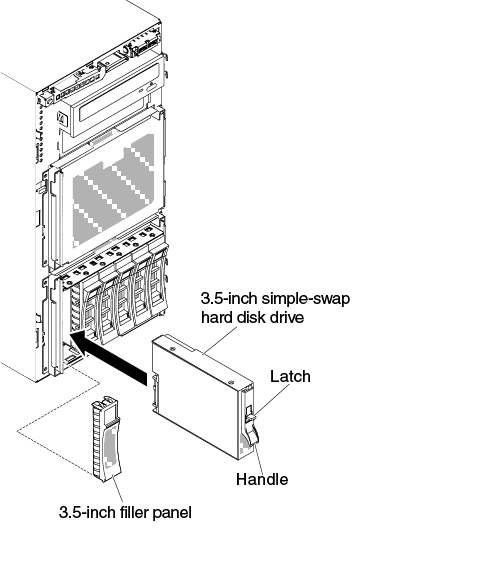
To install a 3.5-inch simple-swap hard disk drive, complete the following steps.
- Grasp the black drive handle and slide the blue release latch to the right and align the drive assembly with the guide rail in the bay.Figure 1. Simple-swap hard disk drive installation
If you have other devices to install or remove, do so now. Otherwise, go to Completing the installation.
Give documentation feedback