Installing a DIMM
Use this information to install a DIMM.
Read the safety information in Safety and Installation guidelines.
If you are replacing a server component in the server, you need to turn off the server and peripheral devices, and disconnect the power cords and all external cables.
To install a DIMM, complete the following steps.
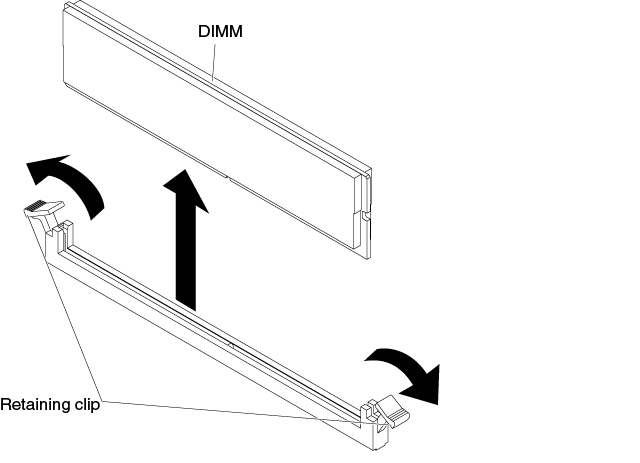
- Open the retaining clip on each end of the DIMM connector. AttentionTo avoid breaking the retaining clips or damaging the DIMM connectors, open and close the clips gently.Figure 1. DIMM installation
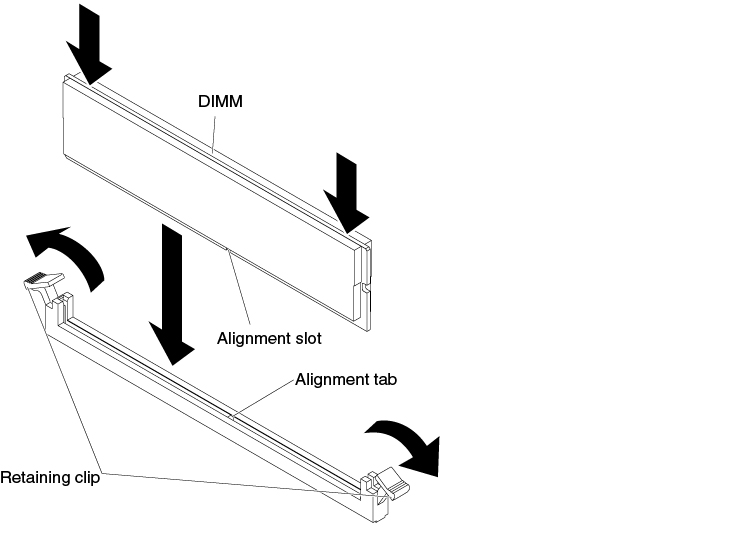
- Insert the DIMM into the connector by aligning the edges of the DIMM with the slots at the ends of the DIMM connector (see System-board internal connectors) for the locations of the DIMM connectors).Figure 2. Insert DIMM into connector
If you have other devices to install or remove, do so now. Otherwise, go to Completing the installation.
Give documentation feedback