Installing the hot-swap backplane in the optional rear hard disk drive cage

Use this information to install the hot-swap backplane in the optional rear hard disk drive cage.

To install the hot-swap backplane in the optional rear hard disk drive cage, complete the following steps.

  1. Read the safety information that begins in Safety and Installation guidelines.
  2. Turn off the server (see Turning off the server) and all attached peripheral devices. Disconnect all power cords; then, disconnect all external cables from the server.
  3. Remove the server top cover (see Removing the server top cover).
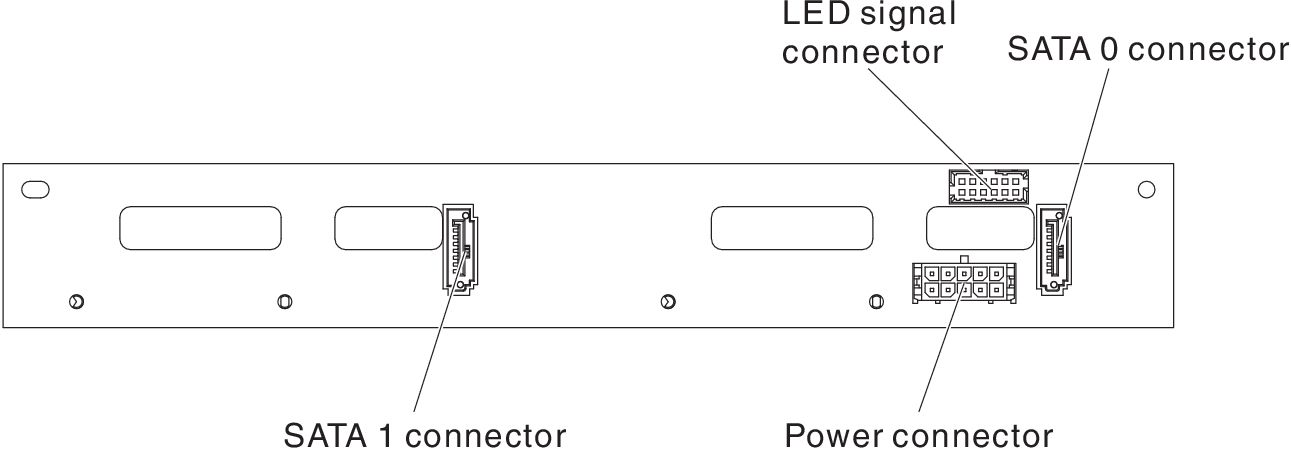
  4. Connect the LED signal, SATA signal and power cables to the backplane.

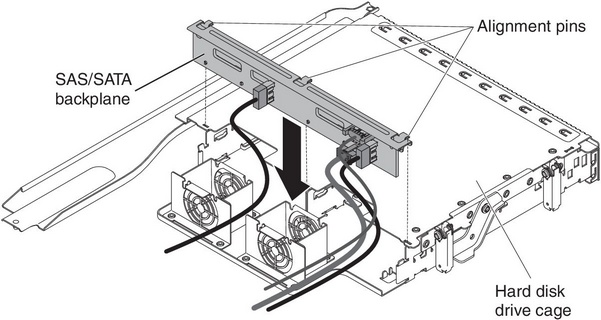
  5. Align the backplane with the slot on the optional rear hard disk drive cage.
  6. Lower the backplane into the optional rear hard disk drive cage. Make sure the three alignment pins securely engages the three holes on the hard disk drive cage.


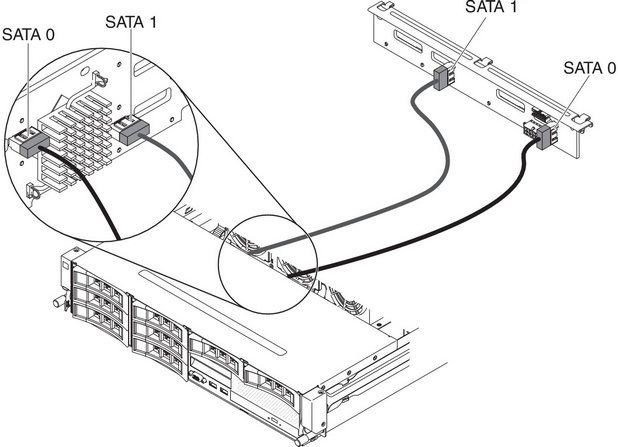
  7. For information on how to connect the relevant cabling on the backplane to the server, please refer to Installing an optional hot-swap rear hard disk drive cage.
    Note
    Make sure that Port 1 is connected to Port 1 for both backplanes. Likewise, Port 0 is connected to Port 0 for both backplanes.


  8. Install the hot-swap hard disk drives in the optional rear hard disk drive cage (see Installing a hot-swap hard disk drive).

If you have other devices to install or remove, do so now. Otherwise, go to Completing the installation.