
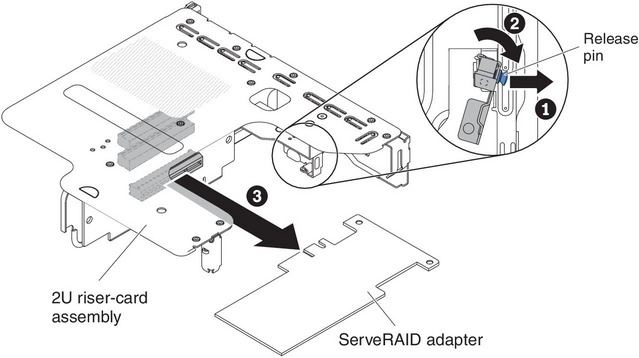
Removing a ServeRAID adapter from the PCI riser-card assembly

Use this information to remove a ServeRAID adapter from the PCI riser-card assembly.

To remove a ServeRAID adapter from the PCI riser-card assembly, complete the following steps:

  1. Read the safety information that begins in Safety and Installation guidelines.
  2. Turn off the server (see Turning off the server) and all attached peripheral devices. Disconnect all power cords; then, disconnect all external cables as necessary to replace the device.
  3. Remove the server cover (see Removing the server top cover).
  4. If you have the optional hot-swap rear hard disk drive cage installed, rotate it up (see Rotating the optional hot-swap rear hard disk drive cage up.)
  5. Remove PCI riser-card assembly 2 (see Removing a PCI riser-card assembly).
  6. Pull the release pin to unlock the retention latch; then rotate the retention latch to the open position.
  7. Carefully grasp the ServeRAID adapter by the edge and pull it out of PCI riser-card assembly 2.
    • For 2U riser card:

    • For 1U riser card:

  8. If you are instructed to return the ServeRAID adapter, follow all packaging instructions, and use any packaging materials for shipping that are supplied to you.
    Note
    When the ServeRAID adapter is removed, software RAID will not be supported. This system does not support downgrade software RAID function from hardware RAID configuration.

If you have other devices to install or remove, do so now. Otherwise, go to Completing the installation.