Completing the installation
Use this information to complete the installation.
To complete the installation, complete the following steps:
- If you removed the air baffle, reinstall it (see Installing the air baffle).
- If you removed a PCIe riser-card assembly, reinstall it (see Installing a PCI riser-card assembly).
- If you have the optional hot-swap rear hard disk drive cage installed, rotate it down (see Rotating the optional hot-swap rear hard disk drive cage down.
- If you removed the server top cover, replace it (see Installing the server top cover).
- Install the server in the rack cabinet (see the Rack Installation Instructions that come with the server for instructions).
- To attach peripheral devices and connect the power cords, see Front view).
- Update the server configuration (see Updating the server configuration).
- Slide the server back into the rack, if necessary.
- Start the server. Confirm that is starts correctly and recognizes the newly installed devices, and make sure that no error LEDs are lit.
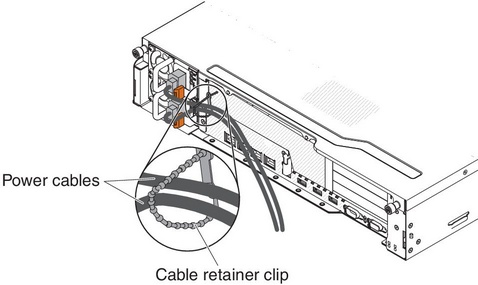
- (Business Partners only) Complete the additional steps in Instructions for Business Partners.NoteRemember to route the power cord through the cable retainer clip so that it does not accidentally become disconnected.

- Installing the air baffle
Use this information to install the air baffle. - Installing a PCI riser-card assembly
Use this information to install a PCI riser-card assembly. - Rotating the optional hot-swap rear hard disk drive cage down
Use this information to rotate the optional hot-swap rear hard disk drive cage down. - Installing the server top cover
Use this information to install the server top cover. - Updating the server configuration
Use this information to update the server configuration.
Give documentation feedback