Use this information to remove the microprocessor and memory expansion tray.
To remove the microprocessor and memory expansion tray, complete the following steps:
- Read the safety information and installation guidelines, see Safety and Installation guidelines.
- Turn off the server and all attached peripheral devices. Disconnect all power cords; then, disconnect all external cables from the server.
- If the server has been installed in a rack, slide the server out from the rack enclosure.
- Remove the top cover (see Removing the server top cover).
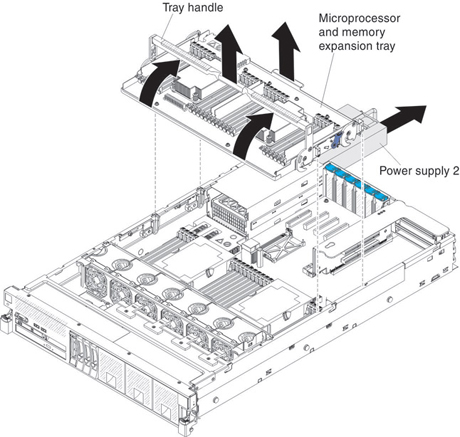
- If power supply 2 is installed, slide it out of the power-supply bay slightly by pressing to the left the orange release tab.
When the Power Supply is pulled out of the power supply bay, the Power Supply Interlock bracket is disengaged and the three Lock icons are no longer visible through the openings on the Interlock bracket.
- Grasp the front handle tray by the blue touch points and rotate the handle all the way up to disengage the tray from the connectors on the system board.
- Grasp the tray by both handles, lift it from the server, and set it on a flat surface to avoid damaging the connector pins on the bottom of the tray.