Removing the midplane
Use this information for instructions on how to remove the chassis midplane.
To remove the chassis midplane, complete the following steps:
Note
This procedure for removing the midplane apply to both the 4-socket and the 8-socket configurations of the server, unless otherwise specified.
- (Optional) Install the lower shipping bracket that comes with the System x3850 X6 and x3950 X6 Rack Installation Kit or with the replacement midplane to help support the shuttle while removing and replacing the midplane. See the Lenovo System x3850 X6 and x3950 X6 Type 6241 Rack Installation Instructions for instructions.
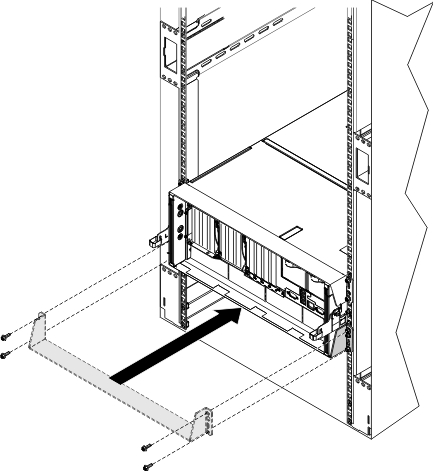 NoteYou can leave the lower shipping bracket installed on the rack after replacing the midplane.
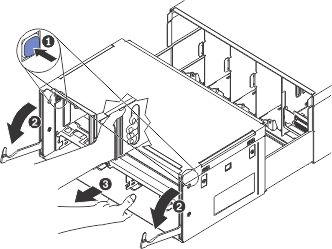
 - Grasp the shuttle with your hand through the hole on the center of the shuttle and grasp the bottom of the shuttle with your other hand and slide the shuttle out of the chassis.
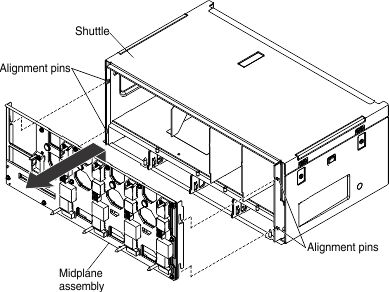
- Lift the midplane all the way up (off of the alignment pins on the shuttle) and remove the midplane from the shuttle.
If you are instructed to return the midplane, follow all packaging instructions, and use any packaging materials for shipping that are supplied to you.
Give documentation feedback