Replacing the shuttle

Use this information for instructions on how to replace the chassis shuttle.

To replace the chassis shuttle, complete the following steps:

Note
This procedure is for both the 4U (4-socket) and 8U (8-socket) server configurations.
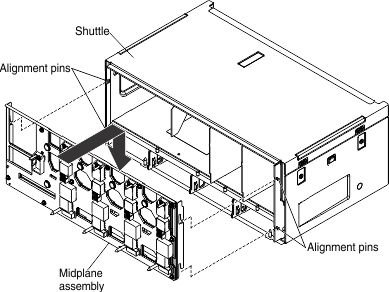
  1. Reinstall the midplane. Align the slots on the sides of the midplane with the alignment pins on the shuttle and lower the midplane onto the pins until the midplane is seated in place on the shuttle.

    Illustration of installing the mid-plane
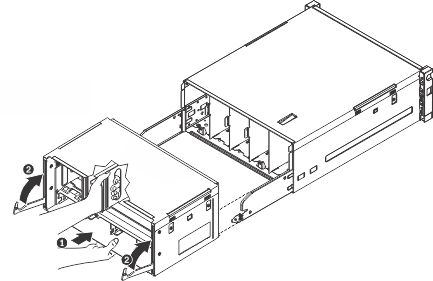
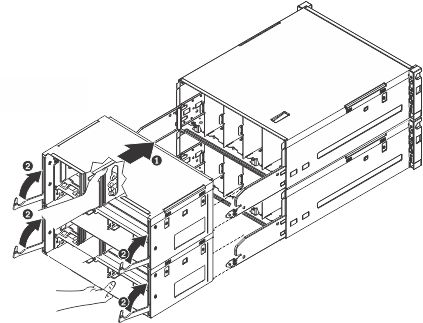
  2. Make sure that the cam handles are open. Grasp the shuttle with your hand through the hole on the center of the shuttle and grasp the bottom of the shuttle with your other hand and align it with the shuttle slot; then, slide the shuttle into the chassis until it is seated firmly.

    The following is an illustration of the 4U shuttle:


    Illustration of replacing the 4U shuttle

    The following is an illustration of the 8U shuttle:


    Illustration of replacing the 8U shuttle
  3. Rotate the shuttle cam handles up until they lock in place on the chassis.
  4. Reinstall all of the components in the rear of the server.
  5. Slide the components in the front of the server back into the server.
  6. Reconnect the power cords and any cables that you removed.
  7. Turn on the peripheral devices and the server.