Creating a custom role group
A role group is a set of roles and a set of users that are members of the same set of roles. The level of access that is granted to each user in the role group is based on the roles that are assigned to that role group. XClarity Administrator provides the following predefined role groups, which correspond to each of the predefined roles. You can also create custom role groups.
About this task
Each XClarity Administrator user must be a member of at least one role group.
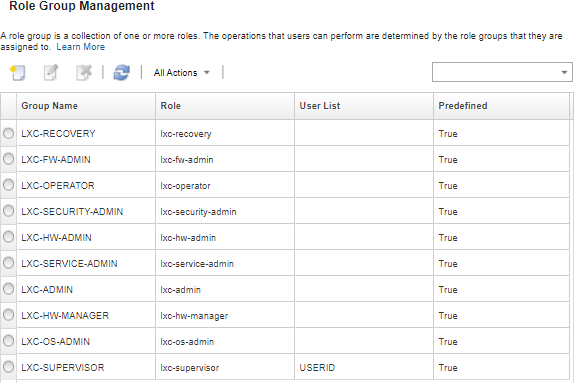
The following role groups are predefined in XClarity Administrator.
LXC-SUPERVISOR. Includes the lxc-supervisor role.
LXC-ADMIN. Includes the lxca-admin role.
LXC-SECURITY-ADMIN. Includes the lxc-security-admin role.
LXC-HW-ADMIN. Includes the lxc-hw-admin role.
LXC-FW-ADMIN. Includes the lxc-fw-admin role.
LXC-OS-ADMIN. Includes the lxc-os-admin role.
LXC-SERVICE-ADMIN. Includes the lxc-service-admin role.
LXC-HW-MANAGER. Includes the lxc-hw-manager role.
LXC-OPERATOR. Includes the lxc-operator role.
LXC-RECOVERY. Includes the lxc-recovery role.
- lxc-sysrdr
- lxc-sysmgr
Procedure
To create a role group, complete the following steps.
Results
The role group is displayed in the Role Groups table. The table shows the associated authorization roles and the members for each role group.

- Add or remove roles that are assigned to this role group by clicking the Edit icon (
 ).
). - Add or remove users as members of the role group (see Adding and removing multiple users from a role group).
- Export information about the role groups, including access permissions, by clicking .
- Delete the role group by clicking the Delete icon (
 ).
).You cannot delete predefined role groups.
After a role group is created, edited, or deleted, the change is immediately provisioned to each managed device.