
Activating the server in lockdown mode

The ThinkEdge server is equipped with the security sensors to detect tamper event, which will also lock down the server in the tamper detection. UpdateXpress supports to activate the lock-down server through ThinkShield Key Vault Portal or XClarity Controller.

Prerequisite:
  • The UpdateXpress application is running on a server installed with a supported operating system. For details of supported operating systems, see Supported operating systems.

  • This function is only supported in the ThinkEdge servers. For details of supported servers, see the ThinkEdge series in Supported server models.

To activate the server in lockdown mode, do the following:
  1. Launch the UpdateXpress application. See Launching the UpdateXpress application.

  2. In the Welcome window, click Next.

  3. In the Target Server window, select Manage the remote server, input the following information, and click Next.
    • (Setting) IP address or Host name: BMC IP address or host name of the target system.

    • (Setting) User Name: BMC user name of the target system.

    • (Setting) Password: BMC password of the target system.

    • (Setting) Port: BMC CIM or RSET port number. If users do not input, the default port is used.

    Note
    If users are not intended to check the BMC server certificate, select Accept BMC server's certificate by default, and click Next.
  4. In the Task window, select Configure security features on ThinkEdge server, and click Next.

  5. In the ThinkEdge Server Security Features window, select Activate server with ThinkShield Portal and click Next.

    Note
    The default system lockdown control is XClarity Controller managed. When the lockdown control is ThinkShield portal managed, users can only activate the server in locked down mode after being authenticated by ThinkShield Key Vault portal.
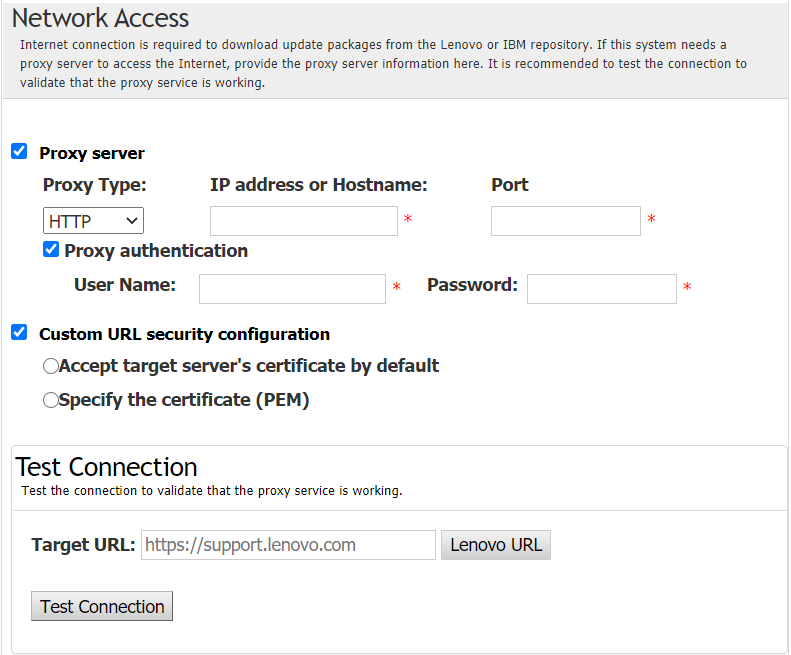
  6. In the Internet Access window, if users have no special requirement for security access, click Test Connection to check the network connection of the target URL, and click Next. If users have more security concerns, before clicking Test Connection, configure Proxy server and/or Custom URL security configuration depending on the security requirements as follows:
    • Proxy server

      1. Select Proxy Server if users require an HTTP/HTTPS proxy to connect to the Web, and complete the following fields:

        Proxy TypeThe proxy type of the proxy server.
        IP address or HostnameThe host name, IP address, or domain name of the proxy server.
        PortThe port number of the proxy server.
      2. Select Proxy authentication if credentials must be specified to authenticate to the proxy server, and complete the following fields:

        User NameThe user name for authenticating to the proxy server.
        PasswordThe password for the specified user name.
    • Custom URL security configuration

      Select Custom URL security configuration if users require a reverse proxy, and select one of the following options:
      • Accept target server’s certificate by default

      • Specify the certificate (PEM)


      Netwoek Access window
  7. In the Activate Server window, input the ThinkShield Key Vault Portal organization ID, user name, and password, and click Activate. After the activation process is completed, click Next.

    Note
    If the sever is managed by XClarity Controller, users don’t need to input the information of ThinkShield Key Vault Portal.
  8. In the Finish window, click View Log to check the upgrade log, copy and save the commands generated, and click Close to exit.