Installing the optional front 2.5-inch hot-swap hard disk drive cage

Use this information to install the optional front 2.5-inch hot-swap hard disk drive cage.

Before you install the optional front 2.5-inch hot-swap hard disk drive cage, complete the following steps:
  1. Read Safety and Installation guidelines.
  2. If the compute node is installed in a NeXtScale n1200 Enclosure, remove it (see Removing a compute node from a chassis for instructions).
  3. Carefully lay the compute node on a flat, static-protective surface, orienting the compute node with the bezel pointing toward you.
Note
There must be either a DIMM or DIMM filler installed for all 16 DIMM slots.

To install the optional front 2.5-inch hot-swap hard disk drive cage, complete the following steps.

  1. Remove the cover (see Removing the compute node cover).
  2. Remove the PCI cage filler, right-hand-side PCI bracket, and left-hand-side PCI bracket if there is one installed.
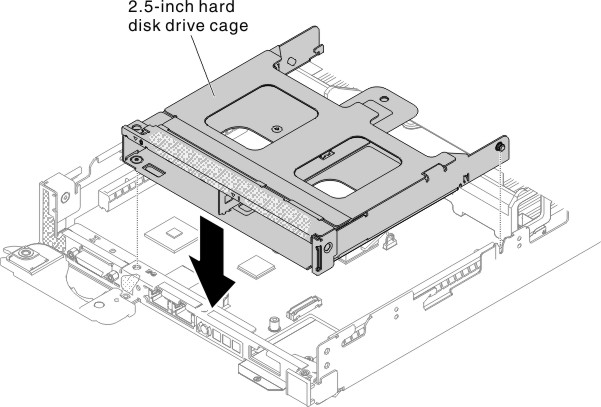
  3. Slowly lower the optional front 2.5-inch hot-swap hard disk drive cage into the node.
    Figure 1. Optional front 2.5-inch hot-swap hard disk drive cage installation
    Optional front 2.5-inch hot-swap hard disk drive cage installation
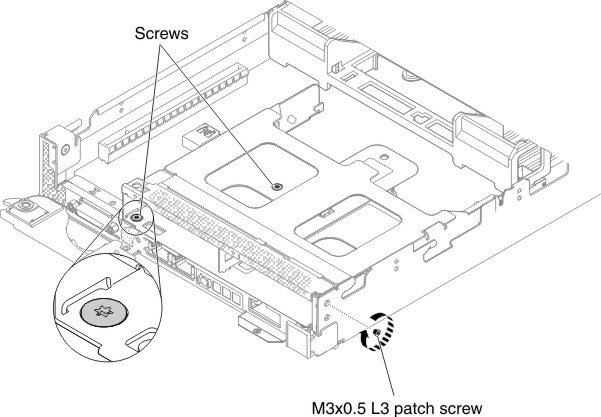
  4. Tighten the screws to secure the optional front hard disk drive cage to the node.
    Figure 2. Screw location
    Screw location
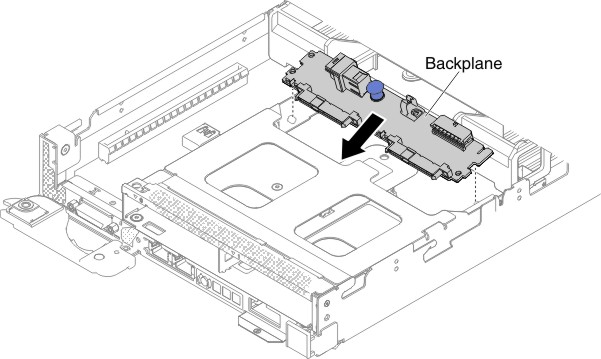
  5. Connect the mini-SAS HD (12Gb) and power cables to the optional front hot-swap backplane (see Figure 3).
  6. Install the backplane into the optional front 2.5-inch hot-swap hard disk drive cage.
    Figure 3. Backplane installation
    Backplane installation
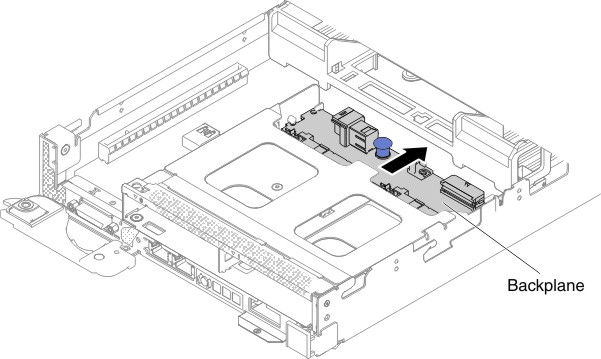
  7. Press down and slide the backplane outward until the backplane clicks into place.
    Figure 4. Backplane installation completed
    Backplane installation completed
  8. Route the cables and connect the other end of the mini-SAS HD (12Gb) and power cables to the RAID adapter and planar power connector (see Cabling hard disk drive with ServeRAID SAS/SATA controller).
  9. Install the hard disk drive(s) if there is any (see Removing and installing drives).
  10. Reinstall the cover (see Installing the compute node cover).
  11. Slide the node into the rack.
  12. Reconnect the power cords and any cables that you removed.
  13. Turn on the peripheral devices and the node.