Install the drive backplane
Use this information to install the drive backplane.
- Read the following section(s) to ensure that you work safely.
Turn off the corresponding compute node that you are going to perform the task on.
Remove the compute node (see Remove a compute node from the enclosure).
Remove the compute node cover (see Remove the compute node cover).
Pull the drives or fillers out of the node slightly to disengage them from the drive backplane (see Remove a hot-swap drive).
You can refer to 2.5-inch drive backplanes for detailed backplane introduction.
Do not mix nodes with the four-drive backplane and six-drive backplanes in the same enclosure. Mixing the four-drive backplane and six-drive backplanes may cause unbalanced cooling.
Before installing a four 2.5-inch NVMe backplane, make sure two processors are installed.
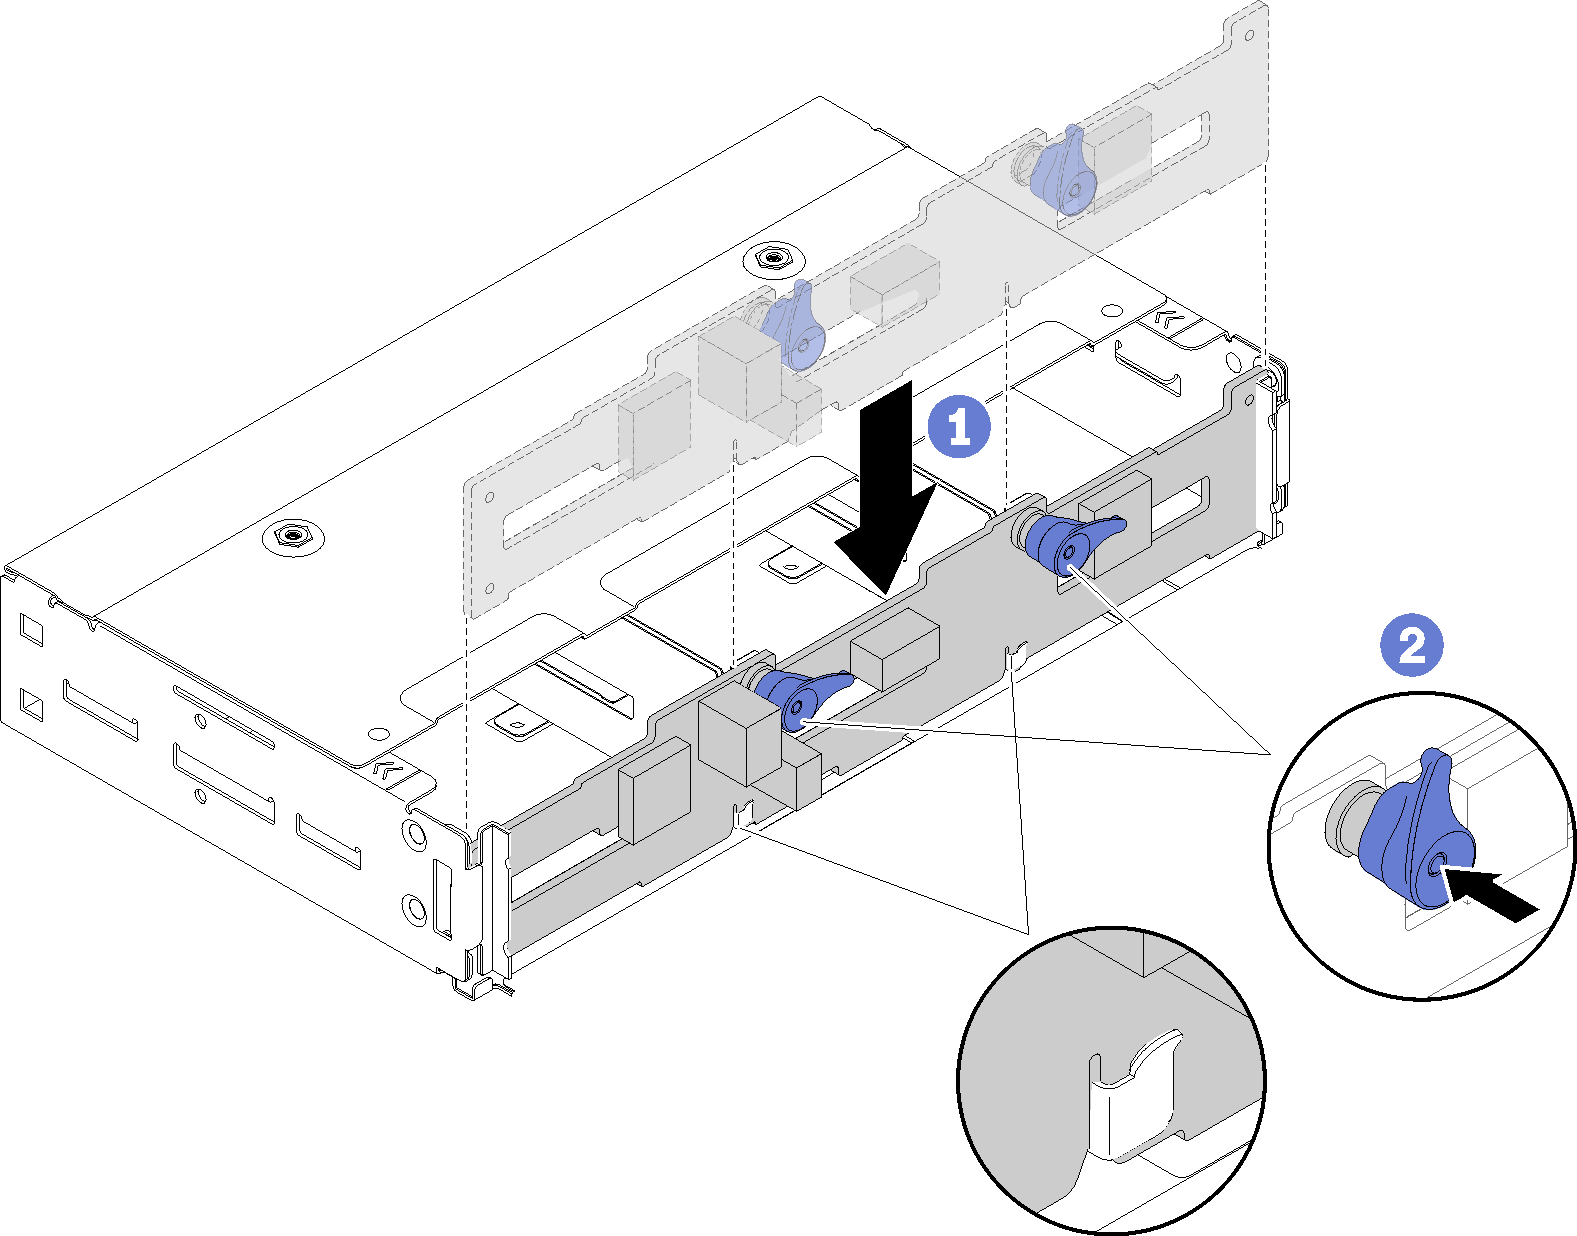
Complete the following steps to install the drive backplane.
After you install the drive backplane, complete the following steps.
Reinstall the drives and filler panels (see Install a hot-swap drive).
If the air baffle is removed, reinstall it (see Install the air baffle).
Reinstall the compute node cover (see Install the compute node cover).
Reinstall the compute node (see Install a compute node in the enclosure).
Check the power LED to make sure it transitions between fast blink and slow blink to indicate the node is ready to be powered on.
Demo video