Remove a node from a rack
Follow instructions in this section to remove a node from a rack.
About this task
To avoid potential danger, make sure to read and follow the safety information.
- S002
 CAUTIONThe power-control button on the device and the power switch on the power supply do not turn off the electrical current supplied to the device. The device also might have more than one power cord. To remove all electrical current from the device, ensure that all power cords are disconnected from the power source.
 - R006
 CAUTIONDo not place any object on top of a rack-mounted device unless that rack-mounted device is intended for use as a shelf.
Read Installation Guidelines and Safety inspection checklist to make sure that you work safely.
- To remove a node from the rack:
Remove the shipping bracket from the enclosure
Follow instructions in this section to remove the shipping bracket from the enclosure.
Depending on the specific configuration, the node, enclosure, or rails might look different from the illustrations in this section.
For details of the rail options for the rack installation, see Rail Installation Guides.
Procedure
- Remove the seven screws of the shipping bracket as shown.Figure 1. Removal of the shipping bracket screws

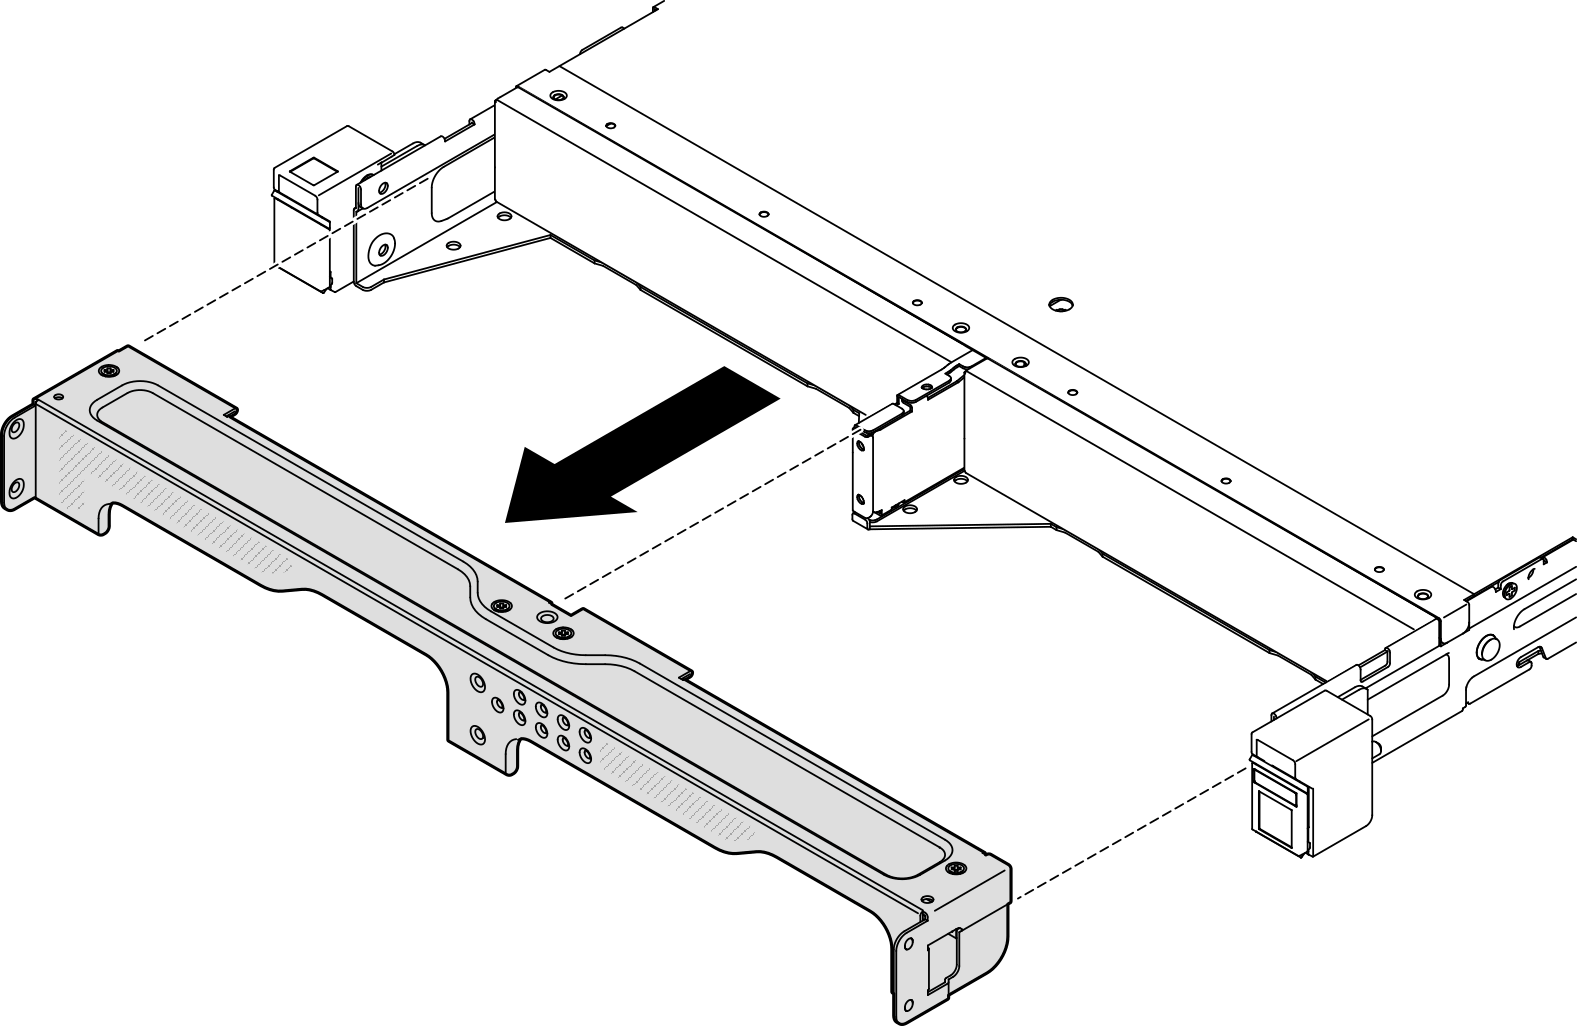
- Pull the shipping bracket away from the enclosure.Figure 2. Removal of the shipping bracket
When a 1U2N enclosure is installed with ThinkSystem Toolless Slide Rail Kit without 1U CMA, a node can be directly removed from the enclosure on the rack. If necessary, proceed to Remove a node from the enclosure for the procedure.
When the enclosure is installed with rail kit except for ThinkSystem Toolless Slide Rail Kit without 1U CMA, remove the enclosure with node(s) from the rack; then, remove the node(s) from the enclosure.
Remove the enclosure from the rack
Depending on the specific configuration, the node, enclosure, or rails might look different from the illustrations in this section.
For details of the rail options for the rack installation, see Rail Installation Guides.
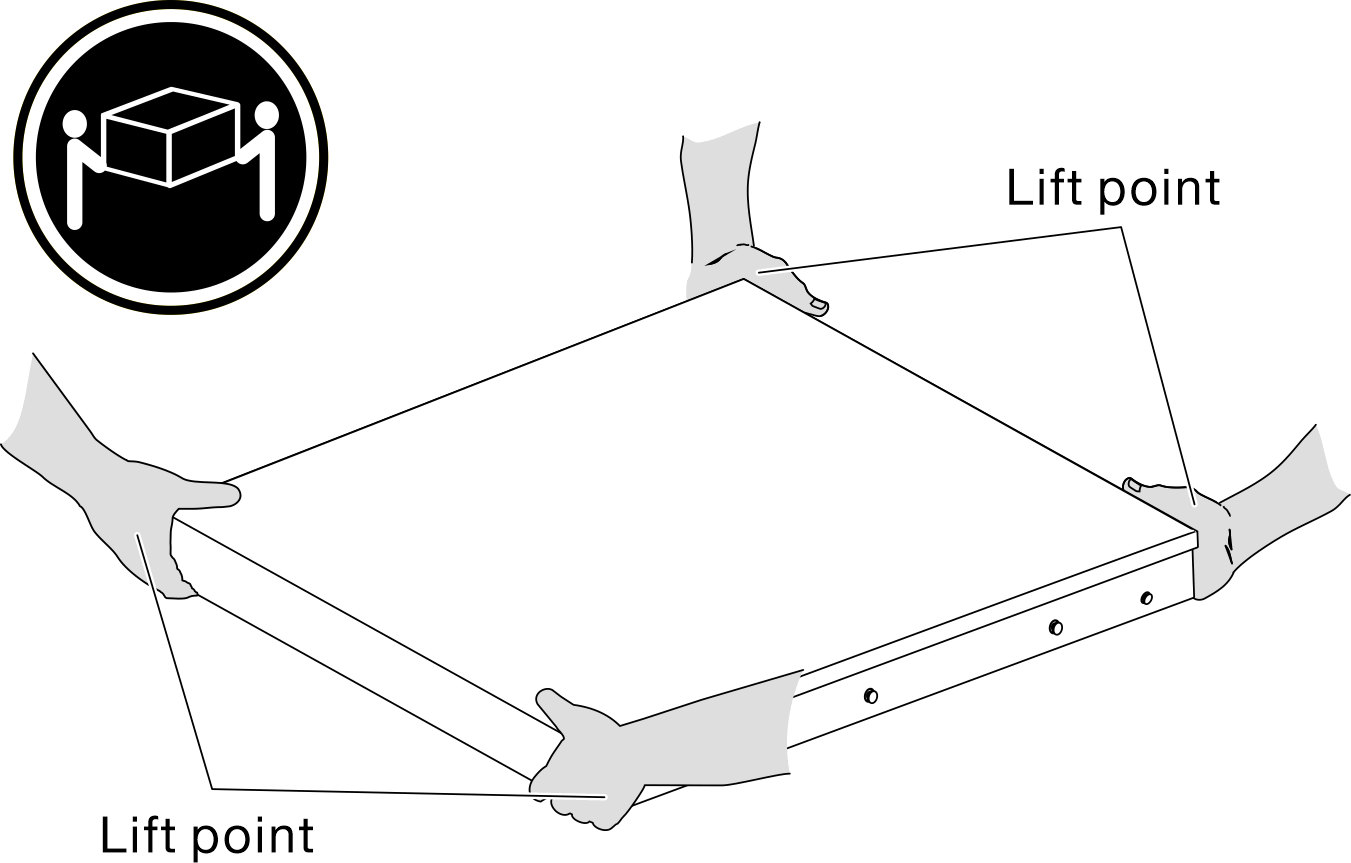
Make sure to have enough help and use safe practices when lifting the enclosure.
Procedure
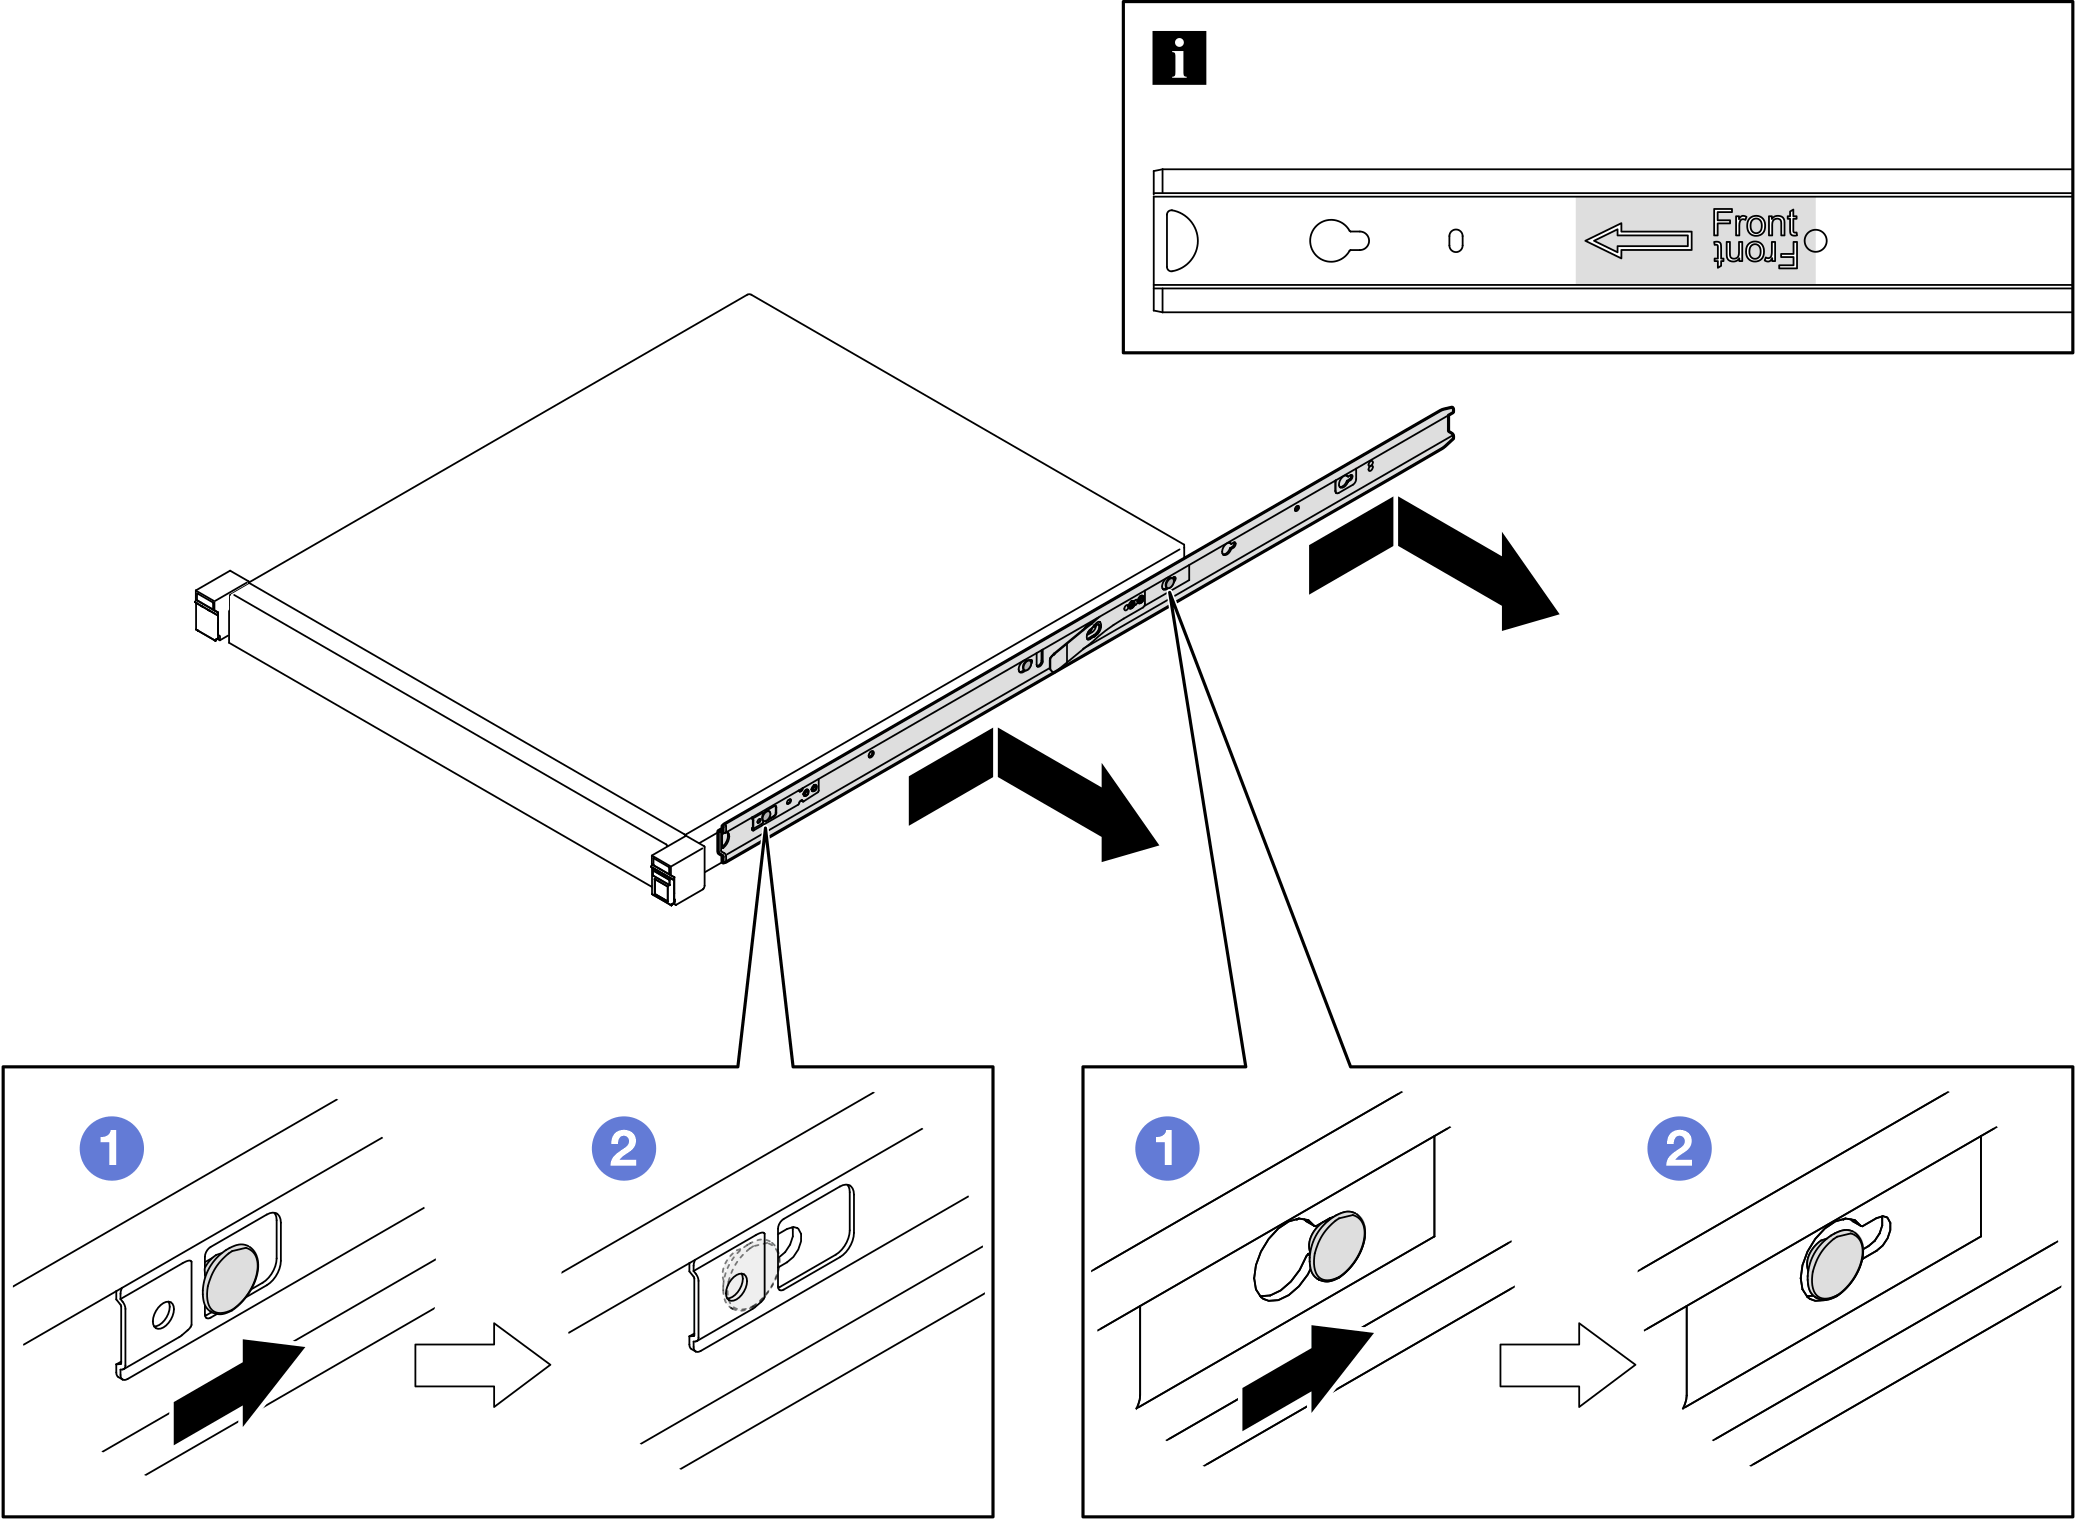
- If applicable, open the rack release latches and remove the screws that secure the enclosure to the rails.Figure 3. Removal of screws from rack release latches
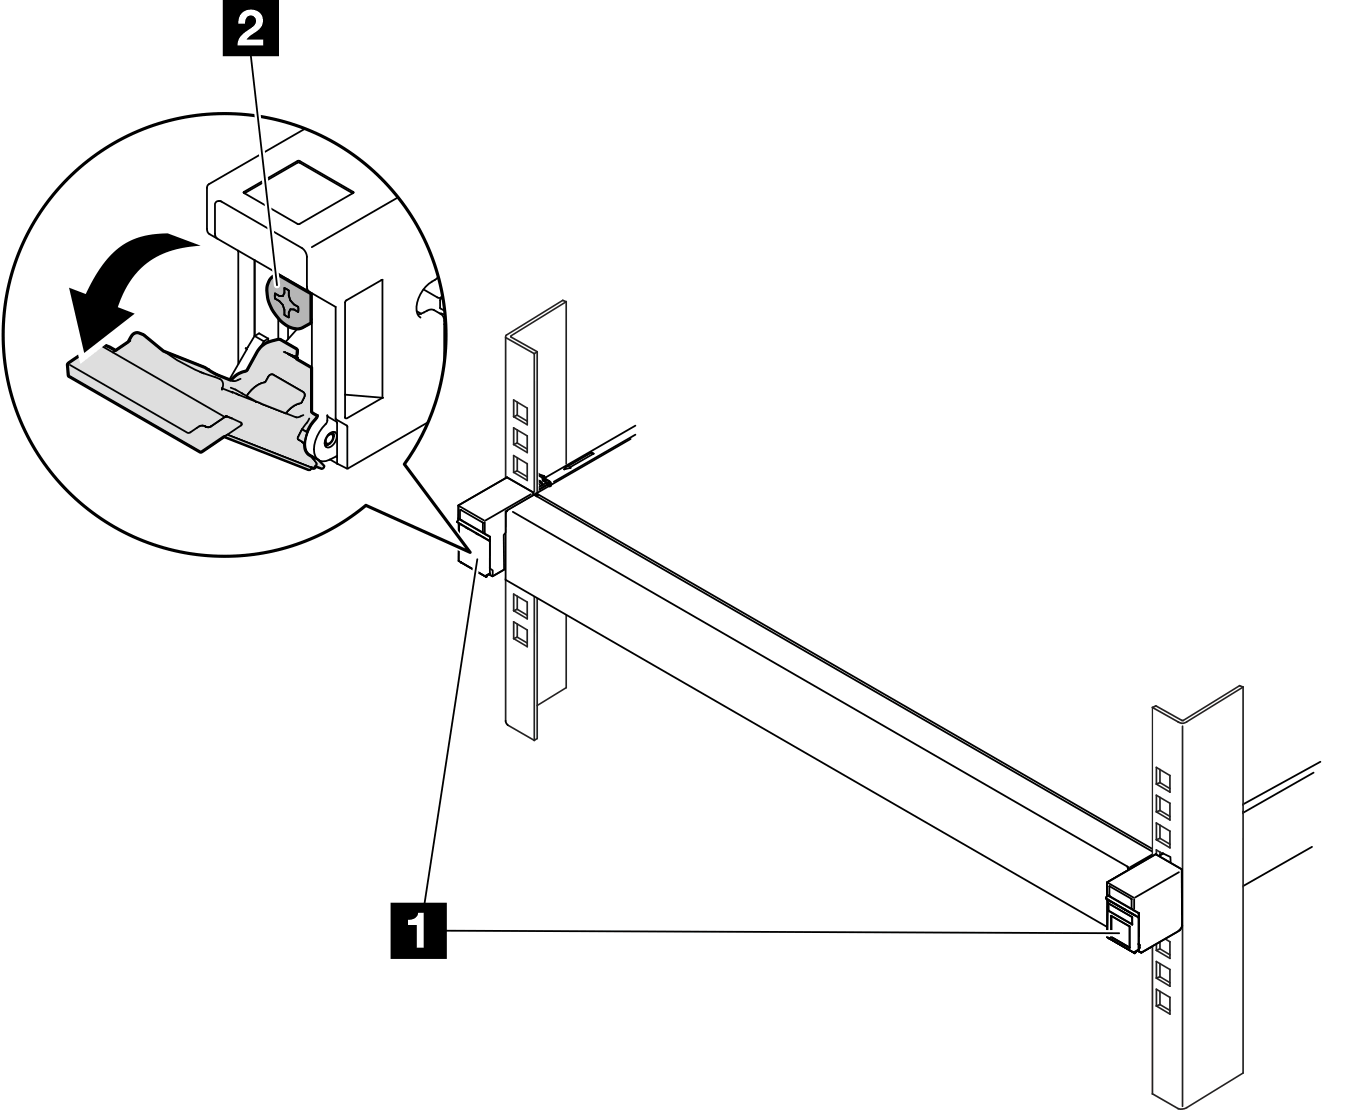
1 Rack release latches 2 Front screw - Depending on the specific configuration, the procedure of removing the enclosure from the rails can be one of the following.
- Rail kit except for ThinkSystem Toolless Slide Rail Kit without 1U CMA
Slide the enclosure out of the rails.
 Open the rack release latches in the front of the enclosure; then, slowly slide out the enclosure until it stops.
 Press the release latches on the rail.
 Carefully lift the enclosure away from the rack.
Figure 4. Removal of the enclosure from the rack by sliding
- (Optional) If necessary, remove the inner rails from the enclosure.
If applicable, remove the screws that secure the inner rails on the enclosure.
Figure 5. Removal of the screws from inner rails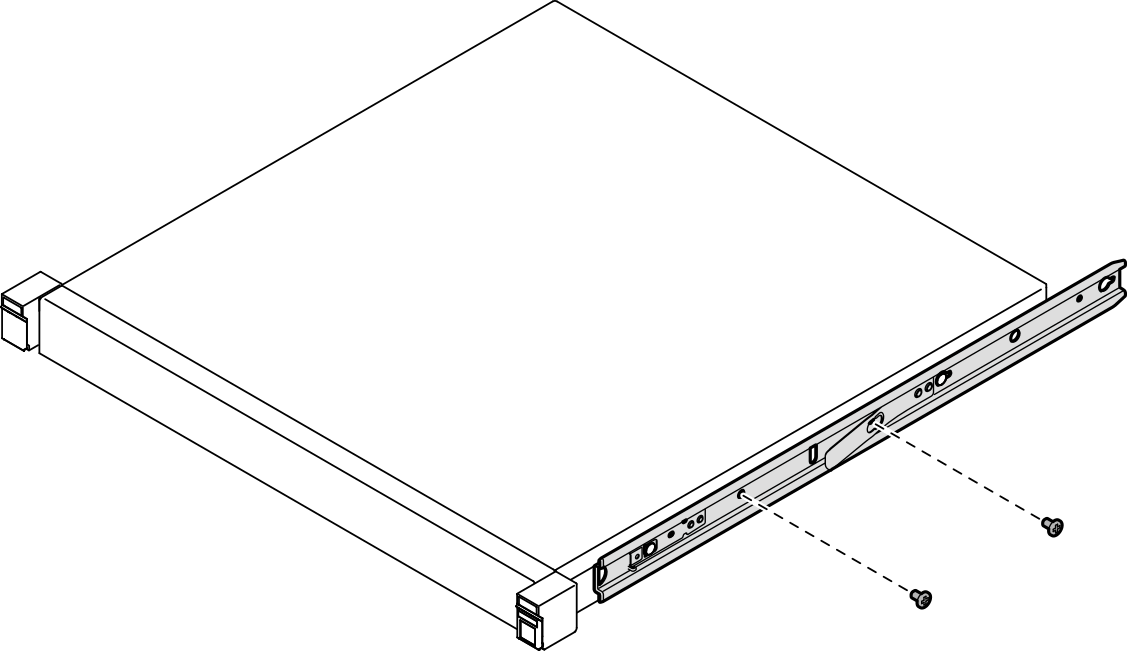
- Push the inner rails as shown to disengage the inner rails from the mounting pins on the enclosure.
- Remove the inner rails from the enclosure when the mounting holes on the inner rails are aligned with the corresponding rail mounting pins on the enclosure.Figure 6. Removal of the inner rails
- ThinkSystem Toolless Slide Rail Kit without 1U CMA
- Press the blue touch points at the front of both the inner rails.
- Carefully rotate the enclosure upward as shown.
- Lift the enclosure out of the rails.
Figure 7. Removal of the enclosure from the rack by lifting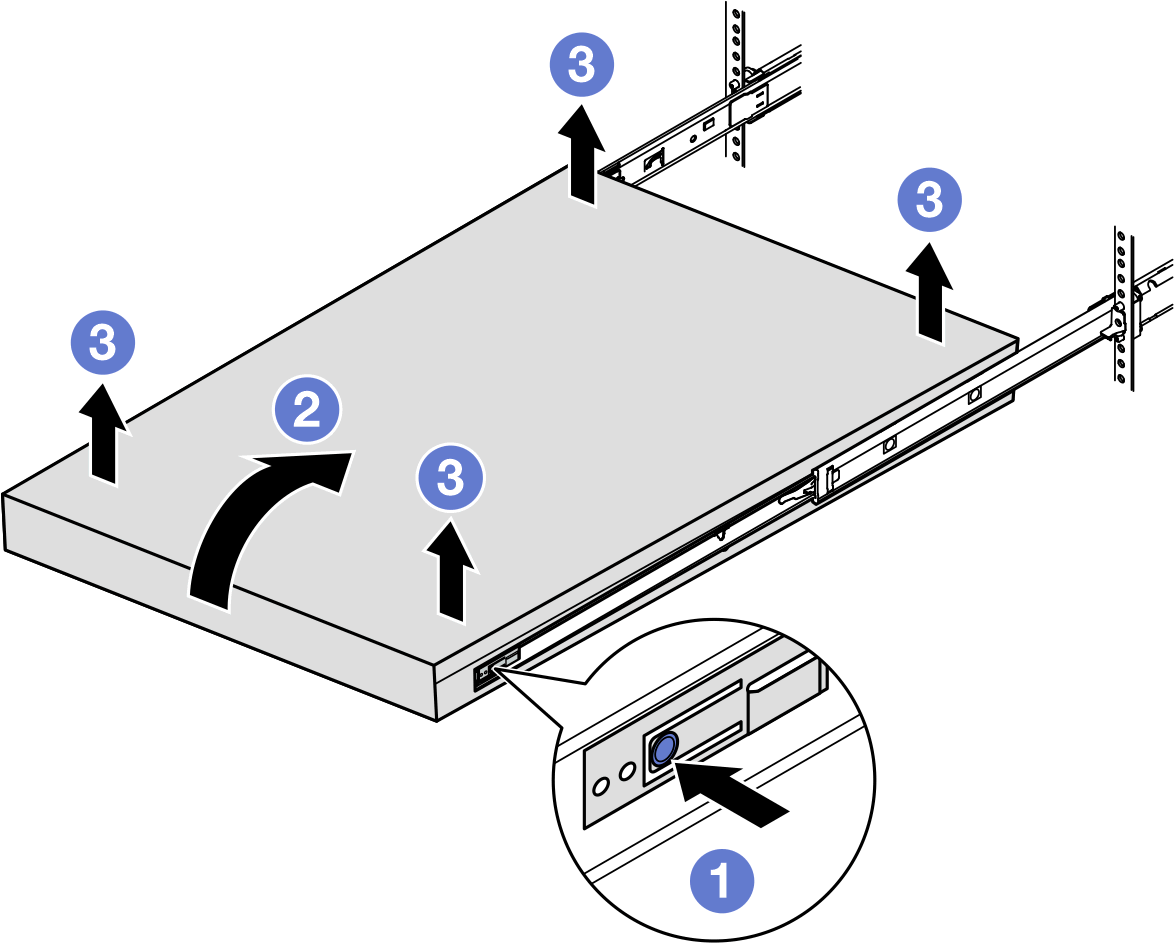
- Attention
- Make sure that two people are lifting the enclosure together, and that the hands must be positioned as illustrated.
- Rail kit except for ThinkSystem Toolless Slide Rail Kit without 1U CMA
After this task is completed
Carefully lay the enclosure on a flat, static-protective surface.
Remove a node from the enclosure
- For a node installed in an enclosure, the node is with no top cover.
Depending on the specific configuration, the node, enclosure, or rails might look different from the illustrations in this section.
Procedure
- Remove the node from the enclosure.
- Press the release button on the rear of the enclosure.
- Slide the node out of the enclosure.
1U2N enclosure
Figure 8. Removal of a node from a 1U2N enclosure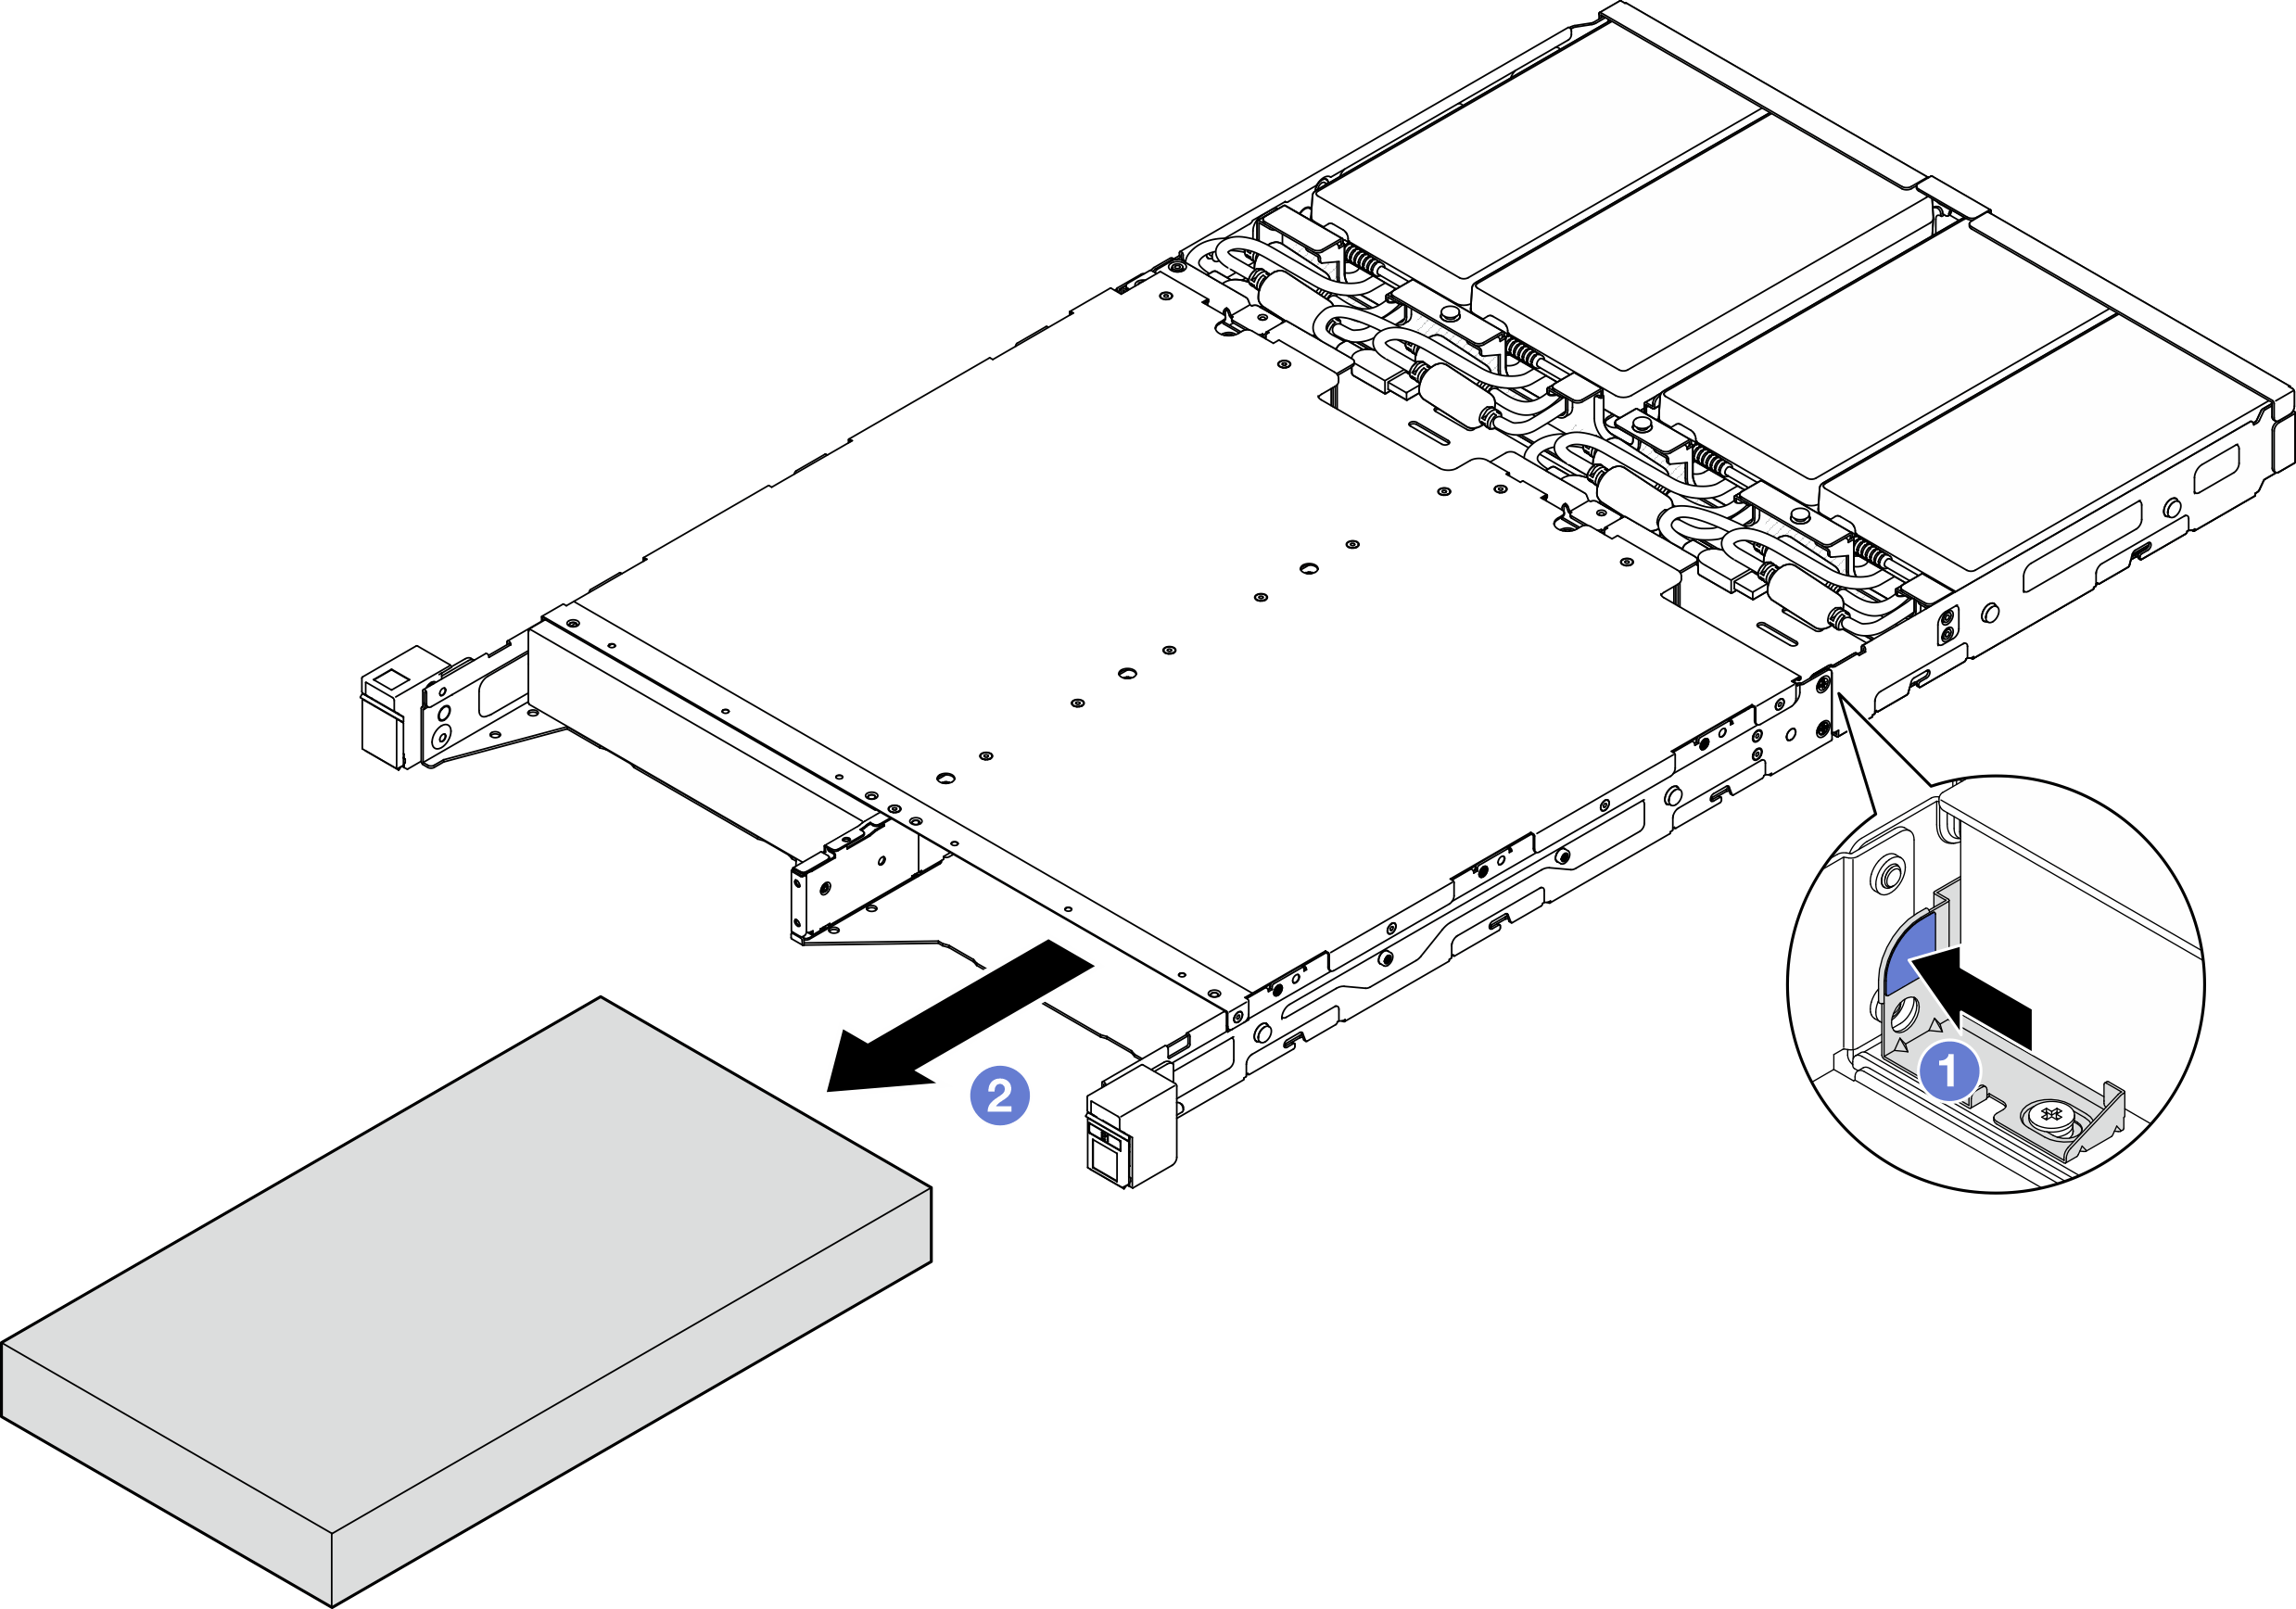
2U2N enclosure
Figure 9. Removal of a node from a 2U2N enclosure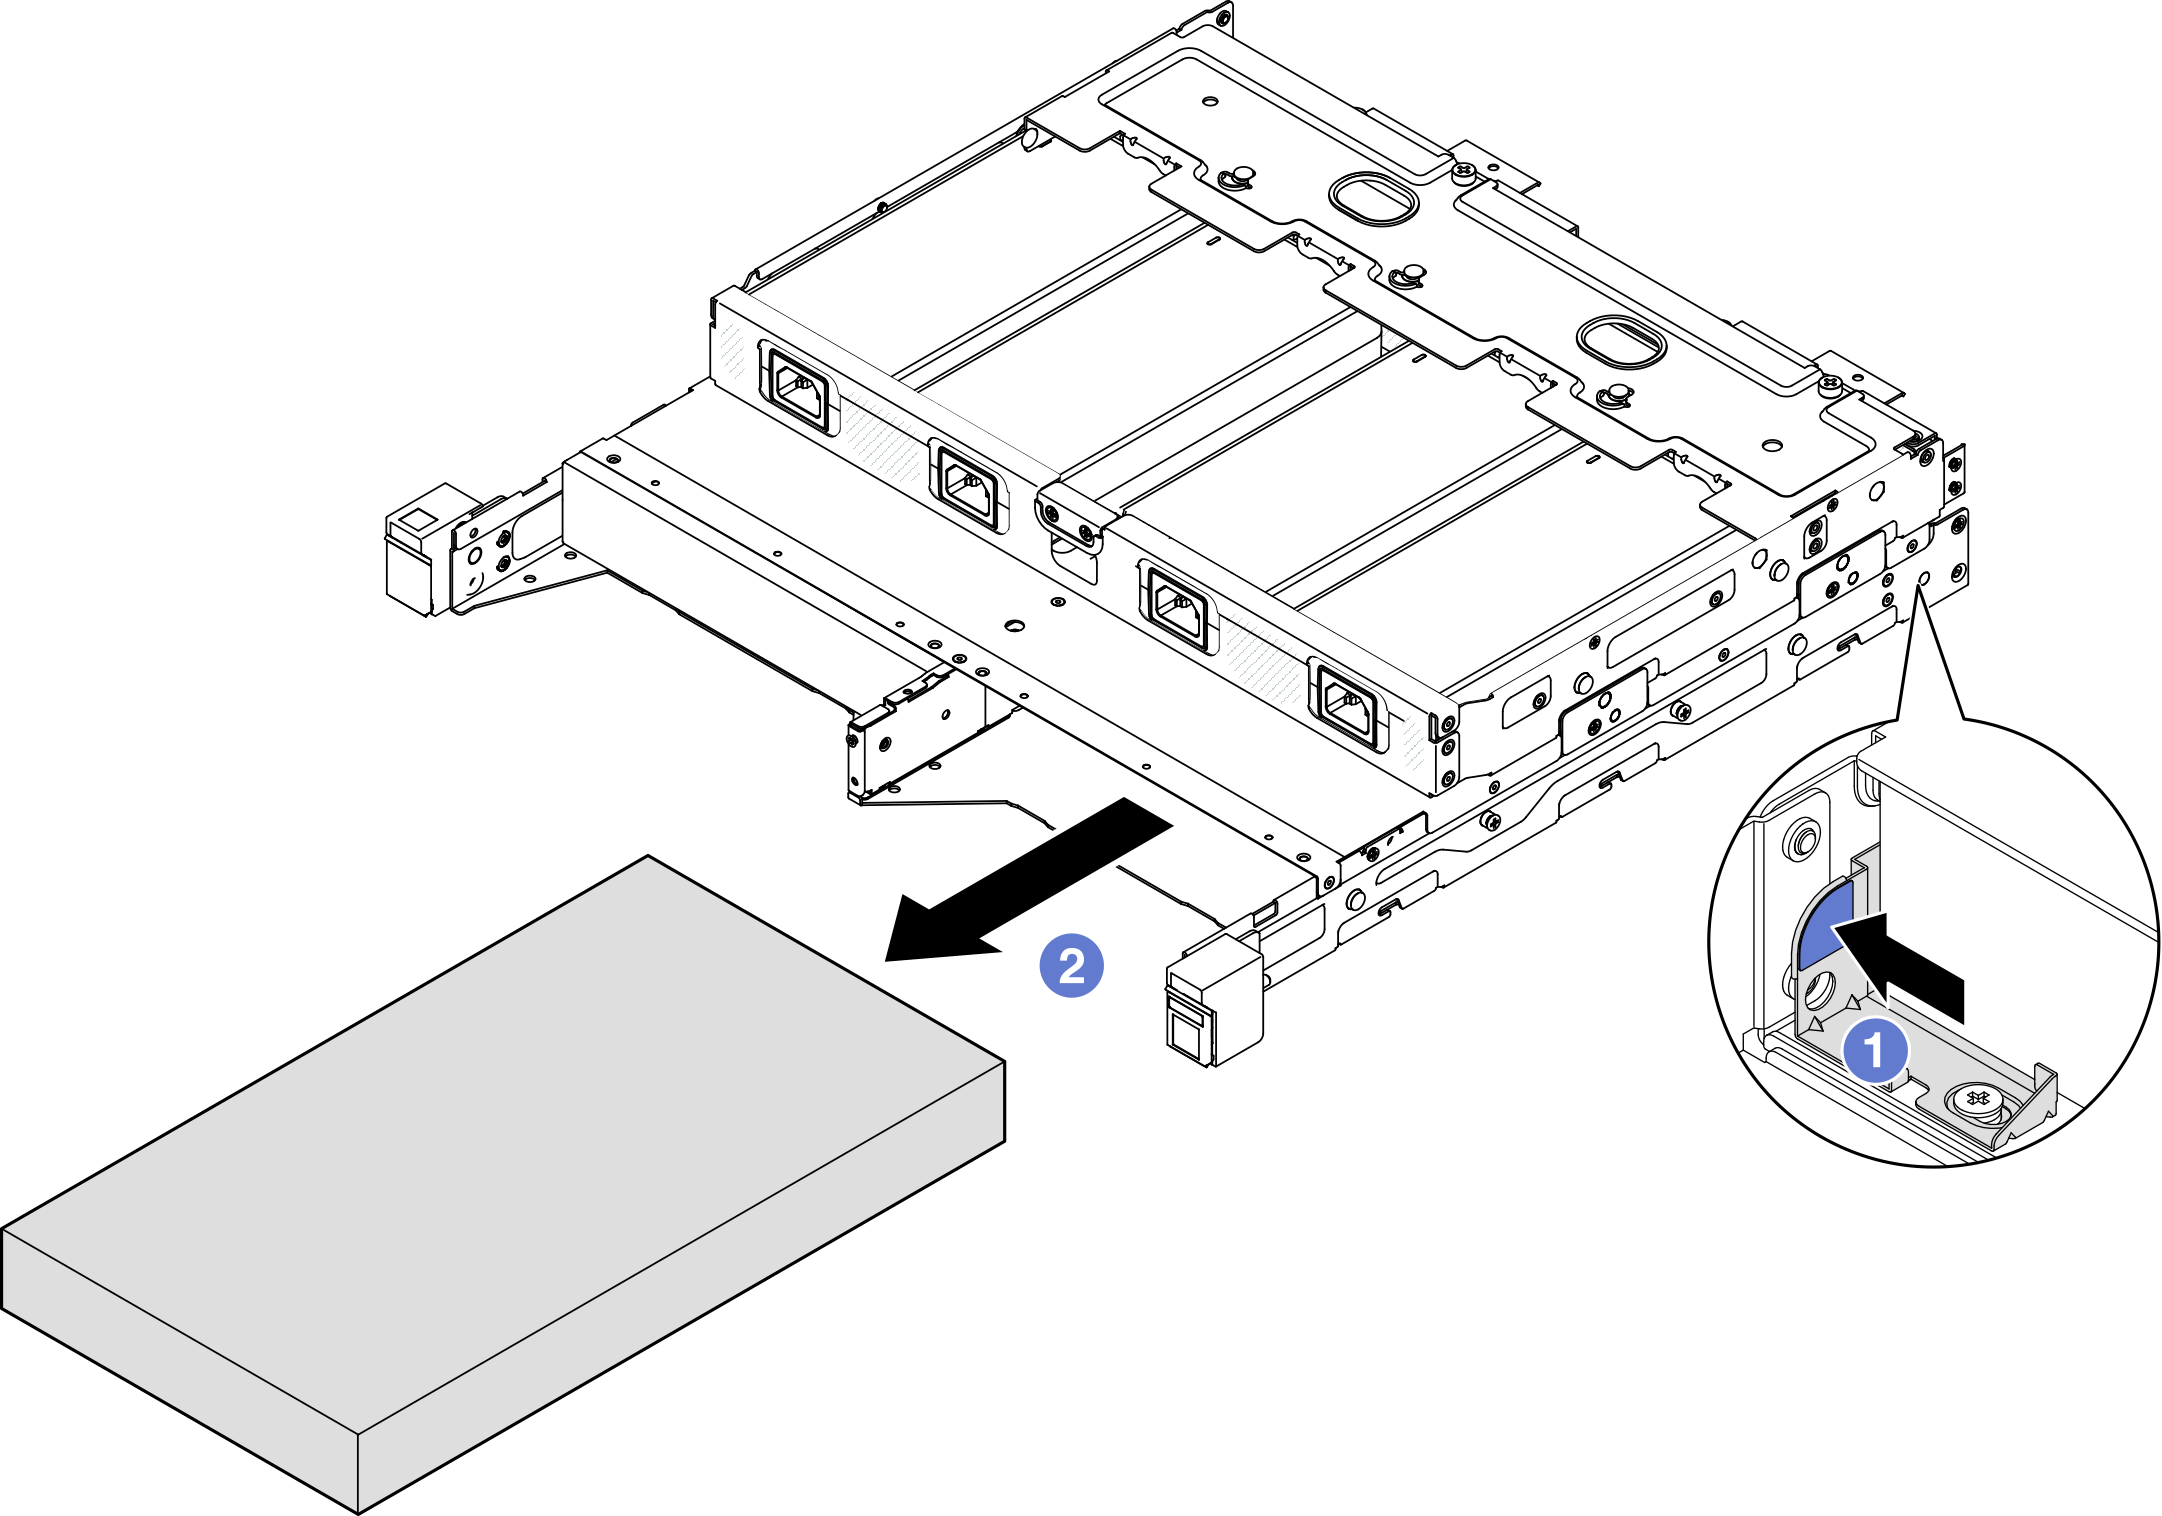
After this task is completed
- Carefully lay the node on a flat, static-protective surface.
- Install a replacement node (see Install a node to the rack) or node dummy filler to the node bay of the enclosure.
- If you are instructed to return the component, follow all of the packaging instructions and use any packaging materials for shipping that are supplied to you.