Install a node to the rack
Follow instructions in this section to install a node to the rack.
About this task
To avoid potential danger, make sure to read and follow the safety information.
- S002
 CAUTIONThe power-control button on the device and the power switch on the power supply do not turn off the electrical current supplied to the device. The device also might have more than one power cord. To remove all electrical current from the device, ensure that all power cords are disconnected from the power source.
 - R006
 CAUTIONDo not place any object on top of a rack-mounted device unless that rack-mounted device is intended for use as a shelf.
Read Installation Guidelines and Safety inspection checklist to make sure that you work safely.
Make sure that all components and cables are installed and seated correctly inside the node, except for the power cords and external cables, and that no loose tools or parts are left inside the node.
For a node installed in an enclosure, the node is with no top cover.
- To install a node to the rack:
For details of the rail options for the rack installation, see Rail Installation Guides.
Install a node into an enclosure
Procedure
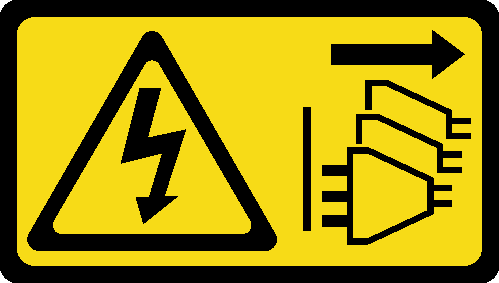
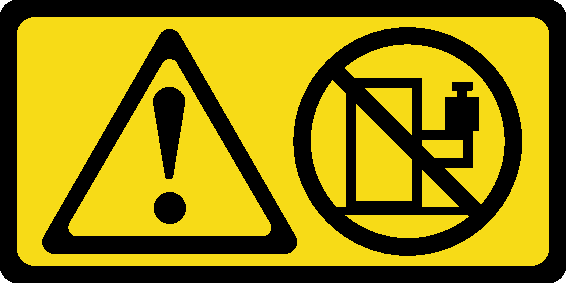
- Insert the node into the node bay until it stops.
1U2N enclosure
Figure 1. Installation of a node into a 1U2N enclosure
2U2N enclosure
Figure 2. Installation of a node into a 2U2N enclosure
Install the enclosure to the rack
Make sure to have enough help and use safe practices when lifting the enclosure.
| 1U2N enclosure | 2U2N enclosure | |||
| DC power source input | 300W external power adapter | AC power source input | 300W external power adapter | |
| ThinkSystem Enclosure Universal Short Rack Rail Kit | √ | Not supported | √ | √ |
| ThinkSystem Friction 2-Post Screw-in Rail Kit | √ | Not supported | √ | √ |
| ThinkSystem Toolless Slide Rail Kit without 1U CMA | √ | √ | √ | Not supported |
Procedure
- Depending on the configuration, the procedure of installing the enclosure to the rack can be one of the following.
- Rail kit except for ThinkSystem Toolless Slide Rail Kit without 1U CMA
If applicable, install the inner rails onto the enclosure.
 Align the mounting holes on the inner rails with the corresponding rail-mounting pins on the side of the enclosure.
 Push the inner rails as shown until the mounting pins on the enclosure lock into place with the inner rails.Figure 3. Installation of the inner rails
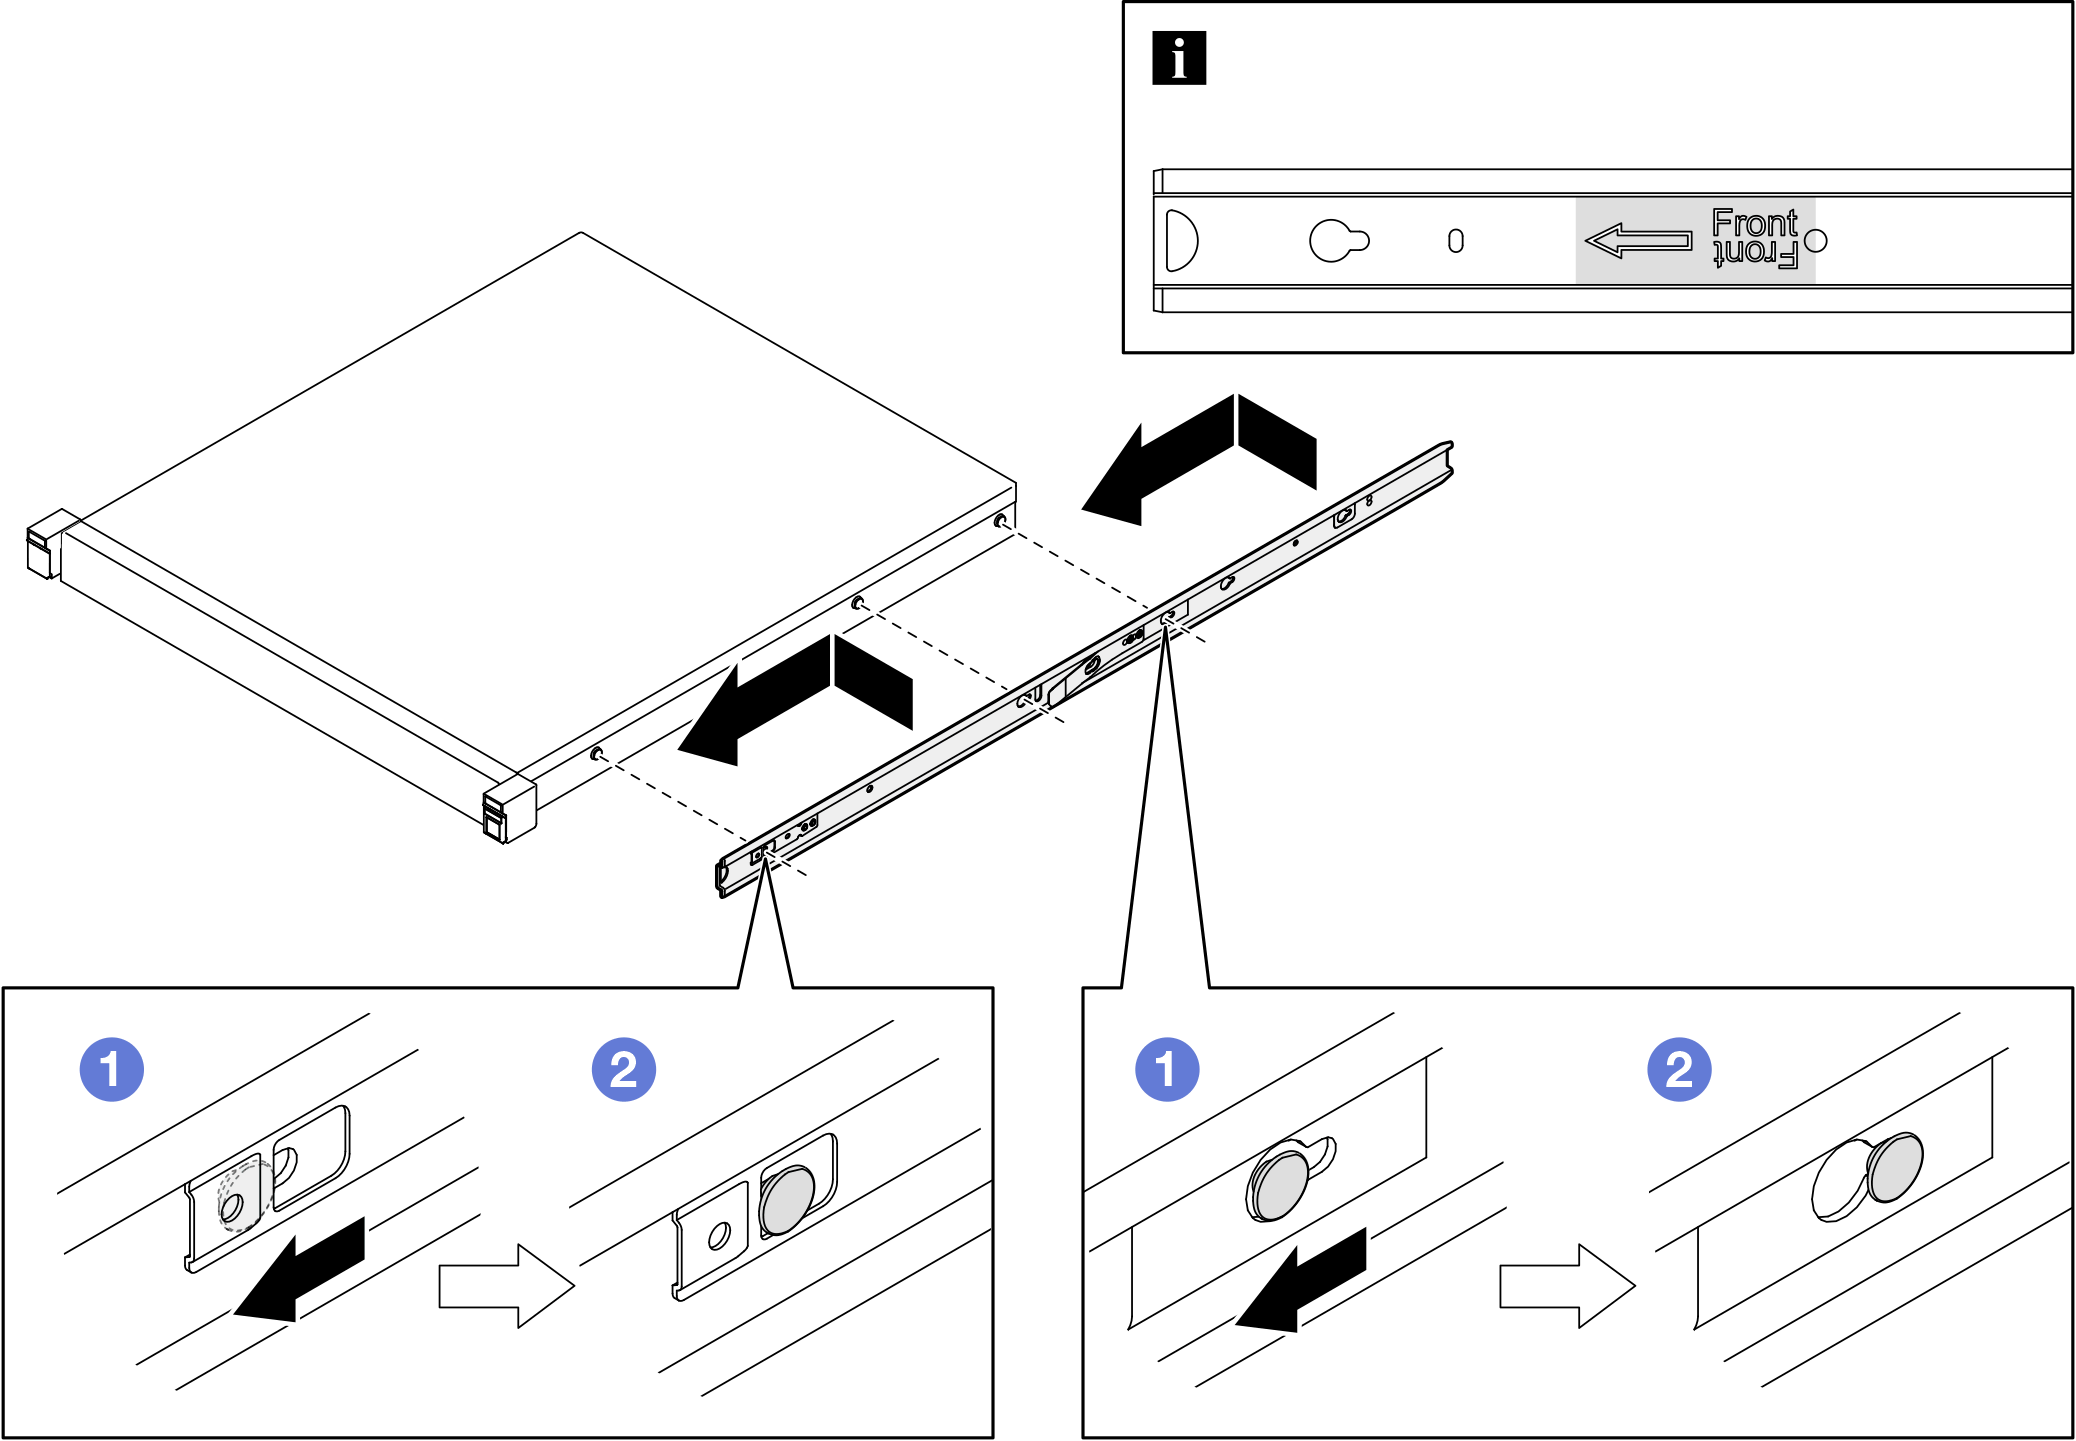
If applicable, tighten the screws to secure the inner rails on the enclosure.
Figure 4. Installation of inner-rail screws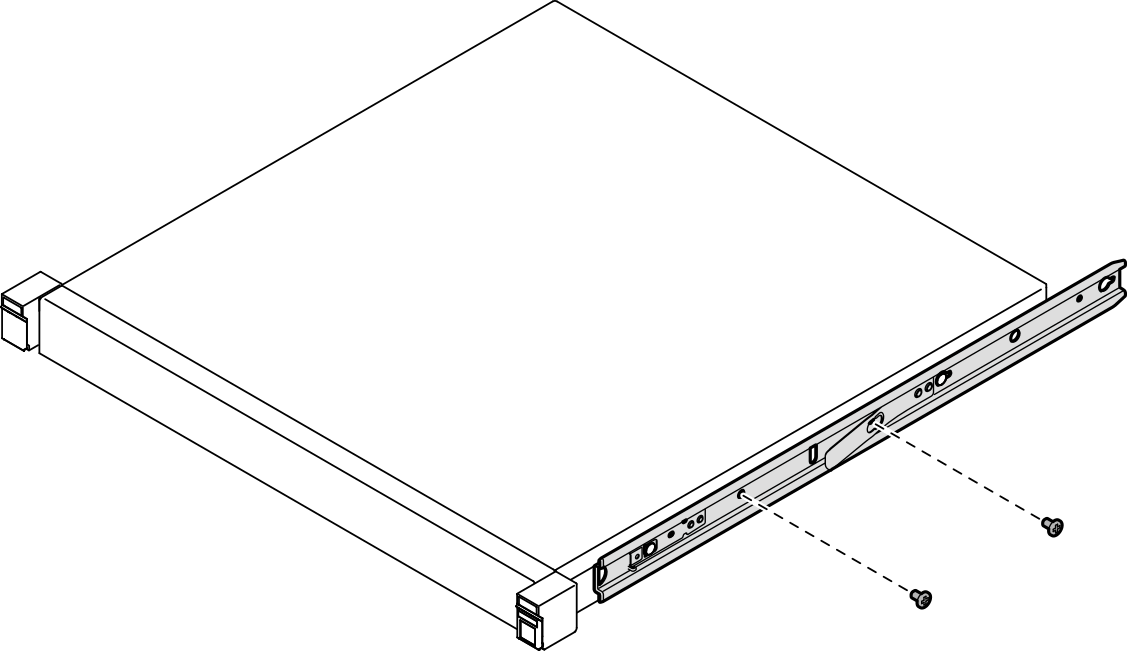
Lift and slide the enclosure into the rails.
- Carefully lift the enclosure and align the enclosure with the rails on the rack; then, position the enclosure as shown and push it into the rack.
- Press the release latches.
 Push the enclosure all the way into the rack until the enclosure locks into place with a click.
Figure 5. Installation of the enclosure into the rack by sliding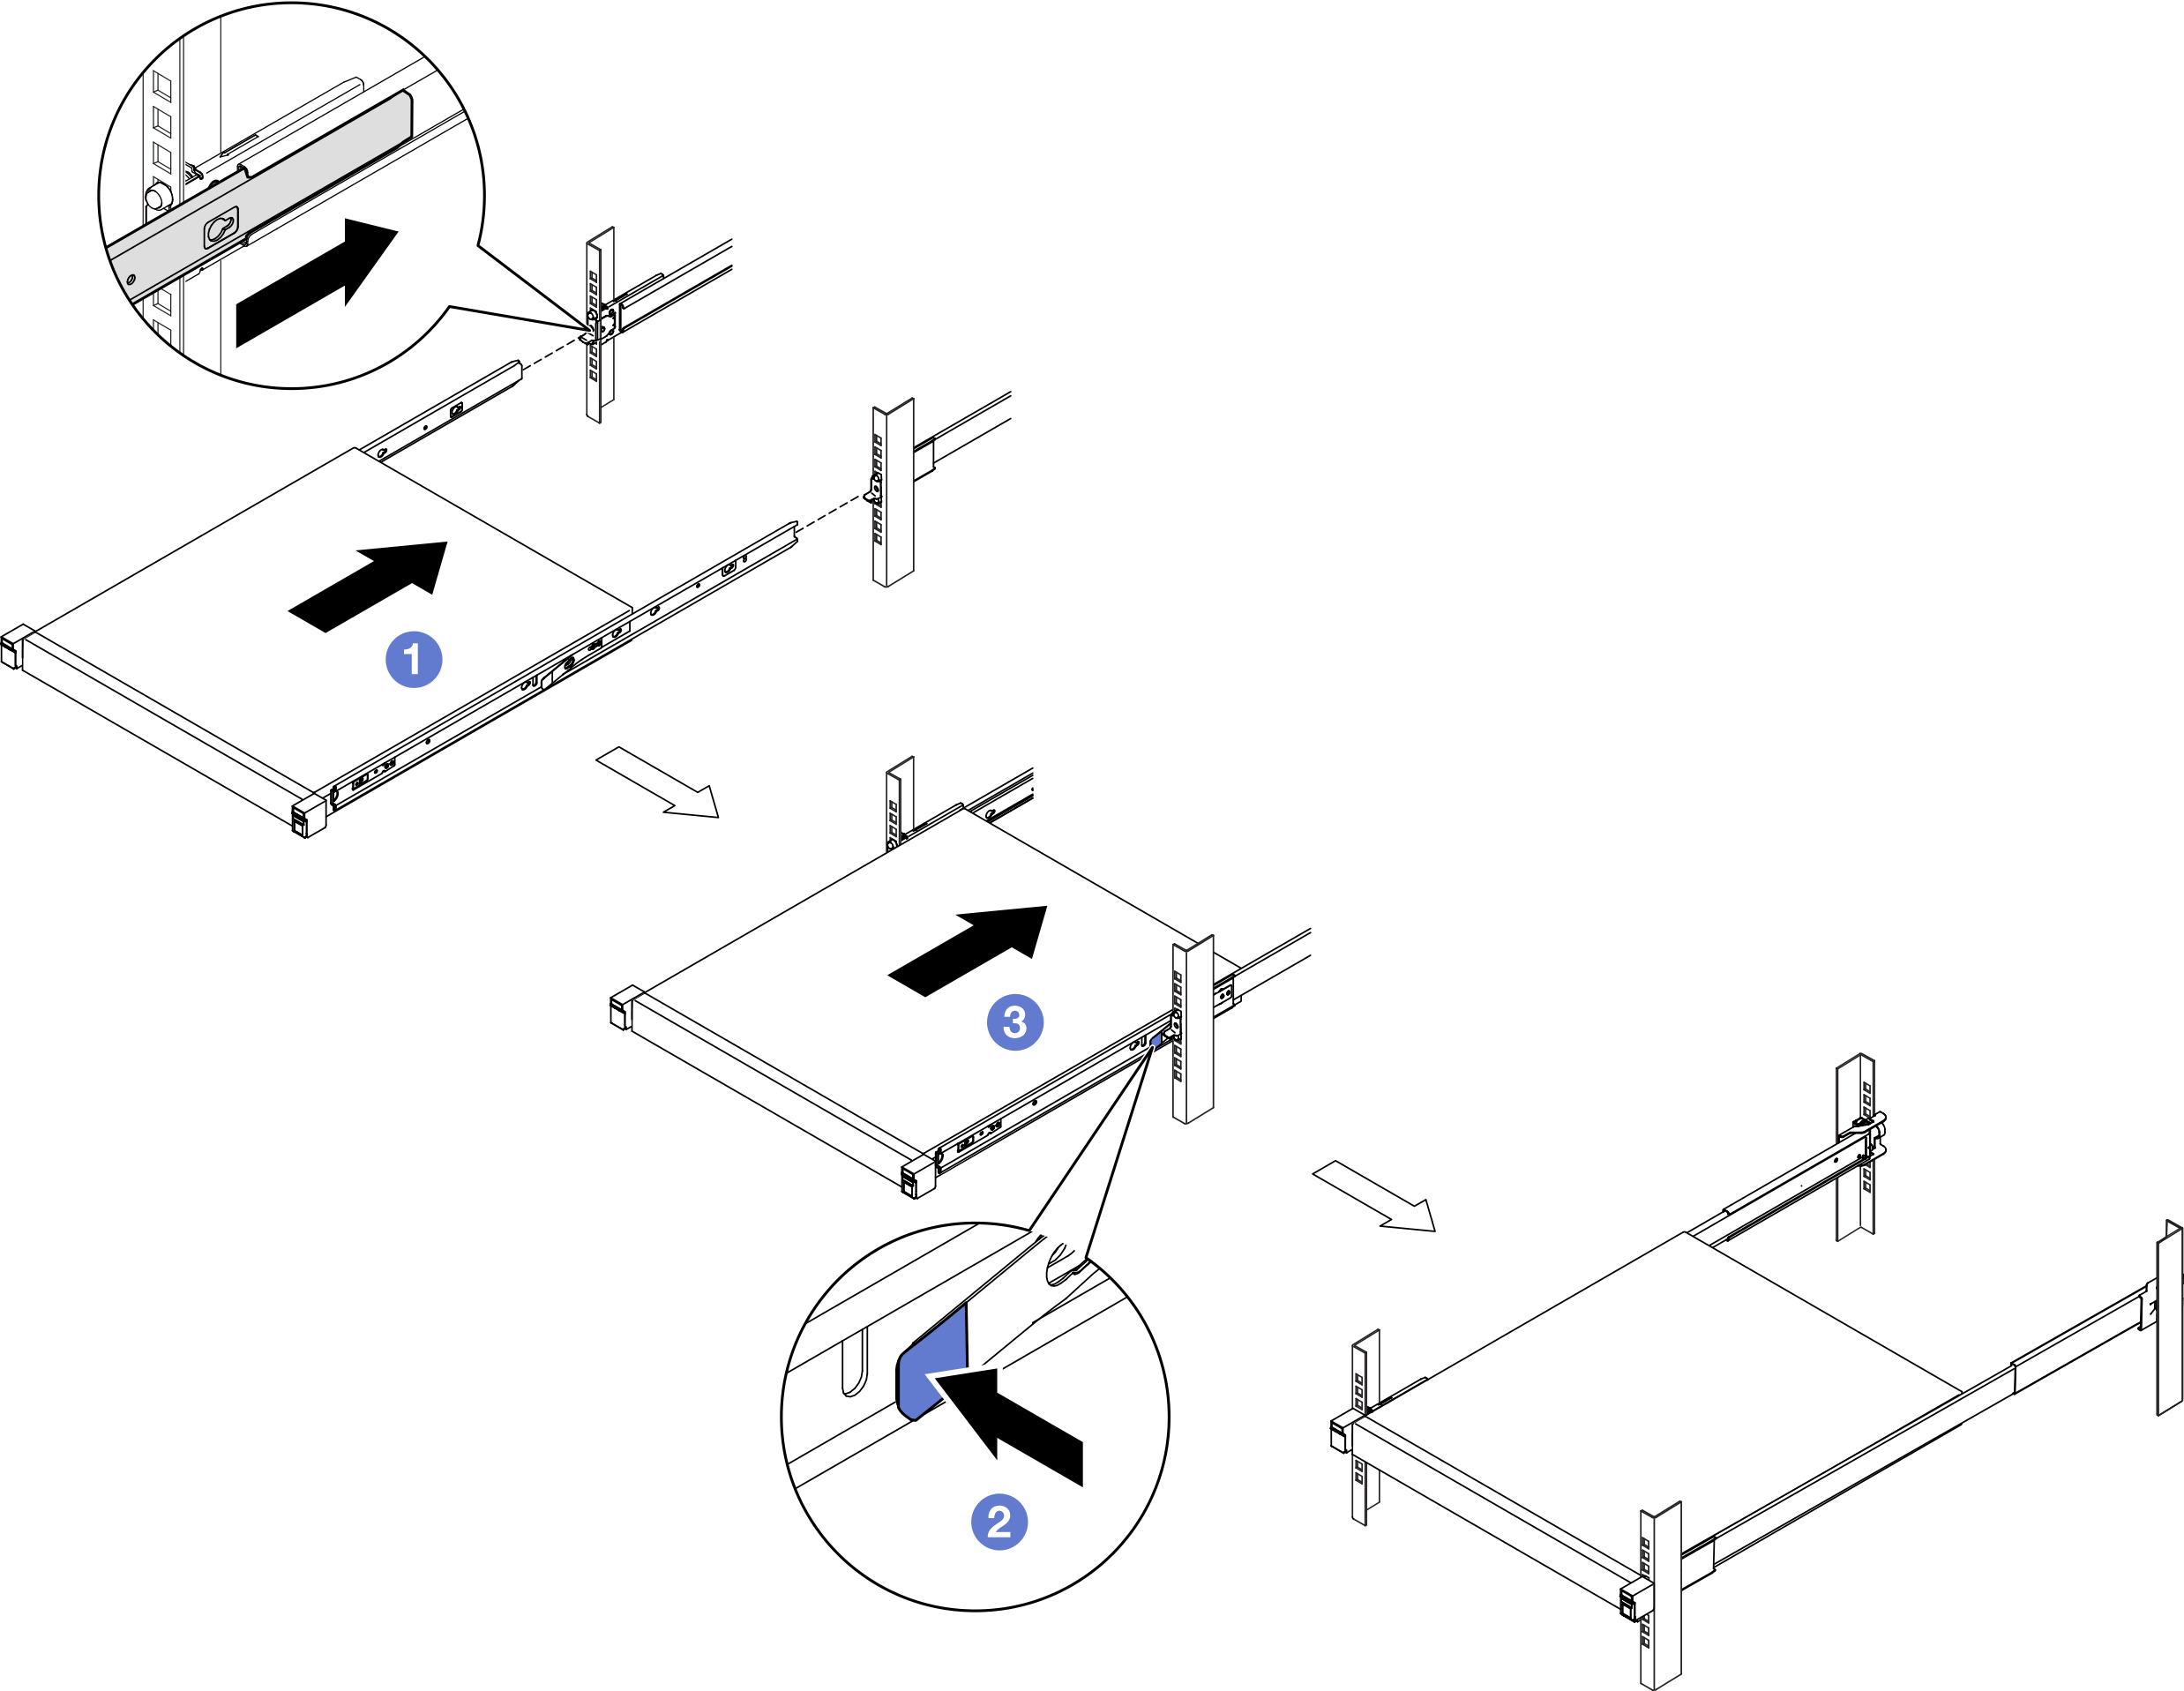
- ThinkSystem Toolless Slide Rail Kit without 1U CMA
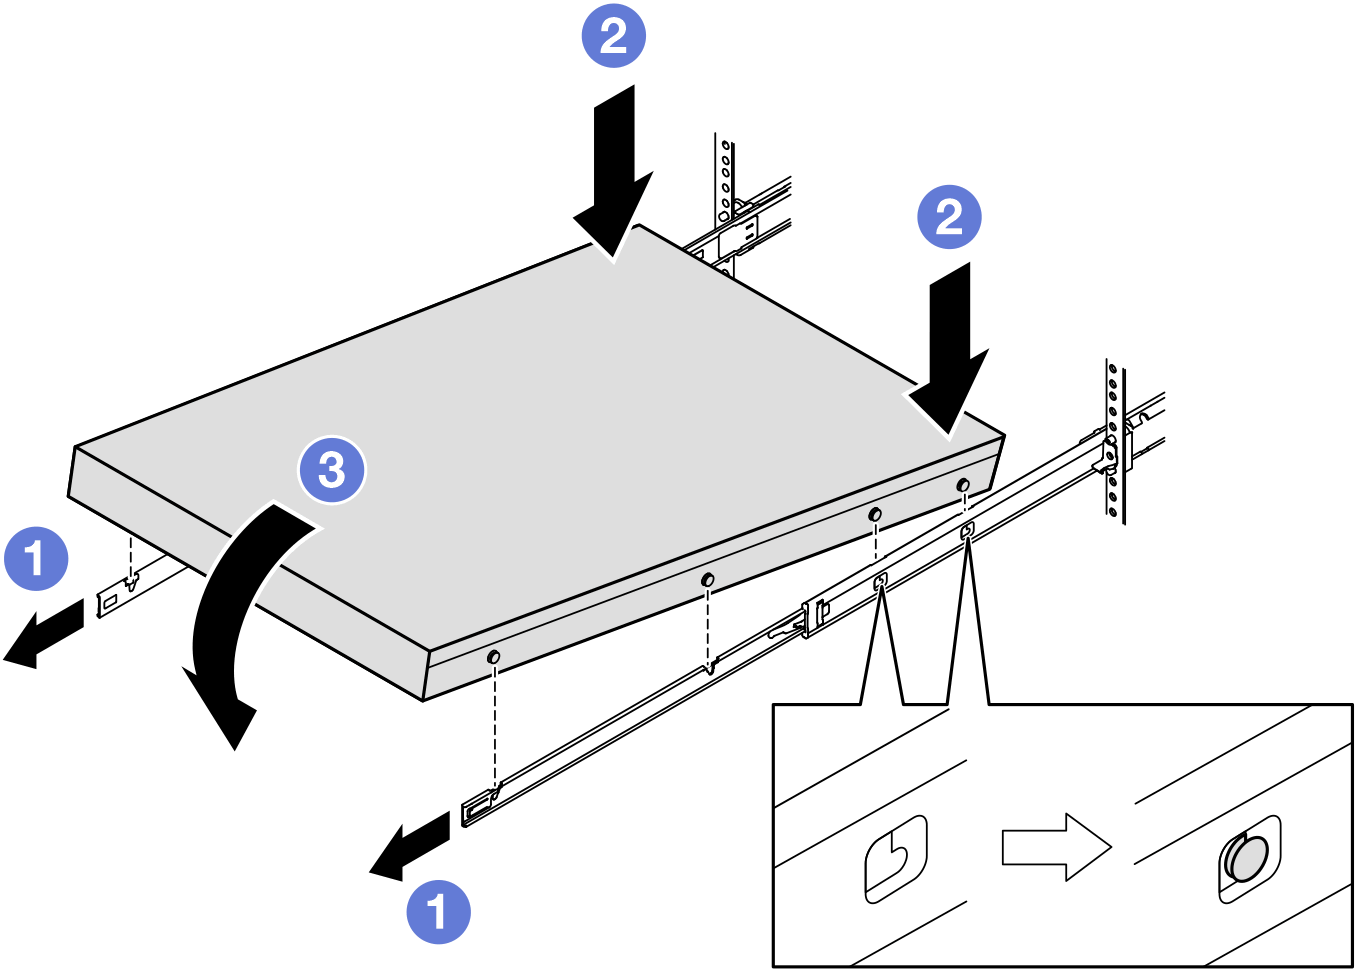
Place the enclosure down into the rails.
- Pull the rails forward until the inner rails click two times into place.
- Carefully lift the enclosure and tilt it into position over the rails so that the mounting studs on the enclosure line up with the mounting holes of the inner rails.
- Slowly lower the enclosure down until the rear mounting studs slide into the rear mounting holes; then, the front mounting studs go into the corresponding mounting holes of the rails. Make sure that the mounting studs are locked into position so the enclosure is firmly secured.Figure 6. Installation of the enclosure into the rack by rotating
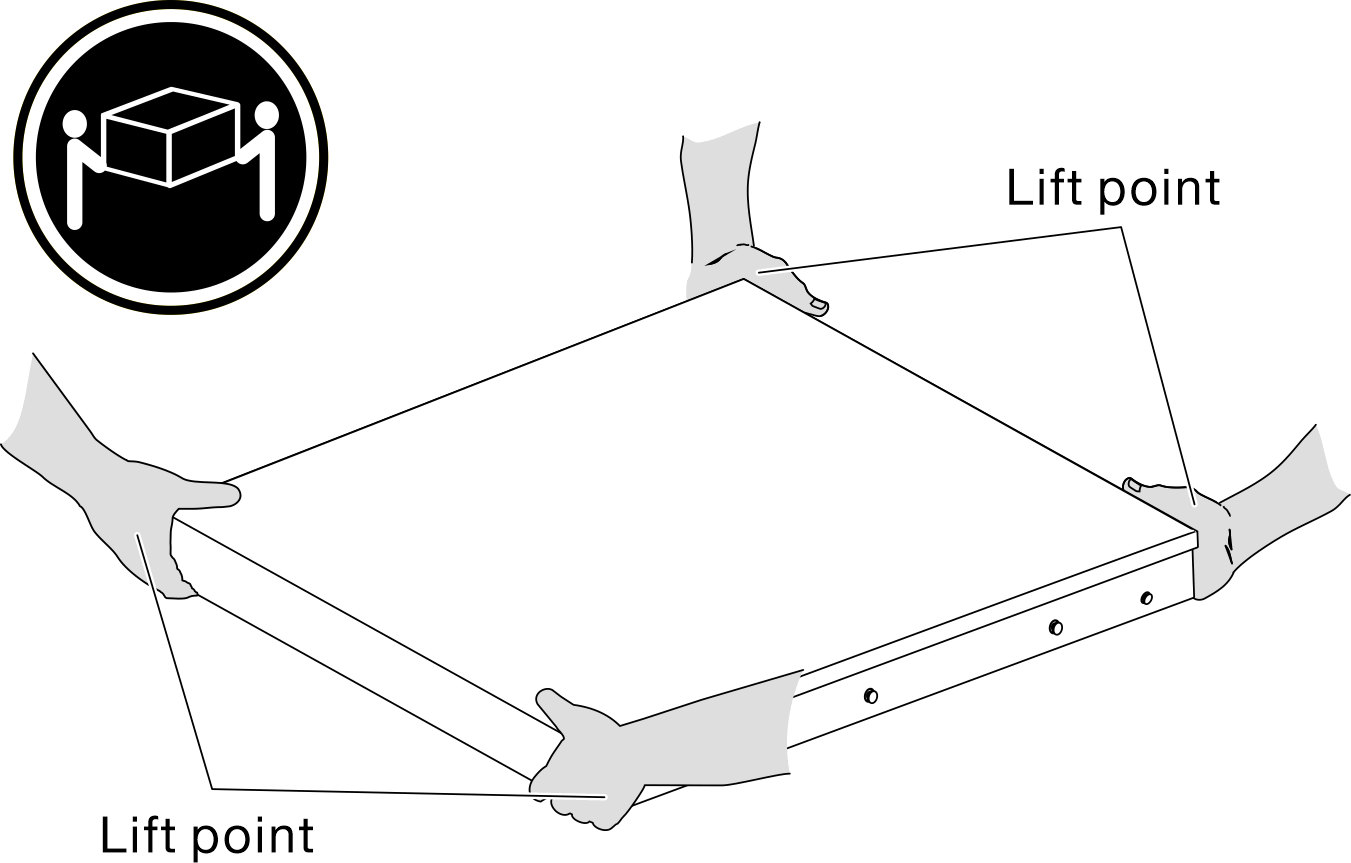
 Attention
- Make sure that two people are lifting the enclosure together, and that the hands must be positioned as illustrated.
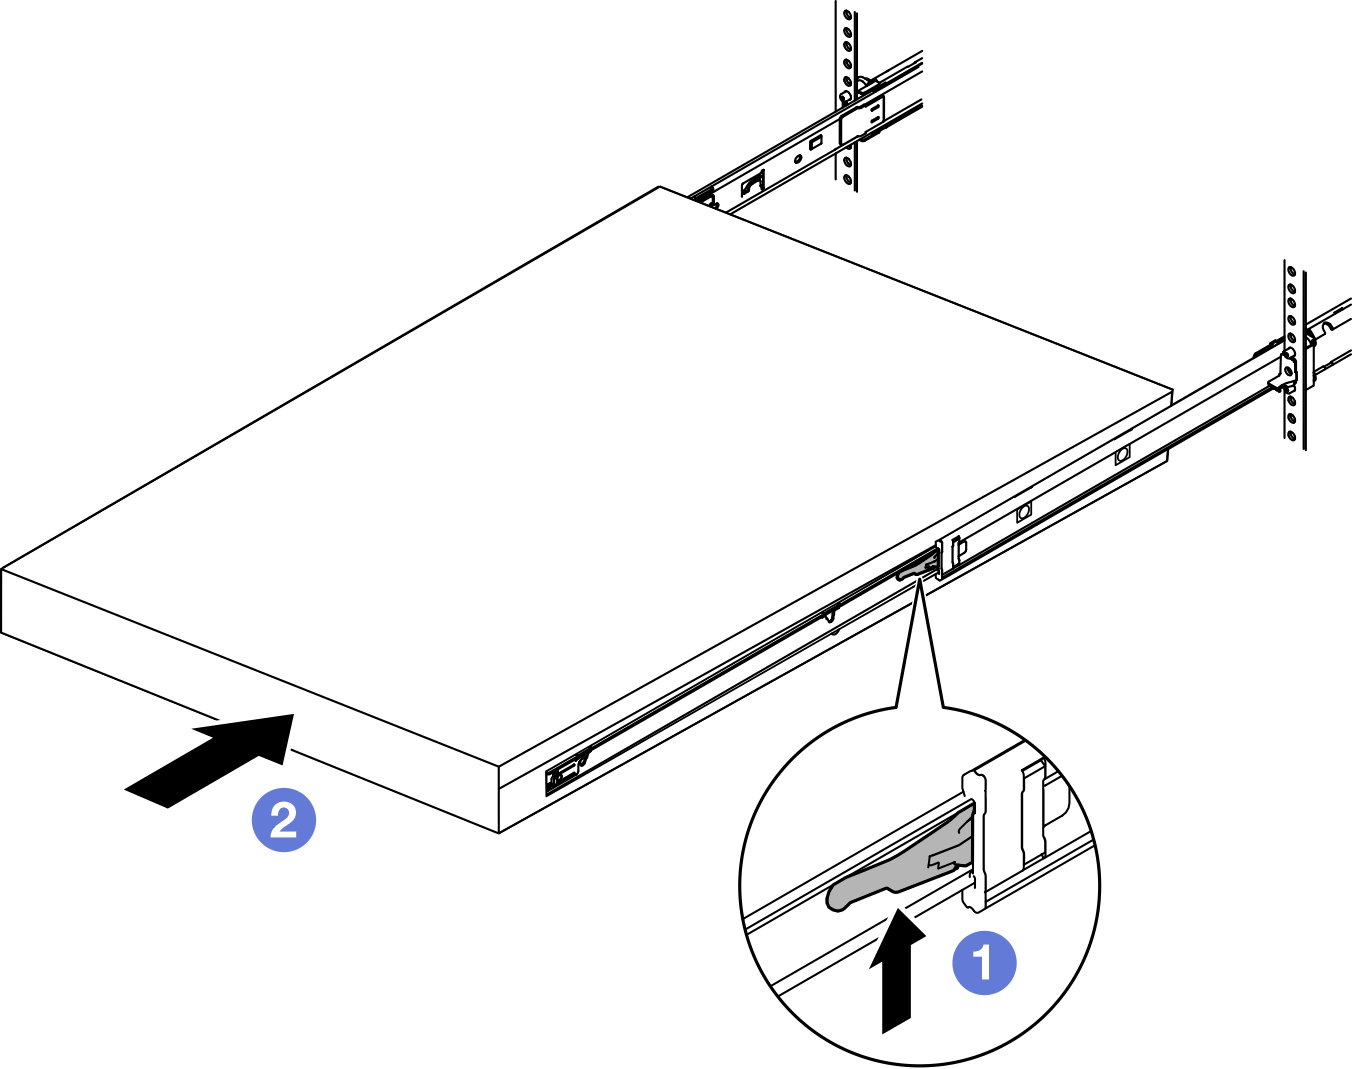
Slide the enclosure into the rack.
- Lift the locking levers on both sides of the rails.
- Push the enclosure all the way into the rack until it clicks into place.Figure 7. Installation of the enclosure into the rack by rotating
- Rail kit except for ThinkSystem Toolless Slide Rail Kit without 1U CMA
- (Optional) If necessary, open the rack release latches and tighten the screws to firmly secure the enclosure to the rack.Figure 8. Installation of screws to the rack release latches
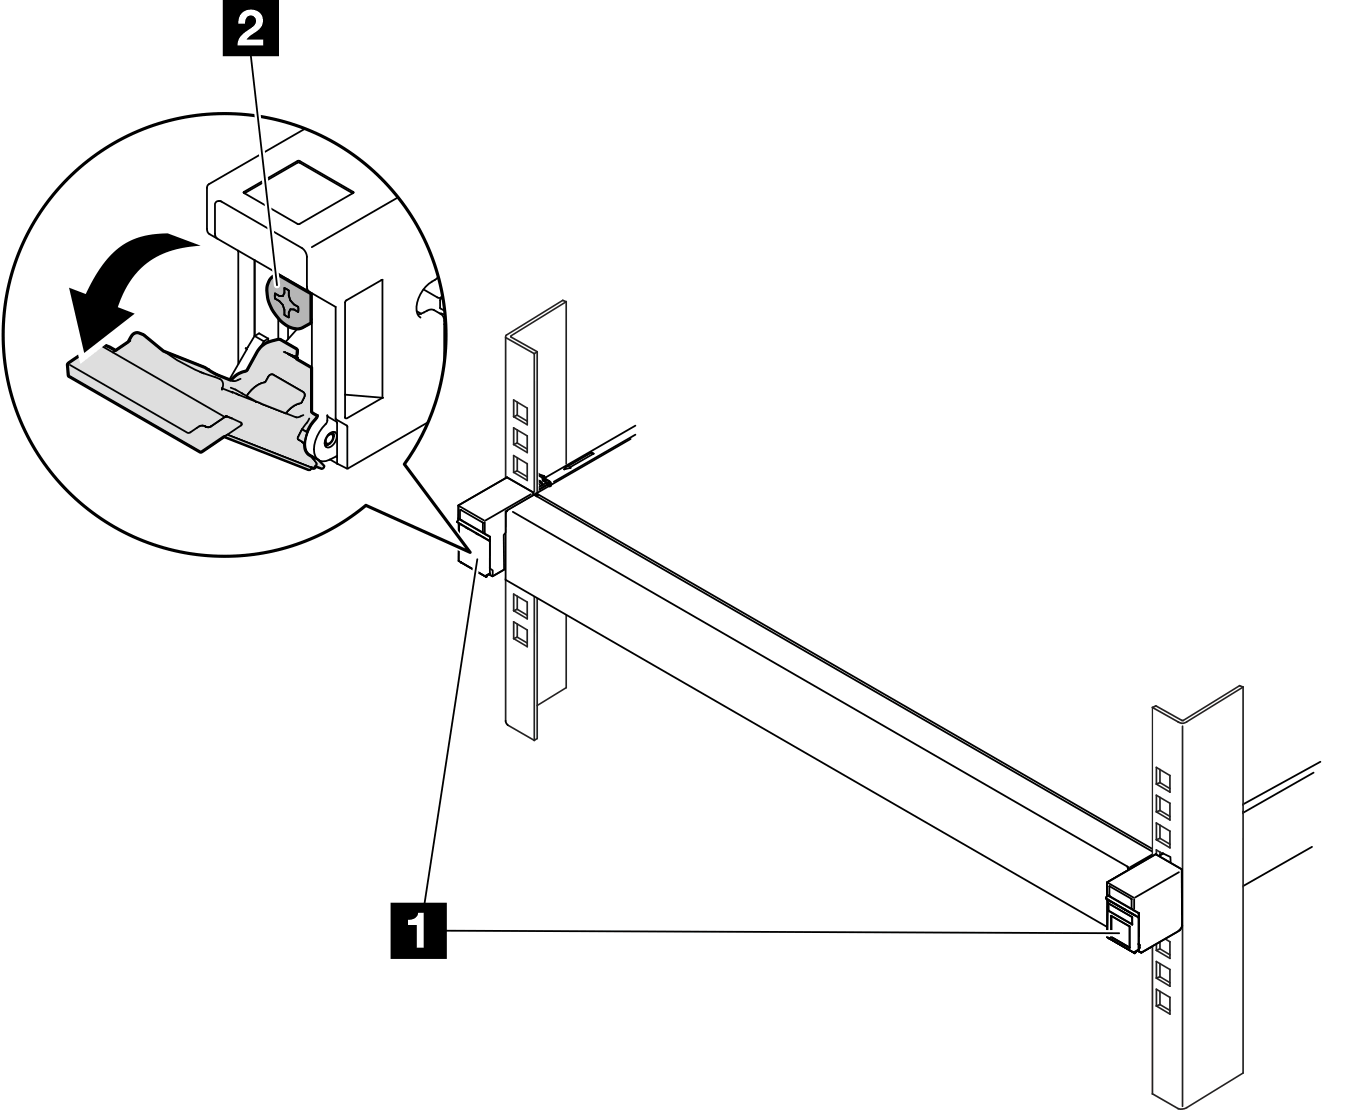
1 Rack release latches 2 Front screw
Install a shipping bracket to the enclosure
Procedure
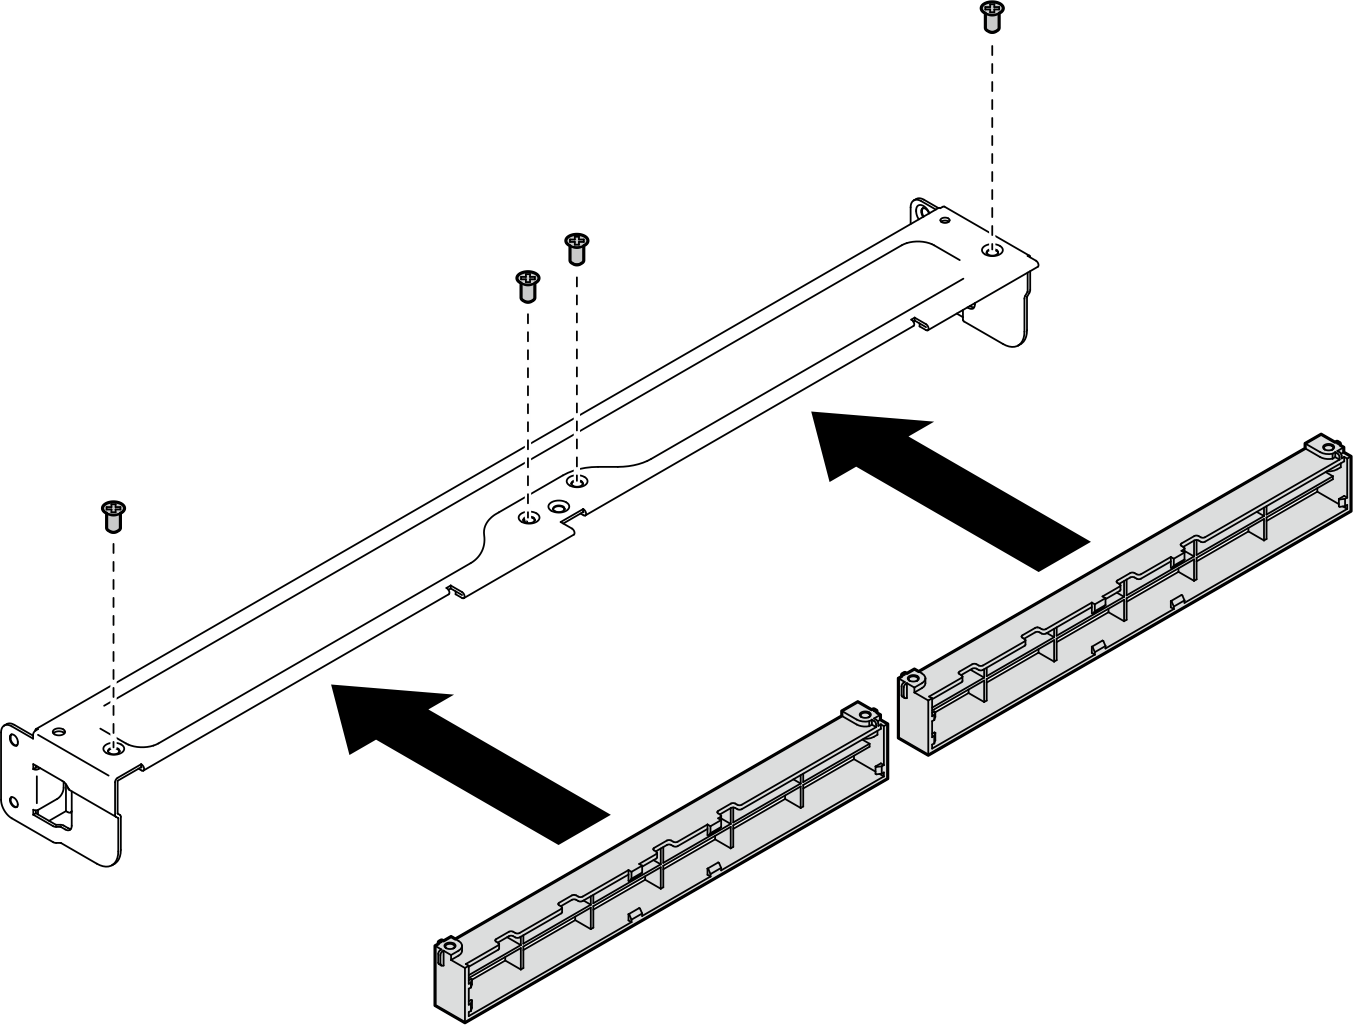
- If applicable, install the dust filter holder to the shipping bracket; then, secure the dust filter holder with two screws.NoteRepeat this step to install the other dust filter holder.Figure 9. Installation of the dust filter holders
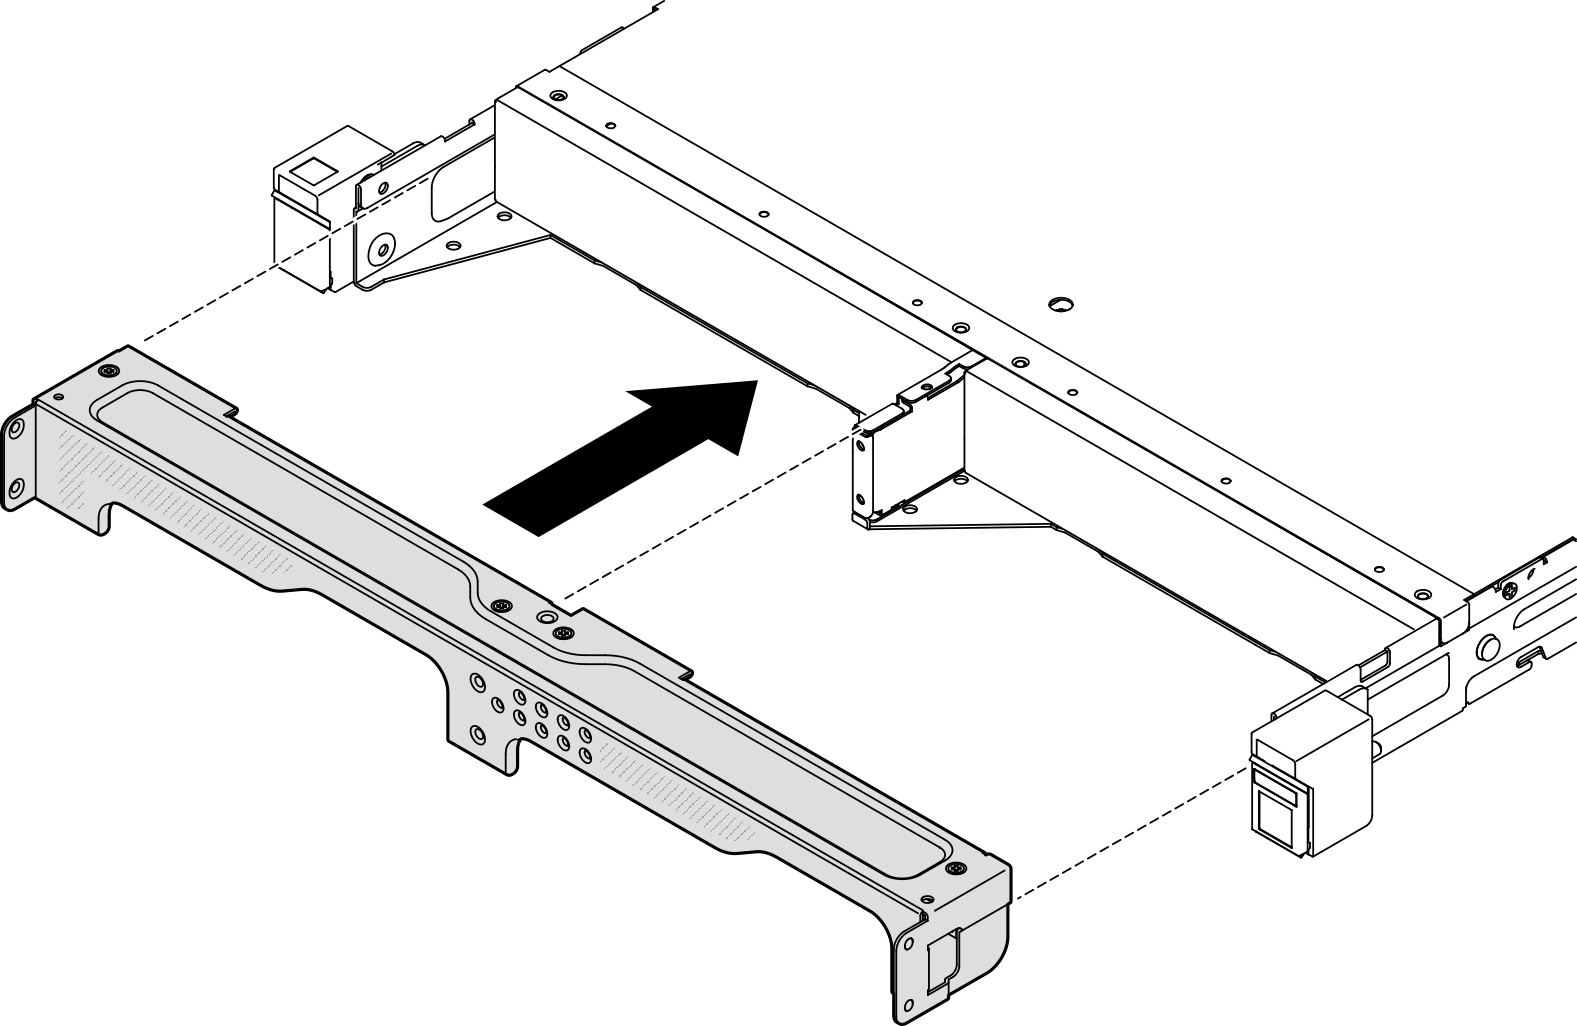
- Insert the shipping bracket to the front of the enclosure.Figure 10. Installation of an shipping bracket
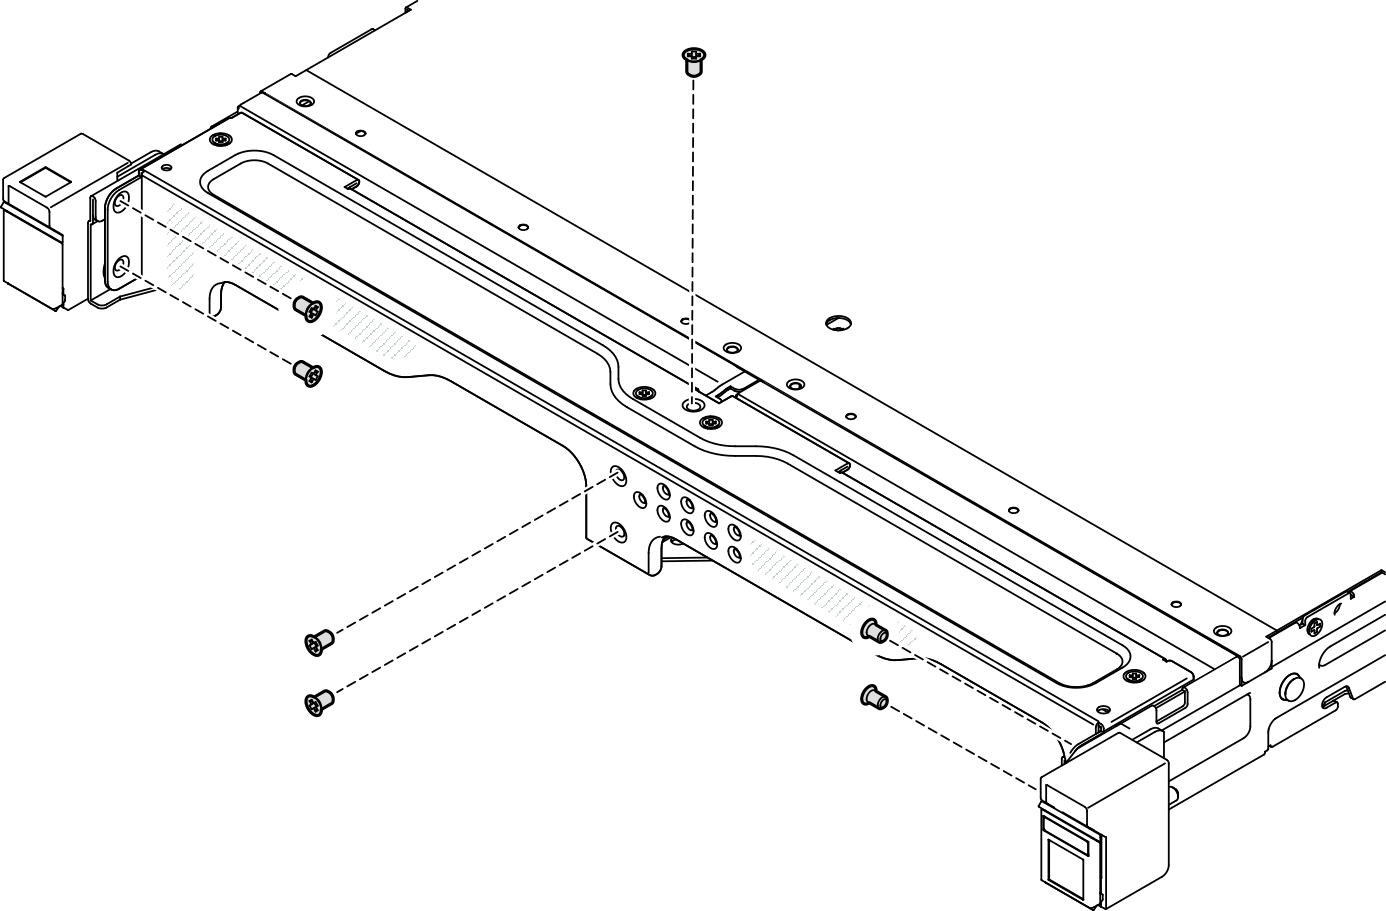
- Tighten the seven screws as shown to secure the shipping bracket.Figure 11. Installation of the shipping bracket screws
After this task is completed
- Proceed to complete the parts replacement (see Complete the parts replacement).