Install the M.2 backplane
Use this information to install the M.2 backplane.
Before you install the M.2 backplane, complete the following steps:
Read Installation Guidelines to ensure that you work safely.
- If necessary, see Install an M.2 drive for information on how to install an M.2 drive in the M.2 backplane.
- If the compute node is installed in a chassis, remove it (see Remove a compute node for instructions).
- Carefully lay the compute node on a flat, static-protective surface, orienting the compute node with the right side facing you.
Remove the compute node cover (see Remove the compute node cover for instructions).
To install the M.2 backplane, complete the following steps:
Figure 1. M.2 backplane installation
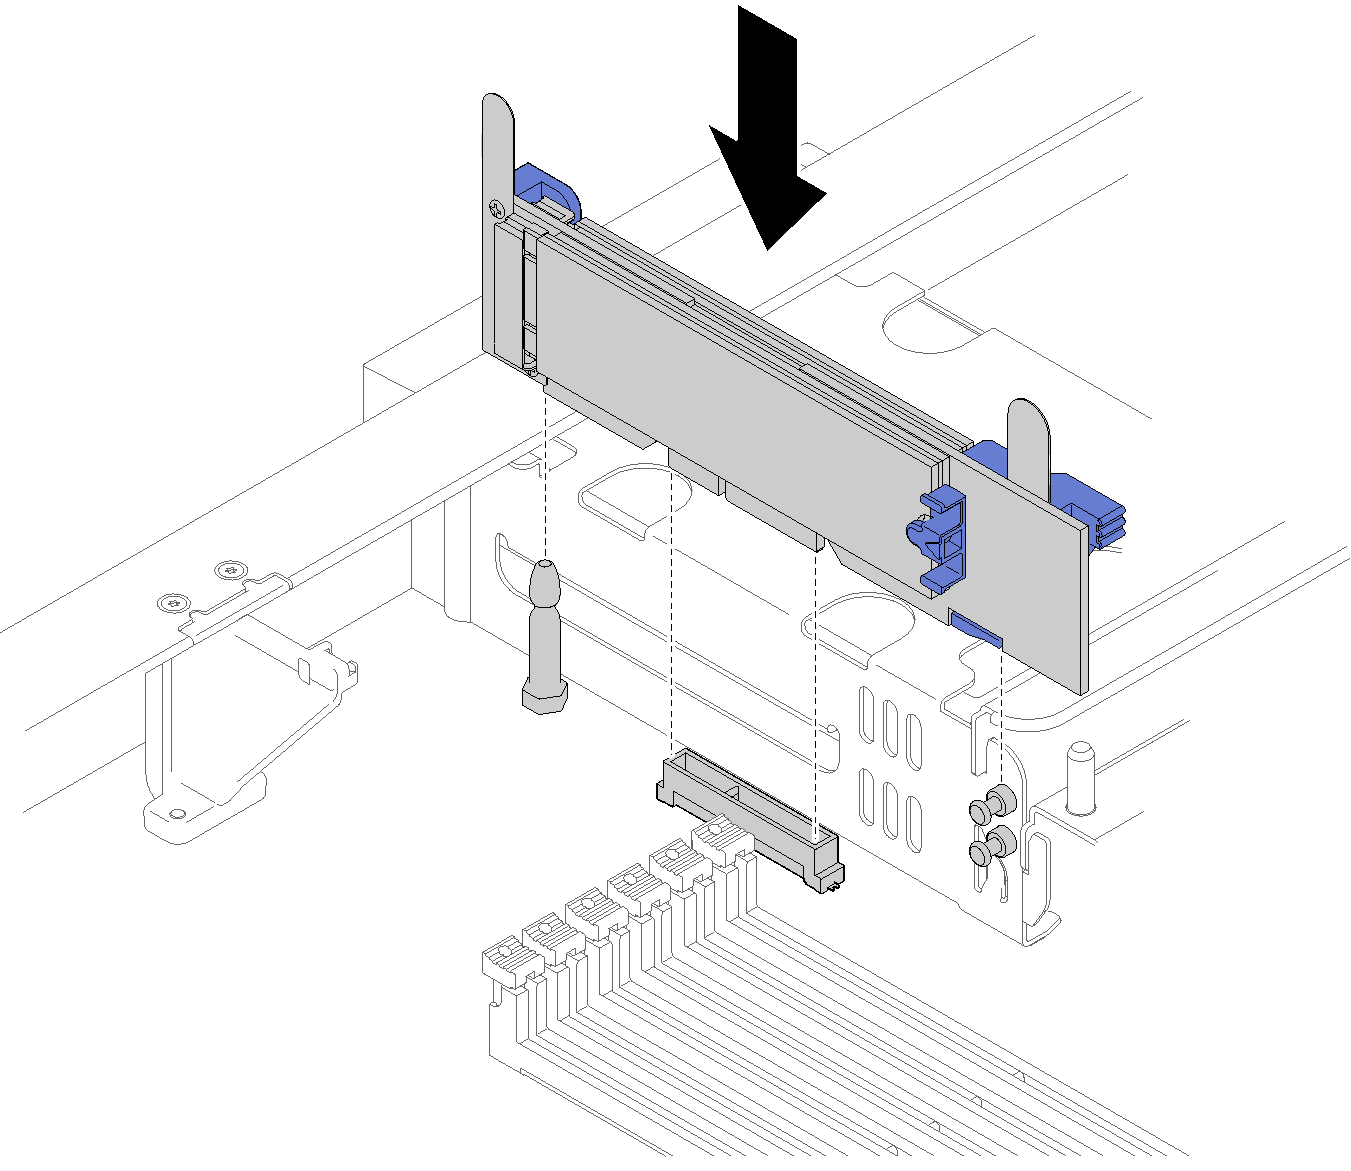
Align the openings on the M.2 backplane with the guide pin on the system board and T-head pins on the storage cage; then, insert the backplane in the system board connector. Press down on the M.2 backplane to fully seated.
After you install the M.2 backplane, complete the following steps:
- Install the compute node cover onto the compute node (see Install the compute node cover for instructions).
- Install the compute node into the chassis (see Install a compute node for instructions).
- See the documentation that comes with the M.2 backplane for device-driver and configuration information to complete the installation.
Demo video
Give documentation feedback