Remove the flash power module
Use this information to remove the flash power module, which is installed on the RAID adapter.
Note
This section only applies to RAID adapters that come with a flash power module.
Before you remove the flash power module, complete the following steps:
Read Installation Guidelines to ensure that you work safely.
- If the compute node is installed in a chassis, remove it (see Remove a compute node for instructions).
- Carefully lay the compute node on a flat, static-protective surface, orienting the compute node with the bezel pointing toward you.
Remove the compute node cover (see Remove the compute node cover for instructions).
To remove the flash power module, complete the following steps:
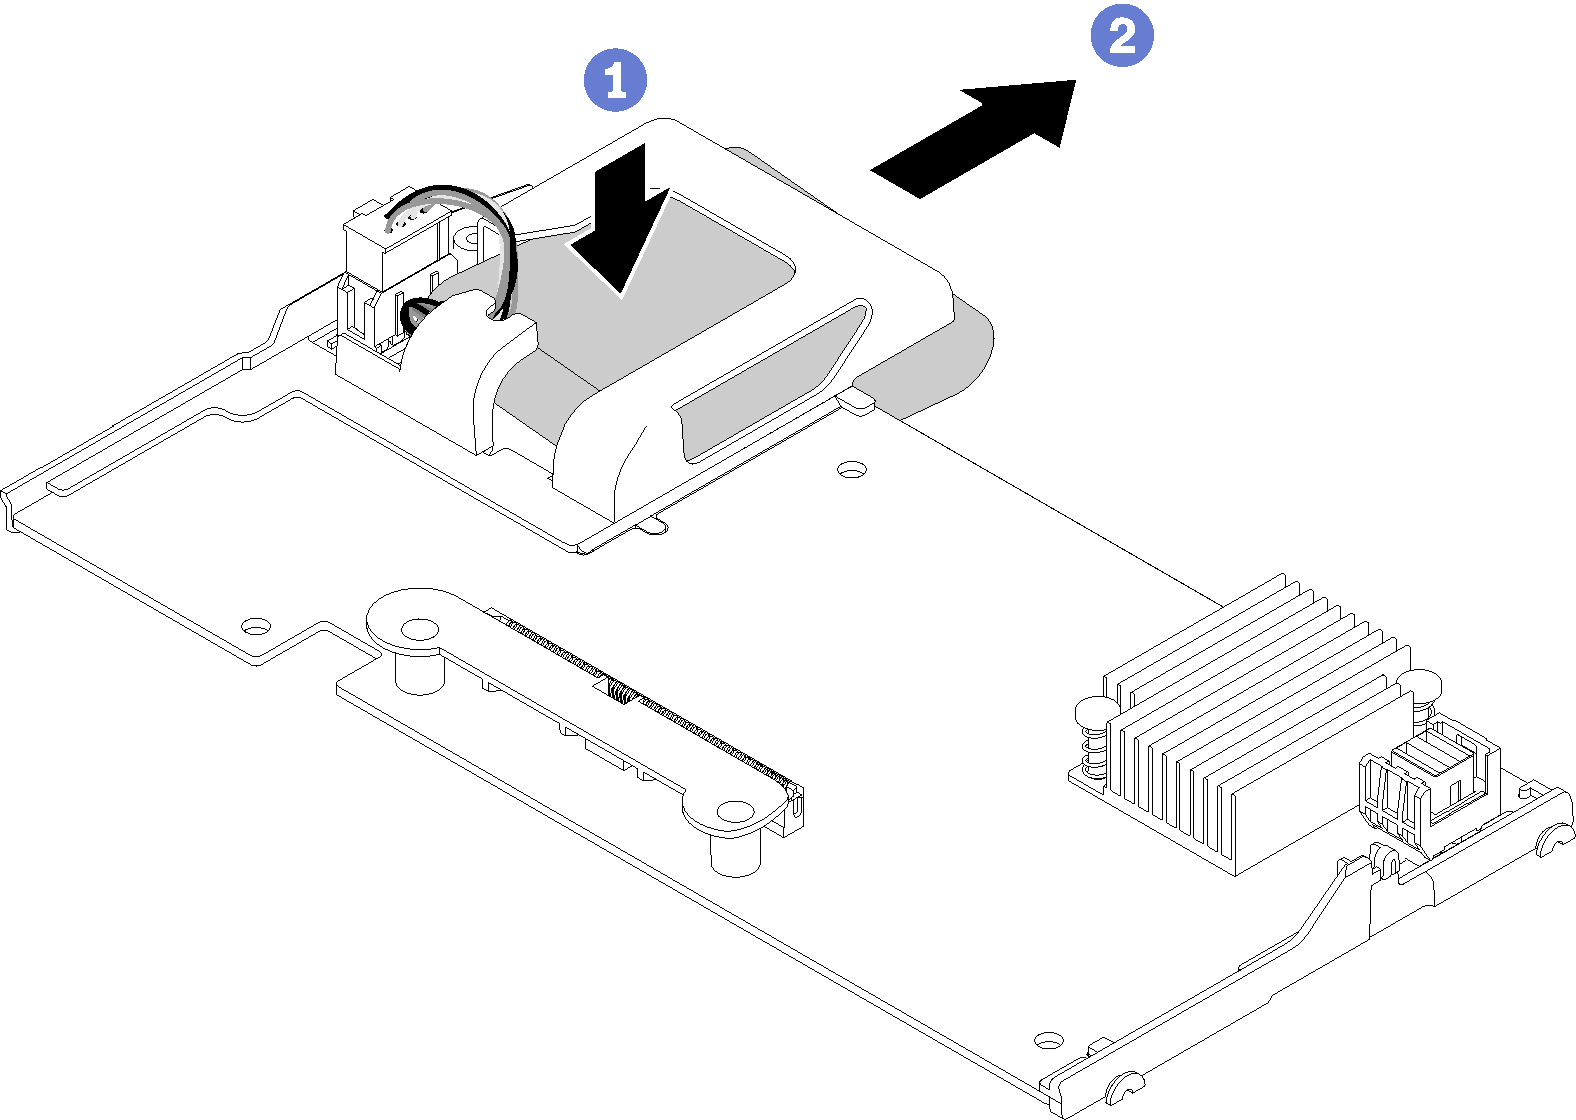
- Carefully turn the RAID adapter over in your hand to access the underside. Press down on the rear of the flash power module; then, slide the flash power module out of its holder on the RAID adapter.Figure 1. Flash power module removal
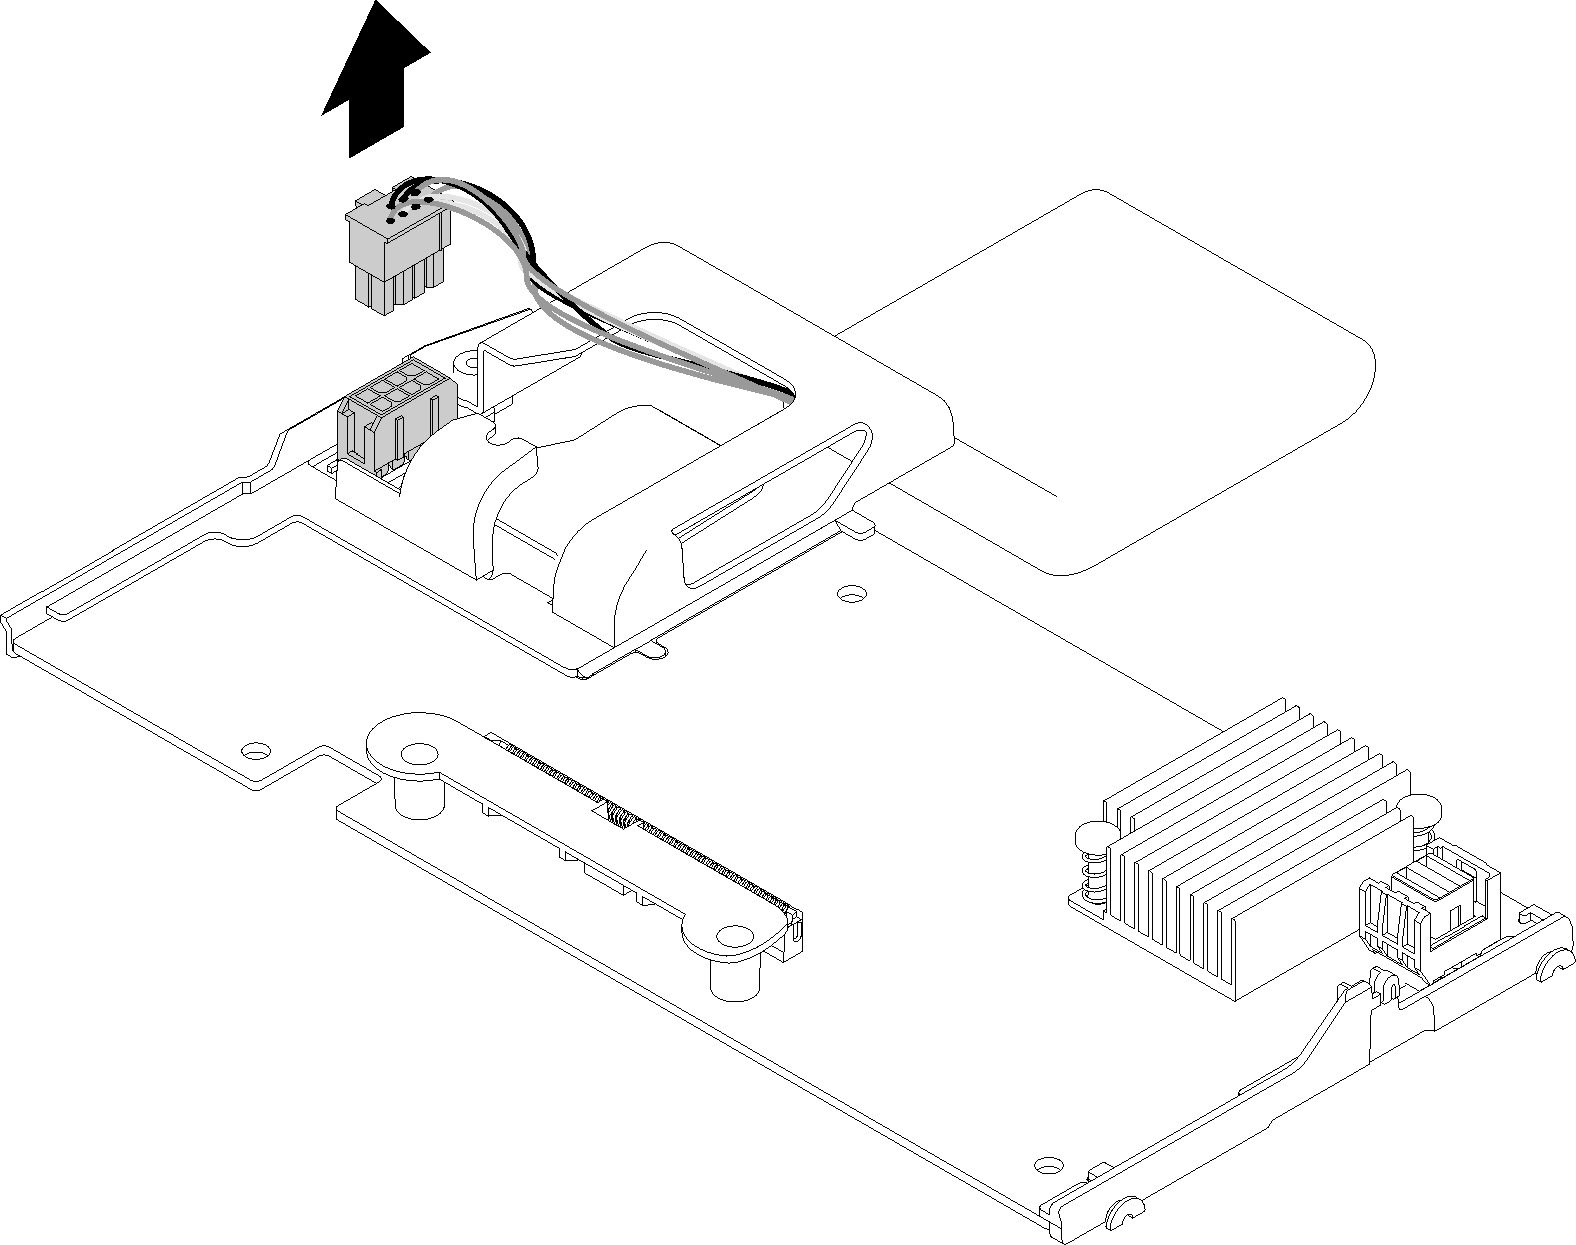
- Disconnect the flash power module cable from the RAID adapter.Figure 2. Disconnecting the cable of flash power module
 AttentionTo prevent any damage to the flash power module cable or connector, it is important to first slide out the flash power module. This provides more space for your fingers to better grip the flash power module cable and remove it from the connector.
If you are instructed to return the flash power module, follow all packaging instructions, and use any packaging materials for shipping that are supplied to you; otherwise, dispose of the flash power module as required by local ordinances or regulations.
Demo video
Give documentation feedback