Install the CFF RAID adapter
Use this information to install the CFF RAID adapter.
About this task

Read Installation Guidelines and Safety inspection checklist to ensure that you work safely.
Power off the server and peripheral devices and disconnect the power cords and all external cables. See Power off the server.
If the server is installed in a rack, remove the server from the rack.
Touch the static-protective package that contains the component to any unpainted metal surface on the server; then, remove it from the package and place it on a static-protective surface.
Go to Drivers and Software download website for ThinkSystem SR250 V3 to see the latest firmware and driver updates for your server.
Go to Update the firmware for more information on firmware updating tools.
Procedure
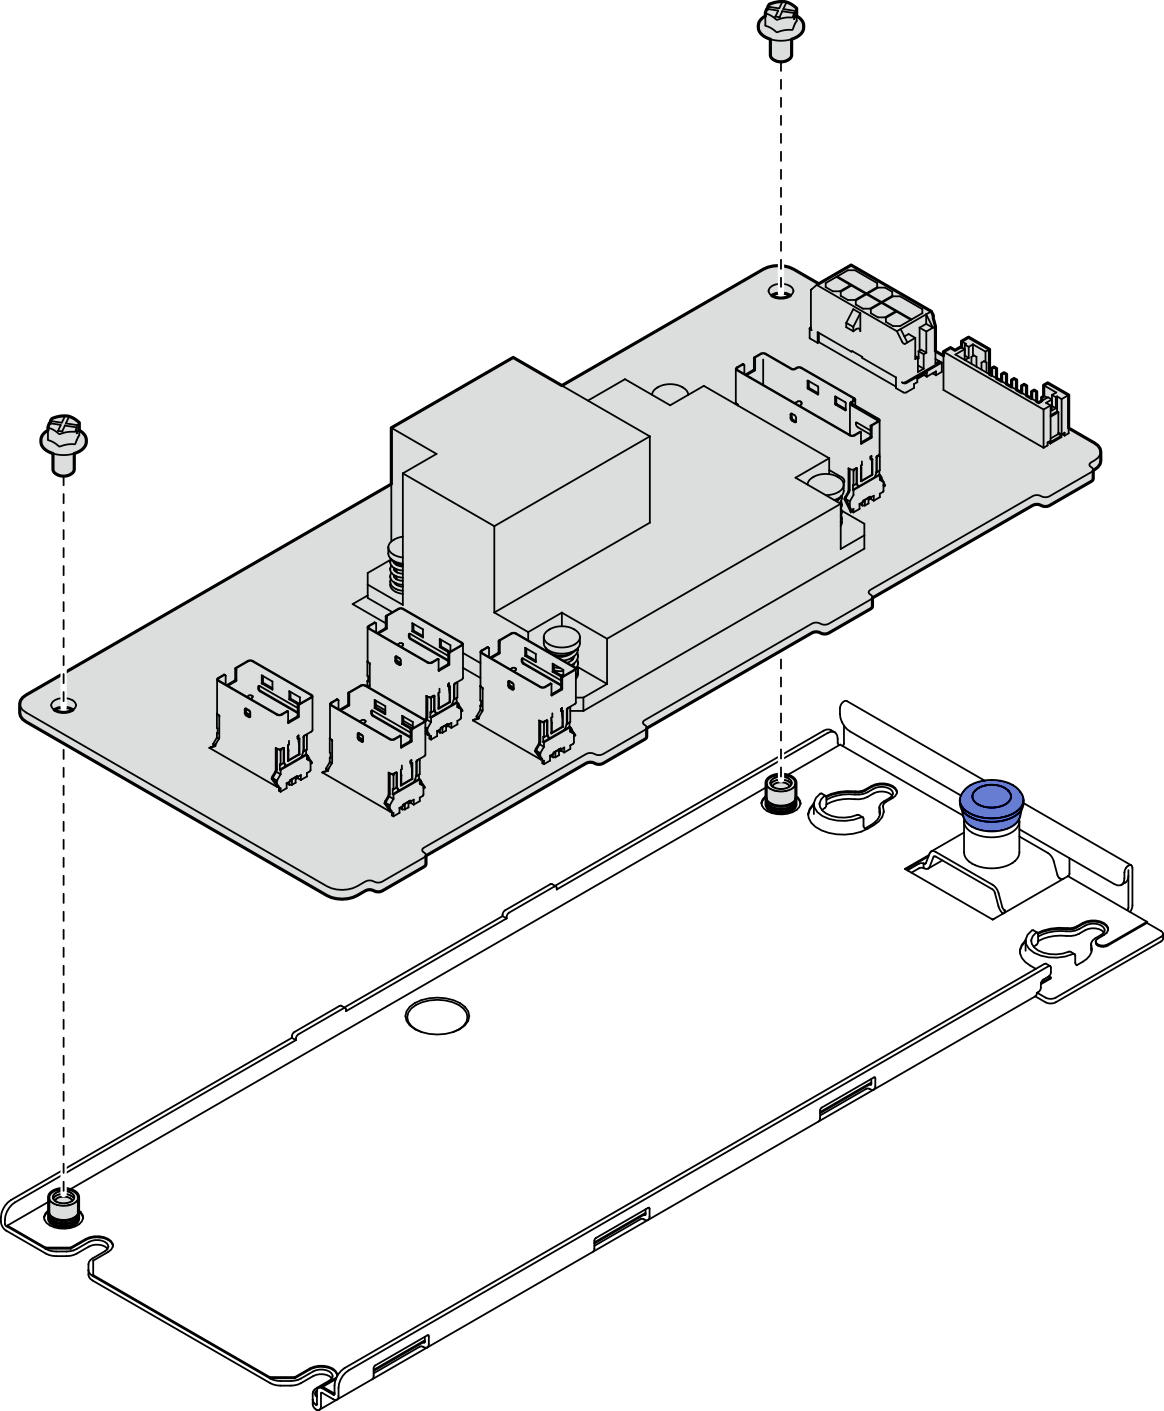
- If necessary, align and lower the CFF RAID adapter with the guide pins and screw holes on the adapter tray; then, tighten the two screws to secure the CFF RAID adapter to the tray.Figure 1. Internal CFF adapter tray installation
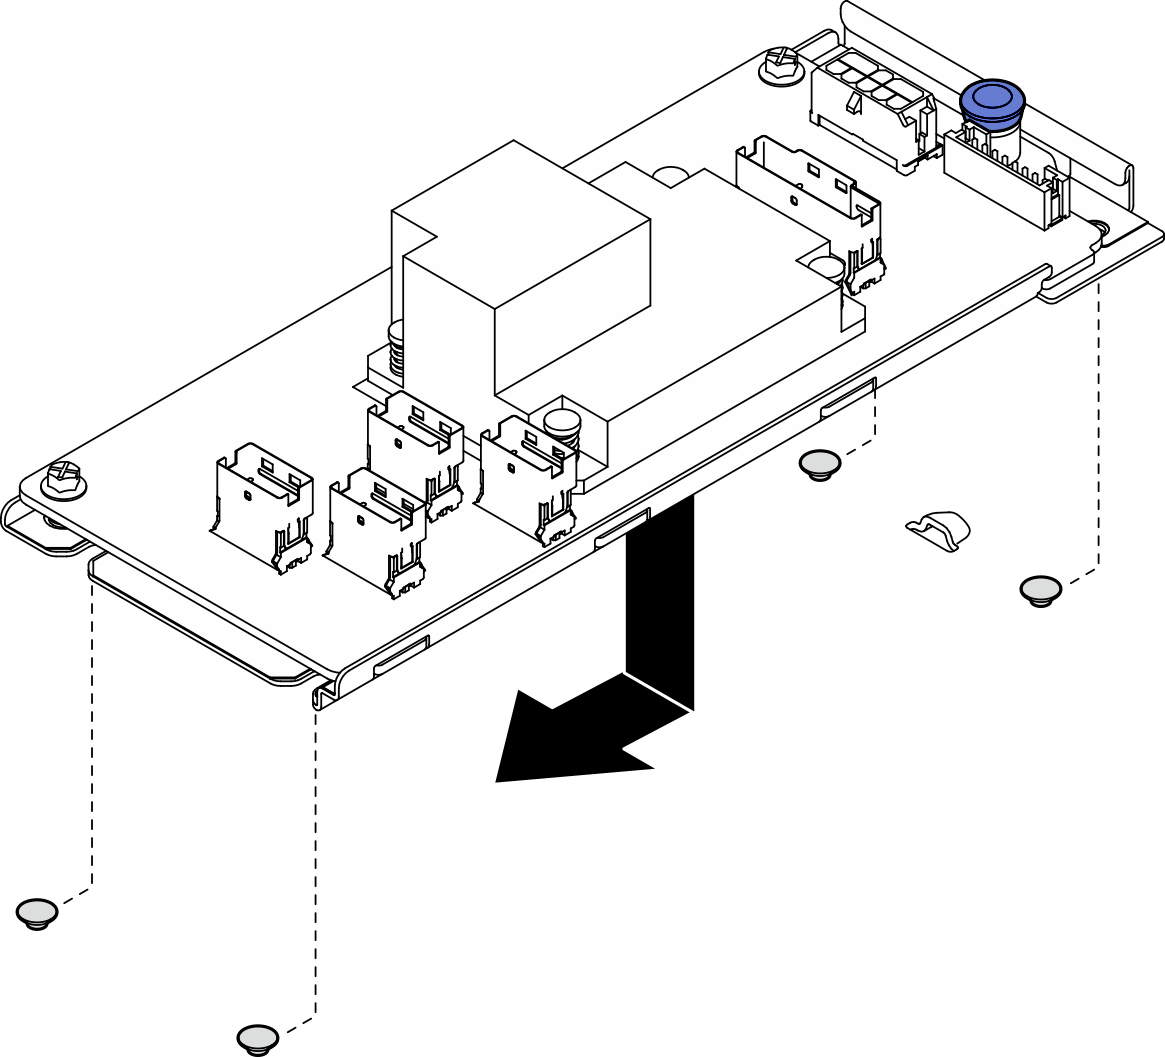
- Align the notches of the tray with the guide pins on the chassis; then slide the tray to one side until the CFF RAID adapter is securely seated in the chassis.Figure 2. Internal CFF adapter installation
After you finish
Install the top cover. See Install the top cover.
Complete the parts replacement. See Complete the parts replacement.
- Configure the RAID array using the Setup utility configuration.
Demo video