Install the air baffle
Follow instructions in this section to install the air baffle.
About this task

Hazardous energy present. Voltages with hazardous energy might cause heating when shorted with metal, which might result in spattered metal, burns, or both.

Read Installation Guidelines and Safety inspection checklist to ensure that you work safely.
For proper cooling and airflow, reinstall the air baffle before you turn on the server. Operating the server with the air baffle removed might damage server components.
Procedure
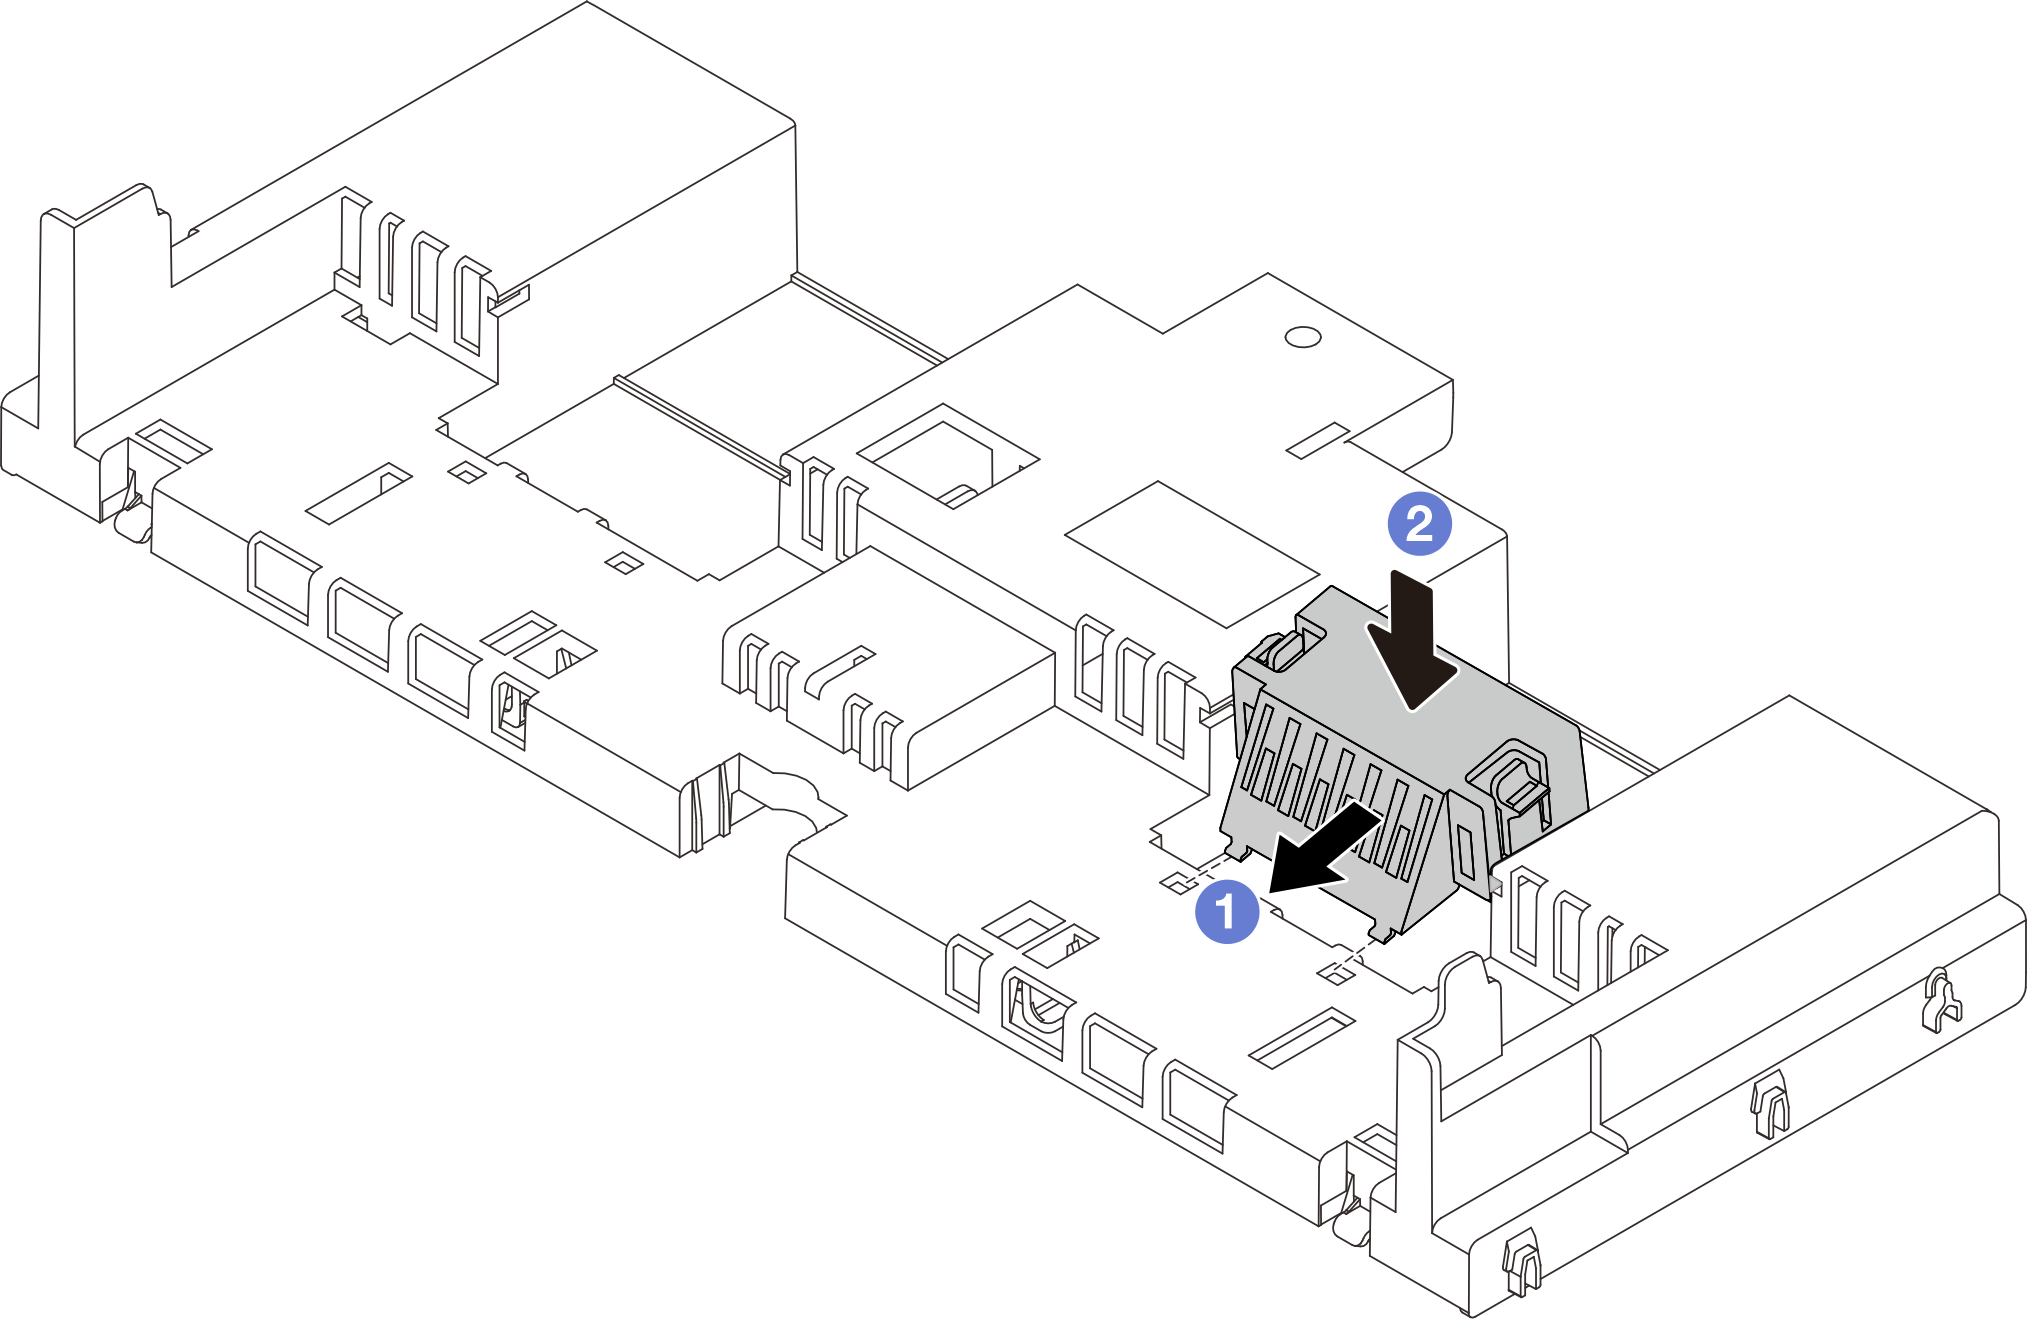
- (Optional) If the T-shape performance heat sink or Direct Water Cooling Module (DWCM) is installed, install the air baffle filler to fill the gap between the heat sink and the air baffle.NoteThe following illustration shows the air baffle upside down.Figure 1. Air baffle filler installation
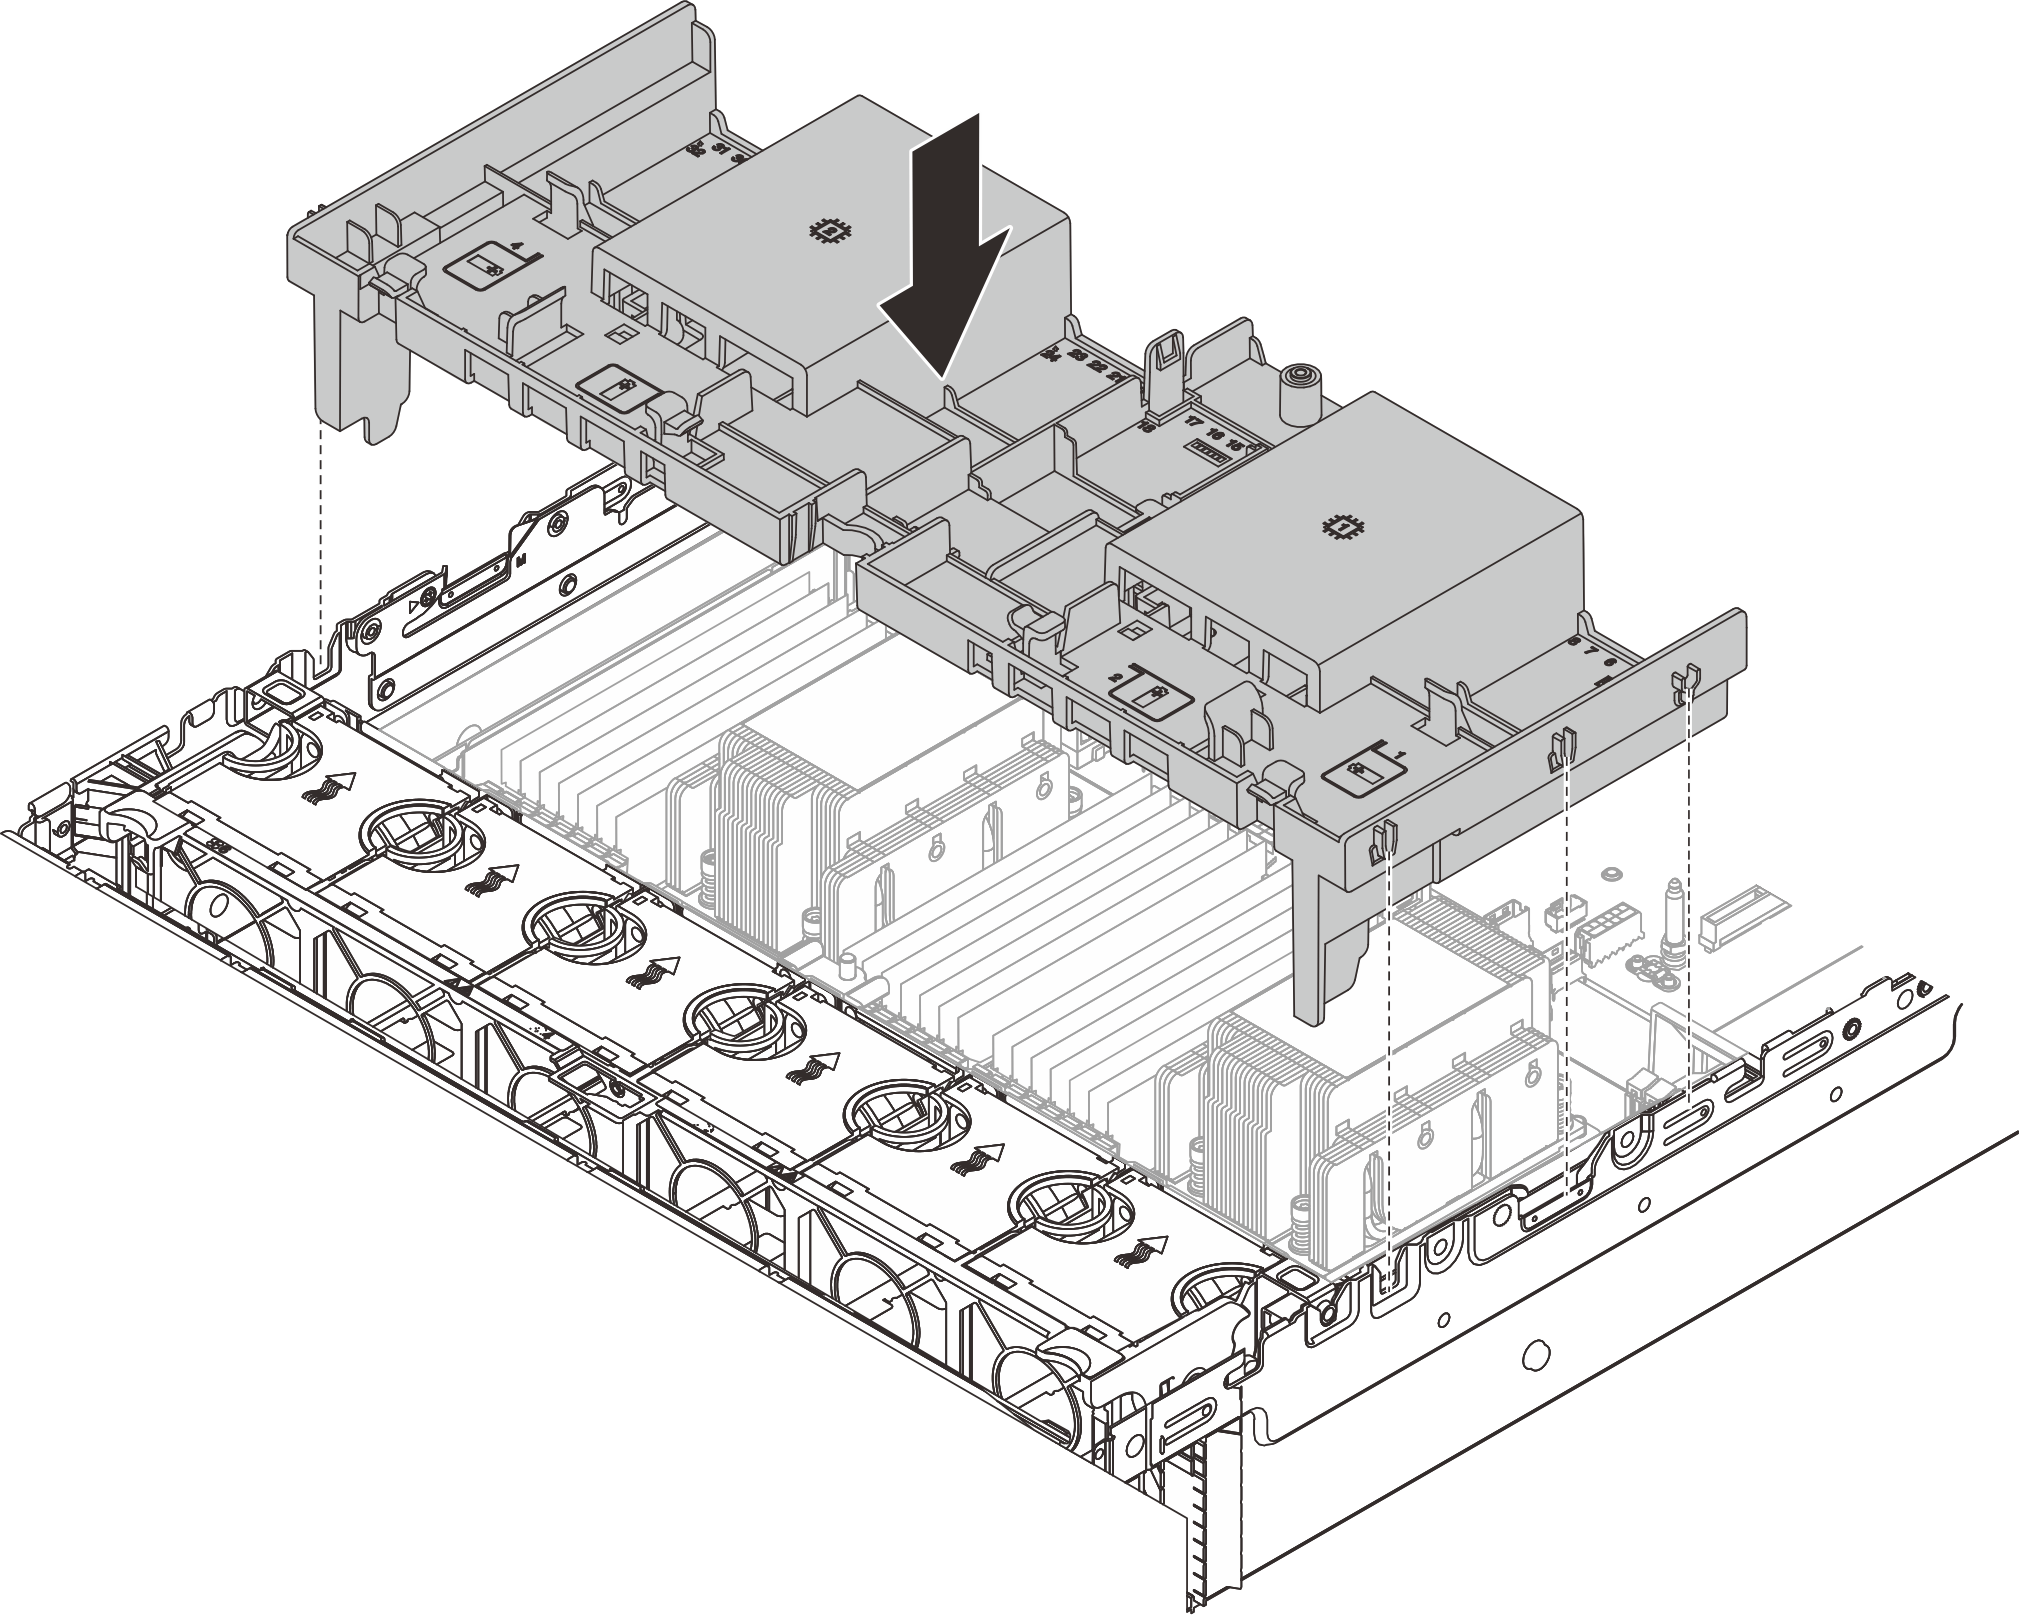
- Align the tabs on both sides of the air baffle with the corresponding slots on both sides of the chassis. Then, lower the air baffle into the chassis and press the air baffle down until it is securely seated.Figure 2. Installation of the standard air baffle
After you finish
Reconnect cables of RAID flash power modules if you have disconnected them. See Internal cable routing.
Reconnect cables of the M.2 backplane if you have disconnected them. See Internal cable routing.
If you have removed a GPU adapter, reinstall it. See Install a GPU adapter.
Complete the parts replacement. See Complete the parts replacement.
Demo video