Install a simple-swap-drive backplate
Use this information to install a simple-swap-drive backplate.


Before installing the simple-swap-drive backplate, touch the static-protective package that contains the new backplate to any unpainted surface on the outside of the server. Then, take the new backplate out of the package and place it on a static-protective surface.
To install the simple-swap-drive backplate, complete the following steps:
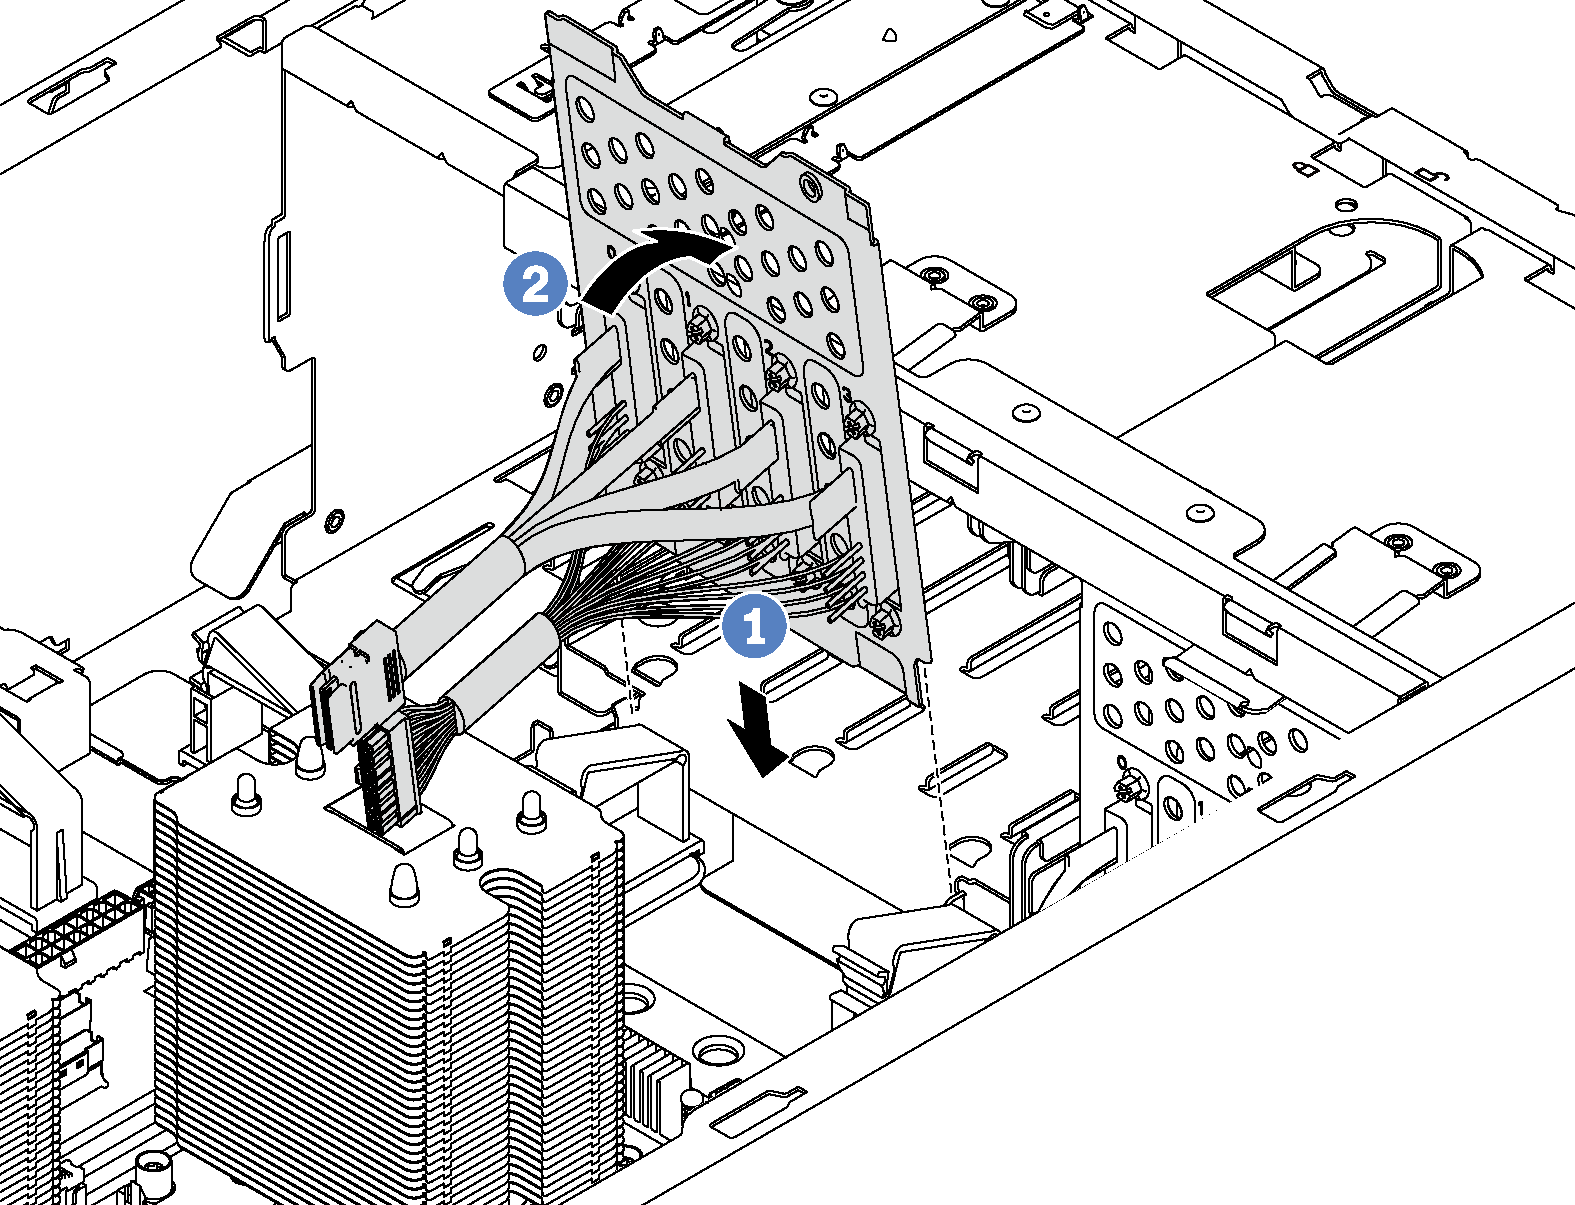
- Lower the new backplate into the chassis and insert the new backplate into the backplate slot. Then, carefully push the new backplate inward until it is secured by the release tab.Figure 1. Simple-swap-drive backplate installation
Give documentation feedback