Before beginning the update procedure, ensure that both Lenovo TOR switch configurations have been backed up.
Backing up the switch configuration files from the TOR switches is a simple matter of a few clicks in XClarity Administrator. Follow these steps:
- At the top menu of the XClarity Administrator browser interface, select .
- Select both TOR switches by clicking the checkbox to the left of each switch.
Figure 1. Selecting both TOR switches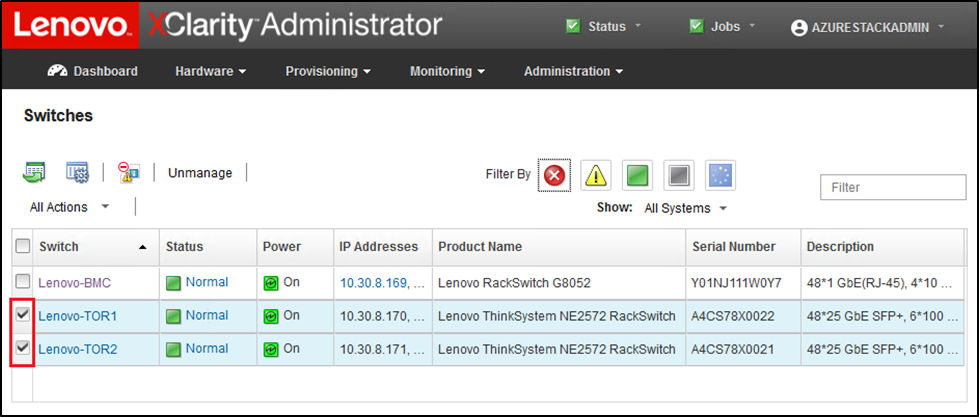
- Select .
Figure 2. Backing up TOR configuration file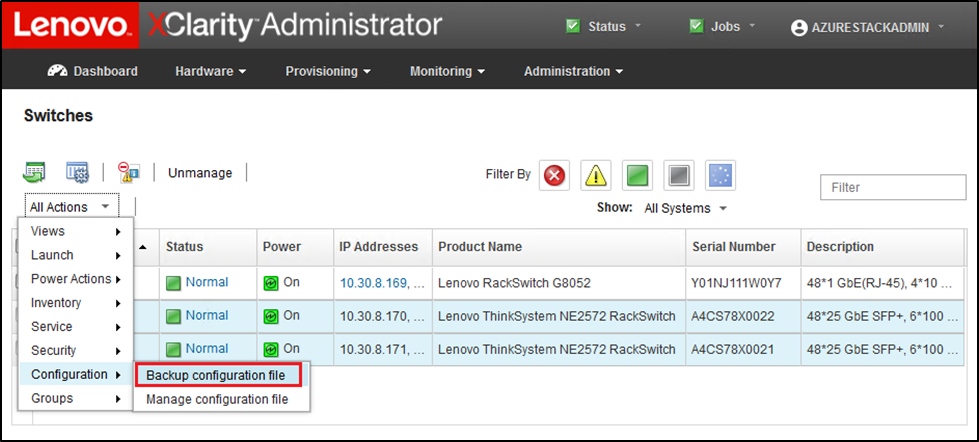
- Verify that both TOR switches display in the Selected Switches field. Enter a descriptive comment for the backup, and click Backup.
Figure 3. Backup configuration file dialog box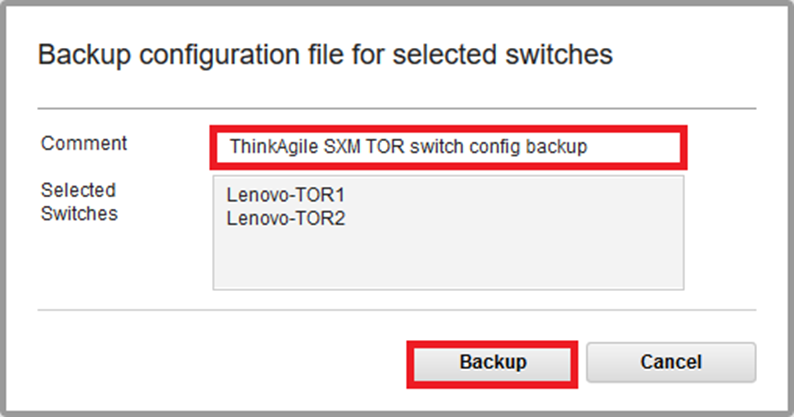
- The window should confirm successful backup. Click Close to dismiss this window.
Figure 4. Backup configuration file results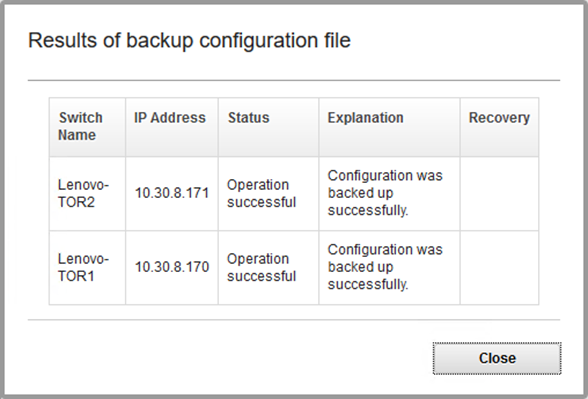
- The backup switch configuration files are stored internal to XClarity Administrator, but it is a good idea to save a more accessible copy. To save a copy to the HLH, click a switch to open a detailed view of the switch.
- In the left pane, select Configuration Files, and click the checkbox to the left of the file name to select the backed up configuration file.
Figure 5. Selecting backup configuration file to download to local PC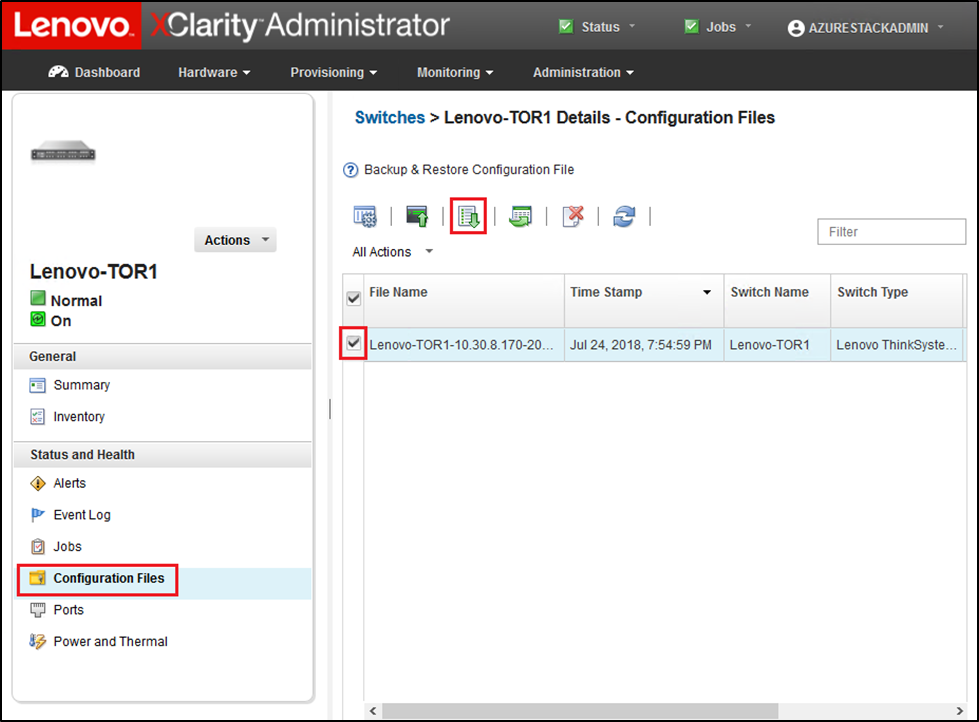
- Click the Download configuration file from XClarity to local PC button (
 ).
). - Depending on the browser being used, specify a download location and save the file. The default file name provided by XClarity Administrator is in the following format: <SwitchHostname>-<IPAddress>-<Date>-<Time>.cfg.
- Repeat steps 6 through 9 for the other TOR switch.
- If not already present, create the directory D:\Lenovo\SwitchConfigBackups on the HLH and move the TOR configuration backup files into this directory.


