Replacing the hot-swap power supply cage
This procedure applies only to the 5U server model with hot-swap power supplies (Model name: 2582-F4x).
To install the hot-swap power supply cage on the 5U server model with hot-swap power supplies (Model name: 2582-F4x), complete the following steps.
- Place the power-supply cage into the chassis and slide it toward the rear of the server until the retaining clips engage the top of the chassis, then install the four screws to secure the power-supply cage to the chassis.
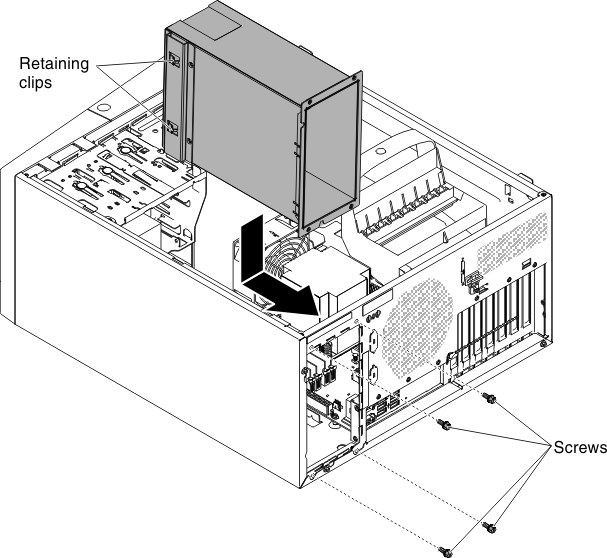
- Install the other two screws to further secure the power-supply cage to the chassis, which is located in front of the power-supply cage.
- Connect the cables from the power-supply cage to the system board and all internal components (see System-board internal connectors for the locations of the internal connectors).
- Stand the server back up in its vertical position.
- Reinstall the hot-swap power supplies (see Replacing the hot-swap power supply).
- Install and lock the side cover (see Replacing the side cover).
- Reconnect the external cables and power cords; then, turn on the attached devices and turn on the server.
Give documentation feedback