Replacing the hot-swap hard disk drive backplane
This procedure applies only to the 5U server model with hot-swap power supplies (Model name: 2582-F4x).
To install the hard disk drive backplane on the 5U server model with hot-swap power supplies (Model name: 2582-F4x), complete the following steps.
- Place the bottom edge of the hot-swap hard disk drive backplane in the lower lip of the drive cage.
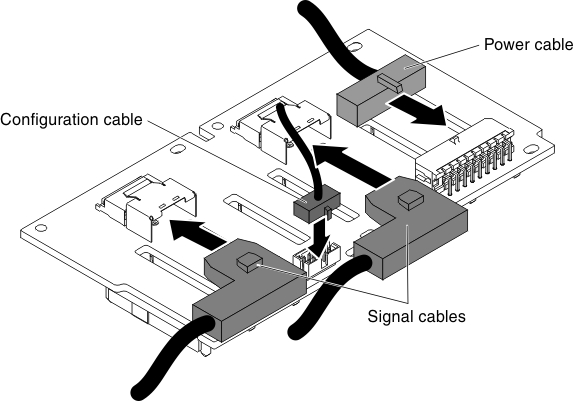
- Connect the power, signal and configuration cables to the hard disk drive backplane.NoteMake sure that Port 1 on the hardware ServeRAID is connected to Port 1 on the backplane. Likewise, Port 0 on the hardware ServeRAID should be connected to Port 0 on the backplane.
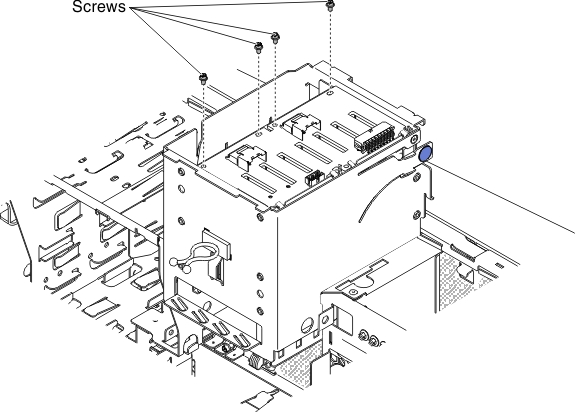
- Install the four screws that secure the hot-swap hard disk drive backplane to the drive cage.
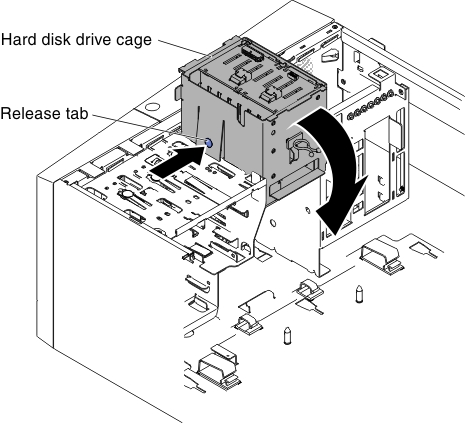
- Press and hold the retaining tab on the side of the cage; then, rotate the drive cage into the chassis until it locks into place.NoteYou may need to slightly lift up the cage in order to press and hold the retaining tab.
- Install the hard disk drive fan duct onto the hard disk drive cage (see Replacing the hard disk drive fan duct).
- Stand the server back up in its vertical position.
- Install the hot-swap hard disk drives that you removed from the hard disk drive cage (see Replacing a hot-swap hard disk drive).
- Install the lower bezel (see Replacing the lower bezel).
- Install and lock the side cover (see Replacing the side cover).
- Reconnect the external cables and power cords; then, turn on the attached devices and turn on the server.
Give documentation feedback