Removing the hard disk drive cage
This procedure applies only to 4U server models with non-hot-swap power supplies.
To remove the hard disk drive cage on 4U server models with non-hot-swap power supplies, complete the following steps.
- Read the safety information in Safety and Installation guidelines.
- Turn off the server and all attached devices; then, disconnect all power cords and external cables.
- Remove the bezel (see Removing the bezel).
- Carefully turn the server on its side so that it is lying flat, with the cover facing up.AttentionDo not allow the server to fall over.
- Remove the side cover (see Removing the side cover).
- Remove the air duct.
- Remove the simple-swap hard disk drives (see Removing a simple-swap hard disk drive).
- Remove the simple-swap backplate (see Removing the simple-swap backplate).
- Press and hold the drive cage release latches.
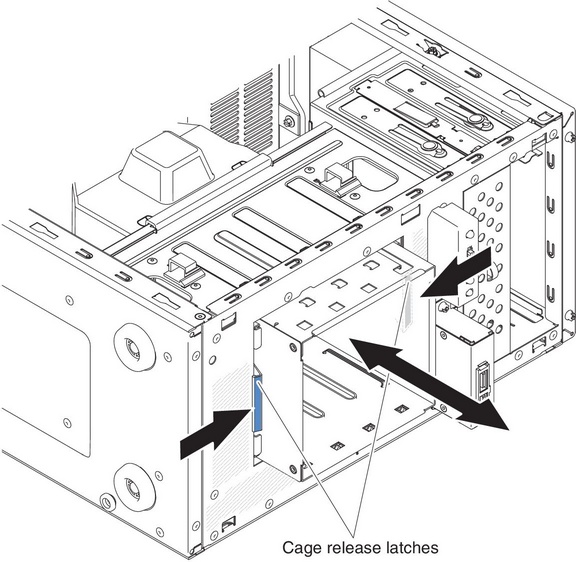
- Carefully pull the hard disk drive cage and the cables out of the opening in the chassis.
- If you are instructed to return the drive cage, follow all packaging instructions, and use any packaging materials for shipping that are supplied to you.
Give documentation feedback