Installing a USB embedded hypervisor flash device
Use this information to install a USB embedded hypervisor flash device.
Hypervisor is a virtualization platform that enables multiple operating systems to run on a host computer at the same time. Support for hypervisor is available with the purchase and installation of an optional USB hypervisor memory key, with embedded hypervisor software.
To install the USB hypervisor memory key, complete the following steps:
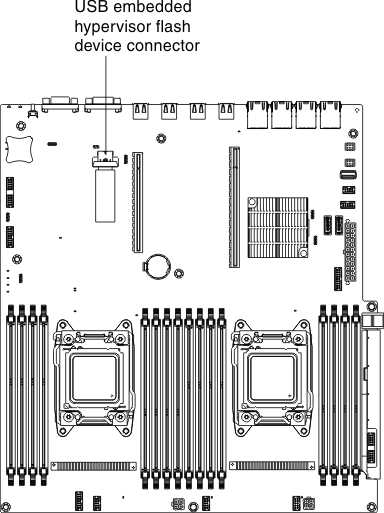
- Locate the embedded hypervisor USB flash device connector on the system board as shown in the following illustration:Figure 1. USB embedded hypervisor flash device connector
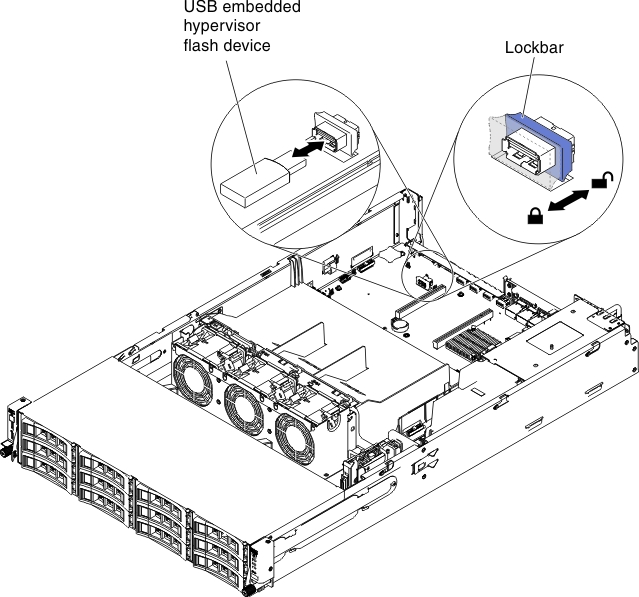
- Slide the lockbar toward the riser-card assembly to the locked position until it is seated firmly.Figure 2. USB embedded hypervisor flash device installation
If you have other devices to install or remove, do so now. Otherwise, go to Completing the installation.
Note
You must configure the server to boot from the hypervisor USB drive. See Configuring the server for information about enabling the embedded hypervisor.
Give documentation feedback