Installing an adapter on the PCI riser-card assembly
Use this information to install an adapter on the PCI riser-card assembly.
The following notes describe the types of adapters that the server supports and other information that you must consider when you install an adapter:
Note
- To confirm that server supports the adapter that you are installing, see https://static.lenovo.com/us/en/serverproven/index.shtml.
- Locate the documentation that comes with the adapter and follow those instructions in addition to the instructions in this section.
- Any high-definition video-out connector or stereo connector on any add-on video adapter is not supported.
- The server does not support legacy 5 V PCI adapters.
To install an adapter, complete the following steps:
- The following steps illustrate the procedure of installing an adapter on the PCI riser-card assemblies:
- For PCI riser-card assembly 1:
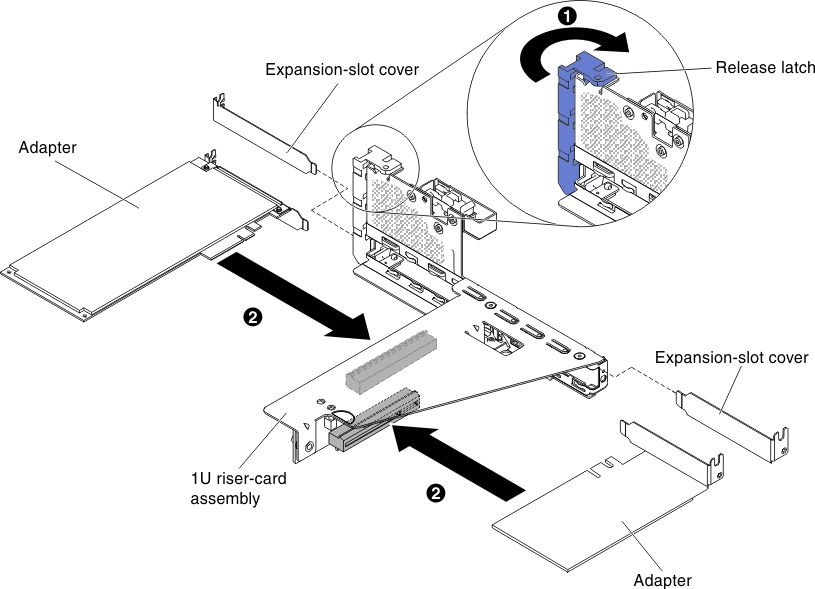
- Rotate the retention latch to the open position. Insert the adapter into the PCI riser-card assembly, aligning the edge connector on the adapter with the connector on the PCI riser-card assembly. Press the edge of the connector firmly into the PCI riser-card assembly. Make sure that the adapter snaps into the PCI riser-card assembly securely.
- Rotate the retention latch to the close position. Make sure the retention latch engages the adapter securely.Figure 1. Adapter installation
- For PCI riser-card assembly 1:
If you have other devices to install or remove, do so now. Otherwise, go to Completing the installation.
Give documentation feedback