Installing a hot-swap backplane on the rear hard disk drive cage
Use this information to install a hot-swap backplane on the rear hard disk drive cage.
The following illustrations show two different types of hot-swap backplanes.
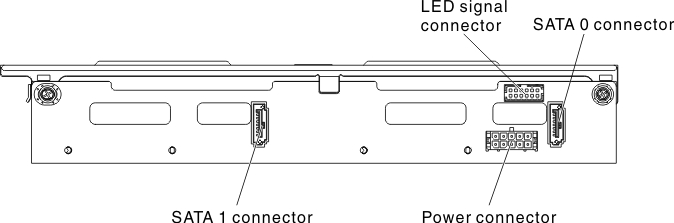
- Type 1 - SATAAttentionThis backplane has to be cascaded with the front backplane to make the master-slave connection.Figure 1. Type 1 - SATA
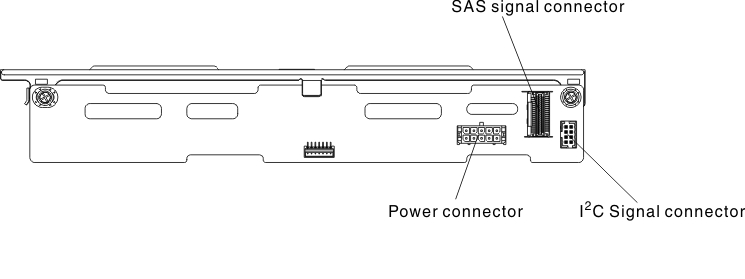
- Type - SASNoteThis backplane can be an independent configuration (Cascading with the front backplane is unnecessary)Figure 2. Type 2 - SAS
To install the hot-swap backplane for the rear hard disk drive cage, complete the following steps.
- Connect cables to the backplane.
- Type 1 - SATA
- Connect the LED signal, SATA signal and power cables to the backplane.Figure 3. Type 1 - SATA
- Connect the LED signal, SATA signal and power cables to the backplane.
- Type 2 - SAS
- Connect the I2C signal, SAS signal and power cables to the backplane.Figure 4. Type 2 - SAS
- Connect the I2C signal, SAS signal and power cables to the backplane.
- Type 1 - SATA
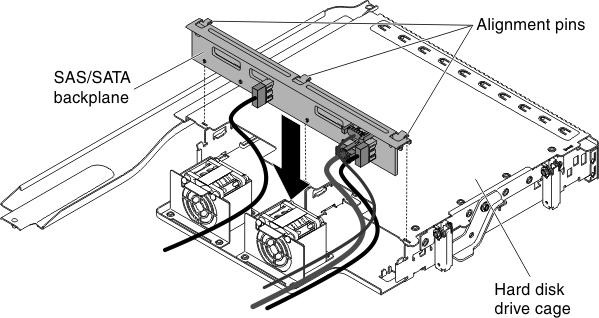
- Lower the backplane into the rear hard disk drive cage. Make sure the three alignment pins securely engages the three holes on the hard disk drive cage.Figure 5. Hot-swap backplane installation
If you have other devices to install or remove, do so now. Otherwise, go to Completing the installation.
Give documentation feedback